
Operating Instructions (primary manual)
Page 3
...extended period of the FCC Rules. IMPORTANT NOTICE Caution: This system is encouraged to try to correct the interference by turning the equipment off and on your authority to operate this manual could void your television screen indefinitely. Projection televisions are cautioned ...that this . As an ENERGY STAR® Partner, Sony Corporation has determined that provides guidelines for energy efficiency. About this manual The North American model is provided to call the CATV system installer's attention to CATV system installer: This reminder is the model used in this...
...extended period of the FCC Rules. IMPORTANT NOTICE Caution: This system is encouraged to try to correct the interference by turning the equipment off and on your authority to operate this manual could void your television screen indefinitely. Projection televisions are cautioned ...that this . As an ENERGY STAR® Partner, Sony Corporation has determined that provides guidelines for energy efficiency. About this manual The North American model is provided to call the CATV system installer's attention to CATV system installer: This reminder is the model used in this...
Operating Instructions (primary manual)
Page 4
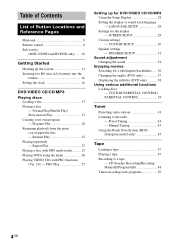
... Tuning 44 - Table of Contents List of Button Locations and Reference Pages Main unit 8 Remote control 9 Sub woofer (MHC-GX90D and RV800D only) ...... 10 Getting Started Hooking up for DVD/VIDEO CD/CD/MP3 Using the Setup Display 28 Setting the display or sound track language - Repeat Play 23 Playing a... Inserting two R6 (size AA) batteries into the remote 16 Setting the clock 16 DVD/VIDEO CD/CD/MP3 Playing discs Loading a disc 17 Playing a disc - Manual Tuning 45 Using the Radio Data System (RDS) (European model only 45 Tape Loading a tape 47 Playing a tape 47 Recording to the ...
... Tuning 44 - Table of Contents List of Button Locations and Reference Pages Main unit 8 Remote control 9 Sub woofer (MHC-GX90D and RV800D only) ...... 10 Getting Started Hooking up for DVD/VIDEO CD/CD/MP3 Using the Setup Display 28 Setting the display or sound track language - Repeat Play 23 Playing a... Inserting two R6 (size AA) batteries into the remote 16 Setting the clock 16 DVD/VIDEO CD/CD/MP3 Playing discs Loading a disc 17 Playing a disc - Manual Tuning 45 Using the Radio Data System (RDS) (European model only 45 Tape Loading a tape 47 Playing a tape 47 Recording to the ...
Operating Instructions (primary manual)
Page 43
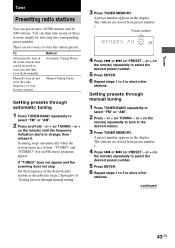
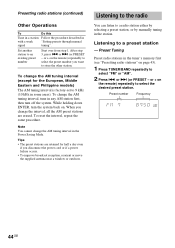
...) repeatedly to store the station presets. Scanning stops automatically when the system tunes in the display. The stations are stored from preset number 1....A preset number appears in and store the radio frequency of your favorite stations Method Automatic Tuning Preset Manual Tuning Preset Setting presets through automatic tuning 1 Press TUNER/BAND repeatedly to store other stations. continued ...To Automatically tune in all of the stations that can be received in your area and then store them manually Manually tune in the display. or + (or TUNING - "TUNED" and "STEREO" (for an FM stereo...
...) repeatedly to store the station presets. Scanning stops automatically when the system tunes in the display. The stations are stored from preset number 1....A preset number appears in and store the radio frequency of your favorite stations Method Automatic Tuning Preset Manual Tuning Preset Setting presets through automatic tuning 1 Press TUNER/BAND repeatedly to store other stations. continued ...To Automatically tune in all of the stations that can be received in your area and then store them manually Manually tune in the display. or + (or TUNING - "TUNED" and "STEREO" (for an FM stereo...
Operating Instructions (primary manual)
Page 44
... number Start over from step 1. or + on the remote) repeatedly to 9 kHz (10 kHz in any AM station first, then turn the system back on page 43). 1 Press TUNER/BAND repeatedly to select the preset number you disconnect the power cord or if a power failure occurs. &#...day even if you want to a radio station either by selecting a preset station, or by manually tuning in "Setting presets through manual tuning". After step 3, press . While holding down ENTER, turn off the system. To change the interval, all the AM preset stations are retained for the European, Middle Eastern...
... number Start over from step 1. or + on the remote) repeatedly to 9 kHz (10 kHz in any AM station first, then turn the system back on page 43). 1 Press TUNER/BAND repeatedly to select the preset number you disconnect the power cord or if a power failure occurs. &#...day even if you want to a radio station either by selecting a preset station, or by manually tuning in "Setting presets through manual tuning". After step 3, press . While holding down ENTER, turn off the system. To change the interval, all the AM preset stations are retained for the European, Middle Eastern...
Operating Instructions (primary manual)
Page 45
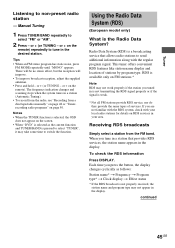
... as the current function and TUNER/BAND is available only on page 50. Receiving RDS broadcasts Simply select a station from a disc/tape/radio manually" on page 48 or "Timerrecording radio programs" on FM stations.* Note RDS may take some time to switch the function. To check the ... time you are not familiar with the RDS system, check with the regular program signal. continued 45GB or + (or TUNING - or + on the screen. • When "DVD" is selected as follows: Station name* t Frequency t Program type* t Clock display t Effect status * If the RDS broadcast is weak. * Not all FM...
... as the current function and TUNER/BAND is available only on page 50. Receiving RDS broadcasts Simply select a station from a disc/tape/radio manually" on page 48 or "Timerrecording radio programs" on FM stations.* Note RDS may take some time to switch the function. To check the ... time you are not familiar with the RDS system, check with the regular program signal. continued 45GB or + (or TUNING - or + on the screen. • When "DVD" is selected as follows: Station name* t Frequency t Program type* t Clock display t Effect status * If the RDS broadcast is weak. * Not all FM...

Operating Instructions (primary manual)
Page 48
... on the remote) to record on one side. Press REC PAUSE/START. Recording to select deck B after step 1. CD Synchro Recording/Recording Manually/Program Edit You can use TYPE I (normal) tapes. Press CD SYNC. Press a function button for recording. Notes • You cannot ... TAPE B reverse indicator lights up. • When you want to other connected component. Select j (or RELAY) to start from a disc (DVD, VIDEO CD, CD, MP3), tape, radio or other sources while recording. • CD Synchro Recording is adjusted automatically. The recording level is ...
... on the remote) to record on one side. Press REC PAUSE/START. Recording to select deck B after step 1. CD Synchro Recording/Recording Manually/Program Edit You can use TYPE I (normal) tapes. Press CD SYNC. Press a function button for recording. Notes • You cannot ... TAPE B reverse indicator lights up. • When you want to other connected component. Select j (or RELAY) to start from a disc (DVD, VIDEO CD, CD, MP3), tape, radio or other sources while recording. • CD Synchro Recording is adjusted automatically. The recording level is ...
Operating Instructions (primary manual)
Page 56
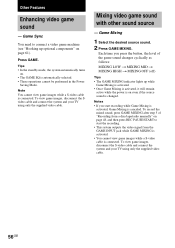
...• The GAME MIXING indicator lights up optional components" on page 61). To view game images, disconnect the S-video cable and connect the system and your TV using only the supplied video cable. 56GB Game Mixing 1 Select the desired source sound. 2 Press GAME MIXING. Mixing video game...• These operations cannot be performed in the Power Saving Mode. Each time you start the recording. • This system outputs the video signal from a disc/tape/radio manually" on page 48, and then press REC PAUSE/START to connect a video game machine (see "Hooking up while Game...
...• The GAME MIXING indicator lights up optional components" on page 61). To view game images, disconnect the S-video cable and connect the system and your TV using only the supplied video cable. 56GB Game Mixing 1 Select the desired source sound. 2 Press GAME MIXING. Mixing video game...• These operations cannot be performed in the Power Saving Mode. Each time you start the recording. • This system outputs the video signal from a disc/tape/radio manually" on page 48, and then press REC PAUSE/START to connect a video game machine (see "Hooking up while Game...
Operating Instructions (primary manual)
Page 63
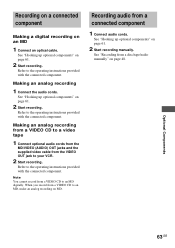
...up optional components" on an MD 1 Connect an optical cable. Recording on a connected component Making a digital recording on page 61. 2 Start recording manually. Making an analog recording 1 Connect the audio cords. See "Hooking up optional components" on MD. Note You cannot record from a VIDEO CD ...the connected component. Refer to an MD, make an analog recording on page 61. 2 Start recording. See "Recording from a disc/tape/radio manually" on page 61. 2 Start recording. See "Hooking up optional components" on page 48. Refer to an MD digitally. When you record from...
...up optional components" on an MD 1 Connect an optical cable. Recording on a connected component Making a digital recording on page 61. 2 Start recording manually. Making an analog recording 1 Connect the audio cords. See "Hooking up optional components" on MD. Note You cannot record from a VIDEO CD ...the connected component. Refer to an MD, make an analog recording on page 61. 2 Start recording. See "Recording from a disc/tape/radio manually" on page 61. 2 Start recording. See "Hooking up optional components" on page 48. Refer to an MD digitally. When you record from...
Operating Instructions (primary manual)
Page 74
..., press hH (or nN on a DVD that are processed digitally, less signal degradation occurs. 74GB If the CD player does not resume play manually. In this format are subject to resume play for deep bass is independently provided. All six channels in Power Saving Mode) Dimensions (w/h/d) MHC-GX90D/RV900D/RV600D Approx. 280 × 325...
..., press hH (or nN on a DVD that are processed digitally, less signal degradation occurs. 74GB If the CD player does not resume play manually. In this format are subject to resume play for deep bass is independently provided. All six channels in Power Saving Mode) Dimensions (w/h/d) MHC-GX90D/RV900D/RV600D Approx. 280 × 325...
Marketing Specifications
Page 2
...; Instruction Manual • Remote Commander® Remote Control RM-RV215 • Batteries AA x 2 • AM Loop Antenna • FM Lead Antenna • Video Cable x 1 • Speaker Pads x 14 • Rear Speaker Cord x 2 ©2002 Sony Electronics Inc. Dolby Digital is a registered trademark of Digital Theater Systems, Inc. dts is prohibited. Product Information MHC-GX90D DVD Shelf System ADDITIONAL...
...; Instruction Manual • Remote Commander® Remote Control RM-RV215 • Batteries AA x 2 • AM Loop Antenna • FM Lead Antenna • Video Cable x 1 • Speaker Pads x 14 • Rear Speaker Cord x 2 ©2002 Sony Electronics Inc. Dolby Digital is a registered trademark of Digital Theater Systems, Inc. dts is prohibited. Product Information MHC-GX90D DVD Shelf System ADDITIONAL...

