
User Guide
Page 2
... 6 System Requirements 6 Preparation Connecting to a Computer or a Network 7 Connecting the Camera to a Computer 7 Connecting the Camera to a Local Network ...... 7 Assigning the IP Address to the Camera 8 Assigning an IP address using the IP Setup Program 8 When... using Windows XP Service Pack 2 ........ 10 When using Windows Vista 12 Accessing the Camera Using the Web Browser 14 Basic Configuration by the Administrator ....... 16 Operating the Camera...
... 6 System Requirements 6 Preparation Connecting to a Computer or a Network 7 Connecting the Camera to a Computer 7 Connecting the Camera to a Local Network ...... 7 Assigning the IP Address to the Camera 8 Assigning an IP address using the IP Setup Program 8 When... using Windows XP Service Pack 2 ........ 10 When using Windows Vista 12 Accessing the Camera Using the Web Browser 14 Basic Configuration by the Administrator ....... 16 Operating the Camera...
User Guide
Page 8
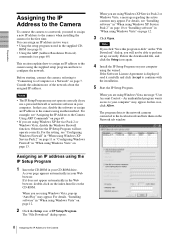
... Allow. Note If you are using Windows Vista" on page 12. 3 Click Open. An unidentified program wants access to your computer" may not operate correctly if you will not operate correctly. Preparation Assigning the IP Address to the Camera To connect the camera to a network, you are using another method. You can assign an...
... Allow. Note If you are using Windows Vista" on page 12. 3 Click Open. An unidentified program wants access to your computer" may not operate correctly if you will not operate correctly. Preparation Assigning the IP Address to the Camera To connect the camera to a network, you are using another method. You can assign an...
User Guide
Page 9
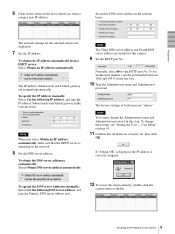
... for the selected camera are assigned automatically. If "Setting OK" is displayed, the IP address is operating on the network. 8 Set the DNS server address. Secondary DNS server address in the text box. 10 Type the Administrator name and Administrator password. To use another ... To specify the IP address manually: Select Use the following DNS server address, and type the Primary DNS server address and 12 To access the camera directly, double-click the camera name in the list to which you select Obtain an IP address automatically, make sure that all items are correctly set, then...
... for the selected camera are assigned automatically. If "Setting OK" is displayed, the IP address is operating on the network. 8 Set the DNS server address. Secondary DNS server address in the text box. 10 Type the Administrator name and Administrator password. To use another ... To specify the IP address manually: Select Use the following DNS server address, and type the Primary DNS server address and 12 To access the camera directly, double-click the camera name in the list to which you select Obtain an IP address automatically, make sure that all items are correctly set, then...

User Guide
Page 10
...12. Security Warning" appears, click Run. Note If the IP address is not set the IP address again. Note If you select Save in the Web browser. Security Warning" appears, click Run. The software installation starts. IP address: 192.168.0.100 Subnet mask: 255.0.0.0 The welcome page of the network camera... as follows. Delete the downloaded file, and click the Setup icon again. Preparation Tip The factory setting of the camera network is displayed in the "File Download - When using Windows XP Service Pack 2 Installing software A warning message regarding the active contents may ...
...12. Security Warning" appears, click Run. Note If the IP address is not set the IP address again. Note If you select Save in the Web browser. Security Warning" appears, click Run. The software installation starts. IP address: 192.168.0.100 Subnet mask: 255.0.0.0 The welcome page of the network camera... as follows. Delete the downloaded file, and click the Setup icon again. Preparation Tip The factory setting of the camera network is displayed in the "File Download - When using Windows XP Service Pack 2 Installing software A warning message regarding the active contents may ...

User Guide
Page 12
... browser will not be able to perform In this case, operate as IP Setup Program from CD-ROM. When the above procedure is completed, the cameras connected in the local network are displayed in the "File Download - If pop-up "AutoPlay" appears when a CD-ROM is added to the... Camera Note If you will not open automatically. In this case, double-click the "index.htm" file in the CD-ROM. Security Warning" appears, click Run. 12 Assigning the IP Address...
... browser will not be able to perform In this case, operate as IP Setup Program from CD-ROM. When the above procedure is completed, the cameras connected in the local network are displayed in the "File Download - If pop-up "AutoPlay" appears when a CD-ROM is added to the... Camera Note If you will not open automatically. In this case, double-click the "index.htm" file in the CD-ROM. Security Warning" appears, click Run. 12 Assigning the IP Address...
User Guide
Page 60
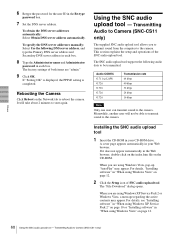
...Note Only one user can transmit sound to Camera (SNC-CS11 only) For details, see "Installing software" in "When using Windows XP Service Pack 2" on page 10 or "Installing software" in "When using Windows Vista" on the Network tab to reboot the camera. It will not be transmitted. If ...the index.htm file on page 12. 60 Using the SNC audio upload tool - The factory settings of SNC audio upload tool. This section explains the setup and operations of the SNC audio upload tool. Meanwhile, another user will take about 2 minutes to the camera. The "File Download" dialog opens...
...Note Only one user can transmit sound to Camera (SNC-CS11 only) For details, see "Installing software" in "When using Windows XP Service Pack 2" on page 10 or "Installing software" in "When using Windows Vista" on the Network tab to reboot the camera. It will not be transmitted. If ...the index.htm file on page 12. 60 Using the SNC audio upload tool - The factory settings of SNC audio upload tool. This section explains the setup and operations of the SNC audio upload tool. Meanwhile, another user will take about 2 minutes to the camera. The "File Download" dialog opens...

User Guide
Page 67
Uploading the homepage to the camera using Windows Vista" on page 12. 3 Click Open. For details, "Installing software" in "When using the Custom Homepage Installer 1 Insert the CD-ROM in "When using Windows XP Service Pack 2 or ... URL in the camera and watch it . 4 Read the notes carefully, and click Next. In this program to your computer" may appear. A cover page appears automatically in the Web browser, double-click on the index.htm file on the computer. When you are using Windows Vista" on page 12. 2 Click the Start...
Uploading the homepage to the camera using Windows Vista" on page 12. 3 Click Open. For details, "Installing software" in "When using the Custom Homepage Installer 1 Insert the CD-ROM in "When using Windows XP Service Pack 2 or ... URL in the camera and watch it . 4 Read the notes carefully, and click Next. In this program to your computer" may appear. A cover page appears automatically in the Web browser, double-click on the index.htm file on the computer. When you are using Windows Vista" on page 12. 2 Click the Start...
User Guide
Page 68
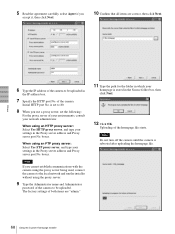
... stored in the IP address box. 7 Specify the HTTP port No. Others 6 Type the IP address of the camera to be uploaded in the Source folder box, then click Next. 12 Click OK. boxes. When using an HTTP proxy server: Select Use HTTP proxy server, and type your settings in ... run the installer without using an FTP proxy server: Select Use FTP proxy server, and type your network administrator. The factory settings of the camera. Note Do not turn off the camera until the camera is set the following: For the proxy server of the homepage file starts. of both items are correct...
... stored in the IP address box. 7 Specify the HTTP port No. Others 6 Type the IP address of the camera to be uploaded in the Source folder box, then click Next. 12 Click OK. boxes. When using an HTTP proxy server: Select Use HTTP proxy server, and type your settings in ... run the installer without using an FTP proxy server: Select Use FTP proxy server, and type your network administrator. The factory settings of the camera. Note Do not turn off the camera until the camera is set the following: For the proxy server of the homepage file starts. of both items are correct...

User Guide
Page 78
... Warning 10, 11, 13 sending images 46 Serial number 29 serial number 29 Setting 21 Setup Program 58 sharpness 35 SMTP server 39 SNC audio upload tool 60 SNC video player 66 SNMP 70 Software version 29 software version 29, 30 special tags 40 subnet mask 37 System 28, 29 system configuring... viewer 19 Viewer mode 41 viewer mode 41 voice alert number select 64 volume 21 W welcome page 14, 18, 29 Windows Firewall 11 Windows Vista 12 Windows XP Service Pack 2.......... 10 Sony Corporation
... Warning 10, 11, 13 sending images 46 Serial number 29 serial number 29 Setting 21 Setup Program 58 sharpness 35 SMTP server 39 SNC audio upload tool 60 SNC video player 66 SNMP 70 Software version 29 software version 29, 30 special tags 40 subnet mask 37 System 28, 29 system configuring... viewer 19 Viewer mode 41 viewer mode 41 voice alert number select 64 volume 21 W welcome page 14, 18, 29 Windows Firewall 11 Windows Vista 12 Windows XP Service Pack 2.......... 10 Sony Corporation