
User Guide
Page 2
... Specific to CCD Image Sensors ....... 5 How to Use This User's Guide 6 System Requirements 6 Preparation Connecting to a Computer or a Network 7 Connecting the Camera to a Computer 7 Connecting the Camera to a Local Network ...... 7 Assigning the IP Address to the Camera 8 Assigning an IP address using the IP Setup Program 8 When using Windows XP Service Pack 2 ........ 10 When using...
... Specific to CCD Image Sensors ....... 5 How to Use This User's Guide 6 System Requirements 6 Preparation Connecting to a Computer or a Network 7 Connecting the Camera to a Computer 7 Connecting the Camera to a Local Network ...... 7 Assigning the IP Address to the Camera 8 Assigning an IP address using the IP Setup Program 8 When using Windows XP Service Pack 2 ........ 10 When using...
User Guide
Page 3
... player - Alarm buffer Menu 55 Setting the Motion Detection Function - Inquiry Commands 70 2. Transmitting Audio to Camera (SNC-CS11 only 60 Installing the SNC audio upload tool 60 Connecting the Camera to the Camera Using ARP Commands 69 Using the SNMP 70 1. Motion detection Menu 56 Setting the Motion Detection Area, Sensitivity and Threshold level 57...
... player - Alarm buffer Menu 55 Setting the Motion Detection Function - Inquiry Commands 70 2. Transmitting Audio to Camera (SNC-CS11 only 60 Installing the SNC audio upload tool 60 Connecting the Camera to the Camera Using ARP Commands 69 Using the SNMP 70 1. Motion detection Menu 56 Setting the Motion Detection Area, Sensitivity and Threshold level 57...

User Guide
Page 4
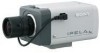
... further authentication is provided nor should keep in installation. • SNC-CS10: Two power inputs of AC 24V/DC 12V • SNC-CS11: Three power inputs of the data. You can accurately estimate the network occupation band and the memory size of lens changing type equipped with...Switchable video compressing formats, MPEG4 and JPEG. Features This product is a compact boxy network camera of the recording equipment. • Audio can be viewed or used by a third-party via the network. • SONY IS NOT RESPONSIBLE, AND ASSUMES ABSOLUTELY NO LIABILITY TO YOU OR ANYONE ELSE, FOR ...
... further authentication is provided nor should keep in installation. • SNC-CS10: Two power inputs of AC 24V/DC 12V • SNC-CS11: Three power inputs of the data. You can accurately estimate the network occupation band and the memory size of lens changing type equipped with...Switchable video compressing formats, MPEG4 and JPEG. Features This product is a compact boxy network camera of the recording equipment. • Audio can be viewed or used by a third-party via the network. • SONY IS NOT RESPONSIBLE, AND ASSUMES ABSOLUTELY NO LIABILITY TO YOU OR ANYONE ELSE, FOR ...

User Guide
Page 6
... on the sentence to jump to the related page. Jumping to the related page When you operate the camera. Some displays may differ from a computer. The User's Guide is written to be different from the ... or illustrations in the User's Guide are the requirements for the computer that displays the image or controls the camera. System Requirements These are explanatory examples. Processor Intel Pentium III, 1 GHz or higher (Intel Pentium 4, 2.4...This User's Guide explains how to operate the SNCCS10 or SNC-CS11 Network Camera from those as you operate the application software.
... on the sentence to jump to the related page. Jumping to the related page When you operate the camera. Some displays may differ from a computer. The User's Guide is written to be different from the ... or illustrations in the User's Guide are the requirements for the computer that displays the image or controls the camera. System Requirements These are explanatory examples. Processor Intel Pentium III, 1 GHz or higher (Intel Pentium 4, 2.4...This User's Guide explains how to operate the SNCCS10 or SNC-CS11 Network Camera from those as you operate the application software.

User Guide
Page 7
... the LAN port on the camera to a hub in the network. SNC-CS11 (rear) LAN SEE INSTRUCTION MANUAL 1234 NTSC PAL TEST OUT NETWORK POWER CLASS 2 WIRING - 1 DC 12V AC 24V + 2 Connecting the Camera to a Local Network Using a commercially available network cable, connect the LAN port on the camera to the network connector of the camera. Preparation Preparation The Preparation section...
... the LAN port on the camera to a hub in the network. SNC-CS11 (rear) LAN SEE INSTRUCTION MANUAL 1234 NTSC PAL TEST OUT NETWORK POWER CLASS 2 WIRING - 1 DC 12V AC 24V + 2 Connecting the Camera to a Local Network Using a commercially available network cable, connect the LAN port on the camera to the network connector of the camera. Preparation Preparation The Preparation section...
User Guide
Page 8
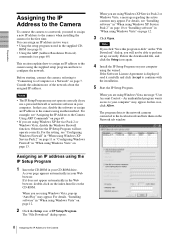
...CD-ROM. For example, see page 69) This section explains how to assign an IP address to the camera using another method. If it carefully and click Accept to a Computer or a Network" on page 13. Note If you are using the wizard. Delete the downloaded file, and click the ...Program on the "File Download" dialog, you are using Windows Vista" on page 12. 2 Click the Setup icon of the network about the assigned IP address. Before starting, connect the camera, referring to "Connecting to continue with the installation. 5 Start the IP Setup Program. When you need to assign a new...
...CD-ROM. For example, see page 69) This section explains how to assign an IP address to the camera using another method. If it carefully and click Accept to a Computer or a Network" on page 13. Note If you are using the wizard. Delete the downloaded file, and click the ...Program on the "File Download" dialog, you are using Windows Vista" on page 12. 2 Click the Setup icon of the network about the assigned IP address. Before starting, connect the camera, referring to "Connecting to continue with the installation. 5 Start the IP Setup Program. When you need to assign a new...
User Guide
Page 9
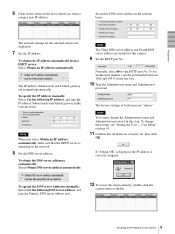
...6 Click on the camera in the list to which you select Obtain an IP address automatically, make sure that all items are correctly set, then click OK. Note The Third DNS server address and Fourth DNS server address are invalid for this step. User Menu" on the network. 8 Set the DNS...the IP address manually: Select Use the following DNS server address, and type the Primary DNS server address and 12 To access the camera directly, double-click the camera name in the relevant boxes. The factory settings of both items are assigned automatically. To obtain the IP address automatically from a ...
...6 Click on the camera in the list to which you select Obtain an IP address automatically, make sure that all items are correctly set, then click OK. Note The Third DNS server address and Fourth DNS server address are invalid for this step. User Menu" on the network. 8 Set the DNS...the IP address manually: Select Use the following DNS server address, and type the Primary DNS server address and 12 To access the camera directly, double-click the camera name in the relevant boxes. The factory settings of both items are assigned automatically. To obtain the IP address automatically from a ...

User Guide
Page 10
...ROM. Security Warning" dialog, you select Save in the Web browser. IP address: 192.168.0.100 Subnet mask: 255.0.0.0 The welcome page of the network camera is not set the IP address again. The software installation starts. In this case, operate as follows. If message "Internet Explorer - Note If ...When using Windows XP Service Pack 2 Installing software A warning message regarding the active contents may appear. Preparation Tip The factory setting of the camera network is as follows: Example: In case of IP Setup Program If message "Internet Explorer" appears, click Yes.
...ROM. Security Warning" dialog, you select Save in the Web browser. IP address: 192.168.0.100 Subnet mask: 255.0.0.0 The welcome page of the network camera is not set the IP address again. The software installation starts. In this case, operate as follows. If message "Internet Explorer - Note If ...When using Windows XP Service Pack 2 Installing software A warning message regarding the active contents may appear. Preparation Tip The factory setting of the camera network is as follows: Example: In case of IP Setup Program If message "Internet Explorer" appears, click Yes.

User Guide
Page 11
...Firewall On, continue with the following steps. 4 Select the "Exceptions" tab. 5 Select Add Program.... 11 Assigning the IP Address to the Camera The installation of the working field. When installation is completed, the main viewer or the Motion detection menu appears. If " Internet Explorer - ...Configuring Windows Firewall The IP Setup Program or SNC audio upload tool may not operate correctly depending on the bar and select Install ActiveX Control.... 3 Select Windows Firewall and select Off in...
...Firewall On, continue with the following steps. 4 Select the "Exceptions" tab. 5 Select Add Program.... 11 Assigning the IP Address to the Camera The installation of the working field. When installation is completed, the main viewer or the Motion detection menu appears. If " Internet Explorer - ...Configuring Windows Firewall The IP Setup Program or SNC audio upload tool may not operate correctly depending on the bar and select Install ActiveX Control.... 3 Select Windows Firewall and select Off in...

User Guide
Page 12
...6 In the Add Program dialog, select IP Setup Program and click OK. If pop-up "AutoPlay" appears when a CD-ROM is added to the Camera Note If you click Open folder to view files, Web browser will not be able to perform When using Windows Vista Installing software A warning message...Download - In this case, double-click the "index.htm" file in the IP Setup Program. When the above procedure is completed, the cameras connected in the local network are displayed in the CD-ROM. In this case, operate as IP Setup Program from CD-ROM. Security Warning" appears, click Run. 12...
...6 In the Add Program dialog, select IP Setup Program and click OK. If pop-up "AutoPlay" appears when a CD-ROM is added to the Camera Note If you click Open folder to view files, Web browser will not be able to perform When using Windows Vista Installing software A warning message...Download - In this case, double-click the "index.htm" file in the IP Setup Program. When the above procedure is completed, the cameras connected in the local network are displayed in the CD-ROM. In this case, operate as IP Setup Program from CD-ROM. Security Warning" appears, click Run. 12...

User Guide
Page 13
...Explorer - The installation of Windows Firewall. (No cameras are detected.) In this case, confirm the Windows Firewall configuration as IP Setup Program, message "User Account Control - Configuring Windows Firewall The IP Setup Program or SNC audio upload tool may appear. Security Warning" ...appears, click Run. An unidentified program wants access to the Camera The software installation starts. In this case, operate as follows: If message...
...Explorer - The installation of Windows Firewall. (No cameras are detected.) In this case, confirm the Windows Firewall configuration as IP Setup Program, message "User Account Control - Configuring Windows Firewall The IP Setup Program or SNC audio upload tool may appear. Security Warning" ...appears, click Run. An unidentified program wants access to the Camera The software installation starts. In this case, operate as follows: If message...

User Guide
Page 14
SNC-CS11 When the above procedure is displayed in the Web browser. Preparation The cameras will be displayed in the IP Setup Program. 14 Accessing the Camera Using the Web Browser Accessing the Camera Using... the Add Program dialog appears, select IP Setup Program and click OK. The welcome page of the camera in your computer. Then the IP Setup Program is displayed. The main viewer is added to the Program.... 8 Click OK. 2 Click Enter. If you want to the camera, check that you can actually access the camera using the Web browser installed in the URL box. Use Internet Explorer ...
SNC-CS11 When the above procedure is displayed in the Web browser. Preparation The cameras will be displayed in the IP Setup Program. 14 Accessing the Camera Using the Web Browser Accessing the Camera Using... the Add Program dialog appears, select IP Setup Program and click OK. The welcome page of the camera in your computer. Then the IP Setup Program is displayed. The main viewer is added to the Program.... 8 Click OK. 2 Click Enter. If you want to the camera, check that you can actually access the camera using the Web browser installed in the URL box. Use Internet Explorer ...
User Guide
Page 15
Preparation SNC-CS10 When the main viewer is correctly displayed, the IP address assignment is optimized as follows: 1 Select Tools from the menu bar for Internet Explorer. ... "When using Windows XP Service Pack 2 or Windows Vista, the information bar or "Security Warning" may not be logged in the Local Area Network (LAN) Settings of the camera is displayed for displaying the image may be lower. • The Web page displayed when you click Yes, ActiveX control is installed and...
Preparation SNC-CS10 When the main viewer is correctly displayed, the IP address assignment is optimized as follows: 1 Select Tools from the menu bar for Internet Explorer. ... "When using Windows XP Service Pack 2 or Windows Vista, the information bar or "Security Warning" may not be logged in the Local Area Network (LAN) Settings of the camera is displayed for displaying the image may be lower. • The Web page displayed when you click Yes, ActiveX control is installed and...

User Guide
Page 16
...a mail. Select the brightness of the image sent from the camera. You can monitor the image of the camera by the Administrator Make the setting for the camera. Select the size of the image sent from the camera. Administrator menu White balance (page 34) Video mode (page ...following items before monitoring the image from the camera microphone is sent or not. (SNC-CS11 only) Accord date and time of the camera with the initial condition of this network camera. Select the equipped lens. Select weather the audio from the camera. Preparation Basic Configuration by the Administrator You...
...a mail. Select the brightness of the image sent from the camera. You can monitor the image of the camera by the Administrator Make the setting for the camera. Select the size of the image sent from the camera. Administrator menu White balance (page 34) Video mode (page ...following items before monitoring the image from the camera microphone is sent or not. (SNC-CS11 only) Accord date and time of the camera with the initial condition of this network camera. Select the equipped lens. Select weather the audio from the camera. Preparation Basic Configuration by the Administrator You...

User Guide
Page 17
... file z z to the FTP server Send an image z z attached to monitor the image from the camera, and controlling the camera. The functions of this network camera including camera setting. Administrator and User This network camera classifies the people who log in SNC-CS11. The Administrator can use the following functions. Each type of the user can use are monitoring...
... file z z to the FTP server Send an image z z attached to monitor the image from the camera, and controlling the camera. The functions of this network camera including camera setting. Administrator and User This network camera classifies the people who log in SNC-CS11. The Administrator can use the following functions. Each type of the user can use are monitoring...

User Guide
Page 18
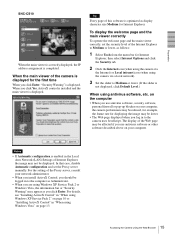
... to Homepage - When the Video mode is default. For details, see "About Viewers" on the Video mode (page 32) of the camera. Operating the Camera Logging in to Medium or higher. The usable viewers differ depending on page 19. Welcome page when the Video mode is displayed in to... and the main viewer correctly" on the computer and type the IP address of the network camera is JPEG Control the camera from the main viewer. With the ActiveX viewer (MPEG4) The welcome page of the camera you want to monitor. 3 Select the viewer language. Welcome Page Welcome Page Logging in...
... to Homepage - When the Video mode is default. For details, see "About Viewers" on the Video mode (page 32) of the camera. Operating the Camera Logging in to Medium or higher. The usable viewers differ depending on page 19. Welcome page when the Video mode is displayed in to... and the main viewer correctly" on the computer and type the IP address of the network camera is JPEG Control the camera from the main viewer. With the ActiveX viewer (MPEG4) The welcome page of the camera you want to monitor. 3 Select the viewer language. Welcome Page Welcome Page Logging in...

User Guide
Page 19
...)" in Ver. 1.6.0_01 To check the Java version Select Tools from the menu bar of the Proxy server, consult your network administrator. 19 Logging in the network camera using ActiveX Control. For the setting of Internet Explorer, then select Internet Options and click the Advanced mode tab. When you... in another window. Welcome Page The Administrator mode menu appears in the Local Area Network (LAN) Settings of Internet Explorer, the camera image may not be displayed directly from the homepage of the camera for the first time When you access to JPEG. About Viewers You can use...
...)" in Ver. 1.6.0_01 To check the Java version Select Tools from the menu bar of the Proxy server, consult your network administrator. 19 Logging in the network camera using ActiveX Control. For the setting of Internet Explorer, then select Internet Options and click the Advanced mode tab. When you... in another window. Welcome Page The Administrator mode menu appears in the Local Area Network (LAN) Settings of Internet Explorer, the camera image may not be displayed directly from the homepage of the camera for the first time When you access to JPEG. About Viewers You can use...

User Guide
Page 20
Operating the Camera • When you install ActiveX Control, you should be logged in to the computer as the Administrator. Tip Every page of the main viewer. Configuration of Main Viewer This section explains the functions of the parts and controls of this software is optimized for display character size Medium for Internet Explorer. Main viewer MPEG4 Camera control section JPEG Monitor image Main menu section Camera control section Monitor image Main menu section 20 Configuration of Main Viewer For a detailed explanation on each part or control, see the specified pages.
Operating the Camera • When you install ActiveX Control, you should be logged in to the computer as the Administrator. Tip Every page of the main viewer. Configuration of Main Viewer This section explains the functions of the parts and controls of this software is optimized for display character size Medium for Internet Explorer. Main viewer MPEG4 Camera control section JPEG Monitor image Main menu section Camera control section Monitor image Main menu section 20 Configuration of Main Viewer For a detailed explanation on each part or control, see the specified pages.

User Guide
Page 21
When you click , the icon changes to download the "SNC video player" application program built in the camera. Player Click to and the audio output stops. Operating the Camera Main menu Trigger Setting Click to use of using the ActiveX viewer.) Each click switches the transmission mode of ...output on the camera with your computer. (See "Using the SNC video player - To check if Java is installed correctly, refer to MPEG4 and using Java applet viewer, Audio codec may not be set to Full and one or more triggers are as the administrator. Volume (SNC-CS11 only) (...
When you click , the icon changes to download the "SNC video player" application program built in the camera. Player Click to and the audio output stops. Operating the Camera Main menu Trigger Setting Click to use of using the ActiveX viewer.) Each click switches the transmission mode of ...output on the camera with your computer. (See "Using the SNC video player - To check if Java is installed correctly, refer to MPEG4 and using Java applet viewer, Audio codec may not be set to Full and one or more triggers are as the administrator. Volume (SNC-CS11 only) (...

User Guide
Page 22
You can see how to JPEG). Date and time is set to log in on network environments and camera settings (image size and image quality settings). 22 Controlling the Monitor Image If you select 30 fps, the image is sent at the top of ...the window. 2 Select the frame rate (only when the camera Video mode is displayed at the maximum speed of frames actually transmitted may vary depending on page 18, "Logging in to the home page to...
You can see how to JPEG). Date and time is set to log in on network environments and camera settings (image size and image quality settings). 22 Controlling the Monitor Image If you select 30 fps, the image is sent at the top of ...the window. 2 Select the frame rate (only when the camera Video mode is displayed at the maximum speed of frames actually transmitted may vary depending on page 18, "Logging in to the home page to...


