User Guide
Page 2
... and Ports...11 About the Indicator Lights ...18 Connecting a Power Source ...19 Using the Battery Pack ...21 Shutting Down Your Computer Safely ...27 Using Your VAIO Computer ...28 Using the Keyboard ...29 Using the Pointing Device ...31 Using Special-function Buttons ...34 Using the Built-in MOTION EYE Camera...35 Using...
... and Ports...11 About the Indicator Lights ...18 Connecting a Power Source ...19 Using the Battery Pack ...21 Shutting Down Your Computer Safely ...27 Using Your VAIO Computer ...28 Using the Keyboard ...29 Using the Pointing Device ...31 Using Special-function Buttons ...34 Using the Built-in MOTION EYE Camera...35 Using...

User Guide
Page 3
... External Microphone ...106 Connecting a Universal Serial Bus (USB) Device...107 Connecting a Printer ...110 Connecting an i.LINK Device ...112 Connecting to a Network (LAN) ...114 Customizing Your VAIO Computer ...116 Setting the Password ...117 Using Fingerprint Authentication ...126 Using Trusted Platform Module (TPM)...144 Setting Up Your Computer with...
... External Microphone ...106 Connecting a Universal Serial Bus (USB) Device...107 Connecting a Printer ...110 Connecting an i.LINK Device ...112 Connecting to a Network (LAN) ...114 Customizing Your VAIO Computer ...116 Setting the Password ...117 Using Fingerprint Authentication ...126 Using Trusted Platform Module (TPM)...144 Setting Up Your Computer with...
User Guide
Page 6
Contains safety guidelines and owner information. Printed Documentation ❑ Welcome mat - Contains an overview of this Sony VAIO® computer, and welcome to the on-screen User Guide. n6 N Before Use Before Use Congratulations on your VAIO computer. Documentation Your documentation includes printed information and user guides to provide state-of-the-art personal computing. Sony has combined leading-edge technology in audio, video, computing, and communications to read on your purchase of connections, setting up information, etc. ❑ Safety Information -
Contains safety guidelines and owner information. Printed Documentation ❑ Welcome mat - Contains an overview of this Sony VAIO® computer, and welcome to the on-screen User Guide. n6 N Before Use Before Use Congratulations on your VAIO computer. Documentation Your documentation includes printed information and user guides to provide state-of-the-art personal computing. Sony has combined leading-edge technology in audio, video, computing, and communications to read on your purchase of connections, setting up information, etc. ❑ Safety Information -

User Guide
Page 7
...software programs included with your entire hard disk drive to the Sony online support Web site at http://esupport.sony.com/EN/VAIO/ for customers in USA, at http://www.sony.ca/support for customers in Canada, or at http://esupport.sony.com/ES/ for customers in Latin American countries or areas.... ❑ VAIO Recovery Guide - To access this manual) - It also includes ...
...software programs included with your entire hard disk drive to the Sony online support Web site at http://esupport.sony.com/EN/VAIO/ for customers in USA, at http://www.sony.ca/support for customers in Canada, or at http://esupport.sony.com/ES/ for customers in Latin American countries or areas.... ❑ VAIO Recovery Guide - To access this manual) - It also includes ...
User Guide
Page 10
Make sure to get started with using your VAIO computer. ! Upon completion, connect one device (for the first time, do not connect any new hardware that did not originally come with your computer. n 10 N ...
Make sure to get started with using your VAIO computer. ! Upon completion, connect one device (for the first time, do not connect any new hardware that did not originally come with your computer. n 10 N ...
User Guide
Page 28
Using Your VAIO Computer This section describes how to get the most out of using your computer. ❑ Using the Keyboard (page 29) ❑ Using the Pointing Device (... (page 47) ❑ Using the Internet (page 50) ❑ Using Wireless LAN (WLAN) (page 51) ❑ Using the Bluetooth Functionality (page 61) n 28 N Using Your VAIO Computer
Using Your VAIO Computer This section describes how to get the most out of using your computer. ❑ Using the Keyboard (page 29) ❑ Using the Pointing Device (... (page 47) ❑ Using the Internet (page 50) ❑ Using Wireless LAN (WLAN) (page 51) ❑ Using the Bluetooth Functionality (page 61) n 28 N Using Your VAIO Computer
User Guide
Page 29
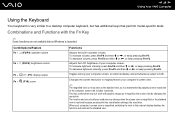
Combinations/Feature Fn + 2 (F3/F4): speaker volume Fn + 8 (F5/F6): brightness control Fn + /T (F7): display output Fn + (F10): zoom Functions Adjusts the built-in speaker volume. n 29 N Using Your VAIO Computer Using the Keyboard Your keyboard is launched. To increase volume, press Fn+F4 and then M or ,, or keep pressing Fn+F4. To decrease volume, press Fn+F3 and then m or Combinations and Functions with the Fn Key ✍ Some functions are not available before Windows is very similar to a desktop computer keyboard, but has additional keys that perform model-specific tasks.
Combinations/Feature Fn + 2 (F3/F4): speaker volume Fn + 8 (F5/F6): brightness control Fn + /T (F7): display output Fn + (F10): zoom Functions Adjusts the built-in speaker volume. n 29 N Using Your VAIO Computer Using the Keyboard Your keyboard is launched. To increase volume, press Fn+F4 and then M or ,, or keep pressing Fn+F4. To decrease volume, press Fn+F3 and then m or Combinations and Functions with the Fn Key ✍ Some functions are not available before Windows is very similar to a desktop computer keyboard, but has additional keys that perform model-specific tasks.

User Guide
Page 30
When you execute this command, the states of power consumption. To return the system to its original state, use the power button to the hard disk and the system power is turned off. Combinations/Feature Fn + (F12): Hibernate n 30 N Using Your VAIO Computer Functions Provides for the lowest level of the system and the peripheral devices are written to turn on power management, see Using the Power Saving Modes (page 150). For details on the power.
When you execute this command, the states of power consumption. To return the system to its original state, use the power button to the hard disk and the system power is turned off. Combinations/Feature Fn + (F12): Hibernate n 30 N Using Your VAIO Computer Functions Provides for the lowest level of the system and the peripheral devices are written to turn on power management, see Using the Power Saving Modes (page 150). For details on the power.

User Guide
Page 31
... are enabled but you can point to scroll horizontally (the scroll function is equipped with applications that support a touch pad scroll feature). n 31 N Using Your VAIO Computer Using the Pointing Device Your computer is available only with two types of the pointing device: the touch pad and the pointing stick. Using...
... are enabled but you can point to scroll horizontally (the scroll function is equipped with applications that support a touch pad scroll feature). n 31 N Using Your VAIO Computer Using the Pointing Device Your computer is available only with two types of the pointing device: the touch pad and the pointing stick. Using...

User Guide
Page 32
... screen using the pointing stick in the direction that support a pointing stick scroll feature.) ✍ The tip on an item or object. n 32 N Using Your VAIO Computer Using the Pointing Stick The keyboard contains a cursor-pointing device, the pointing stick (1). Click Press the left button twice. Drag Push the pointing stick...
... screen using the pointing stick in the direction that support a pointing stick scroll feature.) ✍ The tip on an item or object. n 32 N Using Your VAIO Computer Using the Pointing Stick The keyboard contains a cursor-pointing device, the pointing stick (1). Click Press the left button twice. Drag Push the pointing stick...
User Guide
Page 33
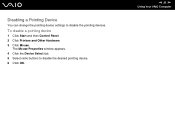
The Mouse Properties window appears. 4 Click the Device Select tab. 5 Select radio buttons to disable the pointing devices. n 33 N Using Your VAIO Computer To disable a pointing device 1 Click Start and then Control Panel. 2 Click Printers and Other Hardware. 3 Click Mouse. Disabling a Pointing Device You can change the pointing device settings to disable the desired pointing device. 6 Click OK.
The Mouse Properties window appears. 4 Click the Device Select tab. 5 Select radio buttons to disable the pointing devices. n 33 N Using Your VAIO Computer To disable a pointing device 1 Click Start and then Control Panel. 2 Click Printers and Other Hardware. 3 Click Mouse. Disabling a Pointing Device You can change the pointing device settings to disable the desired pointing device. 6 Click OK.
User Guide
Page 34
... screen, an external display, and simultaneous output to help you use specific functions of the computer. The LED turns on and off . n 34 N Using Your VAIO Computer Using Special-function Buttons Your computer is equipped with special buttons to both and the S2 button places the computer in Standby mode. To...
... screen, an external display, and simultaneous output to help you use specific functions of the computer. The LED turns on and off . n 34 N Using Your VAIO Computer Using Special-function Buttons Your computer is equipped with special buttons to both and the S2 button places the computer in Standby mode. To...
User Guide
Page 35
... messaging or video editing software does not activate or deactivate the built-in MOTION EYE camera, respectively. To turn off -line state. n 35 N Using Your VAIO Computer Using the Built-in MOTION EYE Camera Your computer may show some noises, for example horizontal streaks, if you view a rapid-moving object. See...
... messaging or video editing software does not activate or deactivate the built-in MOTION EYE camera, respectively. To turn off -line state. n 35 N Using Your VAIO Computer Using the Built-in MOTION EYE Camera Your computer may show some noises, for example horizontal streaks, if you view a rapid-moving object. See...

User Guide
Page 36
... available bay units, ask your PATA hard disk drive) ❑ 80GB HDD bay unit ❑ CD-RW/DVD-ROM drive bay unit - n 36 N Using Your VAIO Computer Using the Multi Function Bay Your computer is safe to unplug. 3 Click Stop. You can be safely removed from the system. 5 Click OK. To...
... available bay units, ask your PATA hard disk drive) ❑ 80GB HDD bay unit ❑ CD-RW/DVD-ROM drive bay unit - n 36 N Using Your VAIO Computer Using the Multi Function Bay Your computer is safe to unplug. 3 Click Stop. You can be safely removed from the system. 5 Click OK. To...

User Guide
Page 37
n 37 N Using Your VAIO Computer 8 Gently pull the button to pop it out of the bay. 7 Push the multi function bay unit eject button (1) to pop out the installed bay unit. 9 Gently take hold of the unit and pull it out.
n 37 N Using Your VAIO Computer 8 Gently pull the button to pop it out of the bay. 7 Push the multi function bay unit eject button (1) to pop out the installed bay unit. 9 Gently take hold of the unit and pull it out.

User Guide
Page 38
n 38 N Using Your VAIO Computer 10 Insert another bay unit with the label facing upward into the bay until it clicks into place.
n 38 N Using Your VAIO Computer 10 Insert another bay unit with the label facing upward into the bay until it clicks into place.

User Guide
Page 39
n 39 N Using Your VAIO Computer About bay unit protection against theft To protect the HDD bay unit against theft, secure the bay unit on your computer using a security screw* and L-shaped screwdriver*. * Supplied with optional or supplied HDD bay accessories. See the online Specifications for details about accessories.
n 39 N Using Your VAIO Computer About bay unit protection against theft To protect the HDD bay unit against theft, secure the bay unit on your computer using a security screw* and L-shaped screwdriver*. * Supplied with optional or supplied HDD bay accessories. See the online Specifications for details about accessories.
User Guide
Page 40
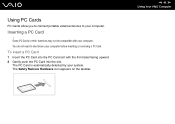
To insert a PC Card 1 Insert the PC Card into the PC Card slot with your computer before inserting or removing a PC Card. n 40 N Using Your VAIO Computer Some PC Cards or their functions may not be compatible with the front label facing upward. 2 Gently push the PC Card into the slot. Inserting a PC Card ! The Safely Remove Hardware icon appears on the taskbar. You do not need to your system. The PC Card is automatically detected by your computer. Using PC Cards PC Cards allow you to connect portable external devices to shut down your computer.
To insert a PC Card 1 Insert the PC Card into the PC Card slot with your computer before inserting or removing a PC Card. n 40 N Using Your VAIO Computer Some PC Cards or their functions may not be compatible with the front label facing upward. 2 Gently push the PC Card into the slot. Inserting a PC Card ! The Safely Remove Hardware icon appears on the taskbar. You do not need to your system. The PC Card is automatically detected by your computer. Using PC Cards PC Cards allow you to connect portable external devices to shut down your computer.

User Guide
Page 41
... card is not recognized. Make sure you have difficulty inserting a PC Card, check that came with your PC Card for more information. n 41 N Using Your VAIO Computer ✍ Some devices may not enter Hibernate power management mode. mark appears on the Device Manager tab in the correct direction. We recommend that...
... card is not recognized. Make sure you have difficulty inserting a PC Card, check that came with your PC Card for more information. n 41 N Using Your VAIO Computer ✍ Some devices may not enter Hibernate power management mode. mark appears on the Device Manager tab in the correct direction. We recommend that...

User Guide
Page 42
... properly, your system may not work properly. The Safely Remove Hardware window appears. 2 Select the hardware you want to unplug. 3 Click Stop. n 42 N Using Your VAIO Computer Removing a PC Card Follow the steps below to remove the PC Card while your computer is off, skip steps 1 to 6. 1 Double-click the Safely...
... properly, your system may not work properly. The Safely Remove Hardware window appears. 2 Select the hardware you want to unplug. 3 Click Stop. n 42 N Using Your VAIO Computer Removing a PC Card Follow the steps below to remove the PC Card while your computer is off, skip steps 1 to 6. 1 Double-click the Safely...

