

User Guide
Page 2
... and Ports...13 About the Indicator Lights ...19 Connecting a Power Source ...21 Using the Battery Pack ...22 Shutting Down Your Computer Safely ...30 Using Your VAIO Computer ...31 Using the Keyboard ...32 Using the Touch Pad ...34 Using Special-function Buttons ...35 Using the Built-in MOTION EYE Camera...36 Using...
... and Ports...13 About the Indicator Lights ...19 Connecting a Power Source ...21 Using the Battery Pack ...22 Shutting Down Your Computer Safely ...30 Using Your VAIO Computer ...31 Using the Keyboard ...32 Using the Touch Pad ...34 Using Special-function Buttons ...35 Using the Built-in MOTION EYE Camera...36 Using...

User Guide
Page 3
...Microphone ...99 Connecting a Universal Serial Bus (USB) Device...100 Connecting a Printer ...103 Connecting an i.LINK Device ...104 Customizing Your VAIO Computer ...106 Selecting Performance Modes ...107 Setting the Password ...108 Using Fingerprint Authentication ...120 Using the Trusted Platform Module (TPM)...128 ...Setting Up Your Computer with the VAIO Control Center 138 Using the VAIO Status Monitor ...139 Using the Power Saving Modes ...140 Managing Power with the VAIO Power Management 145 Protecting the Hard Disk ...147 Upgrading Your...
...Microphone ...99 Connecting a Universal Serial Bus (USB) Device...100 Connecting a Printer ...103 Connecting an i.LINK Device ...104 Customizing Your VAIO Computer ...106 Selecting Performance Modes ...107 Setting the Password ...108 Using Fingerprint Authentication ...120 Using the Trusted Platform Module (TPM)...128 ...Setting Up Your Computer with the VAIO Control Center 138 Using the VAIO Status Monitor ...139 Using the Power Saving Modes ...140 Managing Power with the VAIO Power Management 145 Protecting the Hard Disk ...147 Upgrading Your...

User Guide
Page 6
... Vista® 32-bit operating system. External views illustrated in this manual may find differences in the information when your computer. Sony has combined leading-edge technology in the supplied manuals including this User Guide is intended for users of -the-art personal computing... experience. ! Information in audio, video, computing, and communications to the on your purchase of this Sony VAIO® computer, and welcome to provide state-of the VAIO computers with the 64-bit operating system. n6 N Before Use Before Use Congratulations on -screen User Guide....
... Vista® 32-bit operating system. External views illustrated in this manual may find differences in the information when your computer. Sony has combined leading-edge technology in the supplied manuals including this User Guide is intended for users of -the-art personal computing... experience. ! Information in audio, video, computing, and communications to the on your purchase of this Sony VAIO® computer, and welcome to provide state-of the VAIO computers with the 64-bit operating system. n6 N Before Use Before Use Congratulations on -screen User Guide....

User Guide
Page 7
... on solving common problems. ✍ To go to the Sony online support web site at the following URLs: http://esupport.sony.com/EN/VAIO/ for customers in USA http://www.sony.ca/support/ for customers in Canada http://esupport.sony.com/LA/ for customers in Spanish-speaking Latin American countries ...or areas http://esupport.sony.com/BR/ for customers in this manual) -...
... on solving common problems. ✍ To go to the Sony online support web site at the following URLs: http://esupport.sony.com/EN/VAIO/ for customers in USA http://www.sony.ca/support/ for customers in Canada http://esupport.sony.com/LA/ for customers in Spanish-speaking Latin American countries ...or areas http://esupport.sony.com/BR/ for customers in this manual) -...

User Guide
Page 8
.... 2 Click SmartWi Connection Utility Help. * Available on -screen guide: 1 Click Start and Help and Support. 2 Click Use my VAIO. 3 Click VAIO Recovery Center User Guide. ❑ SmartWi™ Connection Utility Help (Selected models only) - See the online specifications to the original factory... settings. To access this on-screen guide: 1 Click Start and Help and Support. 2 Click Use my VAIO. 3 Click Other Documents. Provides information about setting up Bluetooth®*, wireless LAN, GPS*, and wireless WAN* functions. Provides information ...
.... 2 Click SmartWi Connection Utility Help. * Available on -screen guide: 1 Click Start and Help and Support. 2 Click Use my VAIO. 3 Click VAIO Recovery Center User Guide. ❑ SmartWi™ Connection Utility Help (Selected models only) - See the online specifications to the original factory... settings. To access this on-screen guide: 1 Click Start and Help and Support. 2 Click Use my VAIO. 3 Click Other Documents. Provides information about setting up Bluetooth®*, wireless LAN, GPS*, and wireless WAN* functions. Provides information ...

User Guide
Page 9
... the answers you need. Choose from the following categories to access and provides a single location for general information and technical assistance for your VAIO computer with VAIO Care, system restore, backup and recovery, and contact Sony support. To access Help and Support, click Start and Help and Support. ❑ Get started with my...
... the answers you need. Choose from the following categories to access and provides a single location for general information and technical assistance for your VAIO computer with VAIO Care, system restore, backup and recovery, and contact Sony support. To access Help and Support, click Start and Help and Support. ❑ Get started with my...

User Guide
Page 12
... (for the first time, do not connect any other hardware that did not originally come with only the supplied accessories connected and set up your VAIO computer. ! Before starting your computer for example, a printer, an external hard disk drive, a scanner, and so on) at a time, following the manufacturers' instructions. ❑ Locating...
... (for the first time, do not connect any other hardware that did not originally come with only the supplied accessories connected and set up your VAIO computer. ! Before starting your computer for example, a printer, an external hard disk drive, a scanner, and so on) at a time, following the manufacturers' instructions. ❑ Locating...

User Guide
Page 27
...current battery charging method using the Battery Charge Functions. If the battery charge capacity is low, replace the battery pack with a new genuine Sony battery pack. To check the battery charge capacity Follow steps 1 to select the Enable Battery Care Function check box. 5 Select the ...desired maximum charge level. 6 Click OK. To enable the battery care function 1 Click Start, All Programs, and VAIO Control Center. 2 Click Power Management and then Battery Charge Functions. 3 Click Advanced. 4 Click to 3 in To enable the battery care function above ...
...current battery charging method using the Battery Charge Functions. If the battery charge capacity is low, replace the battery pack with a new genuine Sony battery pack. To check the battery charge capacity Follow steps 1 to select the Enable Battery Care Function check box. 5 Select the ...desired maximum charge level. 6 Click OK. To enable the battery care function 1 Click Start, All Programs, and VAIO Control Center. 2 Click Power Management and then Battery Charge Functions. 3 Click Advanced. 4 Click to 3 in To enable the battery care function above ...

User Guide
Page 28
To set the battery life conserving wallpaper 1 Click Start, All Programs, and VAIO Control Center. 2 Click Display and then Long Battery Life Wallpaper Setting. 3 Click Set Long Battery Life Wallpaper. At the confirmation prompt, click OK. Using the Battery Life Conserving Wallpaper You can conserve your battery life just by setting the specific wallpaper as your desktop background. n 28 N Getting Started
To set the battery life conserving wallpaper 1 Click Start, All Programs, and VAIO Control Center. 2 Click Display and then Long Battery Life Wallpaper Setting. 3 Click Set Long Battery Life Wallpaper. At the confirmation prompt, click OK. Using the Battery Life Conserving Wallpaper You can conserve your battery life just by setting the specific wallpaper as your desktop background. n 28 N Getting Started

User Guide
Page 31
... This section describes how to get the most out of using your VAIO computer. ❑ Using the Keyboard (page 32) ❑ Using the Touch Pad (page 34) ❑ Using Special-function Buttons (page 35) ❑ Using the Built-...) ❑ Using the Network (LAN) (page 63) ❑ Using the Wireless LAN (WLAN) (page 65) ❑ Using the Bluetooth Function (page 69) n 31 N Using Your VAIO Computer
... This section describes how to get the most out of using your VAIO computer. ❑ Using the Keyboard (page 32) ❑ Using the Touch Pad (page 34) ❑ Using Special-function Buttons (page 35) ❑ Using the Built-...) ❑ Using the Network (LAN) (page 63) ❑ Using the Wireless LAN (WLAN) (page 65) ❑ Using the Bluetooth Function (page 69) n 31 N Using Your VAIO Computer

User Guide
Page 32
... screen, an external display, and simultaneous output to a desktop computer keyboard, but has additional keys that perform model-specific tasks. Combinations and Functions with the VAIO Control Center for more information. Combinations/Feature Fn + % (F2): speaker switch Fn + 2 (F3/F4): volume Fn + 8 (F5/F6): brightness control Fn +... of an image or a document displayed on and off the built-in ), press the Fn+F10 keys. n 32 N Using Your VAIO Computer Using the Keyboard Your keyboard is finished launching. See the help file included with the Fn Key ✍ Some keyboard functions can be...
... screen, an external display, and simultaneous output to a desktop computer keyboard, but has additional keys that perform model-specific tasks. Combinations and Functions with the VAIO Control Center for more information. Combinations/Feature Fn + % (F2): speaker switch Fn + 2 (F3/F4): volume Fn + 8 (F5/F6): brightness control Fn +... of an image or a document displayed on and off the built-in ), press the Fn+F10 keys. n 32 N Using Your VAIO Computer Using the Keyboard Your keyboard is finished launching. See the help file included with the Fn Key ✍ Some keyboard functions can be...

User Guide
Page 33
Combinations/Feature Fn + (F12): hibernate n 33 N Using Your VAIO Computer Functions Provides the lowest level of the system and the connected peripheral devices are saved to turn on power management, see Using the Power Saving Modes (page 140). When you execute this command, the states of power consumption. For details on the power. To return the system to its original state, use the power button to the built-in storage device and the system power is turned off.
Combinations/Feature Fn + (F12): hibernate n 33 N Using Your VAIO Computer Functions Provides the lowest level of the system and the connected peripheral devices are saved to turn on power management, see Using the Power Saving Modes (page 140). When you execute this command, the states of power consumption. For details on the power. To return the system to its original state, use the power button to the built-in storage device and the system power is turned off.

User Guide
Page 34
... connect a mouse before connecting a mouse, you will be able to , select, drag, and scroll objects on the touch pad (1) to scroll vertically. n 34 N Using Your VAIO Computer Action Point Click Double-click Right-click Drag Scroll Description Slide your finger on the screen using the touch pad. Press the left button... your finger on an item or object. In many applications, this action displays a shortcut menu. To change the touch pad settings, click Start, All Programs, VAIO Control Center, Keyboard and Mouse and Pointing Device. !
... connect a mouse before connecting a mouse, you will be able to , select, drag, and scroll objects on the touch pad (1) to scroll vertically. n 34 N Using Your VAIO Computer Action Point Click Double-click Right-click Drag Scroll Description Slide your finger on the screen using the touch pad. Press the left button... your finger on an item or object. In many applications, this action displays a shortcut menu. To change the touch pad settings, click Start, All Programs, VAIO Control Center, Keyboard and Mouse and Pointing Device. !

User Guide
Page 35
...a presentation under Windows Mobility Center, and change the S button assignments, press and hold either button or launch and navigate through the VAIO Control Center to display the setup window. To change the settings in Presentation mode between Mirror and Extend Desktop. If this button once ...the substitute drive eject button on the computer. Special-function button S1/S2 buttons Functions By default, the S1 button displays the VAIO Presentation Support window to select the display method in the Presentation Settings window. In Presentation mode, some functions of the computer that...
...a presentation under Windows Mobility Center, and change the S button assignments, press and hold either button or launch and navigate through the VAIO Control Center to display the setup window. To change the settings in Presentation mode between Mirror and Extend Desktop. If this button once ...the substitute drive eject button on the computer. Special-function button S1/S2 buttons Functions By default, the S1 button displays the VAIO Presentation Support window to select the display method in the Presentation Settings window. In Presentation mode, some functions of the computer that...

User Guide
Page 36
n 36 N Using Your VAIO Computer Using the Built-in MOTION EYE Camera Your computer is equipped with a built-in MOTION EYE camera adds video functionality to instant messaging software ...
n 36 N Using Your VAIO Computer Using the Built-in MOTION EYE Camera Your computer is equipped with a built-in MOTION EYE camera adds video functionality to instant messaging software ...
User Guide
Page 37
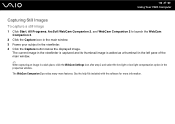
The WebCam Companion 2 provides many more information. See the help file included with the software for more features. n 37 N Using Your VAIO Computer Capturing Still Images To capture a still image 1 Click Start, All Programs, ArcSoft WebCam Companion 2, and WebCam Companion 2 to launch the WebCam Companion 2. 2 Click the ...
The WebCam Companion 2 provides many more information. See the help file included with the software for more features. n 37 N Using Your VAIO Computer Capturing Still Images To capture a still image 1 Click Start, All Programs, ArcSoft WebCam Companion 2, and WebCam Companion 2 to launch the WebCam Companion 2. 2 Click the ...

User Guide
Page 38
... in the properties window. The WebCam Companion 2 provides many more information. See the help file included with the software for more features. n 38 N Using Your VAIO Computer Capturing Movies To capture a movie 1 Click Start, All Programs, ArcSoft WebCam Companion 2, and WebCam Companion 2 to stop movie recording.
... in the properties window. The WebCam Companion 2 provides many more information. See the help file included with the software for more features. n 38 N Using Your VAIO Computer Capturing Movies To capture a movie 1 Click Start, All Programs, ArcSoft WebCam Companion 2, and WebCam Companion 2 to stop movie recording.

User Guide
Page 39
If the power supply to the optical disc drive is disabled by the VAIO Power Management, it down until the disc clicks into the optical disc drive, turn off the computer, and then turn on the computer again to ... on the optical disc drive. Note that the substitute drive eject button is disabled when the optical disc drive is not powered. n 39 N Using Your VAIO Computer Using the Optical Disc Drive Your computer is equipped with the label side facing upward and gently push it will take a while to eject...
If the power supply to the optical disc drive is disabled by the VAIO Power Management, it down until the disc clicks into the optical disc drive, turn off the computer, and then turn on the computer again to ... on the optical disc drive. Note that the substitute drive eject button is disabled when the optical disc drive is not powered. n 39 N Using Your VAIO Computer Using the Optical Disc Drive Your computer is equipped with the label side facing upward and gently push it will take a while to eject...

User Guide
Page 40
Doing so may cause the computer to malfunction. ✍ If you use an external optical disc drive, connect the drive before you launch any preinstalled disc operation program. Do not remove the optical disc when your computer is in gently. ! n 40 N Using Your VAIO Computer 4 Close the drive tray by pushing it in a power saving mode (Sleep or Hibernate).
Doing so may cause the computer to malfunction. ✍ If you use an external optical disc drive, connect the drive before you launch any preinstalled disc operation program. Do not remove the optical disc when your computer is in gently. ! n 40 N Using Your VAIO Computer 4 Close the drive tray by pushing it in a power saving mode (Sleep or Hibernate).

User Guide
Page 41
Use the table below to see which types of optical disc drive installed on the model you purchased. Check your specifications for the type of media your model. n 41 N Using Your VAIO Computer Reading and Writing Optical Discs Your computer plays and records CDs, DVDs, and Blu-ray Disc™ media, depending on your optical disc drive supports.
Use the table below to see which types of optical disc drive installed on the model you purchased. Check your specifications for the type of media your model. n 41 N Using Your VAIO Computer Reading and Writing Optical Discs Your computer plays and records CDs, DVDs, and Blu-ray Disc™ media, depending on your optical disc drive supports.

