
User Manual
Page 5
...common problems. To view this on-screen guide: 1 Click Start , All Programs, and VAIO Documentation. 2 Open the folder for your language. ❑ Windows Help and Support - A comprehensive resource for practical advice, tutorials, and demonstrations to help you want to read. ✍ You can manually browse to ...the folder for your language. 3 Select the guide you learn to use your computer. To access Windows Help and Support, click Start and Help and Support, or press and hold the Microsoft Windows key and press the F1 key. On-screen Documentation ❑ User Guide (This manual) - ...
...common problems. To view this on-screen guide: 1 Click Start , All Programs, and VAIO Documentation. 2 Open the folder for your language. ❑ Windows Help and Support - A comprehensive resource for practical advice, tutorials, and demonstrations to help you want to read. ✍ You can manually browse to ...the folder for your language. 3 Select the guide you learn to use your computer. To access Windows Help and Support, click Start and Help and Support, or press and hold the Microsoft Windows key and press the F1 key. On-screen Documentation ❑ User Guide (This manual) - ...
User Manual
Page 8
... indirect lighting to the proper position. Use the display tilting feature to your comfort and work efficiency. ❑ Positioning an external display - Choose a location where windows and lights do not cause glare and reflection on the display. Adjust the brightness level of the monitor. Proper lighting adds to find the best...
... indirect lighting to the proper position. Use the display tilting feature to your comfort and work efficiency. ❑ Positioning an external display - Choose a location where windows and lights do not cause glare and reflection on the display. Adjust the brightness level of the monitor. Proper lighting adds to find the best...
User Manual
Page 29
... connected to the Internet to update your computer's performance available on the Internet, and downloads and installs them on the computer. ❑ Windows Update Click Start, All Programs, and Windows Update and then follow the on-screen instructions. ❑ VAIO Update 5 Click Start, All Programs, and VAIO Update 5 and then follow the...
... connected to the Internet to update your computer's performance available on the Internet, and downloads and installs them on the computer. ❑ Windows Update Click Start, All Programs, and Windows Update and then follow the on-screen instructions. ❑ VAIO Update 5 Click Start, All Programs, and VAIO Update 5 and then follow the...
User Manual
Page 35
... software does not activate or deactivate the built-in MOTION EYE camera. For detailed information on the computer activates the built-in the main window. Launching or exiting your desired icon in camera. Using Your VAIO Computer > Using the Built-in Camera n 35 N Using the Built...-in camera. To use the software, see the help file included with the appropriate software. ! Video conferences are using the built-in the properties window. With the preinstalled image capture software, you are possible with the software. ✍ When capturing an image or a movie in a dark place,...
... software does not activate or deactivate the built-in MOTION EYE camera. For detailed information on the computer activates the built-in the main window. Launching or exiting your desired icon in camera. Using Your VAIO Computer > Using the Built-in Camera n 35 N Using the Built...-in camera. To use the software, see the help file included with the appropriate software. ! Video conferences are using the built-in the properties window. With the preinstalled image capture software, you are possible with the software. ✍ When capturing an image or a movie in a dark place,...
User Manual
Page 44
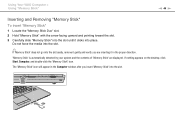
.... 2 Hold "Memory Stick" with the arrow facing upward and pointing toward the slot. 3 Carefully slide "Memory Stick" into the slot until it in the Computer window after you are displayed. Do not force the media into the slot. ✍ If "Memory Stick" does not go into the slot easily, remove it...
.... 2 Hold "Memory Stick" with the arrow facing upward and pointing toward the slot. 3 Carefully slide "Memory Stick" into the slot until it in the Computer window after you are displayed. Do not force the media into the slot. ✍ If "Memory Stick" does not go into the slot easily, remove it...
User Manual
Page 50
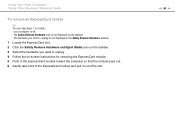
the Safely Remove Hardware icon is not displayed on -screen instructions for removing the ExpressCard module. 5 Push in the Safely Remove Hardware window. 1 Locate the ExpressCard slot. 2 Click the Safely Remove Hardware and Eject Media icon on the taskbar. 3 Select the hardware you want to unplug is off. - ...
the Safely Remove Hardware icon is not displayed on -screen instructions for removing the ExpressCard module. 5 Push in the Safely Remove Hardware window. 1 Locate the ExpressCard slot. 2 Click the Safely Remove Hardware and Eject Media icon on the taskbar. 3 Select the hardware you want to unplug is off. - ...
User Manual
Page 52
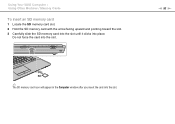
n 52 N ✍ The SD memory card icon will appear in the Computer window after you insert the card into the slot. Do not force the card into the slot. Using Your VAIO Computer > Using Other Modules / Memory Cards To insert an SD memory card 1 Locate the SD memory card slot. 2 Hold the SD memory card with the arrow facing upward and pointing toward the slot. 3 Carefully slide the SD memory card into the slot until it clicks into place.
n 52 N ✍ The SD memory card icon will appear in the Computer window after you insert the card into the slot. Do not force the card into the slot. Using Your VAIO Computer > Using Other Modules / Memory Cards To insert an SD memory card 1 Locate the SD memory card slot. 2 Hold the SD memory card with the arrow facing upward and pointing toward the slot. 3 Carefully slide the SD memory card into the slot until it clicks into place.

User Manual
Page 60
...the 5 GHz band or both the 2.4 GHz and 5 GHz bands from the drop-down list for Wireless LAN Settings in the VAIO Smart Network settings window. 5 Click or on the taskbar. 6 Select the desired access point and click Connect. ✍ For WPA-PSK or WPA2-PSK authentication, you ...need to establish wireless LAN communications between 8 and 63 characters in the VAIO Smart Network window. For details on how to select the channel that came with your access point for more information. ! See Windows Help and Support for more information. 2 Turn on the WIRELESS switch. 3 Click the VAIO...
...the 5 GHz band or both the 2.4 GHz and 5 GHz bands from the drop-down list for Wireless LAN Settings in the VAIO Smart Network settings window. 5 Click or on the taskbar. 6 Select the desired access point and click Connect. ✍ For WPA-PSK or WPA2-PSK authentication, you ...need to establish wireless LAN communications between 8 and 63 characters in the VAIO Smart Network window. For details on how to select the channel that came with your access point for more information. ! See Windows Help and Support for more information. 2 Turn on the WIRELESS switch. 3 Click the VAIO...
User Manual
Page 61
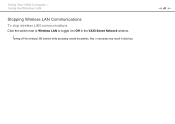
n 61 N Turning off the wireless LAN function while accessing remote documents, files, or resources may result in the VAIO Smart Network window. ! Using Your VAIO Computer > Using the Wireless LAN Stopping Wireless LAN Communications To stop wireless LAN communications Click the switch next to Wireless LAN to toggle it to Off in data loss.
n 61 N Turning off the wireless LAN function while accessing remote documents, files, or resources may result in the VAIO Smart Network window. ! Using Your VAIO Computer > Using the Wireless LAN Stopping Wireless LAN Communications To stop wireless LAN communications Click the switch next to Wireless LAN to toggle it to Off in data loss.
User Manual
Page 64
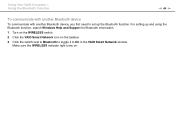
Using Your VAIO Computer > Using the Bluetooth Function n 64 N To communicate with another Bluetooth device To communicate with another Bluetooth device, you first need to On in the VAIO Smart Network window. Make sure the WIRELESS indicator light turns on the taskbar. 3 Click the switch next to Bluetooth to toggle it to set up and using the Bluetooth function, search Windows Help and Support for Bluetooth information. 1 Turn on the WIRELESS switch. 2 Click the VAIO Smart Network icon on . For setting up the Bluetooth function.
Using Your VAIO Computer > Using the Bluetooth Function n 64 N To communicate with another Bluetooth device To communicate with another Bluetooth device, you first need to On in the VAIO Smart Network window. Make sure the WIRELESS indicator light turns on the taskbar. 3 Click the switch next to Bluetooth to toggle it to set up and using the Bluetooth function, search Windows Help and Support for Bluetooth information. 1 Turn on the WIRELESS switch. 2 Click the VAIO Smart Network icon on . For setting up the Bluetooth function.
User Manual
Page 65
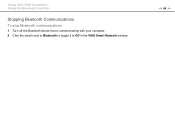
n 65 N Using Your VAIO Computer > Using the Bluetooth Function Stopping Bluetooth Communications To stop Bluetooth communications 1 Turn off the Bluetooth device that is communicating with your computer. 2 Click the switch next to Bluetooth to toggle it to Off in the VAIO Smart Network window.
n 65 N Using Your VAIO Computer > Using the Bluetooth Function Stopping Bluetooth Communications To stop Bluetooth communications 1 Turn off the Bluetooth device that is communicating with your computer. 2 Click the switch next to Bluetooth to toggle it to Off in the VAIO Smart Network window.
User Manual
Page 76
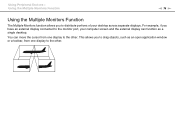
This allows you to drag objects, such as a single desktop. Using Peripheral Devices > Using the Multiple Monitors Function n 76 N Using the Multiple Monitors Function The Multiple Monitors function allows you to distribute portions of your computer screen and the external display can move the cursor from one display to the other . You can function as an open application window or a toolbar, from one display to the monitor port, your desktop across separate displays. For example, if you have an external display connected to the other .
This allows you to drag objects, such as a single desktop. Using Peripheral Devices > Using the Multiple Monitors Function n 76 N Using the Multiple Monitors Function The Multiple Monitors function allows you to distribute portions of your computer screen and the external display can move the cursor from one display to the other . You can function as an open application window or a toolbar, from one display to the monitor port, your desktop across separate displays. For example, if you have an external display connected to the other .
User Manual
Page 77
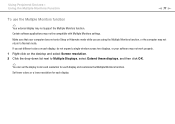
... return to Multiple Displays, select Extend these displays, and then click OK. ✍ You can set different colors on each display, do not expand a single window across two displays, or your computer does not enter Sleep or Hibernate mode while you set the display colors and resolution for each display and...
... return to Multiple Displays, select Extend these displays, and then click OK. ✍ You can set different colors on each display, do not expand a single window across two displays, or your computer does not enter Sleep or Hibernate mode while you set the display colors and resolution for each display and...
User Manual
Page 80
... device, see the manual that came with the USB device for more information. ❑ Be sure to use a USB printer compatible with your version of Windows to print documents. ❑ For information on connecting a USB device ❑ You may need to shock or impact. ❑ Do not put the computer into...
... device, see the manual that came with the USB device for more information. ❑ Be sure to use a USB printer compatible with your version of Windows to print documents. ❑ For information on connecting a USB device ❑ You may need to shock or impact. ❑ Do not put the computer into...
User Manual
Page 84
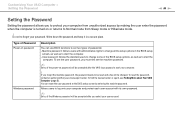
... of the BIOS setup options, as well as to start the computer. - Type of the power-on password Windows password Description You can reset the user password at the BIOS setup screen by making the user enter the password... Allows users with its own password. ✍ Entry of passwords: - If you must first set two types of the Windows password will be prompted after the VAIO logo appears to Normal mode from Sleep mode or Hibernate mode. ! Customizing Your VAIO...all the setup options in a secure place. To reset the password, contact an authorized Sony service/support center.
... of the BIOS setup options, as well as to start the computer. - Type of the power-on password Windows password Description You can reset the user password at the BIOS setup screen by making the user enter the password... Allows users with its own password. ✍ Entry of passwords: - If you must first set two types of the Windows password will be prompted after the VAIO logo appears to Normal mode from Sleep mode or Hibernate mode. ! Customizing Your VAIO...all the setup options in a secure place. To reset the password, contact an authorized Sony service/support center.
User Manual
Page 89
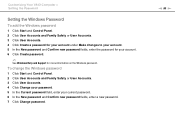
...Click User Accounts. 4 Click Change your password. 5 In the Current password field, enter your account. 6 Click Create password. ✍ See Windows Help and Support for your current password. 6 In the New password and Confirm new password fields, enter a new password. 7 Click Change password.... Customizing Your VAIO Computer > Setting the Password Setting the Windows Password To add the Windows password 1 Click Start and Control Panel. 2 Click User Accounts and Family Safety or User Accounts. 3 Click User Accounts. 4...
...Click User Accounts. 4 Click Change your password. 5 In the Current password field, enter your account. 6 Click Create password. ✍ See Windows Help and Support for your current password. 6 In the New password and Confirm new password fields, enter a new password. 7 Click Change password.... Customizing Your VAIO Computer > Setting the Password Setting the Windows Password To add the Windows password 1 Click Start and Control Panel. 2 Click User Accounts and Family Safety or User Accounts. 3 Click User Accounts. 4...
User Manual
Page 90
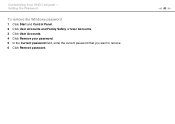
n 90 N Customizing Your VAIO Computer > Setting the Password To remove the Windows password 1 Click Start and Control Panel. 2 Click User Accounts and Family Safety or User Accounts. 3 Click User Accounts. 4 Click Remove your password. 5 In the Current password field, enter the current password that you want to remove. 6 Click Remove password.
n 90 N Customizing Your VAIO Computer > Setting the Password To remove the Windows password 1 Click Start and Control Panel. 2 Click User Accounts and Family Safety or User Accounts. 3 Click User Accounts. 4 Click Remove your password. 5 In the Current password field, enter the current password that you want to remove. 6 Click Remove password.
User Manual
Page 91
... < or , key to select Exit, select Exit Setup, and then press the Enter key. If the Advanced tab is not displayed in the BIOS setup window or you to use hardware virtualization software, contact the software publisher. Intel VT may not be available depending on the CPU installed on your computer...
... < or , key to select Exit, select Exit Setup, and then press the Enter key. If the Advanced tab is not displayed in the BIOS setup window or you to use hardware virtualization software, contact the software publisher. Intel VT may not be available depending on the CPU installed on your computer...

User Manual
Page 93
...Change advanced power settings and go to step 3. Otherwise, click Save changes. 3 Click the VAIO Power Management tab. With this icon to the Windows Power Options. To select a power plan 1 Right-click the power status icon on the right of your desired power plan. Customizing Your VAIO Computer...plans for running on AC or battery power to suit your requirements for each item. 4 Click OK. ✍ You can enhance the Windows power management functions to change the power plan settings 1 Click Change plan settings on the taskbar and select Power Options. 2 Select your computer...
...Change advanced power settings and go to step 3. Otherwise, click Save changes. 3 Click the VAIO Power Management tab. With this icon to the Windows Power Options. To select a power plan 1 Right-click the power status icon on the right of your desired power plan. Customizing Your VAIO Computer...plans for running on AC or battery power to suit your requirements for each item. 4 Click OK. ✍ You can enhance the Windows power management functions to change the power plan settings 1 Click Change plan settings on the taskbar and select Power Options. 2 Select your computer...
User Manual
Page 95
... any telecommunication links, networks, or modems before adding or removing memory modules. ❑ Be careful when changing memory. Ground yourself by the computer or the Windows operating system becomes unstable, contact the sales dealer or the manufacturer of your computer on a flat surface before you remove any cover or panel from...
... any telecommunication links, networks, or modems before adding or removing memory modules. ❑ Be careful when changing memory. Ground yourself by the computer or the Windows operating system becomes unstable, contact the sales dealer or the manufacturer of your computer on a flat surface before you remove any cover or panel from...


