
Quick Reference Guide
Page 20
... connection, connect the stereo audio connecting cable to the AUDIO connector for VPL-ES4, or to : • Turn off all equipment before making any connections. • Use the proper cables for VPL-EX4. 4 GB Projecting Projecting Connecting the Projector When you connect the projector, make sure to the AUDIO INPUT A/B connector for each connection. • Insert...
... connection, connect the stereo audio connecting cable to the AUDIO connector for VPL-ES4, or to : • Turn off all equipment before making any connections. • Use the proper cables for VPL-EX4. 4 GB Projecting Projecting Connecting the Projector When you connect the projector, make sure to the AUDIO INPUT A/B connector for each connection. • Insert...

Quick Reference Guide
Page 21
in the CDROM. 5 Projecting GB For details, see the Operating Instructions contained in the SET SETTING menu. Connecting with VPL-EX4, connect the stereo audio connecting cable to select the input signal with the "Input-A Signal Sel." If connection 3 is made , you may have to the ...
in the CDROM. 5 Projecting GB For details, see the Operating Instructions contained in the SET SETTING menu. Connecting with VPL-EX4, connect the stereo audio connecting cable to select the input signal with the "Input-A Signal Sel." If connection 3 is made , you may have to the ...

Quick Reference Guide
Page 22
Connecting with a computer 1 2 Power INPUT A INPUT B (VPL-EX4 only) VIDEO S VIDEO 4 F7 Fx or Fn 6 GB Projecting Projecting Before connecting the equipments, plug the AC power cord into a wall outlet. 1 Press the ?/1 (on/standby) key. 2 Turn on the equipment connected to the projector. 3 Press the INPUT key to select the input source. 4 When the computer is connected, set it to output the signal to only the external monitor.
Connecting with a computer 1 2 Power INPUT A INPUT B (VPL-EX4 only) VIDEO S VIDEO 4 F7 Fx or Fn 6 GB Projecting Projecting Before connecting the equipments, plug the AC power cord into a wall outlet. 1 Press the ?/1 (on/standby) key. 2 Turn on the equipment connected to the projector. 3 Press the INPUT key to select the input source. 4 When the computer is connected, set it to output the signal to only the external monitor.

Quick Reference Guide
Page 30
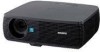
... 1.0 A, 50/ 60 Hz Power consumption Max. 220 W in some areas. Optional accessories Projector Lamp LMP-C162 (for replacement) Some of the items may be available in standby: 5 ...Commander (1) Lithium battery CR2025 (1) HD D-sub 15 pin cable (1.8 m) (1) (1-832-428-11, SONY) Carrying case (1) AC power cord (1) Operating instructions (CD-ROM) (1) Quick Reference Manual (1) ...shown above. Specifications Projection system 3 LCD panels, 1 lens, projection system LCD panel VPL-ES4: 0.63-inch SVGA panel, 1,440,000 pixels (480,000 pixels × 3) VPL-EX4: 0.63-inch XGA panel, 2,...
... 1.0 A, 50/ 60 Hz Power consumption Max. 220 W in some areas. Optional accessories Projector Lamp LMP-C162 (for replacement) Some of the items may be available in standby: 5 ...Commander (1) Lithium battery CR2025 (1) HD D-sub 15 pin cable (1.8 m) (1) (1-832-428-11, SONY) Carrying case (1) AC power cord (1) Operating instructions (CD-ROM) (1) Quick Reference Manual (1) ...shown above. Specifications Projection system 3 LCD panels, 1 lens, projection system LCD panel VPL-ES4: 0.63-inch SVGA panel, 1,440,000 pixels (480,000 pixels × 3) VPL-EX4: 0.63-inch XGA panel, 2,...


