Operating Instructions
Page 1
4-162-930-11 (1) Data Projector Operating Instructions Before operating the unit, please read this manual thoroughly and retain it for future reference. VPL-EX130 © 2009 Sony Corporation
4-162-930-11 (1) Data Projector Operating Instructions Before operating the unit, please read this manual thoroughly and retain it for future reference. VPL-EX130 © 2009 Sony Corporation

Operating Instructions
Page 3
...Canadian ICES-003. For the customers in this manual could void your local authorities or the Electronic Industries Alliance (www.eiae.org). For the State of Conformity Trade Name: SONY Model: VPL-EX130 Responsible party: Sony Electronics Inc. For the customers in Taiwan ...of the FCC Rules. special handling may call; ca.gov/hazardouswaste/ perchlorate Perchlorate Material: Lithium battery contains perchlorate. Operation is Sony Deutschland GmbH, Hedelfinger Strasse 61, 70327 Stuttgart, Germany. For any questions about this product contains mercury. Address: 16530 Via ...
...Canadian ICES-003. For the customers in this manual could void your local authorities or the Electronic Industries Alliance (www.eiae.org). For the State of Conformity Trade Name: SONY Model: VPL-EX130 Responsible party: Sony Electronics Inc. For the customers in Taiwan ...of the FCC Rules. special handling may call; ca.gov/hazardouswaste/ perchlorate Perchlorate Material: Lithium battery contains perchlorate. Operation is Sony Deutschland GmbH, Hedelfinger Strasse 61, 70327 Stuttgart, Germany. For any questions about this product contains mercury. Address: 16530 Via ...

Operating Instructions
Page 4
Table of Contents Precautions 5 Notes on Installation and Usage ........ 6 Overview About the Supplied Manuals 9 Included Attachments 9 Location and Function of Controls .. 10 Top/Right Side/Front 10 Rear/Bottom 10 Control Panel 12 Connector Panel 14 Remote Commander 15 ...
Table of Contents Precautions 5 Notes on Installation and Usage ........ 6 Overview About the Supplied Manuals 9 Included Attachments 9 Location and Function of Controls .. 10 Top/Right Side/Front 10 Rear/Bottom 10 Control Panel 12 Connector Panel 14 Remote Commander 15 ...
Operating Instructions
Page 9
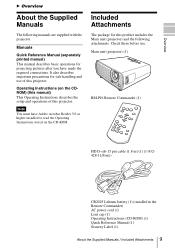
Main unit (projector) (1) RM-PJ6 Remote Commander (1) HD D-sub 15 pin cable (1.8 m) (1) (1-832428-11/Sony) CR2025 Lithium battery (1) (installed in the Remote Commander) AC power cord (1) Lens cap (1) Operating Instructions (CD-ROM) (1) Quick Reference Manual (1) Security Label (1) About the Supplied Manuals / Included Attachments 9 Check them before use of this projector. Included Attachments The package...
Main unit (projector) (1) RM-PJ6 Remote Commander (1) HD D-sub 15 pin cable (1.8 m) (1) (1-832428-11/Sony) CR2025 Lithium battery (1) (installed in the Remote Commander) AC power cord (1) Lens cap (1) Operating Instructions (CD-ROM) (1) Quick Reference Manual (1) Security Label (1) About the Supplied Manuals / Included Attachments 9 Check them before use of this projector. Included Attachments The package...
Operating Instructions
Page 17
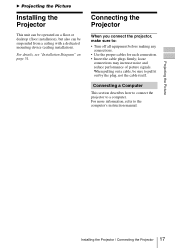
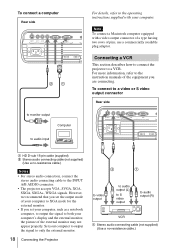
... to pull it out by the plug, not the cable itself. Connecting a Computer This section describes how to connect the projector to the computer's instruction manual. B Projecting the Picture Installing the Projector This unit can be sure to : • Turn off all equipment before making any connections. • Use the proper...
... to pull it out by the plug, not the cable itself. Connecting a Computer This section describes how to connect the projector to the computer's instruction manual. B Projecting the Picture Installing the Projector This unit can be sure to : • Turn off all equipment before making any connections. • Use the proper...
Operating Instructions
Page 18
... of pins, use a commercially available plug adaptor. To connect a computer Rear side to monitor output Computer to audio input For details, refer to the instruction manuals of the equipment you set the output mode of your computer to XGA mode for the external monitor. • If you are connecting. Note To...
... of pins, use a commercially available plug adaptor. To connect a computer Rear side to monitor output Computer to audio input For details, refer to the instruction manuals of the equipment you set the output mode of your computer to XGA mode for the external monitor. • If you are connecting. Note To...

Operating Instructions
Page 21
... you adjust the tilt of the picture and the focus. Turning Off the Power 1 Press the ?/1 key. In this time, you set the "V Keystone" to "Manual." (See page 35.) • If you will not be perfectly adjusted depending on the screen, and adjust the value with the v/V/b/B keys. 8 Adjust the size... the adjuster, the V keystone adjustment is automatically adjusted. Press the KEYSTONE key to turn off the power. Please press ?/1 key again." "POWER OFF? However, it manually. If you do not want to "V Keystone" displays on the room temperature or the screen angle.
... you adjust the tilt of the picture and the focus. Turning Off the Power 1 Press the ?/1 key. In this time, you set the "V Keystone" to "Manual." (See page 35.) • If you will not be perfectly adjusted depending on the screen, and adjust the value with the v/V/b/B keys. 8 Adjust the size... the adjuster, the V keystone adjustment is automatically adjusted. Press the KEYSTONE key to turn off the power. Please press ?/1 key again." "POWER OFF? However, it manually. If you do not want to "V Keystone" displays on the room temperature or the screen angle.
Operating Instructions
Page 33
... , turn on the top panel of input signal. - while "Please replace the Lamp." is set to "Auto," set to "On." If you adjust the picture manually. • If the input signal is not displayed correctly when the input A signal classifying is displayed on or off the Closed Captions (CC) function. Notes...
... , turn on the top panel of input signal. - while "Please replace the Lamp." is set to "Auto," set to "On." If you adjust the picture manually. • If the input signal is not displayed correctly when the input A signal classifying is displayed on or off the Closed Captions (CC) function. Notes...
Operating Instructions
Page 35
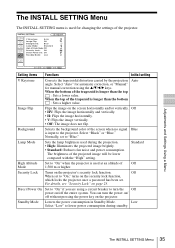
Select "Auto" for automatic correction, or "Manual" for changing the settings of the projected image will be lower compared with the "High" setting. Off • HV: Flips the image horizontally and vertically. &#... Input-A Setting items Functions Initial setting V Keystone Corrects the trapezoidal distortion caused by the projection angle. When the bottom of the trapezoid is used for manual correction using a circuit breaker to "On" when the projector is used during standby. Select "Black" or "Blue." Standby Mode Lowers the power consumption in Standby...
Select "Auto" for automatic correction, or "Manual" for changing the settings of the projected image will be lower compared with the "High" setting. Off • HV: Flips the image horizontally and vertically. &#... Input-A Setting items Functions Initial setting V Keystone Corrects the trapezoidal distortion caused by the projection angle. When the bottom of the trapezoid is used for manual correction using a circuit breaker to "On" when the projector is used during standby. Select "Black" or "Blue." Standby Mode Lowers the power consumption in Standby...
Operating Instructions
Page 36
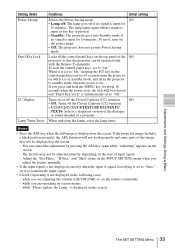
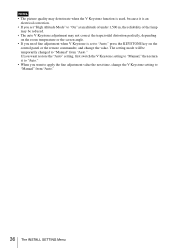
...the KEYSTONE key on the control panel or the remote commander, and change the V Keystone setting to "Manual" from "Auto." If you want restore the "Auto" setting, first switch the V Keystone setting to "Manual," then return it is an electrical correction. • If you set "High Altitude Mode" to "...On" at an altitude of under 1,500 m, the reliability of the lamp may be temporarily changed to "Manual" from "Auto." 36 The INSTALL SETTING Menu Notes • The picture quality may deteriorate when the V Keystone function is used, because it to "Auto."...
...the KEYSTONE key on the control panel or the remote commander, and change the V Keystone setting to "Manual" from "Auto." If you want restore the "Auto" setting, first switch the V Keystone setting to "Manual," then return it is an electrical correction. • If you set "High Altitude Mode" to "...On" at an altitude of under 1,500 m, the reliability of the lamp may be temporarily changed to "Manual" from "Auto." 36 The INSTALL SETTING Menu Notes • The picture quality may deteriorate when the V Keystone function is used, because it to "Auto."...

Operating Instructions
Page 46
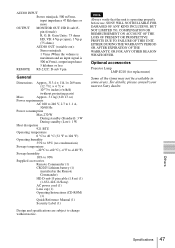
...-inch (7,620 mm): 9.0 to 10.3 m (29.5 to 33.8 feet) Electrical characteristics Color system NTSC3.58/PAL/SECAM/ NTSC4.43/PAL-M/PAL-N/ PAL60 system, switched automatically/manually (NTSC4.43 is set to 92 Hz (Maximum input signal resolution: SXGA+ 1400 × 1050 fV: 60 Hz) 46 Specifications 2) Set the resolution and the...
...-inch (7,620 mm): 9.0 to 10.3 m (29.5 to 33.8 feet) Electrical characteristics Color system NTSC3.58/PAL/SECAM/ NTSC4.43/PAL-M/PAL-N/ PAL60 system, switched automatically/manually (NTSC4.43 is set to 92 Hz (Maximum input signal resolution: SXGA+ 1400 × 1050 fV: 60 Hz) 46 Specifications 2) Set the resolution and the...
Operating Instructions
Page 47
For details, please consult your nearest Sony dealer. SONY WILL NOT BE LIABLE FOR DAMAGES OF ANY KIND INCLUDING, BUT NOT LIMITED TO, COMPENSATION OR REIMBURSEMENT ON ACCOUNT OF THE LOSS OF PRESENT OR ...) Some of the items may not be available in the Remote Commander) HD D-sub 15 pin cable (1.8 m) (1) (1-832-428-11/Sony) AC power cord (1) Lens cap (1) Operating Instructions (CD-ROM) (1) Quick Reference Manual (1) Security Label (1) Design and specifications are subject to change without projecting parts) Mass Approx. 3.1 kg (6 lb 13 oz) Power...
For details, please consult your nearest Sony dealer. SONY WILL NOT BE LIABLE FOR DAMAGES OF ANY KIND INCLUDING, BUT NOT LIMITED TO, COMPENSATION OR REIMBURSEMENT ON ACCOUNT OF THE LOSS OF PRESENT OR ...) Some of the items may not be available in the Remote Commander) HD D-sub 15 pin cable (1.8 m) (1) (1-832-428-11/Sony) AC power cord (1) Lens cap (1) Operating Instructions (CD-ROM) (1) Quick Reference Manual (1) Security Label (1) Design and specifications are subject to change without projecting parts) Mass Approx. 3.1 kg (6 lb 13 oz) Power...
Operating Instructions
Page 59
... Apple Inc. • VESA is a registered trademark of the Video Electronics Standards Association. • Display Data Channel is a trademark of their respective holders. In this manual, ™ and ® marks are trademarks or registered trademarks of the Video Electronics Standards Association. • All other trademarks and registered trademarks are not specified...
... Apple Inc. • VESA is a registered trademark of the Video Electronics Standards Association. • Display Data Channel is a trademark of their respective holders. In this manual, ™ and ® marks are trademarks or registered trademarks of the Video Electronics Standards Association. • All other trademarks and registered trademarks are not specified...

