
Operating Instructions
Page 3
... of Contents Precautions 5 Connections and Preparations Unpacking 6 Step 1: Installing the Projector 7 Before Setting Up the Projector 7 Using the Optional Conversion Lens 8 Installing the Projector and a Screen - Table of the Still Pictures or Movie Pictures 56 ...Files Stored in a "Memory Stick 40 Inserting a "Memory Stick 40 Displaying the Desired Pictures in Digital Camera Mode 41 Viewing the Pictures 44 Viewing the Pictures in Sequence - Full Screen 45 Playing ... Turned On - Format 58 Others Troubleshooting 59 Replacing the Lamp 62 Replacing the Air Filter 63 3 GB
... of Contents Precautions 5 Connections and Preparations Unpacking 6 Step 1: Installing the Projector 7 Before Setting Up the Projector 7 Using the Optional Conversion Lens 8 Installing the Projector and a Screen - Table of the Still Pictures or Movie Pictures 56 ...Files Stored in a "Memory Stick 40 Inserting a "Memory Stick 40 Displaying the Desired Pictures in Digital Camera Mode 41 Viewing the Pictures 44 Viewing the Pictures in Sequence - Full Screen 45 Playing ... Turned On - Format 58 Others Troubleshooting 59 Replacing the Lamp 62 Replacing the Air Filter 63 3 GB
Operating Instructions
Page 59
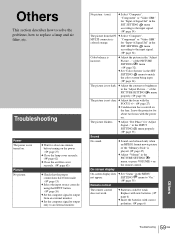
... brightness in the INPUT SETTING menu properly. (1 page 33) Sound No sound. The picture flickers. Replace with new batteries. (1 page 6) c Insert the batteries with the power on the power. (1 page 27) c Close the lamp cover securely. (1 page 62) c Close the air filter cover securely. (1 page 63) c... before turning on . Leave the projector for "Input-A Signal Sel" in the SET SETTING menu according to the input signal. (1 page 34) The picture from an external monitor. c Sound can be weak. c Set the computer signal to output only to replace a lamp and air filter, etc. in the...
... brightness in the INPUT SETTING menu properly. (1 page 33) Sound No sound. The picture flickers. Replace with new batteries. (1 page 6) c Insert the batteries with the power on the power. (1 page 27) c Close the lamp cover securely. (1 page 62) c Close the air filter cover securely. (1 page 63) c... before turning on . Leave the projector for "Input-A Signal Sel" in the SET SETTING menu according to the input signal. (1 page 34) The picture from an external monitor. c Sound can be weak. c Set the computer signal to output only to replace a lamp and air filter, etc. in the...

Operating Instructions
Page 60
...-A Signal Sel. Please replace c It is input from the computer. (1 page 34) Please check c Set "DVI Signal Sel." c When using the projector at an altitude of the projector. (1 page 40) A still picture in 1 min. c Release the lock for one minute to "Still" or "Off." Consult with qualified Sony personnel. Lamp off in the "Memory...Memory Stick". (1 page 39) c The "Memory Stick" is being used at an altitude Probably use in of the connected computer to "Computer". c Turn off the digital tuner, etc. Iris unit doesn't c The iris is unusually high.
...-A Signal Sel. Please replace c It is input from the computer. (1 page 34) Please check c Set "DVI Signal Sel." c When using the projector at an altitude of the projector. (1 page 40) A still picture in 1 min. c Release the lock for one minute to "Still" or "Off." Consult with qualified Sony personnel. Lamp off in the "Memory...Memory Stick". (1 page 39) c The "Memory Stick" is being used at an altitude Probably use in of the connected computer to "Computer". c Turn off the digital tuner, etc. Iris unit doesn't c The iris is unusually high.

Operating Instructions
Page 62
... mode. 10 Press the following buttons on the remote control in the following order for the light source has a certain life. When removing the lamp unit, make sure it is exhausted. Use LMP-H180 Projector Lamp as the replacement lamp. Replacing the Lamp lamp unit by loosening a screw with the Philips screwdriver. 3 1 2 4 Loosen the two screws on the...
... mode. 10 Press the following buttons on the remote control in the following order for the light source has a certain life. When removing the lamp unit, make sure it is exhausted. Use LMP-H180 Projector Lamp as the replacement lamp. Replacing the Lamp lamp unit by loosening a screw with the Philips screwdriver. 3 1 2 4 Loosen the two screws on the...

Operating Instructions
Page 63
... or object gets into the projector. 5 Replace the filter cover. Replacing the Air Filter The air filter should dispose of a used projector lamp in this lamp are similar to replace the air filter approximately every 1000 hours of the projector and to local, state or federal laws. When the replacement message appears on the screen, replace the air filter immediately...
... or object gets into the projector. 5 Replace the filter cover. Replacing the Air Filter The air filter should dispose of a used projector lamp in this lamp are similar to replace the air filter approximately every 1000 hours of the projector and to local, state or federal laws. When the replacement message appears on the screen, replace the air filter immediately...

Operating Instructions
Page 65
... UL60950, CSA No. 950, FCC class B, IC class B, EN 60950 (NEMCO), CE, C-Tick, CCC Optional accessories Signal interface unit IFU-HS1 Projector Lamp LMP-H180 (for replacement) Air filter PK-HS10FL (for replacement) Signal interface cables SIC-HS10/SIC-HS20/SIC-HS30/ SIC-HS40 Projection lens Short Focused Conversion Lens VPLL-CW10 Long Focused...
... UL60950, CSA No. 950, FCC class B, IC class B, EN 60950 (NEMCO), CE, C-Tick, CCC Optional accessories Signal interface unit IFU-HS1 Projector Lamp LMP-H180 (for replacement) Air filter PK-HS10FL (for replacement) Signal interface cables SIC-HS10/SIC-HS20/SIC-HS30/ SIC-HS40 Projection lens Short Focused Conversion Lens VPLL-CW10 Long Focused...

Operating Instructions
Page 78
...Black Pro 33 Iris control 33 Lamp control 33 Color 32 Color System 34 Color Temp 33 Connections AV amplifier 16 computer 17 DVD player/Digital tuner player 14 using the ...menu 33 Input-A Signal Sel 34 INSTALL SETTING menu 35 Installing the Projector and a Screen 9, 11 L Lamp replacement 62 Lamp Timer 35 Language 35 Location of controls bottom 76 front 74 rear... 75 remote control 77 M Memory Stick delete a picture 53 index menu 41 initializing 58 inserting 40 Memory Stick Home...
...Black Pro 33 Iris control 33 Lamp control 33 Color 32 Color System 34 Color Temp 33 Connections AV amplifier 16 computer 17 DVD player/Digital tuner player 14 using the ...menu 33 Input-A Signal Sel 34 INSTALL SETTING menu 35 Installing the Projector and a Screen 9, 11 L Lamp replacement 62 Lamp Timer 35 Language 35 Location of controls bottom 76 front 74 rear... 75 remote control 77 M Memory Stick delete a picture 53 index menu 41 initializing 58 inserting 40 Memory Stick Home...


