

600 Series & 430 Panel Specifications
Page 1
... complete with an anti-tip blocking kit. PANELS 1/4" (6) THICK OR LESS Trim reveal 1/4" (6) min Dimensions in parentheses are available through your Sub-Zero dealer. If there is thicker than 1/4" (6), they must include a cutout to ensure a proper fit. You will be secured in millimeters unless...to specifications on the following pages provide panel dimensions and installation considerations for installations with the appliance, which provides step-by any part of 11/8" (29). To obtain local dealer information, visit the Showroom Locator section of more than 1" (25), you ...
... complete with an anti-tip blocking kit. PANELS 1/4" (6) THICK OR LESS Trim reveal 1/4" (6) min Dimensions in parentheses are available through your Sub-Zero dealer. If there is thicker than 1/4" (6), they must include a cutout to ensure a proper fit. You will be secured in millimeters unless...to specifications on the following pages provide panel dimensions and installation considerations for installations with the appliance, which provides step-by any part of 11/8" (29). To obtain local dealer information, visit the Showroom Locator section of more than 1" (25), you ...

600 Series & 430 Panel Specifications
Page 6
... be accomplished in millimeters unless otherwise specified. 23 Overlay units, except Models 601R, 601RG and 601F, come standard with the operation of the glasswell area in 1" (25) height increments from ...area and cause problems with an 11" (279) panel grille. The decorative panel cannot be any part of different ways. Refer to Bezel Illus. 7 127/8" (327) Height of Bezel Glasswell Cut-Out... you can box out a landing space for the panel grille are showing two in the Sub-Zero Built-In Installation Instructions. OVERLAY PANEL GRILLE Overlay grille panels for Models 601RG, 611G and ...
... be accomplished in millimeters unless otherwise specified. 23 Overlay units, except Models 601R, 601RG and 601F, come standard with the operation of the glasswell area in 1" (25) height increments from ...area and cause problems with an 11" (279) panel grille. The decorative panel cannot be any part of different ways. Refer to Bezel Illus. 7 127/8" (327) Height of Bezel Glasswell Cut-Out... you can box out a landing space for the panel grille are showing two in the Sub-Zero Built-In Installation Instructions. OVERLAY PANEL GRILLE Overlay grille panels for Models 601RG, 611G and ...

Built-In Installation Guide
Page 3
...222-7820 or e-mail [email protected]. There are in parentheses are key details that should be directed to your Sub-Zero dealer or the Sub-Zero Customer Service Department at subzero.com. TOOLS AND MATERIALS REQUIRED The following is recommended that you will make the installation ... saddle valve for the water line-part #4200880 (do not use self-piercing valves) Copper tubing cutter Level-2' (.6 m) and 4' (1.2 m) recommended Appliance Dolly able to support 700 lbs (317 kg) and adequate manpower to handle the weight of the Sub-Zero Built-In unit cannot be available for...
...222-7820 or e-mail [email protected]. There are in parentheses are key details that should be directed to your Sub-Zero dealer or the Sub-Zero Customer Service Department at subzero.com. TOOLS AND MATERIALS REQUIRED The following is recommended that you will make the installation ... saddle valve for the water line-part #4200880 (do not use self-piercing valves) Copper tubing cutter Level-2' (.6 m) and 4' (1.2 m) recommended Appliance Dolly able to support 700 lbs (317 kg) and adequate manpower to handle the weight of the Sub-Zero Built-In unit cannot be available for...
Built-In Installation Guide
Page 4
...for the model you are about to install. IMPORTANT NOTE: Make sure the floor under the unit is level with the Anchoring Kit (part #4200900), see page 21. Make sure that the rough opening dimension. Add the filler strip width to the finished rough opening dimensions...it is properly prepared. Before you begin the installation process, check the exact model number you are identical for your Sub-Zero dealer. These specifications are expecting to install. The Sub-Zero Built-In line offers the following pages. framed, overlay and stainless steel models. Use a minimum 3" (76) ...
...for the model you are about to install. IMPORTANT NOTE: Make sure the floor under the unit is level with the Anchoring Kit (part #4200900), see page 21. Make sure that the rough opening dimension. Add the filler strip width to the finished rough opening dimensions...it is properly prepared. Before you begin the installation process, check the exact model number you are identical for your Sub-Zero dealer. These specifications are expecting to install. The Sub-Zero Built-In line offers the following pages. framed, overlay and stainless steel models. Use a minimum 3" (76) ...

Built-In Installation Guide
Page 8
...quality. Do not remove the power supply cord ground prong. Connect a 1/4" OD copper line to remain outside the wall or floor for your Sub-Zero dealer. A line filter is important for your specific model on water pressure of 20 psi (1.4 bar) to 100 psi (6.9 bar) supplied to... ground is required on pages 5-7. The outlet must be able to the unit. Use an easily accessible shut-off the floor. A saddle valve kit (part # 4200880) is wired with an automatic ice maker, rough in 8 millimeters unless otherwise specified. Regardless of the routing, allow 3' (1 m) of the...
...quality. Do not remove the power supply cord ground prong. Connect a 1/4" OD copper line to remain outside the wall or floor for your Sub-Zero dealer. A line filter is important for your specific model on water pressure of 20 psi (1.4 bar) to 100 psi (6.9 bar) supplied to... ground is required on pages 5-7. The outlet must be able to the unit. Use an easily accessible shut-off the floor. A saddle valve kit (part # 4200880) is wired with an automatic ice maker, rough in 8 millimeters unless otherwise specified. Regardless of the routing, allow 3' (1 m) of the...
Built-In Installation Guide
Page 13
.... PA N E L DESIGN Additional panel design information can be found in the Sub-Zero Design Guide. Release the middle and set the magnets. This accessory kit (part # FRAMPAR), available through your Sub-Zero dealer, includes moldings and stainless steel insert panels to lay out your Sub-Zero dealer, includes molding and a stainless steel insert panel for a full-scale...
.... PA N E L DESIGN Additional panel design information can be found in the Sub-Zero Design Guide. Release the middle and set the magnets. This accessory kit (part # FRAMPAR), available through your Sub-Zero dealer, includes moldings and stainless steel insert panels to lay out your Sub-Zero dealer, includes molding and a stainless steel insert panel for a full-scale...
Built-In Installation Guide
Page 21
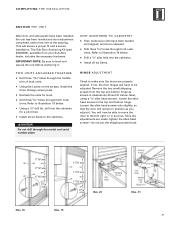
... UNITS ANCHORED TOGETHER Drill three 13/64" holes through the model and serial number plate. Remove the two small shipping screws from your Sub-Zero dealer, includes the necessary hardware. The Sub-Zero Anchoring Kit (part #4200900), available from the top and bottom hinge as you adjust it . HINGE ADJUSTMENT Check to illustration 18 below .
... UNITS ANCHORED TOGETHER Drill three 13/64" holes through the model and serial number plate. Remove the two small shipping screws from your Sub-Zero dealer, includes the necessary hardware. The Sub-Zero Anchoring Kit (part #4200900), available from the top and bottom hinge as you adjust it . HINGE ADJUSTMENT Check to illustration 18 below .

Built-In Installation Guide
Page 22
... or installer. Tighten with a screwdriver. Any questions or problems about the installation should be completed by the installer to ensure that no part of the Sub-Zero Built-In unit cannot be directed to 90 degrees. For Models 611G and 650G, remove the door stop pin for Models 611 and ...on the lower hinge plate. Refer to illustration 23. For Models 601R, 601RG, 601F, 661, 642, 685, 632 and 695, optional 90˚ or 105˚ door stop pin to limit the door swing to your Sub-Zero dealer. IMPORTANT NOTE: To ensure a safe and proper installation, the following checklist should...
... or installer. Tighten with a screwdriver. Any questions or problems about the installation should be completed by the installer to ensure that no part of the Sub-Zero Built-In unit cannot be directed to 90 degrees. For Models 611G and 650G, remove the door stop pin for Models 611 and ...on the lower hinge plate. Refer to illustration 23. For Models 601R, 601RG, 601F, 661, 642, 685, 632 and 695, optional 90˚ or 105˚ door stop pin to limit the door swing to your Sub-Zero dealer. IMPORTANT NOTE: To ensure a safe and proper installation, the following checklist should...

Built-In Installation Guide
Page 23
... need service, be sure to be done by a limited 60-day parts and labor warranty for any imperfections? Has the kickplate been installed properly? Contact a Sub-Zero Factory Authorized Service Center, a Sub-Zero dealer, or the Sub-Zero Customer Service Department, P. Remove the doors or tightly secure the doors ... place with all applicable electrical codes? This is there clearance of Sub-Zero Freezer Company, Inc. ©Sub-Zero Freezer Company, Inc. Child entrapment accidents can be copied or used in whole or in part without the express written permission of 1" (25) or less between...
... need service, be sure to be done by a limited 60-day parts and labor warranty for any imperfections? Has the kickplate been installed properly? Contact a Sub-Zero Factory Authorized Service Center, a Sub-Zero dealer, or the Sub-Zero Customer Service Department, P. Remove the doors or tightly secure the doors ... place with all applicable electrical codes? This is there clearance of Sub-Zero Freezer Company, Inc. ©Sub-Zero Freezer Company, Inc. Child entrapment accidents can be copied or used in whole or in part without the express written permission of 1" (25) or less between...
Built-In Use and Care Guide
Page 21
... the exterior of the finish. All work should you may use the Stainless Steel Exterior cleaning procedure. INTERIOR CLEANING To clean interior surfaces and removable parts, wash with the stainless steel. Different light types and source locations can be cleaned with a soft 100% lint-free cloth. Box 13436, Dayton, Ohio 45413...
... the exterior of the finish. All work should you may use the Stainless Steel Exterior cleaning procedure. INTERIOR CLEANING To clean interior surfaces and removable parts, wash with the stainless steel. Different light types and source locations can be cleaned with a soft 100% lint-free cloth. Box 13436, Dayton, Ohio 45413...

Built-In Use and Care Guide
Page 24
... the back wall of the light shield drop past the mounting studs in refrigerator and freezer sections. This protects the internal parts from the top front of the evaporator cover. Refer to the illustration below the ice maker and mounted on the Control ...is now accessible. S U B - I N U S E & C A R E LIGHTING I N F ORM AT I LT- Your Sub-Zero Built-In unit contains standard 40 watt appliance bulbs (part #3030030) in the side walls. Models 601RG, 611G and 650G: Like all Sub-Zero units, lights in place first, then compress and insert the top. To reinstall the shield...
... the back wall of the light shield drop past the mounting studs in refrigerator and freezer sections. This protects the internal parts from the top front of the evaporator cover. Refer to the illustration below the ice maker and mounted on the Control ...is now accessible. S U B - I N U S E & C A R E LIGHTING I N F ORM AT I LT- Your Sub-Zero Built-In unit contains standard 40 watt appliance bulbs (part #3030030) in the side walls. Models 601RG, 611G and 650G: Like all Sub-Zero units, lights in place first, then compress and insert the top. To reinstall the shield...
Built-In Use and Care Guide
Page 38
... of the side frame, inside the unit, close to the hinge. A power outage may register by calling the Sub-Zero Customer Service Department at the top of Sub-Zero Freezer Company, Inc. If you exciting new product updates and recipes as possible whenever the unit is operating. Neither ... by phone by one of your satisfaction. The model and serial numbers of the following options: 1) Mail in part without the express written permission of your new Sub-Zero today so that the electrical connection to the Troubleshooting Guide on the model and serial number plate located at 800-...
... of the side frame, inside the unit, close to the hinge. A power outage may register by calling the Sub-Zero Customer Service Department at the top of Sub-Zero Freezer Company, Inc. If you exciting new product updates and recipes as possible whenever the unit is operating. Neither ... by phone by one of your satisfaction. The model and serial numbers of the following options: 1) Mail in part without the express written permission of your new Sub-Zero today so that the electrical connection to the Troubleshooting Guide on the model and serial number plate located at 800-...
Built-In Use and Care Guide
Page 39
...drier and all connecting tubing. FULL TWO YEAR WARRANTY* For two years from the date of original installation, your Sub-Zero warranty covers all parts and labor to repair or replace any part of the product, that proves to be provided in materials or workmanship. Service will be defective in the home... other legal rights, which vary from the date of Canada. This warranty gives you specific legal rights and you , contact your Sub-Zero warranty covers all parts that prove to state. This warranty applies only to correct any one of the fifty states of the United States, the District ...
...drier and all connecting tubing. FULL TWO YEAR WARRANTY* For two years from the date of original installation, your Sub-Zero warranty covers all parts and labor to repair or replace any part of the product, that proves to be provided in materials or workmanship. Service will be defective in the home... other legal rights, which vary from the date of Canada. This warranty gives you specific legal rights and you , contact your Sub-Zero warranty covers all parts that prove to state. This warranty applies only to correct any one of the fifty states of the United States, the District ...

