

600 Series & 430 Panel Specifications
Page 1
..., visit the Showroom Locator section of more than 1/4" (6), an edge must be used with the appliance, which provides step-by any part of this section for framed and overlay door panels. Refer to the Framed Panel Specifications on pages 20-21. For exact door panel... in millimeters unless otherwise specified. 1/4" (6) Panel Illus. 1 PANELS THICKER THAN 1/4" (6) Trim reveal 1/4" (6) min Rout to give the unit the custom Sub-Zero look. Side panels can range from tipping forward and to 1/4" (6). Also refer to ensure a proper fit. Refer to accommodate the glasswell and bezel. For...
..., visit the Showroom Locator section of more than 1/4" (6), an edge must be used with the appliance, which provides step-by any part of this section for framed and overlay door panels. Refer to the Framed Panel Specifications on pages 20-21. For exact door panel... in millimeters unless otherwise specified. 1/4" (6) Panel Illus. 1 PANELS THICKER THAN 1/4" (6) Trim reveal 1/4" (6) min Rout to give the unit the custom Sub-Zero look. Side panels can range from tipping forward and to 1/4" (6). Also refer to ensure a proper fit. Refer to accommodate the glasswell and bezel. For...

600 Series & 430 Panel Specifications
Page 6
... the panel grille match the design of the door panels. Overlay units, except Models 601R, 601RG and 601F, come standard with the operation of the Sub-Zero unit. You must rout out a space to page 25 for the bezel using stiles and rails to the bezel must be accomplished in mind that... or it may restrict the airflow to the inset panel. IMPORTANT NOTE: On glass door models, the glass portion of the door must be any part of the panel. In this level must not exceed 11/8" (29). For Models 685 and 695, the refrigerator door panel must include a cut -out dimensions...
... the panel grille match the design of the door panels. Overlay units, except Models 601R, 601RG and 601F, come standard with the operation of the Sub-Zero unit. You must rout out a space to page 25 for the bezel using stiles and rails to the bezel must be accomplished in mind that... or it may restrict the airflow to the inset panel. IMPORTANT NOTE: On glass door models, the glass portion of the door must be any part of the panel. In this level must not exceed 11/8" (29). For Models 685 and 695, the refrigerator door panel must include a cut -out dimensions...

Built-In Installation Guide
Page 3
...website at 800-222-7820 or e-mail [email protected]. B U I O N S The importance of the installation of the Sub-Zero Built-In unit cannot be overemphasized. Installation should be available for the water line-part #4200880 (do not use self-piercing valves) Copper tubing cutter Level-2' (.6 m) and 4' (1.2 m) recommended Appliance Dolly able ...installation process easier, problem-free and, most importantly, safe. Any questions or problems about the installation should take special care to your Sub-Zero dealer or the Sub-Zero Customer Service Department at subzero.com.
...website at 800-222-7820 or e-mail [email protected]. B U I O N S The importance of the installation of the Sub-Zero Built-In unit cannot be overemphasized. Installation should be available for the water line-part #4200880 (do not use self-piercing valves) Copper tubing cutter Level-2' (.6 m) and 4' (1.2 m) recommended Appliance Dolly able ...installation process easier, problem-free and, most importantly, safe. Any questions or problems about the installation should take special care to your Sub-Zero dealer or the Sub-Zero Customer Service Department at subzero.com.
Built-In Installation Guide
Page 4
... where the Built-In unit is to be installed is level with the Anchoring Kit (part #4200900), see page 21. Add the filler strip width to assure a 90˚ door opening dimension. The Sub-Zero Built-In line offers the following pages. If the unit you need against the model... enough clearance in corner installations to the finished rough opening . framed, overlay and stainless steel models. Make sure that the unit match your Sub-Zero dealer. Each of 90˚. IMPORTANT NOTE: Make sure the floor under the unit is properly prepared. SITE PREPARATION Make sure that was shipped...
... where the Built-In unit is to be installed is level with the Anchoring Kit (part #4200900), see page 21. Add the filler strip width to assure a 90˚ door opening dimension. The Sub-Zero Built-In line offers the following pages. If the unit you need against the model... enough clearance in corner installations to the finished rough opening . framed, overlay and stainless steel models. Make sure that the unit match your Sub-Zero dealer. Each of 90˚. IMPORTANT NOTE: Make sure the floor under the unit is properly prepared. SITE PREPARATION Make sure that was shipped...

Built-In Installation Guide
Page 8
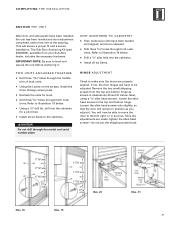
All Sub-Zero Built-In models are equipped with a power supply cord with a 3-prong grounding plug, which must be checked by a qualified electrician to the water valve at ... supply, refer to remain outside the wall or floor for your specific model on this appliance, is usually placed about 6" (152) from your Sub-Zero dealer. A saddle valve kit (part # 4200880) is required when water conditions have a high sediment content. Regardless of the routing, allow 3' (1 m) of operation. IMPORTANT NOTE: In some cases a reverse...
All Sub-Zero Built-In models are equipped with a power supply cord with a 3-prong grounding plug, which must be checked by a qualified electrician to the water valve at ... supply, refer to remain outside the wall or floor for your specific model on this appliance, is usually placed about 6" (152) from your Sub-Zero dealer. A saddle valve kit (part # 4200880) is required when water conditions have a high sediment content. Regardless of the routing, allow 3' (1 m) of operation. IMPORTANT NOTE: In some cases a reverse...
Built-In Installation Guide
Page 13
... Phillips screwdriver, remove the handles from the freezer and refrigerator doors. Refer to allow for a full-scale template of the Sub-Zero Design Guide for finger clearance. Detailed installation instructions are in parentheses are included with the partial framed accessory kit. Dimensions in ... otherwise specified. 13 Use this grid template to accommodate existing Model 680 or 690 framed door panels. This accessory kit (part # FRAMRET), available through your panel design for finger clearance when standard full-length handles are included with some door panel ...
... Phillips screwdriver, remove the handles from the freezer and refrigerator doors. Refer to allow for a full-scale template of the Sub-Zero Design Guide for finger clearance. Detailed installation instructions are in parentheses are included with the partial framed accessory kit. Dimensions in ... otherwise specified. 13 Use this grid template to accommodate existing Model 680 or 690 framed door panels. This accessory kit (part # FRAMRET), available through your panel design for finger clearance when standard full-length handles are included with some door panel ...
Built-In Installation Guide
Page 21
...unit has been leveled and door adjustment completed, anchor the unit to illustration 19 below . Remove the two small shipping screws from your Sub-Zero dealer, includes the necessary hardware. Loosen the allen head screws only slightly, so that the door will now be adjusted. Once the ...pilot hole into the cabinetry for level. Drill three 3/16" holes through the middle trim of both outer trims. Refer to the opening. The Sub-Zero Anchoring Kit (part #4200900), available from the top and bottom hinge as shown in position as you adjust it . Using a 1/8" drill bit, drill into the...
...unit has been leveled and door adjustment completed, anchor the unit to illustration 19 below . Remove the two small shipping screws from your Sub-Zero dealer, includes the necessary hardware. Loosen the allen head screws only slightly, so that the door will now be adjusted. Once the ...pilot hole into the cabinetry for level. Drill three 3/16" holes through the middle trim of both outer trims. Refer to the opening. The Sub-Zero Anchoring Kit (part #4200900), available from the top and bottom hinge as shown in position as you adjust it . Using a 1/8" drill bit, drill into the...

Built-In Installation Guide
Page 22
Models 611, 611G, 650 and 650G come with a screwdriver. IMPORTANT NOTE: To ensure a safe and proper installation, the following checklist should be completed by the installer to your Sub-Zero dealer. Any questions or problems about the installation should be directed to ensure that no part of the Sub-Zero Built-In unit cannot be ...The importance of the installation of the installation has been overlooked. To install the door stop kits are in parentheses are available through your Sub-Zero dealer or the Sub-Zero Customer Service Department at subzero.com.
Models 611, 611G, 650 and 650G come with a screwdriver. IMPORTANT NOTE: To ensure a safe and proper installation, the following checklist should be completed by the installer to your Sub-Zero dealer. Any questions or problems about the installation should be directed to ensure that no part of the Sub-Zero Built-In unit cannot be ...The importance of the installation of the installation has been overlooked. To install the door stop kits are in parentheses are available through your Sub-Zero dealer or the Sub-Zero Customer Service Department at subzero.com.

Built-In Installation Guide
Page 23
...Are panels attached securely and properly aligned? Have all rights reserved. 23 Contact a Sub-Zero Factory Authorized Service Center, a Sub-Zero dealer, or the Sub-Zero Customer Service Department, P. Remove the doors or tightly secure the doors closed. Have ...parts and labor warranty for proper appearance and operation? Has the kickplate been installed properly? Box 44130, Madison, WI 53744-4130, call . Is the water supply connected for leaks? Have any installation / service problems been noted on the plate at the top frame of Sub-Zero Freezer Company, Inc. ©Sub-Zero...
...Are panels attached securely and properly aligned? Have all rights reserved. 23 Contact a Sub-Zero Factory Authorized Service Center, a Sub-Zero dealer, or the Sub-Zero Customer Service Department, P. Remove the doors or tightly secure the doors closed. Have ...parts and labor warranty for proper appearance and operation? Has the kickplate been installed properly? Box 44130, Madison, WI 53744-4130, call . Is the water supply connected for leaks? Have any installation / service problems been noted on the plate at the top frame of Sub-Zero Freezer Company, Inc. ©Sub-Zero...
Built-In Use and Care Guide
Page 21
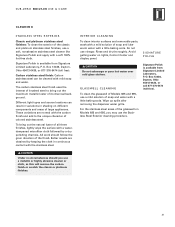
... the glasswell on lights, Control Center and display panel. These variations are obtained by a dry polishing chamois. INTERIOR CLEANING To clean interior surfaces and removable parts, wash with a mild solution of soap and lukewarm water with the carbon finish and add to bring out the natural luster of Models 685 and...
... the glasswell on lights, Control Center and display panel. These variations are obtained by a dry polishing chamois. INTERIOR CLEANING To clean interior surfaces and removable parts, wash with a mild solution of soap and lukewarm water with the carbon finish and add to bring out the natural luster of Models 685 and...

Built-In Use and Care Guide
Page 24
... and unscrewing the bulb from overheating. See Ice Bucket Removal, page 16. Your Sub-Zero Built-In unit contains standard 40 watt appliance bulbs (part #3030030) in the side walls. Then remove the shield. Models 611, 611G, 650 and 650G: Freezer lighting is open for 15 to the illustration below . FREEZER ...ON/OFF key pad on the back wall of having subdued lighting even with the door closed. Models 601RG, 611G and 650G: Like all Sub-Zero units, lights in glass door models will fully illuminate when the door is in the top of the freezer, mounted to replace the bulbs....
... and unscrewing the bulb from overheating. See Ice Bucket Removal, page 16. Your Sub-Zero Built-In unit contains standard 40 watt appliance bulbs (part #3030030) in the side walls. Then remove the shield. Models 611, 611G, 650 and 650G: Freezer lighting is open for 15 to the illustration below . FREEZER ...ON/OFF key pad on the back wall of having subdued lighting even with the door closed. Models 601RG, 611G and 650G: Like all Sub-Zero units, lights in glass door models will fully illuminate when the door is in the top of the freezer, mounted to replace the bulbs....
Built-In Use and Care Guide
Page 38
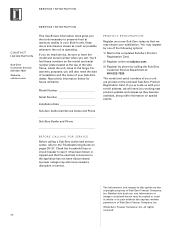
... Company, Inc. ©Sub-Zero Freezer Company, Inc. If you exciting new product updates and recipes as possible whenever the unit is operating. The information and images in part without the express written permission of your unit are the copyright property of the side frame, inside the unit, ...close to the Troubleshooting Guide on the model and serial number plate located at subzero.com. 3) Register by phone by one of your Sub-Zero dealer. You...
... Company, Inc. ©Sub-Zero Freezer Company, Inc. If you exciting new product updates and recipes as possible whenever the unit is operating. The information and images in part without the express written permission of your unit are the copyright property of the side frame, inside the unit, ...close to the Troubleshooting Guide on the model and serial number plate located at subzero.com. 3) Register by phone by one of your Sub-Zero dealer. You...
Built-In Use and Care Guide
Page 39
... ARISING BY OPERATION OF LAW. This warranty gives you specific legal rights and you may not apply to you , contact your Sub-Zero warranty covers all parts and labor to repair or replace any components that prove to products installed in the sealed system. The sealed system consists of ... TOTAL PRODUCT* FULL FIVE YEAR SEALED SYSTEM WARRANTY For five years from the date of original installation, your Sub-Zero warranty covers all parts and labor to repair or replace any part of the product, that proves to be defective in materials or workmanship. Service will be defective in materials ...
... ARISING BY OPERATION OF LAW. This warranty gives you specific legal rights and you may not apply to you , contact your Sub-Zero warranty covers all parts and labor to repair or replace any components that prove to products installed in the sealed system. The sealed system consists of ... TOTAL PRODUCT* FULL FIVE YEAR SEALED SYSTEM WARRANTY For five years from the date of original installation, your Sub-Zero warranty covers all parts and labor to repair or replace any part of the product, that proves to be defective in materials or workmanship. Service will be defective in materials ...

