
Data Sheet
Page 1
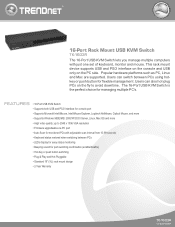
FEATURES • 16-Port USB KVM Switch • Supports both USB and PS/2 Interface for flexible management. kvm 16-Port Rack Mount USB KVM Switch TK-1603R The 16-Port USB KVM Switch lets you manage multiple computers with adjustable scan interval from 10-99 seconds • Keyboard status restored when switching between PCs using hotkey or push button for console port • Supports Microsoft IntelliMouse, IntelliMouse Explorer, Logitech NetMouse, Optical Mouse...
FEATURES • 16-Port USB KVM Switch • Supports both USB and PS/2 Interface for flexible management. kvm 16-Port Rack Mount USB KVM Switch TK-1603R The 16-Port USB KVM Switch lets you manage multiple computers with adjustable scan interval from 10-99 seconds • Keyboard status restored when switching between PCs using hotkey or push button for console port • Supports Microsoft IntelliMouse, IntelliMouse Explorer, Logitech NetMouse, Optical Mouse...
Data Sheet
Page 2
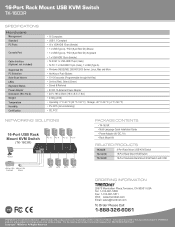
...; TK-1603R • Multi-Language Quick Installation Guide • Power Adapter (9V DC, 1A) • Rack Mount Kit RELATED PRODUCTS TK-803R TK-1601R TK-1602R 8-Port Rack Mount USB KVM Switch 16-Port Rack Mount KVM Switch 16-Port Stackable Rack Mount KVM Switch with OSD ORDERING INFORMATION 20675 Manhattan Place,Torrance, CA 90501 USA Tel: 1-310-961-5500 Fax: 1-310-961-5511 Web: www.trendnet.com...
...; TK-1603R • Multi-Language Quick Installation Guide • Power Adapter (9V DC, 1A) • Rack Mount Kit RELATED PRODUCTS TK-803R TK-1601R TK-1602R 8-Port Rack Mount USB KVM Switch 16-Port Rack Mount KVM Switch 16-Port Stackable Rack Mount KVM Switch with OSD ORDERING INFORMATION 20675 Manhattan Place,Torrance, CA 90501 USA Tel: 1-310-961-5500 Fax: 1-310-961-5511 Web: www.trendnet.com...

Quick Installation Guide
Page 4
...KVM switch's Console Port. (TK-1603R shown) 3. Connect the shared PS/2 or USB keyboard, monitor, and PS/2 or USB mouse to Install 1. Turn OFF all computers and their peripherals, and then disconnect all power cords. 2. Turn ON the connected computers one-by-one and wait until each computer to the KVM switch. 5. PC 1, 2, 3, 4, 5, 6, 7, 8 (TK...-803R) PC 1, 2, 3, 4, 5, 6, 7, 8, 9, 10, 11, 12, 13, 14, 15, 16 (TK-1603R) 2 ESPAÑOL Connect the included AC Power Adapter to the KVM switch and then to connect each ...
...KVM switch's Console Port. (TK-1603R shown) 3. Connect the shared PS/2 or USB keyboard, monitor, and PS/2 or USB mouse to Install 1. Turn OFF all computers and their peripherals, and then disconnect all power cords. 2. Turn ON the connected computers one-by-one and wait until each computer to the KVM switch. 5. PC 1, 2, 3, 4, 5, 6, 7, 8 (TK...-803R) PC 1, 2, 3, 4, 5, 6, 7, 8, 9, 10, 11, 12, 13, 14, 15, 16 (TK-1603R) 2 ESPAÑOL Connect the included AC Power Adapter to the KVM switch and then to connect each ...

