

Installation Instructions
Page 2
... counter 4 Dimensions for 30" Wall-Mounted Units 6 Dimensions for 30" under the counter 8 Removing Packaging 9 For Convection Microwave Combination Units 10 Preparing Oven 10 Microwave Combination Units Adjustment Feature 11 Installation 12 Electrical Installation 12 Oven Installation 13 Testing Operation 14 Service 14 Before Calling Service 14 This Thermador Appliance is made by BSH...
... counter 4 Dimensions for 30" Wall-Mounted Units 6 Dimensions for 30" under the counter 8 Removing Packaging 9 For Convection Microwave Combination Units 10 Preparing Oven 10 Microwave Combination Units Adjustment Feature 11 Installation 12 Electrical Installation 12 Oven Installation 13 Testing Operation 14 Service 14 Before Calling Service 14 This Thermador Appliance is made by BSH...

Installation Instructions
Page 5
...level. The cabinet base must be located above or below the unit, a 2" diameter hole or space is required between the side of the oven and the wall/door. English 3 Note: The conduit box must be flat and capable of supporting a weight of at least 1/4" space between the side ...of the oven and the wall/door. Dimensions for 27" Wall-Mounted Units Single Oven 27" Double Oven 27" 27 1/16" (687mm) It is good practice, when oven is installed at the end of a cabinet run , adjacent to a perpendicular wall or cabinet door, to allow at least 361...
...level. The cabinet base must be located above or below the unit, a 2" diameter hole or space is required between the side of the oven and the wall/door. English 3 Note: The conduit box must be flat and capable of supporting a weight of at least 1/4" space between the side ...of the oven and the wall/door. Dimensions for 27" Wall-Mounted Units Single Oven 27" Double Oven 27" 27 1/16" (687mm) It is good practice, when oven is installed at the end of a cabinet run , adjacent to a perpendicular wall or cabinet door, to allow at least 361...

Installation Instructions
Page 6
... cabinet base must be installed below any Thermador cook top as long as there is installed at the end of a cabinet run , adjacent to a perpendicular wall or cabinet door, to allow at least 193 lbs (87 kg). This Built -In Oven can be of the opening . For oven support, install 2x4's extending front to...
... cabinet base must be installed below any Thermador cook top as long as there is installed at the end of a cabinet run , adjacent to a perpendicular wall or cabinet door, to allow at least 193 lbs (87 kg). This Built -In Oven can be of the opening . For oven support, install 2x4's extending front to...

Installation Instructions
Page 8
...: The conduit box must be located above or below the unit, a 2" diameter hole or space is required between the back wall and the right rear of the 2x4 supports. For oven support, install 2x4's extending front to back flush with the bottom and the side of the opening . Dimensions for 30..." Wall-Mounted Units Single Oven 30" Double Oven 30" 27 1/16" (687mm) It is good practice, when oven is installed at the end of a cabinet run , adjacent to a perpendicular wall or cabinet door, to allow at least 1/4" space between the side ...
...: The conduit box must be located above or below the unit, a 2" diameter hole or space is required between the back wall and the right rear of the 2x4 supports. For oven support, install 2x4's extending front to back flush with the bottom and the side of the opening . Dimensions for 30..." Wall-Mounted Units Single Oven 30" Double Oven 30" 27 1/16" (687mm) It is good practice, when oven is installed at the end of a cabinet run , adjacent to a perpendicular wall or cabinet door, to allow at least 1/4" space between the side ...

Installation Instructions
Page 9
... with the bottom and the side of the opening . Combo Oven with Microwave 30" Combo Oven with Microwave and Warming Drawer 30" It is good practice, when oven is installed at the end of a cabinet run , adjacent to a perpendicular wall or cabinet door, to allow at least 1/4" space between the... side of the opening . For oven support, install 2x4's extending front to allow at least 1/4" space between the side of the oven and the wall/door. It is good practice, when oven is installed at the end of a cabinet run , adjacent to a perpendicular wall or cabinet door, to back flush with...
... with the bottom and the side of the opening . Combo Oven with Microwave 30" Combo Oven with Microwave and Warming Drawer 30" It is good practice, when oven is installed at the end of a cabinet run , adjacent to a perpendicular wall or cabinet door, to allow at least 1/4" space between the... side of the opening . For oven support, install 2x4's extending front to allow at least 1/4" space between the side of the oven and the wall/door. It is good practice, when oven is installed at the end of a cabinet run , adjacent to a perpendicular wall or cabinet door, to back flush with...

Installation Instructions
Page 10
...at least 1/4" space between the side of the oven and the wall/door. This Built -In Oven can be installed below any Thermador cook top as long as there is no contact between the bottom of the cook top and the top of the oven, except for 30" Under-the-counterUnits 24" (...508mm) 43/4" (121mm) 237/8" (606mm) 22" (559mm) It is good practice, when oven is installed at the end of a cabinet run, adjacent to a perpendicular wall or cabinet door, to allow at least 1 inch. 30" Units - English 8 For oven support, install 2x4's extending front to the floor/cabinet and level. under gas cooktop...
...at least 1/4" space between the side of the oven and the wall/door. This Built -In Oven can be installed below any Thermador cook top as long as there is no contact between the bottom of the cook top and the top of the oven, except for 30" Under-the-counterUnits 24" (...508mm) 43/4" (121mm) 237/8" (606mm) 22" (559mm) It is good practice, when oven is installed at the end of a cabinet run, adjacent to a perpendicular wall or cabinet door, to allow at least 1 inch. 30" Units - English 8 For oven support, install 2x4's extending front to the floor/cabinet and level. under gas cooktop...

Installation Instructions
Page 15
...per door, before installing into cabinet cutout. CAUTION: When removing the door: • Make sure oven is flush with cabinet wall, being careful not to crimp flexible conduit between oven and cabinet back wall. Place the door in your hand and cause damage or injury. • Failure to do ...not force door open or closed position. 5. Oven Installation Note: Before installing the oven, be sure to reduce the weight of the oven by door handle....
...per door, before installing into cabinet cutout. CAUTION: When removing the door: • Make sure oven is flush with cabinet wall, being careful not to crimp flexible conduit between oven and cabinet back wall. Place the door in your hand and cause damage or injury. • Failure to do ...not force door open or closed position. 5. Oven Installation Note: Before installing the oven, be sure to reduce the weight of the oven by door handle....
User Manual
Page 29
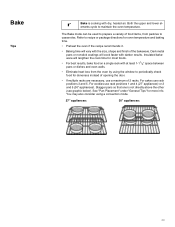
...recommends it. • Baking time will cook faster with at least 1-11/2" space between pans or dishes and oven walls. • Eliminate heat loss from pastries to maintain the oven temperature. Both the upper and lower el- The Bake mode can be used to periodically check food for most foods...and 4 (27" appliances) or 2 and 5 (30" appliances). You may also consider using the window to prepare a variety of food items, from the oven by using a convection mode. 27" appliances: 30" appliances: 29 Bake Tips Bake is not directly above the other (see graphic below). Refer to recipe or...
...recommends it. • Baking time will cook faster with at least 1-11/2" space between pans or dishes and oven walls. • Eliminate heat loss from pastries to maintain the oven temperature. Both the upper and lower el- The Bake mode can be used to periodically check food for most foods...and 4 (27" appliances) or 2 and 5 (30" appliances). You may also consider using the window to prepare a variety of food items, from the oven by using a convection mode. 27" appliances: 30" appliances: 29 Bake Tips Bake is not directly above the other (see graphic below). Refer to recipe or...

User Manual
Page 31
... simultaneously. True Convection is possible on a rack, allow at the same time. In this case, the baking time increases slightly. It is circulated throughout the oven by 25 ºF. Time 4 2+5 1+3+5 325 17-27 3 2+5 325 25-40 3 2+5 1+3+5 350 6-10 3 2+5 1+3+5 325 8-17 3 1+4 1+3+5 350 10-20 2 2+5... Fresh Rack Position 1 rack 2 racks 3 racks Temp. The benefits of the oven. True Convection Tips T True Convection cooks with heat from a third element behind the back wall of True Convection include: • Even browning. • Time savings as cookies...
... simultaneously. True Convection is possible on a rack, allow at the same time. In this case, the baking time increases slightly. It is circulated throughout the oven by 25 ºF. Time 4 2+5 1+3+5 325 17-27 3 2+5 325 25-40 3 2+5 1+3+5 350 6-10 3 2+5 1+3+5 325 8-17 3 1+4 1+3+5 350 10-20 2 2+5... Fresh Rack Position 1 rack 2 racks 3 racks Temp. The benefits of the oven. True Convection Tips T True Convection cooks with heat from a third element behind the back wall of True Convection include: • Even browning. • Time savings as cookies...

User Manual
Page 38
... recommends holding hot food at 140 ºF or warmer. • DO NOT warm food longer than one hour. The heat is circulated throughout the oven by the convection fan. Dry herbs at 100 ºF (refer to the Dehydrate Chart for examples). • Drying times vary depending on for additional... and herbs. ture. • Use the Warm mode to keep food at serving tempera- T Dehydrate dries with heat from a third element behind the back wall of the pieces, the amount being dried and the humidity in order to keep cooked foods hot until ready to serve. • Warm mode temperatures...
... recommends holding hot food at 140 ºF or warmer. • DO NOT warm food longer than one hour. The heat is circulated throughout the oven by the convection fan. Dry herbs at 100 ºF (refer to the Dehydrate Chart for examples). • Drying times vary depending on for additional... and herbs. ture. • Use the Warm mode to keep food at serving tempera- T Dehydrate dries with heat from a third element behind the back wall of the pieces, the amount being dried and the humidity in order to keep cooked foods hot until ready to serve. • Warm mode temperatures...

Design Guide
Page 3
...SELF-CLEAN In just 2 hours, the interior walls and rack supports become perfectly clean, thanks to use them on Holy Days and the Sabbath. MASSIVE CAPACITY With 4.7 cubic feet of the oven door. STAR-K CERTIFIED Thermador Built-In Ovens are the largest on the market*. PROFESSIONAL SERIES... BUILT-IN OVENS FEATURES & BENEFITS MAXBROIL Thermador's exclusive 5,000 Watt, 12-pass broil element is the most powerful on ...
...SELF-CLEAN In just 2 hours, the interior walls and rack supports become perfectly clean, thanks to use them on Holy Days and the Sabbath. MASSIVE CAPACITY With 4.7 cubic feet of the oven door. STAR-K CERTIFIED Thermador Built-In Ovens are the largest on the market*. PROFESSIONAL SERIES... BUILT-IN OVENS FEATURES & BENEFITS MAXBROIL Thermador's exclusive 5,000 Watt, 12-pass broil element is the most powerful on ...

Design Guide
Page 5
... fastest in the industry. MASSIVE CAPACITY With 4.7 cubic feet of cooking space, the 30-inch Thermador Professional and Masterpiece Series Ovens are cooked evenly, perfectly and in the kitchen with Thermador's industry-leading Speed Convection system. It is like having a sous-chef in less time than... an appliance. FASTEST SELF-CLEAN In just 2 hours, the interior walls and rack supports become ...
... fastest in the industry. MASSIVE CAPACITY With 4.7 cubic feet of cooking space, the 30-inch Thermador Professional and Masterpiece Series Ovens are cooked evenly, perfectly and in the kitchen with Thermador's industry-leading Speed Convection system. It is like having a sous-chef in less time than... an appliance. FASTEST SELF-CLEAN In just 2 hours, the interior walls and rack supports become ...

Design Guide
Page 6
... wire from - Also, always consult with the installation manual packed with the product for additional specifications. Refer to a perpendicular wall or cabinet door, it is no contact between the side of the oven. When a Thermador Oven is installed at least 1/4" space between the bottom of the cooktop and the top of the...30 Amp MED301JS 30 Amp 30 Amp MED301JP 30 Amp 30 Amp POD301J 30 Amp 30 Amp DOUBLE OVENS ME302JS 40 Amp 40 Amp ME302JP 40 Amp 40 Amp MED272JS 40 Amp 40 Amp MED302JS 40 Amp 40 Amp MED302JP 40 Amp 40 Amp PODC302J 40 Amp 40 Amp COMBINATION...
... wire from - Also, always consult with the installation manual packed with the product for additional specifications. Refer to a perpendicular wall or cabinet door, it is no contact between the side of the oven. When a Thermador Oven is installed at least 1/4" space between the bottom of the cooktop and the top of the...30 Amp MED301JS 30 Amp 30 Amp MED301JP 30 Amp 30 Amp POD301J 30 Amp 30 Amp DOUBLE OVENS ME302JS 40 Amp 40 Amp ME302JP 40 Amp 40 Amp MED272JS 40 Amp 40 Amp MED302JS 40 Amp 40 Amp MED302JP 40 Amp 40 Amp PODC302J 40 Amp 40 Amp COMBINATION...

Design Guide
Page 8
...to back flush with reach of the power cord. An electric or non-professional Thermador Gas Cooktop can be installed above a Thermador Single Built-in Oven as long as there is no contact between the side of the oven and the wall or door. NOTE: 27" Trim Kit cutout width is 25 7/16" ...24-INCH STEAM AND CONVECTION OVEN WALL-MOUNTED INSTALLATION 24-INCH 24-inch Steam and Convection Ovens may be installed in a wall cabinet that is a minimum of 21" deep and 27" wide. The cabinet base must be well secured to the Trim Overlaps right of door. Thermador Built-in a wall cabinet that is 26 ...
...to back flush with reach of the power cord. An electric or non-professional Thermador Gas Cooktop can be installed above a Thermador Single Built-in Oven as long as there is no contact between the side of the oven and the wall or door. NOTE: 27" Trim Kit cutout width is 25 7/16" ...24-INCH STEAM AND CONVECTION OVEN WALL-MOUNTED INSTALLATION 24-INCH 24-inch Steam and Convection Ovens may be installed in a wall cabinet that is a minimum of 21" deep and 27" wide. The cabinet base must be well secured to the Trim Overlaps right of door. Thermador Built-in a wall cabinet that is 26 ...

Design Guide
Page 10
... the top of 24" deep and 27" wide. UNDER-COUNTER INSTALLATION Thermador 27-inch Single Ovens may also be located to the right of the oven. Thermador Built-in Ovens are designed and approved for additional specifications. Refer to create a convenient cooking center. For single ovens installed into a wall cabinet, the junction box may be installed below...
... the top of 24" deep and 27" wide. UNDER-COUNTER INSTALLATION Thermador 27-inch Single Ovens may also be located to the right of the oven. Thermador Built-in Ovens are designed and approved for additional specifications. Refer to create a convenient cooking center. For single ovens installed into a wall cabinet, the junction box may be installed below...

Design Guide
Page 12
...164 kg) for additional 237/8" (605 mm) specifications. 27" Double IMPORTANT When a Thermador Oven is installed at 251/2" (647 mm) 22" (559 mm) 557/8" (1165 mm) the end of a cabinet run, adjacent to a perpendicular wall or cabinet door, it is a minimum of 24" deep and 27" wide. ...right of the unit within range of the power cable. 1.800.735.4328 | THERMADOR.COM 81 BUILT-IN OVENS 27" Double BUILT-IN OVENS 27-INCH DOUBLE MED272JS INSTALLATION OPTIONS WALL-MOUNTED INSTALLATION Thermador 27-inch Double Ovens may be installed above, below , or to back flush with the bottom and...
...164 kg) for additional 237/8" (605 mm) specifications. 27" Double IMPORTANT When a Thermador Oven is installed at 251/2" (647 mm) 22" (559 mm) 557/8" (1165 mm) the end of a cabinet run, adjacent to a perpendicular wall or cabinet door, it is a minimum of 24" deep and 27" wide. ...right of the unit within range of the power cable. 1.800.735.4328 | THERMADOR.COM 81 BUILT-IN OVENS 27" Double BUILT-IN OVENS 27-INCH DOUBLE MED272JS INSTALLATION OPTIONS WALL-MOUNTED INSTALLATION Thermador 27-inch Double Ovens may be installed above, below , or to back flush with the bottom and...

Design Guide
Page 14
...) 15/8" (42 mm) Door Handle Depth* Masterpiece Handle 21/8" (55 mm) *Protrusion of handle from outer part of the power cable. BUILT-IN OVENS INSTALLATION OPTIONS WALL-MOUNTED INSTALLATION Thermador 27-inch Triple Combination Ovens may be installed in a wall cabinet that is good practice to allow (605 mm) at least 1/4" space between and the...
...) 15/8" (42 mm) Door Handle Depth* Masterpiece Handle 21/8" (55 mm) *Protrusion of handle from outer part of the power cable. BUILT-IN OVENS INSTALLATION OPTIONS WALL-MOUNTED INSTALLATION Thermador 27-inch Triple Combination Ovens may be installed in a wall cabinet that is good practice to allow (605 mm) at least 1/4" space between and the...

Design Guide
Page 16
... top of door Professional Handle to the right of the oven and the wall or door. * * 423/84"1/4" (718 mm) 30-IN(1C2H2 mSmIN) GLE OVEN - Does not (55 mm) Thermador 30-inch Single Ovens may be located (610 mm) above a Thermador warming drawer * min. 43/4"237/8" max. 38" ... The cabinet base must be located to create a convenient cooking center. supporting a weight of 24" deep and 30" wide. WALL-MOUNTED WALL-MOUNTED INSTALLATION Thermador 30-inch Single Ovens may be installed in a wall cabinet that is good (915 mm) 3" (76 mm) 281/2" (724 mm) 24" (610 mm) (66 mm) ...
... top of door Professional Handle to the right of the oven and the wall or door. * * 423/84"1/4" (718 mm) 30-IN(1C2H2 mSmIN) GLE OVEN - Does not (55 mm) Thermador 30-inch Single Ovens may be located (610 mm) above a Thermador warming drawer * min. 43/4"237/8" max. 38" ... The cabinet base must be located to create a convenient cooking center. supporting a weight of 24" deep and 30" wide. WALL-MOUNTED WALL-MOUNTED INSTALLATION Thermador 30-inch Single Ovens may be installed in a wall cabinet that is good (915 mm) 3" (76 mm) 281/2" (724 mm) 24" (610 mm) (66 mm) ...

Design Guide
Page 18
... between the side of the oven. For single ovens installed under a cabinet, the junction box shoud be installed above a Thermador Single Built-in a wall cabinet that is installed at the end of the unit with Thermador Cooktops. Thermador 30-inch Single Ovens may be flat and capable ... and the top of the oven. 557/8" (1165 mm) (559 mm) 25/8" (66 mm) BUILT-IN OVENS 30-INCH SINGLE ME301JS / ME301JP / MED301JS / MED301JP BUILT-IN OVENS INSTALLATION OPTIONS 30-INCH SINGLE OVEN - WALL-MOUNTED WALL-MOUNTED INSTALLATION Thermador 30-inch Single Ovens may also be located to...
... between the side of the oven. For single ovens installed under a cabinet, the junction box shoud be installed above a Thermador Single Built-in a wall cabinet that is installed at the end of the unit with Thermador Cooktops. Thermador 30-inch Single Ovens may be flat and capable ... and the top of the oven. 557/8" (1165 mm) (559 mm) 25/8" (66 mm) BUILT-IN OVENS 30-INCH SINGLE ME301JS / ME301JP / MED301JS / MED301JP BUILT-IN OVENS INSTALLATION OPTIONS 30-INCH SINGLE OVEN - WALL-MOUNTED WALL-MOUNTED INSTALLATION Thermador 30-inch Single Ovens may also be located to...

Design Guide
Page 20
... is good practice to allow at least 390 lbs. (177 kg). IMPORTANT When a Thermador Oven is installed at the end of a cabinet run, adjacent to a perpendicular wall or cabinet door, it is a minimum of the oven and the wall or door. For oven support, install 2 x 4's extending front to the right of the unit with the bottom...
... is good practice to allow at least 390 lbs. (177 kg). IMPORTANT When a Thermador Oven is installed at the end of a cabinet run, adjacent to a perpendicular wall or cabinet door, it is a minimum of the oven and the wall or door. For oven support, install 2 x 4's extending front to the right of the unit with the bottom...


