
User Guide 1
Page 19
... up your software 38 Registering your computer with Toshiba 39 Adding optional external devices 39 Adding memory (optional 40 Installing a memory module 40 Removing a memory module 45 Checking total memory 46 Hard Drive Recovery 47 Hard Disk Drive Recovery options 47 Creating a Recovery DVD 54 Restoring using the Recovery Media 55 Checking the HDD operating status...
... up your software 38 Registering your computer with Toshiba 39 Adding optional external devices 39 Adding memory (optional 40 Installing a memory module 40 Removing a memory module 45 Checking total memory 46 Hard Drive Recovery 47 Hard Disk Drive Recovery options 47 Creating a Recovery DVD 54 Restoring using the Recovery Media 55 Checking the HDD operating status...

User Guide 1
Page 47
...10070; Erase the hard drive Hard Drive Recovery Getting Started Hard Drive Recovery 47 NOTE To purchase an optional external optical drive, visit the Toshiba Web site at accessories.toshiba.com. Using the HDD Recovery, you can: ❖ Recover your hard disk drive to the factory-set default. &#...10070; Recover your hard disk drive to the factory-set default without changing the...
...10070; Erase the hard drive Hard Drive Recovery Getting Started Hard Drive Recovery 47 NOTE To purchase an optional external optical drive, visit the Toshiba Web site at accessories.toshiba.com. Using the HDD Recovery, you can: ❖ Recover your hard disk drive to the factory-set default. &#...10070; Recover your hard disk drive to the factory-set default without changing the...

User Guide 1
Page 48
... 3 Click Yes to continue. (Sample Image) Warning screen 4 When the Toshiba Recovery Wizard opens and the Selecting a process screen displays, select Recovery of -box state deletes all data will appear stating that when the recovery is turned off. 2 Press and hold the 0 (zero) key on your... keyboard while powering on the hard disk drive and your work to external media first. 48 Getting Started Hard Drive Recovery Recovering the original factory image (recommended recovery method) Recovering a hard disk drive to its out-of Factory Default Software and then click Next...
... 3 Click Yes to continue. (Sample Image) Warning screen 4 When the Toshiba Recovery Wizard opens and the Selecting a process screen displays, select Recovery of -box state deletes all data will appear stating that when the recovery is turned off. 2 Press and hold the 0 (zero) key on your... keyboard while powering on the hard disk drive and your work to external media first. 48 Getting Started Hard Drive Recovery Recovering the original factory image (recommended recovery method) Recovering a hard disk drive to its out-of Factory Default Software and then click Next...

User Guide 1
Page 50
... turned off. 2 Press and hold the 0 (zero) key on your keyboard while powering on the computer. 50 Getting Started Hard Drive Recovery Hard Disk Drive Recovery using the Hard Drive Recovery partition to the factory-set default, or recovering just your C: drive and leaving other partitions (for example, a D: drive) intact, or changing the size...
... turned off. 2 Press and hold the 0 (zero) key on your keyboard while powering on the computer. 50 Getting Started Hard Drive Recovery Hard Disk Drive Recovery using the Hard Drive Recovery partition to the factory-set default, or recovering just your C: drive and leaving other partitions (for example, a D: drive) intact, or changing the size...

User Guide 1
Page 51
Select Recovery of Factory Default Software and then click Next. (Sample Image) Selecting a process screen 5 The Recovery of Factory Default Software screen displays. ❖ If you want to change the partition, go to step 6. ❖ If you do not want change the partition, skip to step 7. (Sample Image) Recovery of Factory Default Software screen 6 Select Recover without changing the hard disk drive partitions, then skip to step 8. Getting Started Hard Drive Recovery 51 4 When the Toshiba Recovery Wizard opens and the Selecting a processing screen displays.
Select Recovery of Factory Default Software and then click Next. (Sample Image) Selecting a process screen 5 The Recovery of Factory Default Software screen displays. ❖ If you want to change the partition, go to step 6. ❖ If you do not want change the partition, skip to step 7. (Sample Image) Recovery of Factory Default Software screen 6 Select Recover without changing the hard disk drive partitions, then skip to step 8. Getting Started Hard Drive Recovery 51 4 When the Toshiba Recovery Wizard opens and the Selecting a processing screen displays.

User Guide 1
Page 52
... your data to restart the computer. Be sure to create recovery DVDs and back up and down arrow buttons to set the hard disk size under The size of hard disk section of the screen. 8 Click Next to begin the restoration. The Recovery Wizard allows you will appear stating that the HDD has been... on the computer. A warning screen will need to use the up your keyboard while powering on the keyboard to external media before erasing the hard disk. 52 Getting Started Hard Drive Recovery 7 Select Recover to a custom size partition, If you want to customize the hard...
... your data to restart the computer. Be sure to create recovery DVDs and back up and down arrow buttons to set the hard disk size under The size of hard disk section of the screen. 8 Click Next to begin the restoration. The Recovery Wizard allows you will appear stating that the HDD has been... on the computer. A warning screen will need to use the up your keyboard while powering on the keyboard to external media before erasing the hard disk. 52 Getting Started Hard Drive Recovery 7 Select Recover to a custom size partition, If you want to customize the hard...

User Guide 1
Page 53
... Hard Drive Recovery 53 4 When the Toshiba Recovery Wizard opens and the Selecting a process screen displays, select Erase the hard disk and then click Next. 5 The Erase the hard disk screen lists the two methods you can choose from: ❖ Delete all data and partitions from the hard disk-This option ...and overwrite all sectors on the keyboard to begin deleting the HDD. Be sure you have saved your HDD. (Sample Image) Erase the hard disk screen 6 Select the desired method, and then click Next. When the process is completed, a message displays informing you that the HDD has been...
... Hard Drive Recovery 53 4 When the Toshiba Recovery Wizard opens and the Selecting a process screen displays, select Erase the hard disk and then click Next. 5 The Erase the hard disk screen lists the two methods you can choose from: ❖ Delete all data and partitions from the hard disk-This option ...and overwrite all sectors on the keyboard to begin deleting the HDD. Be sure you have saved your HDD. (Sample Image) Erase the hard disk screen 6 Select the desired method, and then click Next. When the process is completed, a message displays informing you that the HDD has been...

User Guide 1
Page 54
... your system if the hard drive recovery partition has been deleted or the hard disk has been replaced on -screen prompts for your computer. To create a recovery DVD: 1 Connect an optional external writable optical drive. 2 Click Start, All Programs, TOSHIBA, Recovery, and then Recovery Disc Creator. 3 Select DVD (to create a Recovery media on DVD). 4 Select the items...
... your system if the hard drive recovery partition has been deleted or the hard disk has been replaced on -screen prompts for your computer. To create a recovery DVD: 1 Connect an optional external writable optical drive. 2 Click Start, All Programs, TOSHIBA, Recovery, and then Recovery Disc Creator. 3 Select DVD (to create a Recovery media on DVD). 4 Select the items...

User Guide 1
Page 55
...rebuild the system using your hard disk drive using the Recovery Media NOTE To purchase an optional external optical drive, visit the Toshiba Web site at accessories.toshiba.com. The options are: ❖ Toshiba Recovery wizard ❖ System Recovery Options (Sample Image) Selecting a ...Process screen To recover your Hard Drive Recovery Utilities. Select one of the options and ...
...rebuild the system using your hard disk drive using the Recovery Media NOTE To purchase an optional external optical drive, visit the Toshiba Web site at accessories.toshiba.com. The options are: ❖ Toshiba Recovery wizard ❖ System Recovery Options (Sample Image) Selecting a ...Process screen To recover your Hard Drive Recovery Utilities. Select one of the options and ...
User Guide 1
Page 56
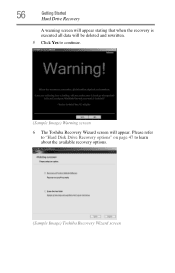
56 Getting Started Hard Drive Recovery A warning screen will appear stating that when the recovery is executed all data will be deleted and rewritten. 5 Click Yes to learn about the available recovery options. (Sample Image) Toshiba Recovery Wizard screen Please refer to "Hard Disk Drive Recovery options" on page 47 to continue. (Sample Image) Warning screen 6 The Toshiba Recovery Wizard screen will appear.
56 Getting Started Hard Drive Recovery A warning screen will appear stating that when the recovery is executed all data will be deleted and rewritten. 5 Click Yes to learn about the available recovery options. (Sample Image) Toshiba Recovery Wizard screen Please refer to "Hard Disk Drive Recovery options" on page 47 to continue. (Sample Image) Warning screen 6 The Toshiba Recovery Wizard screen will appear.

User Guide 1
Page 144
...the Check now button. Many software packages automatically create backup files. This is probably a configuration problem. Error-checking tests and repairs the disk. Run Disk Defragmenter. If a program does not run Error-checking: 1 Click Start, then click My Computer. 2 Right-click the drive you...it finds. Your data files are damaged or corrupted. Consult your software documentation for and attempt recovery of bad sectors 7 Click Start. Your hard disk seems very slow. The Check Disk All Apps box appears. 6 You can choose one or both options: ❖ Automatically fix...
...the Check now button. Many software packages automatically create backup files. This is probably a configuration problem. Error-checking tests and repairs the disk. Run Disk Defragmenter. If a program does not run Error-checking: 1 Click Start, then click My Computer. 2 Right-click the drive you...it finds. Your data files are damaged or corrupted. Consult your software documentation for and attempt recovery of bad sectors 7 Click Start. Your hard disk seems very slow. The Check Disk All Apps box appears. 6 You can choose one or both options: ❖ Automatically fix...


