
User Manual
Page 1
Printed in China P000422550 N PM0020764010 © 2005 Toshiba Corporation 12/18/04, 6:27 PM Others Function setup Library Editing Playback Recording Introduction Printed on 100% Recycled Paper RD-XS34SB_Ope_E001-176 1 TOSHIBA HDD/DVD VIDEO RECORDER RD-XS34SB DIGITAL VIDEO HDD/DVD VIDEO RECORDER RD-XS34SB OWNER'S MANUAL OPERATIONS Read "INSTALLATION GUIDE" first.
Printed in China P000422550 N PM0020764010 © 2005 Toshiba Corporation 12/18/04, 6:27 PM Others Function setup Library Editing Playback Recording Introduction Printed on 100% Recycled Paper RD-XS34SB_Ope_E001-176 1 TOSHIBA HDD/DVD VIDEO RECORDER RD-XS34SB DIGITAL VIDEO HDD/DVD VIDEO RECORDER RD-XS34SB OWNER'S MANUAL OPERATIONS Read "INSTALLATION GUIDE" first.

User Manual
Page 4
Introduction Caution for safety Read "SAFETY PRECAUTIONS", "IMPORTANT SAFETY INSTRUCTIONS", "Precautions" and others of the "INSTALLATION GUIDE" first. 4 RD-XS34SB_Ope_E_p002-011 4 12/18/04, 5:38 PM
Introduction Caution for safety Read "SAFETY PRECAUTIONS", "IMPORTANT SAFETY INSTRUCTIONS", "Precautions" and others of the "INSTALLATION GUIDE" first. 4 RD-XS34SB_Ope_E_p002-011 4 12/18/04, 5:38 PM

User Manual
Page 12
... page 34, 40 Illuminates in the HDD mode. 5 TIMESLIP button page 64, 65 Selects the time slip mode. 6 TIMESLIP indicator page 64, 65 Illuminates in "INSTALLATION GUIDE" 9 (PLAY) button page 62 Starts playback. 12 RD-XS34SB_Ope_E_p012-019 12 12/18/04, 5:41 PM
... page 34, 40 Illuminates in the HDD mode. 5 TIMESLIP button page 64, 65 Selects the time slip mode. 6 TIMESLIP indicator page 64, 65 Illuminates in "INSTALLATION GUIDE" 9 (PLAY) button page 62 Starts playback. 12 RD-XS34SB_Ope_E_p012-019 12 12/18/04, 5:41 PM

User Manual
Page 14
...1 AC IN socket page 15 in "INSTALLATION GUIDE" Connects to the supplied power cord. 2 Ventilation fan 3 VIDEO OUTPUT, AUDIO OUTPUT jacks page 16 in "INSTALLATION GUIDE" Outputs video and audio signals to a ...connected TV or amplifier. 4 Component VIDEO OUTPUT jacks page 17 in "INSTALLATION GUIDE" Use this to connect the ...TV) output socket page 14 in "INSTALLATION GUIDE" Connects the supplied coaxial cable to a TV. 8 CHANNEL CHANGE IR jack page 48 in "INSTALLATION GUIDE" Connect the supplied IR control cable...
...1 AC IN socket page 15 in "INSTALLATION GUIDE" Connects to the supplied power cord. 2 Ventilation fan 3 VIDEO OUTPUT, AUDIO OUTPUT jacks page 16 in "INSTALLATION GUIDE" Outputs video and audio signals to a ...connected TV or amplifier. 4 Component VIDEO OUTPUT jacks page 17 in "INSTALLATION GUIDE" Use this to connect the ...TV) output socket page 14 in "INSTALLATION GUIDE" Connects the supplied coaxial cable to a TV. 8 CHANNEL CHANGE IR jack page 48 in "INSTALLATION GUIDE" Connect the supplied IR control cable...

User Manual
Page 15
... jack. Function setup Others RD-XS34SB_Ope_E_p012-019 15 12/18/04, 5:41 PM 15 When connecting the optical digital cable, remove the cap and fit the connector into the jack firmly. Introduction Recording Playback Editing Library 10 DIGITAL BITSTREAM/PCM OPTICAL AUDIO OUTPUT jack page 20 in "INSTALLATION GUIDE" Use this to connect...
... jack. Function setup Others RD-XS34SB_Ope_E_p012-019 15 12/18/04, 5:41 PM 15 When connecting the optical digital cable, remove the cap and fit the connector into the jack firmly. Introduction Recording Playback Editing Library 10 DIGITAL BITSTREAM/PCM OPTICAL AUDIO OUTPUT jack page 20 in "INSTALLATION GUIDE" Use this to connect...

User Manual
Page 17
...19 DIMMER button page 19 20 FL SELECT button page 19 21 Buttons for TV operation page 44 in "INSTALLATION GUIDE" 53 T.SEARCH button page 69 54 CLEAR button page 69 55 DELETE button page 52 *1 MENU Use ...DVD button page 34, 40, 62 29 INSTANT SKIP button page 66 30 INSTANT REPLAY button page 66 RD-XS34SB_Ope_E_p012-019 17 31 CONTENT MENU button page 57, 95 32 EDIT MENU button page 108 33 SKIP...90 42 P in P button page 71 43 ZOOM button page 74 44 PROGRESSIVE buttton page 17 in "INSTALLATION GUIDE" 45 INPUT SELECT button page 40 46 TV/DVR button page 37 47 VIDEO Plus+ button page 48 ...
...19 DIMMER button page 19 20 FL SELECT button page 19 21 Buttons for TV operation page 44 in "INSTALLATION GUIDE" 53 T.SEARCH button page 69 54 CLEAR button page 69 55 DELETE button page 52 *1 MENU Use ...DVD button page 34, 40, 62 29 INSTANT SKIP button page 66 30 INSTANT REPLAY button page 66 RD-XS34SB_Ope_E_p012-019 17 31 CONTENT MENU button page 57, 95 32 EDIT MENU button page 108 33 SKIP...90 42 P in P button page 71 43 ZOOM button page 74 44 PROGRESSIVE buttton page 17 in "INSTALLATION GUIDE" 45 INPUT SELECT button page 40 46 TV/DVR button page 37 47 VIDEO Plus+ button page 48 ...
User Manual
Page 19
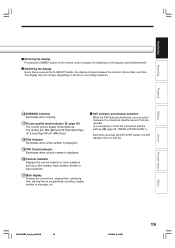
...is displayed. 19 TRK (Track) indicator Illuminates when a track number is necessary to finish the connection and the settings ( page 48, "INSTALLATION GUIDE").) Each time you press the FL SELECT button, the display changes between the channel, title number, and time. SAT indicator and channel ... Displays the current time, elapsed time, remaining time, starting time of the display (normal/dimmed/off . Library Function setup Others RD-XS34SB_Ope_E_p012-019 19 12/18/04, 5:41 PM 19 Introduction Recording Playback Editing Dimming the display Pressing the DIMMER button on the ...
...is displayed. 19 TRK (Track) indicator Illuminates when a track number is necessary to finish the connection and the settings ( page 48, "INSTALLATION GUIDE").) Each time you press the FL SELECT button, the display changes between the channel, title number, and time. SAT indicator and channel ... Displays the current time, elapsed time, remaining time, starting time of the display (normal/dimmed/off . Library Function setup Others RD-XS34SB_Ope_E_p012-019 19 12/18/04, 5:41 PM 19 Introduction Recording Playback Editing Dimming the display Pressing the DIMMER button on the ...
User Manual
Page 20
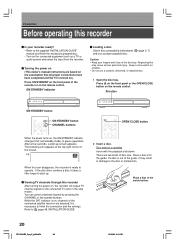
... disc, it may cause serious personal injury. Place a disc in the stop mode). Neglecting this may result in damage to the supplied "INSTALLATION GUIDE" manual and finish the necessary preparations. • Turn on , channels of disc size. Loading When this icon disappears, the recorder is necessary...cracked, deformed, or repaired disc. 1 Open the disc tray. It is ready to the connected TV (also in the inside hollow. 20 RD-XS34SB_Ope_E_p020-024 20 12/18/04, 5:41 PM Turning the power on (This owner's manual instructions are selected. The following icon appears at...
... disc, it may cause serious personal injury. Place a disc in the stop mode). Neglecting this may result in damage to the supplied "INSTALLATION GUIDE" manual and finish the necessary preparations. • Turn on , channels of disc size. Loading When this icon disappears, the recorder is necessary...cracked, deformed, or repaired disc. 1 Open the disc tray. It is ready to the connected TV (also in the inside hollow. 20 RD-XS34SB_Ope_E_p020-024 20 12/18/04, 5:41 PM Turning the power on (This owner's manual instructions are selected. The following icon appears at...

User Manual
Page 26
...in the "Management settings" menu. For DVD-RAM disc, initialization is still unusable, it complies with a built-in , read the separate "INSTALLATION GUIDE" volume again, and confirm all the recorded titles and Library information are recorded on other devices and not finalized yet, cannot be read this ...RW disc if recorded in the same way as a tape. Further, the DVD-RAM drive on this recorder can be erased or not. 26 RD-XS34SB_Ope_E_p025-038 26 12/18/04, 5:42 PM When you want , without initializing. Conventional video cassette recorders have been done. Is your own...
...in the "Management settings" menu. For DVD-RAM disc, initialization is still unusable, it complies with a built-in , read the separate "INSTALLATION GUIDE" volume again, and confirm all the recorded titles and Library information are recorded on other devices and not finalized yet, cannot be read this ...RW disc if recorded in the same way as a tape. Further, the DVD-RAM drive on this recorder can be erased or not. 26 RD-XS34SB_Ope_E_p025-038 26 12/18/04, 5:42 PM When you want , without initializing. Conventional video cassette recorders have been done. Is your own...

User Manual
Page 34
Preparation • When you have set ( page 49, INSTALLATION GUIDE) is selected. HDD : To record on the SAT indicator. Ch: To record a TV programme with recorder tuner. REMAIN DISPLAY TIME BAR CHP DIVIDE DIMMER FL ... programme. - L-U: To record pictures currently played ( page 116). Load a disc which has sufficient space available to select a recording source. For details, see page 19. 34 RD-XS34SB_Ope_E_p025-038 34 12/18/04, 5:42 PM AV1: To record a source connected to the INPUT jacks on the rear panel ( page 39). The input...
Preparation • When you have set ( page 49, INSTALLATION GUIDE) is selected. HDD : To record on the SAT indicator. Ch: To record a TV programme with recorder tuner. REMAIN DISPLAY TIME BAR CHP DIVIDE DIMMER FL ... programme. - L-U: To record pictures currently played ( page 116). Load a disc which has sufficient space available to select a recording source. For details, see page 19. 34 RD-XS34SB_Ope_E_p025-038 34 12/18/04, 5:42 PM AV1: To record a source connected to the INPUT jacks on the rear panel ( page 39). The input...

User Manual
Page 40
...or DVD to the INPUT jacks on the front panel. DVD : To record on the HDD. INPUT SELECT Each time you have set ( page 49, INSTALLATION GUIDE) is selected. HDD : To record on a DVD-RAM/R/RW disc. To record a satellite programme, press the SAT.CONT. AV1: To record pictures... REC of this recorder to start recording. The input you press the button, the indicator changes. REC 5 When recording is connected. STOP 40 RD-XS34SB_Ope_E_p039-047 40 12/18/04, 5:43 PM Recording Recording an external source (Continued) IP FRAME OPEN/CLOSE DVD TOP MENU MENU RETURN ANGLE ...
...or DVD to the INPUT jacks on the front panel. DVD : To record on the HDD. INPUT SELECT Each time you have set ( page 49, INSTALLATION GUIDE) is selected. HDD : To record on a DVD-RAM/R/RW disc. To record a satellite programme, press the SAT.CONT. AV1: To record pictures... REC of this recorder to start recording. The input you press the button, the indicator changes. REC 5 When recording is connected. STOP 40 RD-XS34SB_Ope_E_p039-047 40 12/18/04, 5:43 PM Recording Recording an external source (Continued) IP FRAME OPEN/CLOSE DVD TOP MENU MENU RETURN ANGLE ...

User Manual
Page 48
Preparation • Make sure that the recorder's clock, receiving channels and their guide channels are set top box setting ( page 49, "INSTALLATION GUIDE"), and turn on a DVD-RAM/R/RW disc, load it into the recorder. - VIDEO Plus+ The "REC MENU Timer Programing" with the ... loaded disc is highlighted. For satellite receiver users: • Finish the set correctly ( "INSTALLATION GUIDE"). • When you enter the number starting from 0, a 9-digit number is entered. 3 Press ENTER. ENTER 48 RD-XS34SB_Ope_E_p048-054 48 12/20/04, 6:48 PM Recording HDD DVD-RAM DVD-RW DVD-R VIDEO...
Preparation • Make sure that the recorder's clock, receiving channels and their guide channels are set top box setting ( page 49, "INSTALLATION GUIDE"), and turn on a DVD-RAM/R/RW disc, load it into the recorder. - VIDEO Plus+ The "REC MENU Timer Programing" with the ... loaded disc is highlighted. For satellite receiver users: • Finish the set correctly ( "INSTALLATION GUIDE"). • When you enter the number starting from 0, a 9-digit number is entered. 3 Press ENTER. ENTER 48 RD-XS34SB_Ope_E_p048-054 48 12/20/04, 6:48 PM Recording HDD DVD-RAM DVD-RW DVD-R VIDEO...

User Manual
Page 74
... scope appears. Open the lid. 74 RD-XS34SB_Ope_E_p071-077 74 12/18/04, 5:45 PM SAT.MONI. IP FRAME SL SEARCH OW SK ENTER /ADJUST PAUSE STOP PICTURE PLAY REC QUICK MENU Start REMAIN DISPLAY TIME BAR CHP DIVIDE DIMMER FL SELECT ZOOM P in "INSTALLATION GUIDE"). • The zoom feature is not available...
... scope appears. Open the lid. 74 RD-XS34SB_Ope_E_p071-077 74 12/18/04, 5:45 PM SAT.MONI. IP FRAME SL SEARCH OW SK ENTER /ADJUST PAUSE STOP PICTURE PLAY REC QUICK MENU Start REMAIN DISPLAY TIME BAR CHP DIVIDE DIMMER FL SELECT ZOOM P in "INSTALLATION GUIDE"). • The zoom feature is not available...

User Manual
Page 78
... button repeatedly. : To skip forward. : To skip backward. Notes • The magnified image is adjusted to be limited. 78 RD-XS34SB_Ope_E_p078-081 78 12/20/04, 6:49 PM IP FRAME HDD TIMESLIP DVD EASY NAVI INSTANT REPLAY INSTANT SKIP REC MENU EDIT MENU Start...manual of the function settings via the on page 74. To magnify a picture Follow the procedure on -screen displays of the recorder ( page 42, "INSTALLATION GUIDE"). Preparations • Prepare a compatible disc ( page 79) that contains JPEG files. For details, refer to "Photo". • Make your TV. ...
... button repeatedly. : To skip forward. : To skip backward. Notes • The magnified image is adjusted to be limited. 78 RD-XS34SB_Ope_E_p078-081 78 12/20/04, 6:49 PM IP FRAME HDD TIMESLIP DVD EASY NAVI INSTANT REPLAY INSTANT SKIP REC MENU EDIT MENU Start...manual of the function settings via the on page 74. To magnify a picture Follow the procedure on -screen displays of the recorder ( page 42, "INSTALLATION GUIDE"). Preparations • Prepare a compatible disc ( page 79) that contains JPEG files. For details, refer to "Photo". • Make your TV. ...
User Manual
Page 153
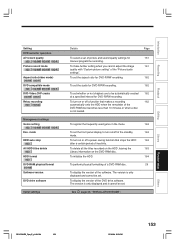
... in the standby 163 mode. Library Function setup Others RD-XS34SB_Ope_E_p149-164 153 12/18/04, 5:53 PM 153 To register the frequently used genre in the menu. 163 To set the front panel display to be set. See page 24, "INSTALLATION GUIDE". mode HDD auto stop HDD All HDD titles delete HDD...
... in the standby 163 mode. Library Function setup Others RD-XS34SB_Ope_E_p149-164 153 12/18/04, 5:53 PM 153 To register the frequently used genre in the menu. 163 To set the front panel display to be set. See page 24, "INSTALLATION GUIDE". mode HDD auto stop HDD All HDD titles delete HDD...

User Manual
Page 159
... may return to the normal by all means. If this function is set this function to "Off". On: Activates the screen protector function. RD-XS34SB_Ope_E_p149-164 159 12/18/04, 5:53 PM 159 Introduction Recording Playback Display settings TV Shape HDD DVD-RAM DVD-RW DVD-R DVD-VIDEO ...set to the normal TV screen when the recorder remains idle for about 15 minutes or longer. Note • Toshiba does not guarantee that this setting, see "TV shape setting" ( page 42, "INSTALLATION GUIDE"). For details on the TV screen. On screen display HDD DVD-RAM DVD-RW DVD-R DVD-VIDEO VCD ...
... may return to the normal by all means. If this function is set this function to "Off". On: Activates the screen protector function. RD-XS34SB_Ope_E_p149-164 159 12/18/04, 5:53 PM 159 Introduction Recording Playback Display settings TV Shape HDD DVD-RAM DVD-RW DVD-R DVD-VIDEO ...set to the normal TV screen when the recorder remains idle for about 15 minutes or longer. Note • Toshiba does not guarantee that this setting, see "TV shape setting" ( page 42, "INSTALLATION GUIDE"). For details on the TV screen. On screen display HDD DVD-RAM DVD-RW DVD-R DVD-VIDEO VCD ...
User Manual
Page 160
... the disc tray to avoid confusion in the response of this recorder" ( page 46, "INSTALLATION GUIDE"). Audio: MP3/WMA files take priority over MP3/WMA files. Off: Turns off beeps for... each recorder to have the recorder read the disc again. 160 RD-XS34SB_Ope_E_p149-164 160 12/18/04, 5:53 PM Instant replay interval HDD DVD-RAM ...playback priority between titles, the recorder remembers only the last point where you use the second and third TOSHIBA HDD/DVD video recorders, set the different remote codes for alerts irrespective of the recorders. Because there is...
... the disc tray to avoid confusion in the response of this recorder" ( page 46, "INSTALLATION GUIDE"). Audio: MP3/WMA files take priority over MP3/WMA files. Off: Turns off beeps for... each recorder to have the recorder read the disc again. 160 RD-XS34SB_Ope_E_p149-164 160 12/18/04, 5:53 PM Instant replay interval HDD DVD-RAM ...playback priority between titles, the recorder remembers only the last point where you use the second and third TOSHIBA HDD/DVD video recorders, set the different remote codes for alerts irrespective of the recorders. Because there is...

User Manual
Page 167
... been completed. → Complete the clock setting ( page 26, "INSTALLATION GUIDE"). • The programs list is not completed. → Complete the guide channel setting ( "INSTALLATION GUIDE"). VIDEO Plus+ recording does not work properly. • Guide channel setting is full. → Cancel unwanted programs ( page 45)....You can still play it with this recorder, but the contents will be lost. page 29, Editing Library Function setup Others RD-XS34SB_Ope_E_p165-175 167 12/18/04, 5:53 PM 167 Introduction Recording Playback Recording Cannot be recorded on a DVD-RAM disc...
... been completed. → Complete the clock setting ( page 26, "INSTALLATION GUIDE"). • The programs list is not completed. → Complete the guide channel setting ( "INSTALLATION GUIDE"). VIDEO Plus+ recording does not work properly. • Guide channel setting is full. → Cancel unwanted programs ( page 45)....You can still play it with this recorder, but the contents will be lost. page 29, Editing Library Function setup Others RD-XS34SB_Ope_E_p165-175 167 12/18/04, 5:53 PM 167 Introduction Recording Playback Recording Cannot be recorded on a DVD-RAM disc...

User Manual
Page 168
...not keep time. → Set the time and date manually ( "INSTALLATION GUIDE"). page 28, 168 RD-XS34SB_Ope_E_p165-175 168 12/18/04, 5:53 PM Clock The clock blinks. → Complete the initial setting again ( "INSTALLATION GUIDE"). Others Before calling service personnel (Continued) Remote control The remote control ...• The batteries in the remote control are exhausted. → Replace all the batteries in the remote control ( page 12, "INSTALLATION GUIDE"). • The light emitter of the remote control is not pointed at the receptor of this recorder. → Point the emitter...
...not keep time. → Set the time and date manually ( "INSTALLATION GUIDE"). page 28, 168 RD-XS34SB_Ope_E_p165-175 168 12/18/04, 5:53 PM Clock The clock blinks. → Complete the initial setting again ( "INSTALLATION GUIDE"). Others Before calling service personnel (Continued) Remote control The remote control ...• The batteries in the remote control are exhausted. → Replace all the batteries in the remote control ( page 12, "INSTALLATION GUIDE"). • The light emitter of the remote control is not pointed at the receptor of this recorder. → Point the emitter...

User Manual
Page 173
...8226; Remote control 1 • Batteries (R03 2 • Power cord 1 • Coaxial cable 1 • Video/Audio cable 1 • IR control cable 1 • OWNER'S MANUAL (INSTALLATION GUIDE) ....... 1 • OWNER'S MANUAL (OPERATIONS 1 • Quick Reference 1 • The design and specifications may change without prior notice. • The Illustrations and screens described in this... may be exaggerated or simplified for easy recognition and may be slightly different from the actual unit. Library Function setup Others RD-XS34SB_Ope_E_p165-175 173 12/18/04, 5:53 PM 173
...8226; Remote control 1 • Batteries (R03 2 • Power cord 1 • Coaxial cable 1 • Video/Audio cable 1 • IR control cable 1 • OWNER'S MANUAL (INSTALLATION GUIDE) ....... 1 • OWNER'S MANUAL (OPERATIONS 1 • Quick Reference 1 • The design and specifications may change without prior notice. • The Illustrations and screens described in this... may be exaggerated or simplified for easy recognition and may be slightly different from the actual unit. Library Function setup Others RD-XS34SB_Ope_E_p165-175 173 12/18/04, 5:53 PM 173