
User Manual
Page 6
......3 Using the Product 5 Control Panel ...5 Connection Ports...6 Remote Control ...7 Replacing the Battery 8 Remote Control Operation 9 Installation 10 Connecting the Projector 10 Powering On/Off the Projector 11 Adjusting the Projector 12 Menu Operation 14 Maintenance 18 Cleaning the Lens ...18 Cleaning the Projector Housing 18 Cleaning the Air Filter 18 Replacing the Lamp 19 Specifications 21...
......3 Using the Product 5 Control Panel ...5 Connection Ports...6 Remote Control ...7 Replacing the Battery 8 Remote Control Operation 9 Installation 10 Connecting the Projector 10 Powering On/Off the Projector 11 Adjusting the Projector 12 Menu Operation 14 Maintenance 18 Cleaning the Lens ...18 Cleaning the Projector Housing 18 Cleaning the Air Filter 18 Replacing the Lamp 19 Specifications 21...

User Manual
Page 8
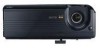
ViewSonic 2 PJ557DC/PJ559DC/PJ560DC they will comein handy if you have all these components: Projector with Lens Cap AC Power Cord VGA Cable (D-SUB to ship your unit as it was originally packed at the factory. „ Accessories ... and region. For maximum protection, repack your unit. Package Contents When you unpack the projector, make sure you ever to D-SUB) Composite Video Cable S-Video Cable Remote Control (IR) AAA size batteries for remote control User's Manual Quick Start Guide Projector Carrying Case „ Save the original shipping carton and packing material;
ViewSonic 2 PJ557DC/PJ559DC/PJ560DC they will comein handy if you have all these components: Projector with Lens Cap AC Power Cord VGA Cable (D-SUB to ship your unit as it was originally packed at the factory. „ Accessories ... and region. For maximum protection, repack your unit. Package Contents When you unpack the projector, make sure you ever to D-SUB) Composite Video Cable S-Video Cable Remote Control (IR) AAA size batteries for remote control User's Manual Quick Start Guide Projector Carrying Case „ Save the original shipping carton and packing material;

User Manual
Page 9
Projector Overview Front View 9 12 11 10 9 8 1 2 3 45 6 7 1 Lens cap 2 Elevator button 3 Lens cap strap 4 Projection lens 5 Front IR remote control sensor 6 Ventilation holes 7 Air filter cover 8 AC power socket 9 Speaker 10 Control panel 11 Zoom ring 12 Focus ring 13 Lamp cover ViewSonic 3 PJ557DC/PJ559DC/PJ560DC
Projector Overview Front View 9 12 11 10 9 8 1 2 3 45 6 7 1 Lens cap 2 Elevator button 3 Lens cap strap 4 Projection lens 5 Front IR remote control sensor 6 Ventilation holes 7 Air filter cover 8 AC power socket 9 Speaker 10 Control panel 11 Zoom ring 12 Focus ring 13 Lamp cover ViewSonic 3 PJ557DC/PJ559DC/PJ560DC

User Manual
Page 10
ViewSonic 4 PJ557DC/PJ559DC/PJ560DC Rear View 1 2 3 4 1 Connection ports 2 Kensington lock 3 Rear IR remote control sensor 4 Ventilation holes Bottom View 1 2 3 1 Elevator foot 2 Ceiling mount 3 Tilt-adjustment foot „ This projector can be used with a ceiling mount for support. The ceiling mount is not included in the package.
ViewSonic 4 PJ557DC/PJ559DC/PJ560DC Rear View 1 2 3 4 1 Connection ports 2 Kensington lock 3 Rear IR remote control sensor 4 Ventilation holes Bottom View 1 2 3 1 Elevator foot 2 Ceiling mount 3 Tilt-adjustment foot „ This projector can be used with a ceiling mount for support. The ceiling mount is not included in the package.

User Manual
Page 13
...function. 3 MENU Display or exit the on or off the screen temporarily. ViewSonic 7 11 10 9 8 PJ557DC/PJ559DC/PJ560DC The right button acts as mouse right button. This function is only available when the projector 7 is connected to a computer via a USB cable. 6 Left (Computer... mode only) Act as mouse left button. Remote Control 1 Power Turn the projector on -screen display 3 menus. 4 Laser 4 Aim the remote at the viewing screen, press and hold this button 5 to activate the laser pointer. 5 Four directional ...
...function. 3 MENU Display or exit the on or off the screen temporarily. ViewSonic 7 11 10 9 8 PJ557DC/PJ559DC/PJ560DC The right button acts as mouse right button. This function is only available when the projector 7 is connected to a computer via a USB cable. 6 Left (Computer... mode only) Act as mouse left button. Remote Control 1 Power Turn the projector on -screen display 3 menus. 4 Laser 4 Aim the remote at the viewing screen, press and hold this button 5 to activate the laser pointer. 5 Four directional ...

User Manual
Page 15
...and press a button. „ Operating the projector from the front „ Operating the projector from a position where the remote sensor is sunlight or other strong light such as a fluorescent lamp shining on the remote sensor. „ Operate the remote control from the rear 10 15 5m 7m 5m... the remote control out of locations with excessively high temperature or humidity. „ Do not get water on the remote control or place wet objects on it. „ Do not disassemble the remote control. There is a danger of injuiry to the people's eyes (especiallyn small children). ViewSonic 9...
...and press a button. „ Operating the projector from the front „ Operating the projector from a position where the remote sensor is sunlight or other strong light such as a fluorescent lamp shining on the remote sensor. „ Operate the remote control from the rear 10 15 5m 7m 5m... the remote control out of locations with excessively high temperature or humidity. „ Do not get water on the remote control or place wet objects on it. „ Do not disassemble the remote control. There is a danger of injuiry to the people's eyes (especiallyn small children). ViewSonic 9...

User Manual
Page 21
...distortion. Press the Menu button on the control panel or the MENU button on the remote control, the screen will automatically save the new settings. To exit OSD, press the...132; User : Memorize user's settings. Color Setting Adjust the color temperature. The OSD menu will close and the projector will return to operate 1. Screen Type Select the projection screen type. When OSD is displayed, use S / ... the screen. Press the Menu buttonon the control panel or the MENU button on the remote control to select any feature in the main menu. 3. Contrast Set the difference between ...
...distortion. Press the Menu button on the control panel or the MENU button on the remote control, the screen will automatically save the new settings. To exit OSD, press the...132; User : Memorize user's settings. Color Setting Adjust the color temperature. The OSD menu will close and the projector will return to operate 1. Screen Type Select the projection screen type. When OSD is displayed, use S / ... the screen. Press the Menu buttonon the control panel or the MENU button on the remote control to select any feature in the main menu. 3. Contrast Set the difference between ...

User Manual
Page 30
... of focus: „ Be sure the lens cover is blocking the remote control receiver on -screen menu, adjust the focus ring. (The image size should not change; Troubleshooting Refer to the computer manual. If the image is out of the projector. ViewSonic 24 PJ557DC/PJ559DC/PJ560DC if it does, you are adjusting the...
... of focus: „ Be sure the lens cover is blocking the remote control receiver on -screen menu, adjust the focus ring. (The image size should not change; Troubleshooting Refer to the computer manual. If the image is out of the projector. ViewSonic 24 PJ557DC/PJ559DC/PJ560DC if it does, you are adjusting the...


