
V15
Page 1
All other trademarks are registered trademarks of their respective companies. All rights reserved. V15 Freelance Digital Camera Owner's Manual © 2009 Sakar International, Inc. Windows and the Windows logo are the property of Microsoft Corporation.
All other trademarks are registered trademarks of their respective companies. All rights reserved. V15 Freelance Digital Camera Owner's Manual © 2009 Sakar International, Inc. Windows and the Windows logo are the property of Microsoft Corporation.
V15
Page 2
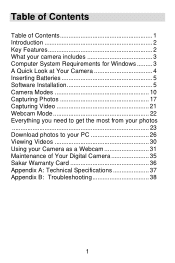
Table of Contents Table of Contents 1 Introduction 2 Key Features 2 What your camera includes 3 Computer System Requirements for Windows ......... 3 A Quick Look at Your Camera 4 Inserting Batteries 5 Software Installation 5 Camera Modes 10 Capturing Photos 17 Capturing Video 21 Webcam Mode 22 Everything you need to get the most from your photos 23 Download photos to your PC 26 Viewing Videos 30 Using your Camera as a Webcam 31 Maintenance of Your Digital Camera 35 Sakar Warranty Card 36 Appendix A: Technical Specifications 37 Appendix B: Troubleshooting 38 1
Table of Contents Table of Contents 1 Introduction 2 Key Features 2 What your camera includes 3 Computer System Requirements for Windows ......... 3 A Quick Look at Your Camera 4 Inserting Batteries 5 Software Installation 5 Camera Modes 10 Capturing Photos 17 Capturing Video 21 Webcam Mode 22 Everything you need to get the most from your photos 23 Download photos to your PC 26 Viewing Videos 30 Using your Camera as a Webcam 31 Maintenance of Your Digital Camera 35 Sakar Warranty Card 36 Appendix A: Technical Specifications 37 Appendix B: Troubleshooting 38 1
V15
Page 3
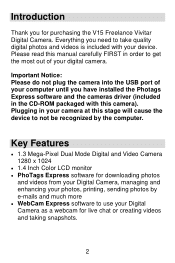
...camera into the USB port of your Digital Camera as a webcam for purchasing the V15 Freelance Vivitar Digital Camera. Please read this manual carefully FIRST in order to take quality digital photos and videos is included with this stage will cause the device to use your digital camera... Everything you have installed the Photags Express software and the cameras driver (included in your camera at this camera). Plugging in the CD-ROM packaged with your device. Key Features • 1.3 Mega-Pixel Dual Mode Digital and Video Camera 1280 x 1024 • 1.4 Inch Color LCD monitor &#...
...camera into the USB port of your Digital Camera as a webcam for purchasing the V15 Freelance Vivitar Digital Camera. Please read this manual carefully FIRST in order to take quality digital photos and videos is included with this stage will cause the device to use your digital camera... Everything you have installed the Photags Express software and the cameras driver (included in your camera at this camera). Plugging in the CD-ROM packaged with your device. Key Features • 1.3 Mega-Pixel Dual Mode Digital and Video Camera 1280 x 1024 • 1.4 Inch Color LCD monitor &#...
V15
Page 4
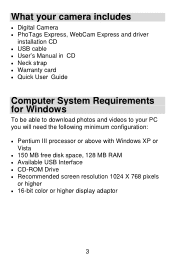
What your camera includes • Digital Camera • PhoTags Express, WebCam Express and driver installation CD • USB cable • User's Manual in CD • Neck strap • Warranty card • Quick ...
What your camera includes • Digital Camera • PhoTags Express, WebCam Express and driver installation CD • USB cable • User's Manual in CD • Neck strap • Warranty card • Quick ...
V15
Page 6
... Installation NOTE: Before attempting to install the software, make changes to lose them if the battery power becomes too low. Inserting Batteries Open the camera's battery compartment cover (if the screw on the compartment has been fixed, please use a small screwdriver to loose the screw, then open the...alkaline batteries according to power on , if you want to make sure that you do not have the camera's USB cable attached to your photos and videos often so as not to the camera's default settings, please read the instructions of 5 Note: We recommend to download and save your computer...
... Installation NOTE: Before attempting to install the software, make changes to lose them if the battery power becomes too low. Inserting Batteries Open the camera's battery compartment cover (if the screw on the compartment has been fixed, please use a small screwdriver to loose the screw, then open the...alkaline batteries according to power on , if you want to make sure that you do not have the camera's USB cable attached to your photos and videos often so as not to the camera's default settings, please read the instructions of 5 Note: We recommend to download and save your computer...
V15
Page 7
...and click the "Install" button to install the CD installation disk. button. Warning: DO NOT PLUG YOUR CAMERA INTO THE USB PORT UNTIL THE SOFTWARE INSTALLATION HAS BEEN COMPLETELY INSTALLED. the camera software and drivers. A Menu screen will automatically appear. For more installation information click the "Read Me First...!" On the "PhoTags Express" screen, click the "Next" 6 Insert the installation CD into your camera driver. In order to install the Software and drivers to download and edit the photos and videos captured using this...
...and click the "Install" button to install the CD installation disk. button. Warning: DO NOT PLUG YOUR CAMERA INTO THE USB PORT UNTIL THE SOFTWARE INSTALLATION HAS BEEN COMPLETELY INSTALLED. the camera software and drivers. A Menu screen will automatically appear. For more installation information click the "Read Me First...!" On the "PhoTags Express" screen, click the "Next" 6 Insert the installation CD into your camera driver. In order to install the Software and drivers to download and edit the photos and videos captured using this...
V15
Page 10
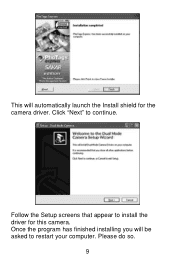
Please do so. 9 Follow the Setup screens that appear to install the driver for the camera driver. This will be asked to restart your computer. Click "Next" to continue. Once the program has finished installing you will automatically launch the Install shield for this camera.
Please do so. 9 Follow the Setup screens that appear to install the driver for the camera driver. This will be asked to restart your computer. Click "Next" to continue. Once the program has finished installing you will automatically launch the Install shield for this camera.
V15
Page 11
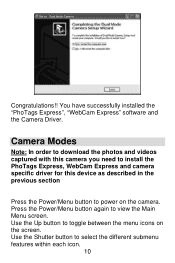
... Note: In order to download the photos and videos captured with this camera you need to install the PhoTags Express, WebCam Express and camera specific driver for this device as described in the previous section Press the Power/Menu button to select the different submenu features within each... icon. 10 Press the Power/Menu button again to toggle between the menu icons on the camera. Congratulations!! Use the Up button to view the Main Menu screen. You have successfully installed the "PhoTags Express", "WebCam Express" software and ...
... Note: In order to download the photos and videos captured with this camera you need to install the PhoTags Express, WebCam Express and camera specific driver for this device as described in the previous section Press the Power/Menu button to select the different submenu features within each... icon. 10 Press the Power/Menu button again to toggle between the menu icons on the camera. Congratulations!! Use the Up button to view the Main Menu screen. You have successfully installed the "PhoTags Express", "WebCam Express" software and ...

V15
Page 12
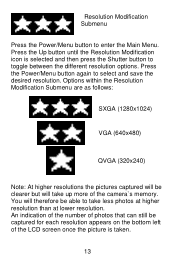
Press the Shutter button to enter the Main Menu. Camera Submenu Press the Power/Menu button to toggle through the following various options within the camera submenu. Below is automatically selected. Press the Power /Menu button to save your choice. By default the camera icon is an explanation for each of the Submenus on the Main Menu. Take Photo 11
Press the Shutter button to enter the Main Menu. Camera Submenu Press the Power/Menu button to toggle through the following various options within the camera submenu. Below is automatically selected. Press the Power /Menu button to save your choice. By default the camera icon is an explanation for each of the Submenus on the Main Menu. Take Photo 11
V15
Page 14
... the desired resolution. An indication of the number of photos that can still be captured for each resolution appears on the bottom left of the camera`s memory. Press the Power/Menu button again to enter the Main Menu.
... the desired resolution. An indication of the number of photos that can still be captured for each resolution appears on the bottom left of the camera`s memory. Press the Power/Menu button again to enter the Main Menu.
V15
Page 16
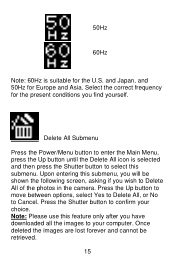
... 50Hz for the U.S. Select the correct frequency for the present conditions you have downloaded all the images to Delete All of the photos in the camera. 50Hz 60Hz Note: 60Hz is selected and then press the Shutter button to select this feature only after you find yourself. Upon entering this submenu...
... 50Hz for the U.S. Select the correct frequency for the present conditions you have downloaded all the images to Delete All of the photos in the camera. 50Hz 60Hz Note: 60Hz is selected and then press the Shutter button to select this feature only after you find yourself. Upon entering this submenu...
V15
Page 17
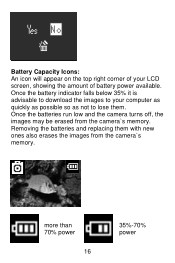
Removing the batteries and replacing them . more than 70% power 16 35%-70% power Once the batteries run low and the camera turns off, the images may be erased from the camera`s memory. Battery Capacity Icons: An icon will appear on the top right corner of your computer as quickly as possible so as not to lose them with new ones also erases the images from the camera`s memory. Once the battery indicator falls below 35% it is advisable to download the images to your LCD screen, showing the amount of battery power available.
Removing the batteries and replacing them . more than 70% power 16 35%-70% power Once the batteries run low and the camera turns off, the images may be erased from the camera`s memory. Battery Capacity Icons: An icon will appear on the top right corner of your computer as quickly as possible so as not to lose them with new ones also erases the images from the camera`s memory. Once the battery indicator falls below 35% it is advisable to download the images to your LCD screen, showing the amount of battery power available.

V15
Page 18
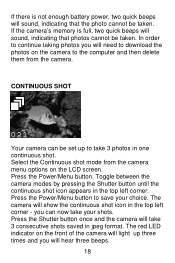
.... 17 If the level of brightness is displayed at the bottom left of the LCD screen. Hold the camera steady and press the shutter button. After each photo is taken the number of the camera will cause the photo to shoot at this resolution is too low, two quick beeps will sound... the photo has been taken. A beep will sound and the red LED indicator on the front of photos left to blur. Do not move the camera until you hear the beep. 5%-35% power less than 5% power Capturing Photos TAKING INDIVIDUAL PHOTOS You can compose your shot using the LCD screen.
.... 17 If the level of brightness is displayed at the bottom left of the LCD screen. Hold the camera steady and press the shutter button. After each photo is taken the number of the camera will cause the photo to shoot at this resolution is too low, two quick beeps will sound... the photo has been taken. A beep will sound and the red LED indicator on the front of photos left to blur. Do not move the camera until you hear the beep. 5%-35% power less than 5% power Capturing Photos TAKING INDIVIDUAL PHOTOS You can compose your shot using the LCD screen.
V15
Page 19
... shots saved in the top left corner - Press the Shutter button once and the camera will show the continuous shot icon in one continuous shot. The camera will take 3 photos in the top left corner. If the camera's memory is not enough battery power, two quick beeps will sound, indicating that photos...the continuous shot icon appears in jpeg format. you can be set up three times and you will need to download the photos on the camera to continue taking photos you will hear three beeps. 18 If there is full, two quick beeps will sound, indicating that the photo cannot...
... shots saved in the top left corner - Press the Shutter button once and the camera will show the continuous shot icon in one continuous shot. The camera will take 3 photos in the top left corner. If the camera's memory is not enough battery power, two quick beeps will sound, indicating that photos...the continuous shot icon appears in jpeg format. you can be set up three times and you will need to download the photos on the camera to continue taking photos you will hear three beeps. 18 If there is full, two quick beeps will sound, indicating that the photo cannot...
V15
Page 20
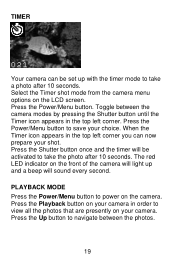
... the top left corner you can be activated to take a photo after 10 seconds. The red LED indicator on the front of the camera will light up and a beep will be set up with the timer mode to take the photo after 10 seconds. PLAYBACK MODE Press the Power/...Menu button to save your shot. Press the Power/Menu button. Toggle between the photos. 19 Press the Up button to navigate between the camera modes by pressing the Shutter button until the Timer icon appears in order to view all the photos that are presently on the...
... the top left corner you can be activated to take a photo after 10 seconds. The red LED indicator on the front of the camera will light up and a beep will be set up with the timer mode to take the photo after 10 seconds. PLAYBACK MODE Press the Power/...Menu button to save your shot. Press the Power/Menu button. Toggle between the photos. 19 Press the Up button to navigate between the camera modes by pressing the Shutter button until the Timer icon appears in order to view all the photos that are presently on the...

V15
Page 21
... photo, or "No" to your computer the photo is deleted from your camera before downloading them to Cancel. Note: If you wish to confirm your camera's memory and will be lost with 2 options. The photo is completely erased from your camera's memory. A Delete single photo icon will go into Sleep Mode automatically after...
... photo, or "No" to your computer the photo is deleted from your camera before downloading them to Cancel. Note: If you wish to confirm your camera's memory and will be lost with 2 options. The photo is completely erased from your camera's memory. A Delete single photo icon will go into Sleep Mode automatically after...
V15
Page 22
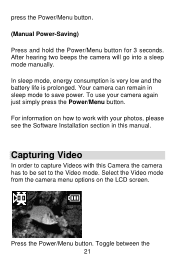
... button. (Manual Power-Saving) Press and hold the Power/Menu button for 3 seconds. Toggle between the 21 Select the Video mode from the camera menu options on how to save power. In sleep mode, energy consumption is very low and the battery life is prolonged. After hearing two beeps... the camera will go into a sleep mode manually. Your camera can remain in this Camera the camera has to be set to capture Videos with your camera again just simply press the Power/Menu button. Press the Power/Menu button. ...
... button. (Manual Power-Saving) Press and hold the Power/Menu button for 3 seconds. Toggle between the 21 Select the Video mode from the camera menu options on how to save power. In sleep mode, energy consumption is very low and the battery life is prolonged. After hearing two beeps... the camera will go into a sleep mode manually. Your camera can remain in this Camera the camera has to be set to capture Videos with your camera again just simply press the Power/Menu button. Press the Power/Menu button. ...
V15
Page 23
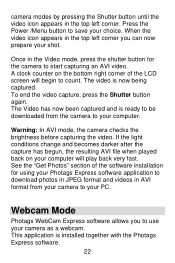
... the brightness before capturing the video. Webcam Mode Photags WebCam Express software allows you can now prepare your shot. A clock counter on your camera as a webcam. The Video has now been captured and is now being captured. When the video icon appears in the top left corner you to... use your computer will begin to save your choice. Press the Power /Menu button to count. camera modes by pressing the Shutter button until the video icon appears in the top left corner. This application is installed together with the Photags Express...
... the brightness before capturing the video. Webcam Mode Photags WebCam Express software allows you can now prepare your shot. A clock counter on your camera as a webcam. The Video has now been captured and is now being captured. When the video icon appears in the top left corner you to... use your computer will begin to save your choice. Press the Power /Menu button to count. camera modes by pressing the Shutter button until the video icon appears in the top left corner. This application is installed together with the Photags Express...
V15
Page 24
To use the WebCam Express software see the "Using your Camera as a Webcam" section further on in this message before you open the software until you see this guide. Everything you do not see the "Your ..." software that you have captured and downloaded with your computer. Important: Do not open the software, the camera will not function properly. 23 If you need to use" pop-up box on your camera. Plug the other end of the USB cable into the USB port of the USB cable into a USB...
To use the WebCam Express software see the "Using your Camera as a Webcam" section further on in this message before you open the software until you see this guide. Everything you do not see the "Your ..." software that you have captured and downloaded with your computer. Important: Do not open the software, the camera will not function properly. 23 If you need to use" pop-up box on your camera. Plug the other end of the USB cable into the USB port of the USB cable into a USB...
V15
Page 25
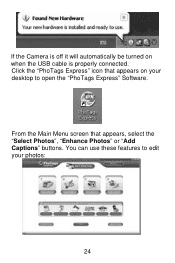
From the Main Menu screen that appears on when the USB cable is off it will automatically be turned on your photos: 24 Click the "PhoTags Express" icon that appears, select the "Select Photos", "Enhance Photos" or "Add Captions" buttons. You can use these features to edit your desktop to open the "PhoTags Express" Software. If the Camera is properly connected.
From the Main Menu screen that appears on when the USB cable is off it will automatically be turned on your photos: 24 Click the "PhoTags Express" icon that appears, select the "Select Photos", "Enhance Photos" or "Add Captions" buttons. You can use these features to edit your desktop to open the "PhoTags Express" Software. If the Camera is properly connected.


