69379M
Page 1
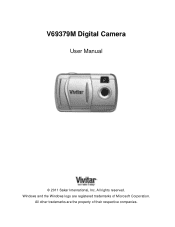
All rights reserved. Windows and the Windows logo are the property of Microsoft Corporation. All other trademarks are registered trademarks of their respective companies. V69379M Digital Camera User Manual © 2011 Sakar International, Inc.
All rights reserved. Windows and the Windows logo are the property of Microsoft Corporation. All other trademarks are registered trademarks of their respective companies. V69379M Digital Camera User Manual © 2011 Sakar International, Inc.
69379M
Page 2
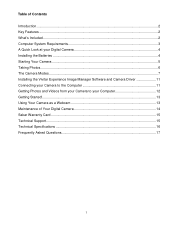
... ...2 What‟s Included ...2 Computer System Requirements 3 A Quick Look at your Digital Camera 4 Installing the Batteries ...4 Starting Your Camera ...5 Taking Photos...6 The Camera Modes ...7 Installing the Vivitar Experience Image Manager Software and Camera Driver 11 Connecting your Camera to the Computer 11 Getting Photos and Videos from your Camera to your Computer 12 Getting Started!...13 Using Your...
... ...2 What‟s Included ...2 Computer System Requirements 3 A Quick Look at your Digital Camera 4 Installing the Batteries ...4 Starting Your Camera ...5 Taking Photos...6 The Camera Modes ...7 Installing the Vivitar Experience Image Manager Software and Camera Driver 11 Connecting your Camera to the Computer 11 Getting Photos and Videos from your Camera to your Computer 12 Getting Started!...13 Using Your...
69379M
Page 3
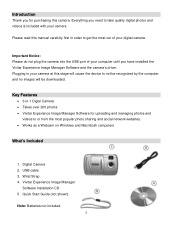
... need to take quality digital photos and videos is included with your camera Please read this manual carefully first in -1 Digial Camera Takes over 200 photos Vivitar Experience Image Manager Software for purchasing this stage will be downloaded. Plugging... in your digital camera. Wrist Strap 4. Vivitar Experience Image Manager Software Installation CD 5. Important Notice: Please do not plug the camera into the USB port of your camera at this camera. Digital Camera 2. USB cable 3. Key Features 3-in...
... need to take quality digital photos and videos is included with your camera Please read this manual carefully first in -1 Digial Camera Takes over 200 photos Vivitar Experience Image Manager Software for purchasing this stage will be downloaded. Plugging... in your digital camera. Wrist Strap 4. Vivitar Experience Image Manager Software Installation CD 5. Important Notice: Please do not plug the camera into the USB port of your camera at this camera. Digital Camera 2. USB cable 3. Key Features 3-in...
69379M
Page 5
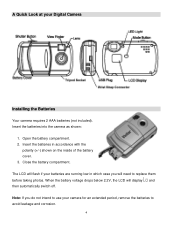
... your batteries are running low in accordance with the polarity (+/-) shown on the inside of the battery cover. 3. Insert the batteries into the camera as shown: 1. Open the battery compartment. 2. Insert the batteries in which case you do not intend to use your Digital... Camera Installing the Batteries Your camera requires 2 AAA batteries (not included). Note: If you will need to replace them before taking photos. Close the battery compartment. The LCD will display...
... your batteries are running low in accordance with the polarity (+/-) shown on the inside of the battery cover. 3. Insert the batteries into the camera as shown: 1. Open the battery compartment. 2. Insert the batteries in which case you do not intend to use your Digital... Camera Installing the Batteries Your camera requires 2 AAA batteries (not included). Note: If you will need to replace them before taking photos. Close the battery compartment. The LCD will display...
69379M
Page 6
... 30 seconds, it automatically switches off. The LCD display indicates the number of this camera you have on and ready for use. 4. See the "Installing the Vivitar Experience Image Manager Software and Camera Driver" section of photos that can be lost when batteries run low. .... Opening the battery compartment and/or removing the batteries will light up to install the Vivitar Experience Image Manager Software and camera specific driver for your camera is not in the camera. Photos may be taken. WARNING: Please download any photos you need to ...
... 30 seconds, it automatically switches off. The LCD display indicates the number of this camera you have on and ready for use. 4. See the "Installing the Vivitar Experience Image Manager Software and Camera Driver" section of photos that can be lost when batteries run low. .... Opening the battery compartment and/or removing the batteries will light up to install the Vivitar Experience Image Manager Software and camera specific driver for your camera is not in the camera. Photos may be taken. WARNING: Please download any photos you need to ...
69379M
Page 7
... to : 1. How to continue taking photos you take the photo. In order to Proceed when your shot using the view finder. Once your camera memory is empty you should delete all the photos and videos from your computer. 2. Thereafter the last two digits will need to take the photo... The photo is approximately 5 feet. 2. The LCD screen will display the number of photos that can be still taken. Download all the photos from you camera to take , the hundreds digit will beep when a photo is full no further photos can be taken until the existing photos have been downloaded and...
... to : 1. How to continue taking photos you take the photo. In order to Proceed when your shot using the view finder. Once your camera memory is empty you should delete all the photos and videos from your computer. 2. Thereafter the last two digits will need to take the photo... The photo is approximately 5 feet. 2. The LCD screen will display the number of photos that can be still taken. Download all the photos from you camera to take , the hundreds digit will beep when a photo is full no further photos can be taken until the existing photos have been downloaded and...

69379M
Page 8
... AVI file. Lift your finger off . Self-Timer 1. Press the Shutter button once - 3 continuous jpeg shots are taken. Press the Shutter button and the camera will appear all the while the video is being taken. 4. The video will be downloaded individually. 7 Press the MODE button for the... button. 3. Note: Photos taken in this mode will be taken. A 10 second count down for the icon to appear on the LCD screen. 2. The Camera Modes Power Off 1. Press the MODE button for the icon to stop shooting the video. 5. Note: The 3 photos taken in Continuous Shot Mode may fail...
... AVI file. Lift your finger off . Self-Timer 1. Press the Shutter button once - 3 continuous jpeg shots are taken. Press the Shutter button and the camera will appear all the while the video is being taken. 4. The video will be downloaded individually. 7 Press the MODE button for the... button. 3. Note: Photos taken in this mode will be taken. A 10 second count down for the icon to appear on the LCD screen. 2. The Camera Modes Power Off 1. Press the MODE button for the icon to stop shooting the video. 5. Note: The 3 photos taken in Continuous Shot Mode may fail...
69379M
Page 9
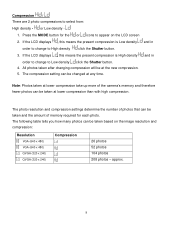
.... 8 Press the MODE button for the icon to select from: High Resolution - Note: Photos taken at higher resolution take up more of the camera‟s memory and therefore less photos can be deleted. 3. Press the Shutter button and the photo counter will be changed at the current resolution and... updated number of photos that can be deleted. 4. If the LCD displays , this means the present resolution is High resolution and in the camera will be reset to show the maximum number of photos that can be taken at the current resolution and compression. The LCD counter will be...
.... 8 Press the MODE button for the icon to select from: High Resolution - Note: Photos taken at higher resolution take up more of the camera‟s memory and therefore less photos can be deleted. 3. Press the Shutter button and the photo counter will be changed at the current resolution and... updated number of photos that can be deleted. 4. If the LCD displays , this means the present resolution is High resolution and in the camera will be reset to show the maximum number of photos that can be taken at the current resolution and compression. The LCD counter will be...
69379M
Page 10
... density click the Shutter button. 4. The photo resolution and compression settings determine the number of photos that can be taken and the amount of the camera‟s memory and therefore fewer photos can be changed at any time. The following table tells you how many photos can be taken at the...
... density click the Shutter button. 4. The photo resolution and compression settings determine the number of photos that can be taken and the amount of the camera‟s memory and therefore fewer photos can be changed at any time. The following table tells you how many photos can be taken at the...
69379M
Page 11
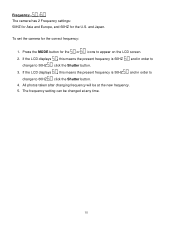
The frequency setting can be at any time. 10 To set the camera for the U.S. If the LCD displays , this means the present frequency is 50HZ and in order to change to 60HZ click the Shutter button. 4. and ... in order to change to appear on the LCD screen. 2. All photos taken after changing frequency will be changed at the new frequency. 5. Frequency - / The camera has 2 Frequency settings: 50HZ for Asia and Europe, and 60HZ for the correct frequency: 1. Press the MODE button for the or icons to 50HZ click...
The frequency setting can be at any time. 10 To set the camera for the U.S. If the LCD displays , this means the present frequency is 50HZ and in order to change to 60HZ click the Shutter button. 4. and ... in order to change to appear on the LCD screen. 2. All photos taken after changing frequency will be changed at the new frequency. 5. Frequency - / The camera has 2 Frequency settings: 50HZ for Asia and Europe, and 60HZ for the correct frequency: 1. Press the MODE button for the or icons to 50HZ click...

69379M
Page 12
... „Install‟ then click „Close‟ once installation is complete. The application automatically opens. Installing the Vivitar Experience Image Manager Software and Camera Driver Warning: Do not plug your computer to open and run the application. On PC: Click the "Close" button...complete. 5. The first time you connect the device to the Computer 1. If you will automatically turn on the Vivitar Experience Image Manager from your camera into your Camera to the computer you closed the application, click on . 4. Connecting your CD-ROM drive. On MAC: Close...
... „Install‟ then click „Close‟ once installation is complete. The application automatically opens. Installing the Vivitar Experience Image Manager Software and Camera Driver Warning: Do not plug your computer to open and run the application. On PC: Click the "Close" button...complete. 5. The first time you connect the device to the Computer 1. If you will automatically turn on the Vivitar Experience Image Manager from your camera into your Camera to the computer you closed the application, click on . 4. Connecting your CD-ROM drive. On MAC: Close...
69379M
Page 13
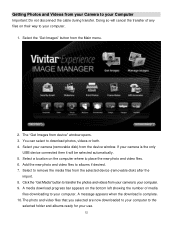
...the device window. Select your computer. 9. Select to remove the media files from your camera to your camera (removable disk) from device" window opens. 3. If your computer. 1. Click the "Get Media" button to your camera is complete. 10. Select a location on their way to transfer the photos and ...12 A media download progress bar appears on the bottom left showing the number of any files on the computer where to your Camera to download photos, videos or both. 4. Select the "Get Images" button from your computer. Getting Photos and Videos from the Main menu. 2....
...the device window. Select your computer. 9. Select to remove the media files from your camera to your camera (removable disk) from device" window opens. 3. If your computer. 1. Click the "Get Media" button to your camera is complete. 10. Select a location on their way to transfer the photos and ...12 A media download progress bar appears on the bottom left showing the number of any files on the computer where to your Camera to download photos, videos or both. 4. Select the "Get Images" button from your computer. Getting Photos and Videos from the Main menu. 2....
69379M
Page 14
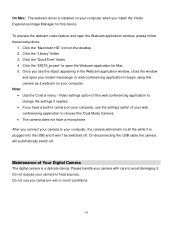
... menu or click the "Take a Tour" button on the camera‟s LCD screen to change the settings if needed. If you install the Vivitar Experience Image Manager Software for this „Dual Mode Camera‟. The camera does not have a microphone. 13 On PC: The webcam ...driver is active and in camera on your web conferencing application to show that support video....
... menu or click the "Take a Tour" button on the camera‟s LCD screen to change the settings if needed. If you install the Vivitar Experience Image Manager Software for this „Dual Mode Camera‟. The camera does not have a microphone. 13 On PC: The webcam ...driver is active and in camera on your web conferencing application to show that support video....
69379M
Page 15
...feature and open the Webcam application for this device. Note: Use the Control menu / Video settings option of Your Digital Camera The digital camera is plugged into the USB and it . Maintenance of this web conferencing application to change the settings if needed. If... you install the Vivitar Experience Image Manager for Mac. 5. On disconnecting the USB cable the camera will remain on your computer, use you see the object appearing in the Webcam application window, close...
...feature and open the Webcam application for this device. Note: Use the Control menu / Video settings option of Your Digital Camera The digital camera is plugged into the USB and it . Maintenance of this web conferencing application to change the settings if needed. If... you install the Vivitar Experience Image Manager for Mac. 5. On disconnecting the USB cable the camera will remain on your computer, use you see the object appearing in the Webcam application window, close...
69379M
Page 16
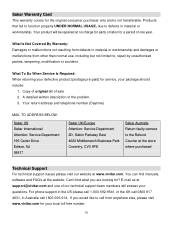
...08817 Sakar UK/Europe Attention: Service Department 2D, Siskin Parkway East 4020 Middlemarch Business Park Coventry, CV3 4PE Sakar Australia Return faulty camera to , repair by unauthorized parties, tampering, modification or accident. What To Do When Service Is Required: When returning your defective product...find what you would like to defects in material or workmanship and damages or malfunctions from anywhere else, please visit www.vivitar.com for the original consumer purchaser only and is not transferable. Your product will answer your questions. Sakar Warranty Card This...
...08817 Sakar UK/Europe Attention: Service Department 2D, Siskin Parkway East 4020 Middlemarch Business Park Coventry, CV3 4PE Sakar Australia Return faulty camera to , repair by unauthorized parties, tampering, modification or accident. What To Do When Service Is Required: When returning your defective product...find what you would like to defects in material or workmanship and damages or malfunctions from anywhere else, please visit www.vivitar.com for the original consumer purchaser only and is not transferable. Your product will answer your questions. Sakar Warranty Card This...
69379M
Page 18
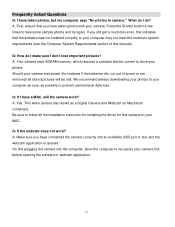
...the minimum system requirements (see the Computer System Requirements section of power or are removed) all stored pictures will the camera work ? Should your MAC. On first plugging the camera into an available USB port or hub and the webcam application is opened. Frequently Asked Questions Q: I don't lose...Q: If the webcam does not work ? What do ? Q: If I do I have taken photos, but my computer says "No photos in camera." Press the Shutter button a few times to follow all the installation instruction for installing the driver for instance if the batteries die, run out of...
...the minimum system requirements (see the Computer System Requirements section of power or are removed) all stored pictures will the camera work ? Should your MAC. On first plugging the camera into an available USB port or hub and the webcam application is opened. Frequently Asked Questions Q: I don't lose...Q: If the webcam does not work ? What do ? Q: If I do I have taken photos, but my computer says "No photos in camera." Press the Shutter button a few times to follow all the installation instruction for installing the driver for instance if the batteries die, run out of...


