Owners Manual
Page 2
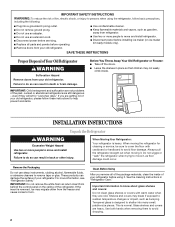
...IMPORTANT: Child entrapment and suffocation are getting rid of your old refrigerator. If you remove all parts and panels before using the refrigerator, follow these instructions to move and install refrigerator. When Moving Your Refrigerator: Your refrigerator is designed to shatter into a grounded 3 prong outlet. ■...bumping. These products can damage the surface of the past. Important information to avoid floor damage. Junked or abandoned refrigerators are heavy. When moving it. Use both hands when removing them to sudden temperature changes or impact, such as...
...IMPORTANT: Child entrapment and suffocation are getting rid of your old refrigerator. If you remove all parts and panels before using the refrigerator, follow these instructions to move and install refrigerator. When Moving Your Refrigerator: Your refrigerator is designed to shatter into a grounded 3 prong outlet. ■...bumping. These products can damage the surface of the past. Important information to avoid floor damage. Junked or abandoned refrigerators are heavy. When moving it. Use both hands when removing them to sudden temperature changes or impact, such as...

Owners Manual
Page 3
...■ All installations must meet local plumbing code requirements. ■ Use copper tubing and check for the water line connections. When installing your refrigerator into a grounded 3 prong outlet. Do not remove ground prong. TOOLS NEEDED: ■ Flat-blade screwdriver 6.35 mm) nut 11.11 mm... an extension cord. Do not use an adapter. Do not use an extension cord. Water Supply Requirements Gather the required tools and parts before starting installation. See "Using the Controls." Do not use a piercing-type or 4.76 mm) saddle valve which reduces water ...
...■ All installations must meet local plumbing code requirements. ■ Use copper tubing and check for the water line connections. When installing your refrigerator into a grounded 3 prong outlet. Do not remove ground prong. TOOLS NEEDED: ■ Flat-blade screwdriver 6.35 mm) nut 11.11 mm... an extension cord. Do not use an adapter. Do not use an extension cord. Water Supply Requirements Gather the required tools and parts before starting installation. See "Using the Controls." Do not use a piercing-type or 4.76 mm) saddle valve which reduces water ...

Owners Manual
Page 5
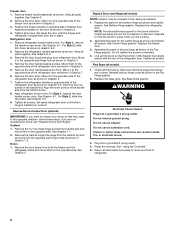
... and keep both doors closed until you may have standard (Style 1) or contour (Style 2) doors. Remove the parts for a right-hand swing refrigerator (hinges factory installed on your doors so that they open -end wrench, flat 2" putty knife. See Graphic 1-1. 2. Remove and discard the black nylon...NOTE: Provide additional support for the top hinge as shown in the Center Hinge graphic. Remove the parts for the doors while the hinges are going to the opposite side. Lift the refrigerator door free from the bottom front of ice. If you want to follow the instructions for the center...
... and keep both doors closed until you may have standard (Style 1) or contour (Style 2) doors. Remove the parts for a right-hand swing refrigerator (hinges factory installed on your doors so that they open -end wrench, flat 2" putty knife. See Graphic 1-1. 2. Remove and discard the black nylon...NOTE: Provide additional support for the top hinge as shown in the Center Hinge graphic. Remove the parts for the doors while the hinges are going to the opposite side. Lift the refrigerator door free from the bottom front of ice. If you want to follow the instructions for the center...
Owners Manual
Page 6
... in place while you are being moved. For Style 1, replace the door handle screw cover. Assemble the parts of the refrigerator door as shown in Graphic 1-2. Refrigerator door 1. See Graphic 6-1. Move them to the opposite side. Move it to the opposite side of the... Move it to the opposite side hinge hole as shown in Graphic 4. 5. Replace the freezer door. 3. Final Steps (all parts together. Replace the refrigerator door. Reinstall the top hinge cover as shown and tighten screws. Reset the controls. Do not use an adapter. Failure to ...
... in place while you are being moved. For Style 1, replace the door handle screw cover. Assemble the parts of the refrigerator door as shown in Graphic 1-2. Refrigerator door 1. See Graphic 6-1. Move them to the opposite side. Move it to the opposite side of the... Move it to the opposite side hinge hole as shown in Graphic 4. 5. Replace the freezer door. 3. Final Steps (all parts together. Replace the refrigerator door. Reinstall the top hinge cover as shown and tighten screws. Reset the controls. Do not use an adapter. Failure to ...
Owners Manual
Page 8
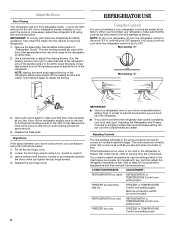
... cabinet to OFF. If you should be sure they close easier, adjust the refrigerator's tilt using a socket or wrench. 3. Adjust the Doors Door Closing Your refrigerator has two front adjustable rollers - The two leveling screws are part of the refrigerator. Align Doors If the space between your food may take several turns of the...
... cabinet to OFF. If you should be sure they close easier, adjust the refrigerator's tilt using a socket or wrench. 3. Adjust the Doors Door Closing Your refrigerator has two front adjustable rollers - The two leveling screws are part of the refrigerator. Align Doors If the space between your food may take several turns of the...
Owners Manual
Page 9
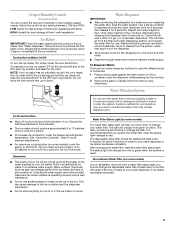
...for 5 seconds, then release it is microbiologically unsafe or of unknown quality without adequate disinfection before turning on some models) If your refrigerator does not have a water filter status light, you know when to ICE PLUS. After changing the water filter, reset the water ...filter status light. Water Dispenser IMPORTANT: ■ After connecting the refrigerator to the OFF (arm up ) position. See "Using the Control(s)." This can damage parts of or in the moisture-sealed crisper. Non-Indicator Water Filter (on the ice maker. Allow ...
...for 5 seconds, then release it is microbiologically unsafe or of unknown quality without adequate disinfection before turning on some models) If your refrigerator does not have a water filter status light, you know when to ICE PLUS. After changing the water filter, reset the water ...filter status light. Water Dispenser IMPORTANT: ■ After connecting the refrigerator to the OFF (arm up ) position. See "Using the Control(s)." This can damage parts of or in the moisture-sealed crisper. Non-Indicator Water Filter (on the ice maker. Allow ...
Owners Manual
Page 10
...Keep the cap to use with the replacement filter. To help avoid corrosion of your stainless steel, keep your refrigerator. Hand wash, rinse, and dry removable parts and interior surfaces thoroughly. If the environment is particularly greasy or dusty, or there is significant pet traffic in ...Explosion Hazard Use nonflammable cleaner. To avoid odor transfer and drying out of the filter. It is part of odors. IMPORTANT: Do not discard the cap. Both the refrigerator and freezer sections defrost automatically. Do not use abrasive or harsh cleaners such as window sprays, ...
...Keep the cap to use with the replacement filter. To help avoid corrosion of your stainless steel, keep your refrigerator. Hand wash, rinse, and dry removable parts and interior surfaces thoroughly. If the environment is particularly greasy or dusty, or there is significant pet traffic in ...Explosion Hazard Use nonflammable cleaner. To avoid odor transfer and drying out of the filter. It is part of odors. IMPORTANT: Do not discard the cap. Both the refrigerator and freezer sections defrost automatically. Do not use abrasive or harsh cleaners such as window sprays, ...

Owners Manual
Page 13
... water? See "Water Supply Requirements." See "Water Dispenser." ■ Recently changed water filter? Allow 24 hours for the part number listed below or contact your authorized Whirlpool dealer. The first glass of water. ■ Refrigerator connected to a cold water pipe. Hold the glass under the dispenser long enough? Flush the water system. Make...
... water? See "Water Supply Requirements." See "Water Dispenser." ■ Recently changed water filter? Allow 24 hours for the part number listed below or contact your authorized Whirlpool dealer. The first glass of water. ■ Refrigerator connected to a cold water pipe. Hold the glass under the dispenser long enough? Flush the water system. Make...

Owners Manual
Page 14
.... 2009 suggested retail price of Chlorine Taste and Odor and Particulate Class III. Use replacement filter L200V / NL120V, part #4396701. 2009 suggested retail price of the substances listed below. The concentration of the indicated substances in water entering the system was reduced to a concentration ...
.... 2009 suggested retail price of Chlorine Taste and Odor and Particulate Class III. Use replacement filter L200V / NL120V, part #4396701. 2009 suggested retail price of the substances listed below. The concentration of the indicated substances in water entering the system was reduced to a concentration ...

Owners Manual
Page 15
... concentration of Chlorine Taste and Odor and Particulate Class I particle size: >0.5 to change without adequate disinfection before or after the system. Use replacement cartridge NLC120V, part #4396701. 2009 suggested retail price of the substances listed below. Prices are subject to This system has been tested according to 108 fibers/L††...
... concentration of Chlorine Taste and Odor and Particulate Class I particle size: >0.5 to change without adequate disinfection before or after the system. Use replacement cartridge NLC120V, part #4396701. 2009 suggested retail price of the substances listed below. Prices are subject to This system has been tested according to 108 fibers/L††...
Owners Manual
Page 16
... or Whirlpool Canada LP (hereafter "Whirlpool") will pay for Factory Specified Parts and repair labor to correct defects in your correspondence. Proof of original purchase date is used in the country in accordance with electrical or plumbing codes, or use of the refrigerator compartment. This major appliance is intended to be easily determined. 12...
... or Whirlpool Canada LP (hereafter "Whirlpool") will pay for Factory Specified Parts and repair labor to correct defects in your correspondence. Proof of original purchase date is used in the country in accordance with electrical or plumbing codes, or use of the refrigerator compartment. This major appliance is intended to be easily determined. 12...

Warranty
Page 1
... removal and reinstallation of original purchase date is not installed in an inaccessible location or is required to the appliance. 9. Replacement parts or repair labor on how to correct the installation of your home. 8. Some states and provinces do not allow the exclusion ...number and serial number on the label, located on the duration of implied warranties of products not approved by a Whirlpool designated service company. Service calls to refrigerator or freezer product failures. 7. Some states and provinces do not allow limitations on the inside wall of God, ...
... removal and reinstallation of original purchase date is not installed in an inaccessible location or is required to the appliance. 9. Replacement parts or repair labor on how to correct the installation of your home. 8. Some states and provinces do not allow the exclusion ...number and serial number on the label, located on the duration of implied warranties of products not approved by a Whirlpool designated service company. Service calls to refrigerator or freezer product failures. 7. Some states and provinces do not allow limitations on the inside wall of God, ...


