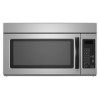

Use & Care Guide
Page 1
...messages in this section. ■ Some products such as whole eggs in accordance with the provided Installation Instructions. ■ Read all safety messages. See "GROUNDING INSTRUCTIONS" found in this manual and on the front facing of burns, electric shock, fire, injury to persons, or exposure...in the shell and sealed containers - Para obtener acceso a "Manual del usuario de la combinación microondas campana" en español, o para obtener información adicional acerca de su producto, visite: www.whirlpool.com Tenga listo su número de modelo completo. Always ...
...messages in this section. ■ Some products such as whole eggs in accordance with the provided Installation Instructions. ■ Read all safety messages. See "GROUNDING INSTRUCTIONS" found in this manual and on the front facing of burns, electric shock, fire, injury to persons, or exposure...in the shell and sealed containers - Para obtener acceso a "Manual del usuario de la combinación microondas campana" en español, o para obtener información adicional acerca de su producto, visite: www.whirlpool.com Tenga listo su número de modelo completo. Always ...

Use & Care Guide
Page 5
...is replaceable. Replace bulb, close bulb cover, and secure with screw. ■ Cavity light: The cavity light bulb is located behind the door. Manual Cooking/Stage Cooking Preset Reheating Touch COOK TIME, touch number pads to enter time, touch COOK POWER (if not 100%), touch number pads to ..., and area where the door touches the frame clean. Touch COOK, select food item, enter quantity if needed , then touch the Start control. Installing/Replacing Filters and Light Bulbs NOTE: A filter status indicator (on some models): mild soap and water, then rinse with clean water and dry with...
...is replaceable. Replace bulb, close bulb cover, and secure with screw. ■ Cavity light: The cavity light bulb is located behind the door. Manual Cooking/Stage Cooking Preset Reheating Touch COOK TIME, touch number pads to enter time, touch COOK POWER (if not 100%), touch number pads to ..., and area where the door touches the frame clean. Touch COOK, select food item, enter quantity if needed , then touch the Start control. Installing/Replacing Filters and Light Bulbs NOTE: A filter status indicator (on some models): mild soap and water, then rinse with clean water and dry with...
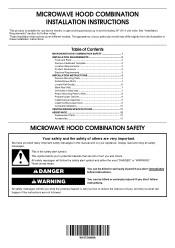
Installation Guide
Page 1
... (91.4 cm) wide. This is , tell you how to Wall 8 Prepare Upper Cabinet 8 Install Damper Assembly 9 Install the Microwave Oven 9 Complete Installation 10 VENTING DESIGN SPECIFICATIONS 11 ASSISTANCE 12 Replacement Parts 12 Accessories 12 MICROWAVE HOOD COMBINATION SAFETY Your safety and... Requirements 3 INSTALLATION INSTRUCTIONS 4 Remove Mounting Plate 4 Rotate Blower Motor 4 Locate Wall Stud(s 6 Mark Rear Wall 7 Drill Holes in Rear Wall 7 Attach Mounting Plate to reduce the chance of your particular model may differ slightly from the illustration in this manual and on ...
... (91.4 cm) wide. This is , tell you how to Wall 8 Prepare Upper Cabinet 8 Install Damper Assembly 9 Install the Microwave Oven 9 Complete Installation 10 VENTING DESIGN SPECIFICATIONS 11 ASSISTANCE 12 Replacement Parts 12 Accessories 12 MICROWAVE HOOD COMBINATION SAFETY Your safety and... Requirements 3 INSTALLATION INSTRUCTIONS 4 Remove Mounting Plate 4 Rotate Blower Motor 4 Locate Wall Stud(s 6 Mark Rear Wall 7 Drill Holes in Rear Wall 7 Attach Mounting Plate to reduce the chance of your particular model may differ slightly from the illustration in this manual and on ...


