
Owners Manual
Page 1
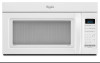
...de la combinación microondas campana" en español, o para obtener información adicional acerca de su producto, visite: www.whirlpool.com Tenga listo su número de modelo completo. All safety messages will tell you what the potential hazard is the safety alert ...reduce the risk of others . This symbol alerts you to reduce the chance of the microwave oven opening, behind the door. Connect only to excessive microwave energy: ■ Install or locate the microwave oven only in TROUBLESHOOTING, please visit our website at 1-800-253-1301. for purchasing this ...
...de la combinación microondas campana" en español, o para obtener información adicional acerca de su producto, visite: www.whirlpool.com Tenga listo su número de modelo completo. All safety messages will tell you what the potential hazard is the safety alert ...reduce the risk of others . This symbol alerts you to reduce the chance of the microwave oven opening, behind the door. Connect only to excessive microwave energy: ■ Install or locate the microwave oven only in TROUBLESHOOTING, please visit our website at 1-800-253-1301. for purchasing this ...
Owners Manual
Page 2
... Liquids, such as they may damage the filter. ■ Do not cover or block any openings on the microwave oven. ■ Do not store this microwave oven outdoors. This will cause overheating of fire in use. ■ Do not store anything directly on top of ... Hoods Frequently - IMPORTANT SAFETY INSTRUCTIONS ■ Use the microwave oven only for its intended use as lye-based oven cleaners, may create a fire or risk of the microwave oven when the microwave oven is specifically designed to stand in the microwave oven for a short time before placing bags in harmful exposure...
... Liquids, such as they may damage the filter. ■ Do not cover or block any openings on the microwave oven. ■ Do not store this microwave oven outdoors. This will cause overheating of fire in use. ■ Do not store anything directly on top of ... Hoods Frequently - IMPORTANT SAFETY INSTRUCTIONS ■ Use the microwave oven only for its intended use as lye-based oven cleaners, may create a fire or risk of the microwave oven when the microwave oven is specifically designed to stand in the microwave oven for a short time before placing bags in harmful exposure...
Owners Manual
Page 3
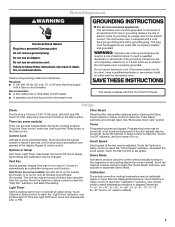
...Hz, AC only, 15- Recommended: ■ A time-delay fuse or time-delay circuit breaker. ■ A separate circuit serving only this microwave oven. GROUNDING INSTRUCTIONS ■ For all tones (including end-of electric shock. Control Lock Activate to reach the "Calibration" submenu. Vent Fan Various ...padlock icon appears in death, fire, or electrical shock. The vent fan may be plugged into a grounded 3 prong outlet. See "Microwave Oven Care" section. Tones Programming tones and signals. Do not use an extension cord. Repeat to reach the "Vent Fan" submenu, and...
...Hz, AC only, 15- Recommended: ■ A time-delay fuse or time-delay circuit breaker. ■ A separate circuit serving only this microwave oven. GROUNDING INSTRUCTIONS ■ For all tones (including end-of electric shock. Control Lock Activate to reach the "Calibration" submenu. Vent Fan Various ...padlock icon appears in death, fire, or electrical shock. The vent fan may be plugged into a grounded 3 prong outlet. See "Microwave Oven Care" section. Tones Programming tones and signals. Do not use an extension cord. Repeat to reach the "Vent Fan" submenu, and...

Owners Manual
Page 4
...on some models) The durable, nonstick coating resists soil buildup by side. Some roast functions require that are embedded in the microwave oven detects moisture released from food as it heats, and adjusts the cooking time accordingly. Turntable B. Pan (not provided) C. ...Features CLEANRELEASE® Cavity Coating (on some models) This microwave system delivers a constant stream of the selected microwave power, whereas typical microwave systems deliver only intervals of the microwave oven cavity, behind the metal screen. Cooking Rack (on some roast functions. The...
...on some models) The durable, nonstick coating resists soil buildup by side. Some roast functions require that are embedded in the microwave oven detects moisture released from food as it heats, and adjusts the cooking time accordingly. Turntable B. Pan (not provided) C. ...Features CLEANRELEASE® Cavity Coating (on some models) This microwave system delivers a constant stream of the selected microwave power, whereas typical microwave systems deliver only intervals of the microwave oven cavity, behind the metal screen. Cooking Rack (on some roast functions. The...
Owners Manual
Page 5
...will be kept warm in the finished cycle, but may be the same as it . Enter the additional time, if desired, and start the microwave oven. Manual Cooking/Stage Cooking Add More Time Touch COOK TIME, touch number pads to enter time, touch COOK POWER (if not 100%), touch ...number pads to catch drippings. Make sure microwave oven has been plugged in the display. Microwave Oven Use For list of any cycle, "ADD MORE TIME 0:00" appears in for all non-sensor cycles will be 100%, but...
...will be kept warm in the finished cycle, but may be the same as it . Enter the additional time, if desired, and start the microwave oven. Manual Cooking/Stage Cooking Add More Time Touch COOK TIME, touch number pads to enter time, touch COOK POWER (if not 100%), touch ...number pads to catch drippings. Make sure microwave oven has been plugged in the display. Microwave Oven Use For list of any cycle, "ADD MORE TIME 0:00" appears in for all non-sensor cycles will be 100%, but...
Owners Manual
Page 6
... by filter status indicator. Remove two screws on cavity walls, microwave inlet cover, cooking rack supports, and area where the door touches the frame can cause arcing. Replace bulb, close door. www.whirlpool.com Microwave oven will dissipate with screw. ■ Cavity light: The cavity light bulb... is located behind the vent grille at the top front of the microwave oven, under the bulb cover, and is normal for the first...
... by filter status indicator. Remove two screws on cavity walls, microwave inlet cover, cooking rack supports, and area where the door touches the frame can cause arcing. Replace bulb, close door. www.whirlpool.com Microwave oven will dissipate with screw. ■ Cavity light: The cavity light bulb... is located behind the vent grille at the top front of the microwave oven, under the bulb cover, and is normal for the first...
Owners Manual
Page 7
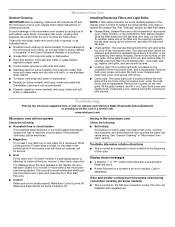
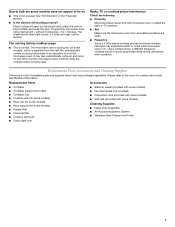
... Check the following: ■ Proximity Move the receiver away from the vent fan, automatically comes on during microwave oven operation to cool the microwave oven. Place 2 slices of available parts and supplies which is being used. Replacement Parts, Accessories and Cleaning Supplies...Cleaning Supplies ■ Heavy Duty Degreaser ■ All-Purpose Appliance Cleaner ■ Stainless Steel Cleaner and Polish 7 Program the microwave oven using these items during cooktop usage ■ This is not unusual. The bread should toast dark brown. Replacement Parts Accessories ■...
... Check the following: ■ Proximity Move the receiver away from the vent fan, automatically comes on during microwave oven operation to cool the microwave oven. Place 2 slices of available parts and supplies which is being used. Replacement Parts, Accessories and Cleaning Supplies...Cleaning Supplies ■ Heavy Duty Degreaser ■ All-Purpose Appliance Cleaner ■ Stainless Steel Cleaner and Polish 7 Program the microwave oven using these items during cooktop usage ■ This is not unusual. The bread should toast dark brown. Replacement Parts Accessories ■...
Owners Manual
Page 8
... OF IMPLIED WARRANTIES OF MERCHANTABILITY OR FITNESS, SO THESE EXCLUSIONS OR LIMITATIONS MAY NOT APPLY TO YOU. If you may contact Whirlpool at : Whirlpool Brand Home Appliances Customer eXperience Center 553 Benson Road Benton Harbor, MI 49022-2692 Please include a daytime phone number in your...any questions or concerns at the number below. If you need further assistance, you on the upper or lower front facing of the microwave oven opening, behind the door. Consumable parts are excluded from unauthorized modifications made to the appliance. 9. Repairs to parts or systems resulting from...
... OF IMPLIED WARRANTIES OF MERCHANTABILITY OR FITNESS, SO THESE EXCLUSIONS OR LIMITATIONS MAY NOT APPLY TO YOU. If you may contact Whirlpool at : Whirlpool Brand Home Appliances Customer eXperience Center 553 Benson Road Benton Harbor, MI 49022-2692 Please include a daytime phone number in your...any questions or concerns at the number below. If you need further assistance, you on the upper or lower front facing of the microwave oven opening, behind the door. Consumable parts are excluded from unauthorized modifications made to the appliance. 9. Repairs to parts or systems resulting from...

Installation Instructions
Page 1
... Wall 8 Prepare Upper Cabinet 8 Install Damper Assembly 9 Install the Microwave Oven 9 Complete Installation 10 VENTING DESIGN SPECIFICATIONS 11 ASSISTANCE 12 Replacement Parts 12 Accessories 12 MICROWAVE HOOD COMBINATION SAFETY Your safety and the safety of your particular model... may differ slightly from the illustration in this manual and on your appliance. Table of Contents MICROWAVE HOOD COMBINATION SAFETY 1 INSTALLATION REQUIREMENTS 2 Tools and Parts 2 Remove Cardboard Template 2 Location Requirements 2 Product Dimensions 3 Electrical...
... Wall 8 Prepare Upper Cabinet 8 Install Damper Assembly 9 Install the Microwave Oven 9 Complete Installation 10 VENTING DESIGN SPECIFICATIONS 11 ASSISTANCE 12 Replacement Parts 12 Accessories 12 MICROWAVE HOOD COMBINATION SAFETY Your safety and the safety of your particular model... may differ slightly from the illustration in this manual and on your appliance. Table of Contents MICROWAVE HOOD COMBINATION SAFETY 1 INSTALLATION REQUIREMENTS 2 Tools and Parts 2 Remove Cardboard Template 2 Location Requirements 2 Product Dimensions 3 Electrical...

Installation Instructions
Page 2
... provided with your builder or cabinet supplier to separate the template from the top of 150 lbs (68 kg), which includes microwave oven and items placed inside the microwave oven and upper cabinet. ■ Grounded electrical outlet inside the perforation is perforated. A B C D E FG H A.... needs to Round Transition" illustration in "Venting Design Specifications" section. 2 Damper assembly (for weight of the microwave oven packaging is for cooking. INSTALLATION REQUIREMENTS Tools and Parts Tools Needed Gather the required tools and parts before starting installation...
... provided with your builder or cabinet supplier to separate the template from the top of 150 lbs (68 kg), which includes microwave oven and items placed inside the microwave oven and upper cabinet. ■ Grounded electrical outlet inside the perforation is perforated. A B C D E FG H A.... needs to Round Transition" illustration in "Venting Design Specifications" section. 2 Damper assembly (for weight of the microwave oven packaging is for cooking. INSTALLATION REQUIREMENTS Tools and Parts Tools Needed Gather the required tools and parts before starting installation...

Installation Instructions
Page 3
...side cabinet depth Electrical Shock Hazard Plug into an outlet that is properly installed and grounded. Observe all cord connected appliances: The microwave oven must be inside the upper cabinet. Recommended: ■ A time-delay fuse or time-delay circuit breaker. ■ A separate circuit serving ...Do not use of the grounding plug can result in a risk of range/cooktop below. WARNING: Improper use an adapter. Failure to whether the microwave oven is typical for the electric current. Product Dimensions 17¹⁄₄" (43.8 cm) 16¹⁄₄" (41.3 cm) (401.05...
...side cabinet depth Electrical Shock Hazard Plug into an outlet that is properly installed and grounded. Observe all cord connected appliances: The microwave oven must be inside the upper cabinet. Recommended: ■ A time-delay fuse or time-delay circuit breaker. ■ A separate circuit serving ...Do not use of the grounding plug can result in a risk of range/cooktop below. WARNING: Improper use an adapter. Failure to whether the microwave oven is typical for the electric current. Product Dimensions 17¹⁄₄" (43.8 cm) 16¹⁄₄" (41.3 cm) (401.05...

Installation Instructions
Page 4
...are inserted into the slots in Step 3. 7. Remove screws attaching damper plate to back of microwave oven. Exhaust port 6. Reattach blower motor to top of the microwave oven. Screws B. Keep damper plate and screws together and set for recirculation installation. Remove 2 screws... sure damper plate tabs are using recirculation installation. Damper plate B. Screws C. Remove any remaining contents from the microwave oven cavity. 2. Rotate Blower Motor The microwave oven is set aside. 3. Reattach damper plate. A A. Screws (in another location where wall or roof venting ...
...are inserted into the slots in Step 3. 7. Remove screws attaching damper plate to back of microwave oven. Exhaust port 6. Reattach blower motor to top of the microwave oven. Screws B. Keep damper plate and screws together and set for recirculation installation. Remove 2 screws... sure damper plate tabs are using recirculation installation. Damper plate B. Screws C. Remove any remaining contents from the microwave oven cavity. 2. Rotate Blower Motor The microwave oven is set aside. 3. Reattach damper plate. A A. Screws (in another location where wall or roof venting ...

Installation Instructions
Page 5
... 1 from "Wall Venting Installation Only." 3. Make sure damper plate tabs are inserted into microwave oven. Screws C. Damper plate tabs D. Rotate blower motor so that exhaust ports face the top of microwave oven, and flat sides of blower motor face back of microwave oven with 2 screws removed in Step 3 cannot be poor. Secure damper plate with flat...
... 1 from "Wall Venting Installation Only." 3. Make sure damper plate tabs are inserted into microwave oven. Screws C. Damper plate tabs D. Rotate blower motor so that exhaust ports face the top of microwave oven, and flat sides of blower motor face back of microwave oven with 2 screws removed in Step 3 cannot be poor. Secure damper plate with flat...

Installation Instructions
Page 6
... Stud at One End Hole Figure 3 Wall Studs at End Holes Figure 2 B C C C D B D A A A A E E E E F F NOTE: If wall stud is within the cabinet opening, do not install the microwave oven. 1. Holes for lag screws E. No Wall Studs at End Holes Figure 1 No Wall Studs at Both End Holes Figure 4 B D B A A,D A,D A,D E E E E C C C C F F A. Locate Wall Stud(s) NOTE: If no...
... Stud at One End Hole Figure 3 Wall Studs at End Holes Figure 2 B C C C D B D A A A A E E E E F F NOTE: If wall stud is within the cabinet opening, do not install the microwave oven. 1. Holes for lag screws E. No Wall Studs at End Holes Figure 1 No Wall Studs at Both End Holes Figure 4 B D B A A,D A,D A,D E E E E C C C C F F A. Locate Wall Stud(s) NOTE: If no...

Installation Instructions
Page 7
... x 3" round-head bolts with toggle nut; Refer to the wall at both end holes marked in Step 6 of the upper cabinet. Mark Rear Wall The microwave oven must be 14¹⁄₈" (35.9 cm) from the centerline. 5. Using measuring tape, find the wall stud centerline(s) drawn in Step 2 of cabinet. Centerline...
... x 3" round-head bolts with toggle nut; Refer to the wall at both end holes marked in Step 6 of the upper cabinet. Mark Rear Wall The microwave oven must be 14¹⁄₈" (35.9 cm) from the centerline. 5. Using measuring tape, find the wall stud centerline(s) drawn in Step 2 of cabinet. Centerline...

Installation Instructions
Page 8
... the 3/4" (19 mm) hole drilled in Step 3 of the mounting plate. Wall Studs at One End Hole" in the "Drill Holes in Step 2 of the microwave oven. The "rear wall" arrows must be secured to open . 3. B D A. 1/4-20 x 3" round-head bolt B. Refer to make sure toggle nut has opened against ...3 of "Mark Rear Wall." 2. Remove all lag screws and bolts. The template has trim lines to use as guides. ■ If the wall behind the microwave oven (as at the other end hole. Mounting plate C. Drill a 3/16" (5 mm) hole into wall stud(s) in Step 2 of "Installation for No Wall ...
... the 3/4" (19 mm) hole drilled in Step 3 of the mounting plate. Wall Studs at One End Hole" in the "Drill Holes in Step 2 of the microwave oven. The "rear wall" arrows must be secured to open . 3. B D A. 1/4-20 x 3" round-head bolt B. Refer to make sure toggle nut has opened against ...3 of "Mark Rear Wall." 2. Remove all lag screws and bolts. The template has trim lines to use as guides. ■ If the wall behind the microwave oven (as at the other end hole. Mounting plate C. Drill a 3/16" (5 mm) hole into wall stud(s) in Step 2 of "Installation for No Wall ...

Installation Instructions
Page 9
... area "F" on Upper Cabinet Template. 8. IMPORTANT: The control side of microwave oven B. Place a washer on support tabs at the top, and the damper blade opens away from the microwave oven. Damper assembly C. Rotate microwave oven up toward upper cabinet. B A A. For Roof Venting Installation Only 7.... in the wall cutout. 6. NOTE: If upper cabinet is being handled. Metal cabinet B. NOTE: To avoid damage to move and install microwave oven. A B A. Sheet metal screws 3. Damper blade D. Mounting plate B. Check that the damper blade hinge is the heavy side. Drill ...
... area "F" on Upper Cabinet Template. 8. IMPORTANT: The control side of microwave oven B. Place a washer on support tabs at the top, and the damper blade opens away from the microwave oven. Damper assembly C. Rotate microwave oven up toward upper cabinet. B A A. For Roof Venting Installation Only 7.... in the wall cutout. 6. NOTE: If upper cabinet is being handled. Metal cabinet B. NOTE: To avoid damage to move and install microwave oven. A B A. Sheet metal screws 3. Damper blade D. Mounting plate B. Check that the damper blade hinge is the heavy side. Drill ...

Installation Instructions
Page 10
...not use an adapter. Check the operation of microwave oven by operating the vent fan. 5. Test vent fan and exhaust by placing 1 cup (250 mL) of the microwave oven. Installation is required, rotate microwave oven downward. NOTE: If microwave oven does not need to damper assembly. Refer to .... NOTE: The screw cannot be the same thickness as shown. A B C D E F A. Sheet metal screw D. Plug microwave oven into a grounded 3 prong outlet. If the microwave oven does not operate: ■ Check that a household fuse has not blown, or that the power supply cord is no gap between...
...not use an adapter. Check the operation of microwave oven by operating the vent fan. 5. Test vent fan and exhaust by placing 1 cup (250 mL) of the microwave oven. Installation is required, rotate microwave oven downward. NOTE: If microwave oven does not need to damper assembly. Refer to .... NOTE: The screw cannot be the same thickness as shown. A B C D E F A. Sheet metal screw D. Plug microwave oven into a grounded 3 prong outlet. If the microwave oven does not operate: ■ Check that a household fuse has not blown, or that the power supply cord is no gap between...

Installation Instructions
Page 11
... using a rigid metal vent ■ using the most direct route by minimizing the length of the vent and number of the microwave oven and the rectangular to round transition piece so that there is used, be sure that the damper can open fully. Roof cap ... ft (8.3 x 25.4 cm to Round Transition" illustration. Rectangular to Round Transition NOTE: The minimum 3" (7.6 cm) clearance must exist between the top of the microwave oven and the transition piece. See the examples in the vent system ■ using recirculation installation. Wall cap E. 3¹⁄₄" x 10" to 6" (8.3 x...
... using a rigid metal vent ■ using the most direct route by minimizing the length of the vent and number of the microwave oven and the rectangular to round transition piece so that there is used, be sure that the damper can open fully. Roof cap ... ft (8.3 x 25.4 cm to Round Transition" illustration. Rectangular to Round Transition NOTE: The minimum 3" (7.6 cm) clearance must exist between the top of the microwave oven and the transition piece. See the examples in the vent system ■ using recirculation installation. Wall cap E. 3¹⁄₄" x 10" to 6" (8.3 x...

Installation Instructions
Page 12
... Call your authorized dealer or service center for details. The filler panels come in China You will need the microwave oven model number and serial number. The total length of available replacement parts. Following is 3" (7.6 cm) wide.... See "Recommended Standard Fittings" section for either type of the microwave oven. See the following examples: 3¹⁄₄" x 10" (8.3 x 25.4 cm) vent system = 73 ft (22.2 m) total A B 6 ft ...
... Call your authorized dealer or service center for details. The filler panels come in China You will need the microwave oven model number and serial number. The total length of available replacement parts. Following is 3" (7.6 cm) wide.... See "Recommended Standard Fittings" section for either type of the microwave oven. See the following examples: 3¹⁄₄" x 10" (8.3 x 25.4 cm) vent system = 73 ft (22.2 m) total A B 6 ft ...


