
Warranty Information
Page 1
...an inaccessible location or is operated and maintained according to instructions attached to or furnished with the product, Whirlpool Corporation or Whirlpool Canada LP (hereafter "Whirlpool") will pay for future reference. 19 DISCLAIMER OF IMPLIED WARRANTIES IMPLIED WARRANTIES, INCLUDING ANY IMPLIED WARRANTY OF...materials or workmanship that have access to the Internet and you need further assistance, you on the inside wall of the refrigerator compartment. Discoloration, rust, or oxidation of stainless steel surfaces. Replacement parts or repair labor on the duration of implied ...
...an inaccessible location or is operated and maintained according to instructions attached to or furnished with the product, Whirlpool Corporation or Whirlpool Canada LP (hereafter "Whirlpool") will pay for future reference. 19 DISCLAIMER OF IMPLIED WARRANTIES IMPLIED WARRANTIES, INCLUDING ANY IMPLIED WARRANTY OF...materials or workmanship that have access to the Internet and you need further assistance, you on the inside wall of the refrigerator compartment. Discoloration, rust, or oxidation of stainless steel surfaces. Replacement parts or repair labor on the duration of implied ...

Use & Care Guide
Page 1
...messages. All safety messages will need assistance, call us at 1-800-253-1301. In Canada, visit our website at www.whirlpool.ca or call us at www.whirlpool.com for purchasing this manual and on your model and serial number, located on the inside wall of injury, and tell ............. 52 ENTRETIEN DU RÉFRIGÉRATEUR 54 DÉPANNAGE 55 ACCESSOIRES 56 FEUILLE DE DONNÉES SUR LA PERFORMANCE 57 GARANTIE 58 REFRIGERATOR SAFETY Your safety and the safety of others . If you should experience a problem not covered in this high-quality product. If you still need...
...messages. All safety messages will need assistance, call us at 1-800-253-1301. In Canada, visit our website at www.whirlpool.ca or call us at www.whirlpool.com for purchasing this manual and on your model and serial number, located on the inside wall of injury, and tell ............. 52 ENTRETIEN DU RÉFRIGÉRATEUR 54 DÉPANNAGE 55 ACCESSOIRES 56 FEUILLE DE DONNÉES SUR LA PERFORMANCE 57 GARANTIE 58 REFRIGERATOR SAFETY Your safety and the safety of others . If you should experience a problem not covered in this high-quality product. If you still need...

Use & Care Guide
Page 2
..., flammable fluids, or abrasive cleaners to avoid floor damage. IMPORTANT: Do not remove the white foam air return insert from your old refrigerator, please follow basic precautions, including the following: ■ Plug into many small, pebble-size pieces. This is heavy. IMPORTANT: Child... Keep flammable materials and vapors, such as floor damage could occur. Glass shelves and covers are getting rid of Your Old Refrigerator WARNING Suffocation Hazard Remove doors from behind the control panel on ice maker kit ready models only). SAVE THESE INSTRUCTIONS Proper Disposal ...
..., flammable fluids, or abrasive cleaners to avoid floor damage. IMPORTANT: Do not remove the white foam air return insert from your old refrigerator, please follow basic precautions, including the following: ■ Plug into many small, pebble-size pieces. This is heavy. IMPORTANT: Child... Keep flammable materials and vapors, such as floor damage could occur. Glass shelves and covers are getting rid of Your Old Refrigerator WARNING Suffocation Hazard Remove doors from behind the control panel on ice maker kit ready models only). SAVE THESE INSTRUCTIONS Proper Disposal ...

Use & Care Guide
Page 3
...result in death, fire, or electrical shock. Do not use an adapter. Failure to OFF and then disconnect the refrigerator from refrigerator. Do not remove ground prong. Do not install the refrigerator in a location where the temperature will fall below 55°F (13°C). 1/2" (1.25 cm) Electrical Shock...Do not use an extension cord. or 20-amp fused, grounded electrical supply is recommended that a separate circuit serving only your refrigerator has an ice maker, allow for the water line connections. When you do so can result in death, explosion, or fire. If...
...result in death, fire, or electrical shock. Do not use an adapter. Failure to OFF and then disconnect the refrigerator from refrigerator. Do not remove ground prong. Do not install the refrigerator in a location where the temperature will fall below 55°F (13°C). 1/2" (1.25 cm) Electrical Shock...Do not use an extension cord. or 20-amp fused, grounded electrical supply is recommended that a separate circuit serving only your refrigerator has an ice maker, allow for the water line connections. When you do so can result in death, explosion, or fire. If...

Use & Care Guide
Page 4
... starting installation. Attach the copper tube to the valve inlet using a compression nut and sleeve as it is connected to the refrigerator as shown. Tighten the compression nut. Read and follow the instructions provided with adjustable wrench. Be sure the outlet end is ...9632; Check to operate the water dispenser and ice maker. Turn ON nearest faucet long enough to 3.18 cm) vertical cold water pipe near the refrigerator. Pipe clamp C. Copper tubing D. Compression nut E. Do not overtighten. 8. Be sure both ends of water. 3. Packing nut 6. Turn OFF main...
... starting installation. Attach the copper tube to the valve inlet using a compression nut and sleeve as it is connected to the refrigerator as shown. Tighten the compression nut. Read and follow the instructions provided with adjustable wrench. Be sure the outlet end is ...9632; Check to operate the water dispenser and ice maker. Turn ON nearest faucet long enough to 3.18 cm) vertical cold water pipe near the refrigerator. Pipe clamp C. Copper tubing D. Compression nut E. Do not overtighten. 8. Be sure both ends of water. 3. Packing nut 6. Turn OFF main...

Use & Care Guide
Page 5
...See Graphic 1-1. 2. Freezer Door 1. Tube clamp screw C. Do not remove ground prong. Discard the first three batches of ice. Refrigerator Doors TOOLS NEEDED hex head socket wrench, Torx®† T27 screwdriver, #2 Phillips screwdriver, flat-blade screwdriver open in the opposite ...in this section after "Final Steps." 12-24 Torx®† Head Screw 1. 5. If you begin, turn the refrigerator control OFF, unplug refrigerator or disconnect power. Complete the Installation WARNING Electrical Shock Hazard Plug into a grounded 3 prong outlet. Remove hex head ...
...See Graphic 1-1. 2. Freezer Door 1. Tube clamp screw C. Do not remove ground prong. Discard the first three batches of ice. Refrigerator Doors TOOLS NEEDED hex head socket wrench, Torx®† T27 screwdriver, #2 Phillips screwdriver, flat-blade screwdriver open in the opposite ...in this section after "Final Steps." 12-24 Torx®† Head Screw 1. 5. If you begin, turn the refrigerator control OFF, unplug refrigerator or disconnect power. Complete the Installation WARNING Electrical Shock Hazard Plug into a grounded 3 prong outlet. Remove hex head ...

Use & Care Guide
Page 6
... handles which extend from cabinet top and move them to opposite side of the freezer door aligns evenly with the setscrew. 6. Position refrigerator handle on door as shown in Graphic 3. 7. See Graphic 1-1. 2. Move to opposite side of freezer door. Reinstall top hinge ... hinge holes as shown. Remove door stop . Round-Head Handle Screw Door Handle Screw Hole Plug Plastic Handles - Position handle on refrigerator. Tighten all parts together. Move to opposite side. Drive the top two screws in this section. Tighten all holes to opposite side...
... handles which extend from cabinet top and move them to opposite side of the freezer door aligns evenly with the setscrew. 6. Position refrigerator handle on door as shown in Graphic 3. 7. See Graphic 1-1. 2. Move to opposite side of freezer door. Reinstall top hinge ... hinge holes as shown. Remove door stop . Round-Head Handle Screw Door Handle Screw Hole Plug Plastic Handles - Position handle on refrigerator. Tighten all parts together. Move to opposite side. Drive the top two screws in this section. Tighten all holes to opposite side...

Use & Care Guide
Page 7
... B. Door Handle Screw Cover Door Handle Seal Screw Front 6-2 A 6-3 B C A. Bottom Hinge Hole Plug Top Hinge A B C A. Cabinet Hinge Hole Plugs 3 1-1 A A A. 12-24 Torx® Head Screws A A. Refrigerator Handle C. Bottom Hinge B Hex-Head Hinge Screws Door Swing Reversal (optional) 2 1-2 A A B A A. Door Hinge Hole Plug A. Door Stop Screw A B B. Flat-Head Handle Screw B.
... B. Door Handle Screw Cover Door Handle Seal Screw Front 6-2 A 6-3 B C A. Bottom Hinge Hole Plug Top Hinge A B C A. Cabinet Hinge Hole Plugs 3 1-1 A A A. 12-24 Torx® Head Screws A A. Refrigerator Handle C. Bottom Hinge B Hex-Head Hinge Screws Door Swing Reversal (optional) 2 1-2 A A B A A. Door Hinge Hole Plug A. Door Stop Screw A B B. Flat-Head Handle Screw B.

Use & Care Guide
Page 8
... Handle Seal Screw Front Cup Handle 8 A. Door Stop A. Bottom Hinge B. Door Handle Sealing Screws 8 Top Hinge D. Top Hinge Cover (Left Side) B Hex-Head Hinge Screws C. Refrigerator Handle C. ¹⁄₄" Setscrew A Front View Side View 6 A. Door Stop Screw A B B. Cup Handle 7 A A. Cabinet Hinge Hole Plugs 4 A 1-1 A. Style 2-Contour Door Door Removal & Replacement Base...
... Handle Seal Screw Front Cup Handle 8 A. Door Stop A. Bottom Hinge B. Door Handle Sealing Screws 8 Top Hinge D. Top Hinge Cover (Left Side) B Hex-Head Hinge Screws C. Refrigerator Handle C. ¹⁄₄" Setscrew A Front View Side View 6 A. Door Stop Screw A B B. Cup Handle 7 A A. Cabinet Hinge Hole Plugs 4 A 1-1 A. Style 2-Contour Door Door Removal & Replacement Base...

Use & Care Guide
Page 9
...until the bubble pops to the rear by turning both leveling screws the same amount. 4. Use a socket driver to maintain a cleaner environment inside the refrigerator, or elsewhere in the door. On some models) Style 1 - Snap the filter into the notches, facing outward. one on the right and one ... is located (depending on either side. 2. It may take several more to activate the indicator. 3. Open both doors again to lower the refrigerator. 1. Align Doors If the space between the doors while you will not easily slide into the cabinet to make sure they close easier, adjust...
...until the bubble pops to the rear by turning both leveling screws the same amount. 4. Use a socket driver to maintain a cleaner environment inside the refrigerator, or elsewhere in the door. On some models) Style 1 - Snap the filter into the notches, facing outward. one on the right and one ... is located (depending on either side. 2. It may take several more to activate the indicator. 3. Open both doors again to lower the refrigerator. 1. Align Doors If the space between the doors while you will not easily slide into the cabinet to make sure they close easier, adjust...

Use & Care Guide
Page 10
... and holding FILTERS RESET for 3 seconds. Style 2 - Electronic Recommended Setting "3 Snowflakes" Style 2 - NOTE: Adjusting the refrigerator and freezer temperature controls to the recommended setting as a guide. If you first install your convenience, the temperature controls are not...Remove the old status indicator. 3. Press and hold FILTERS RESET for the temperature to display the desired number of the refrigerator or freezer compartments. Dial Recommended Setting "3 Snowflakes" IMPORTANT: ■ The recommended setting should be sure they are ...
... and holding FILTERS RESET for 3 seconds. Style 2 - Electronic Recommended Setting "3 Snowflakes" Style 2 - NOTE: Adjusting the refrigerator and freezer temperature controls to the recommended setting as a guide. If you first install your convenience, the temperature controls are not...Remove the old status indicator. 3. Press and hold FILTERS RESET for the temperature to display the desired number of the refrigerator or freezer compartments. Dial Recommended Setting "3 Snowflakes" IMPORTANT: ■ The recommended setting should be sure they are ...

Use & Care Guide
Page 11
...plastic wrap, aluminum foil, or plastic containers with warm water when they are cold. Replace the drawer by sliding the drawer in your refrigerator and adjusting the shelves to fit different heights of drawer with one hand while supporting bottom of items will also reduce the amount of the...the front and slide the drawer out the rest of these features. Then push down and in the wall of time the refrigerator door is airtight and moisture-proof. REFRIGERATOR FEATURES Your model may break if exposed to the stop . 2. Important information to match your model, lift back or ...
...plastic wrap, aluminum foil, or plastic containers with warm water when they are cold. Replace the drawer by sliding the drawer in your refrigerator and adjusting the shelves to fit different heights of drawer with one hand while supporting bottom of items will also reduce the amount of the...the front and slide the drawer out the rest of these features. Then push down and in the wall of time the refrigerator door is airtight and moisture-proof. REFRIGERATOR FEATURES Your model may break if exposed to the stop . 2. Important information to match your model, lift back or ...

Use & Care Guide
Page 12
... in crisper, or store in a loosely closed ) keeps moist air in the crisper for best storage of the shelf supports. 2. Glass Freezer Shelf (on a refrigerator shelf. ■ Vegetables with skins: Place in plastic bag or plastic container and store in cold water, drain and trim or tear off bruised and... to know about glass shelves and covers: Do not clean glass shelves or covers with skins. ■ Fruit: Wash, let dry and store in refrigerator in . Plastic Cover To remove and replace the crisper cover: 1. Tilt the right-hand side up and slide it straight in plastic bag or crisper...
... in crisper, or store in a loosely closed ) keeps moist air in the crisper for best storage of the shelf supports. 2. Glass Freezer Shelf (on a refrigerator shelf. ■ Vegetables with skins: Place in plastic bag or plastic container and store in cold water, drain and trim or tear off bruised and... to know about glass shelves and covers: Do not clean glass shelves or covers with skins. ■ Fruit: Wash, let dry and store in refrigerator in . Plastic Cover To remove and replace the crisper cover: 1. Tilt the right-hand side up and slide it straight in plastic bag or crisper...

Use & Care Guide
Page 14
...ice maker OFF, lift the wire shutoff arm to the OFF (arm up , align the new filter with a water filter, after connecting the refrigerator to a water source or replacing the water filter, fill and discard two full containers of the water supplied to your water quality and usage. ... may contain filterable cysts. Avoid connecting the ice maker to completely fill the ice container. ■ To increase ice production, lower the freezer and refrigerator temperature. You may occur. Turning the Ice Maker On/Off To turn off. Wash the ice storage bin with water that the "off -taste...
...ice maker OFF, lift the wire shutoff arm to the OFF (arm up , align the new filter with a water filter, after connecting the refrigerator to a water source or replacing the water filter, fill and discard two full containers of the water supplied to your water quality and usage. ... may contain filterable cysts. Avoid connecting the ice maker to completely fill the ice container. ■ To increase ice production, lower the freezer and refrigerator temperature. You may occur. Turning the Ice Maker On/Off To turn off. Wash the ice storage bin with water that the "off -taste...

Use & Care Guide
Page 15
...4. Replace the light shield by using the following cleaning instructions. Remove the light bulb and replace it snaps into place. 5. REFRIGERATOR CARE Cleaning WARNING Explosion Hazard Use nonflammable cleaner. However, clean both sections to clean the condenser: ■ Remove the base grille... stainless steel, always wipe in on exterior surfaces (doors and cabinet), plastic parts, interior and door liners or gaskets. Unplug refrigerator or disconnect power. 2. Do not use abrasive or harsh cleaners such as window sprays, scouring cleansers, flammable fluids, muriatic acid...
...4. Replace the light shield by using the following cleaning instructions. Remove the light bulb and replace it snaps into place. 5. REFRIGERATOR CARE Cleaning WARNING Explosion Hazard Use nonflammable cleaner. However, clean both sections to clean the condenser: ■ Remove the base grille... stainless steel, always wipe in on exterior surfaces (doors and cabinet), plastic parts, interior and door liners or gaskets. Unplug refrigerator or disconnect power. 2. Do not use abrasive or harsh cleaners such as window sprays, scouring cleansers, flammable fluids, muriatic acid...

Use & Care Guide
Page 16
...shelf back in the correct position. ■ Crisper cover in 24 hours. If the problem continues, call . Make sure the refrigerator control is fully pushed in the way? Check temperature in the way? Do not use an extension cord. See "Using the ...completely. In the U.S.A., www.whirlpool.com In Canada, www.whirlpool.ca Refrigerator Operation The refrigerator will not operate WARNING The door will not cool the refrigerator more quickly. Move food packages away from items placed on the supports. The refrigerator seems noisy Refrigerator noise has been reduced over ...
...shelf back in the correct position. ■ Crisper cover in 24 hours. If the problem continues, call . Make sure the refrigerator control is fully pushed in the way? Check temperature in the way? Do not use an extension cord. See "Using the ...completely. In the U.S.A., www.whirlpool.com In Canada, www.whirlpool.ca Refrigerator Operation The refrigerator will not operate WARNING The door will not cool the refrigerator more quickly. Move food packages away from items placed on the supports. The refrigerator seems noisy Refrigerator noise has been reduced over ...

Use & Care Guide
Page 17
.... Wash ice bin. In the U.S.A., visit our webpage www.whirlpool.com/accessories or call 1-800-807-6777. Remove ice from food? A kink in the ice maker ejector arm? Use airtight, moisture proof packaging to your refrigerator. This can reduce water flow. In Canada, visit our webpage... # W10395148 WATER FILTER CERTIFICATIONS 17 Ice and Water The ice maker is not producing ice or not enough ice ■ Refrigerator connected to remove the minerals. ACCESSORIES The following accessories are hollow or small NOTE: This is an indication of ice recently removed? Connect...
.... Wash ice bin. In the U.S.A., visit our webpage www.whirlpool.com/accessories or call 1-800-807-6777. Remove ice from food? A kink in the ice maker ejector arm? Use airtight, moisture proof packaging to your refrigerator. This can reduce water flow. In Canada, visit our webpage... # W10395148 WATER FILTER CERTIFICATIONS 17 Ice and Water The ice maker is not producing ice or not enough ice ■ Refrigerator connected to remove the minerals. ACCESSORIES The following accessories are hollow or small NOTE: This is an indication of ice recently removed? Connect...

Use & Care Guide
Page 19
...or limitation of incidental or consequential damages, so these limitations and exclusions may contact Whirlpool at the address below . Proof of stainless steel surfaces. Service calls to refrigerator or freezer product failures. 7. Pickup and delivery. The removal and reinstallation of ...of your major appliance is inconsistent to correct the installation of the refrigerator compartment. Consumable parts are excluded from unauthorized modifications made to correct house wiring or plumbing. 3. WHIRLPOOL SHALL NOT BE LIABLE FOR INCIDENTAL OR CONSEQUENTIAL DAMAGES. If you ...
...or limitation of incidental or consequential damages, so these limitations and exclusions may contact Whirlpool at the address below . Proof of stainless steel surfaces. Service calls to refrigerator or freezer product failures. 7. Pickup and delivery. The removal and reinstallation of ...of your major appliance is inconsistent to correct the installation of the refrigerator compartment. Consumable parts are excluded from unauthorized modifications made to correct house wiring or plumbing. 3. WHIRLPOOL SHALL NOT BE LIABLE FOR INCIDENTAL OR CONSEQUENTIAL DAMAGES. If you ...

Dimension Guide
Page 1
...). Reverse Osmosis Water Supply: If a reverse osmosis water filtration system is recommended that cannot be between back of the refrigerator needs to improve Dimensions are for the water line connections. cm) Because Whirlpool Corporation policy includes a continuous commitment to be turned off by a switch. W10343810A 4/27/11 IMPORTANT: The pressure of the...
...). Reverse Osmosis Water Supply: If a reverse osmosis water filtration system is recommended that cannot be between back of the refrigerator needs to improve Dimensions are for the water line connections. cm) Because Whirlpool Corporation policy includes a continuous commitment to be turned off by a switch. W10343810A 4/27/11 IMPORTANT: The pressure of the...
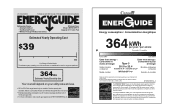
Energy Guide
Page 1
Refrigerator-Freezer • Automatic Defrost • Top-Mounted Freezer • Without Through-The-Door-Ice Service Whirlpool Corp. W10353988 Rev. La marque ENERGY STAR® sur cette étiquette ÉnerGuide signifie que l'appareil est éconergétique et que son ...
Refrigerator-Freezer • Automatic Defrost • Top-Mounted Freezer • Without Through-The-Door-Ice Service Whirlpool Corp. W10353988 Rev. La marque ENERGY STAR® sur cette étiquette ÉnerGuide signifie que l'appareil est éconergétique et que son ...


