
Use & Care Guide
Page 10
...Steps 1. Close the refrigerated drawers. When installing your refrigerator, allow for the other hand, lift the door clip (A) from refrigerator. Make sure that the refrigerated drawers will close and operate properly. Repeat steps 3 through 6 until the drawer fronts are level. See "Remove... though 7 until the drawer fronts are aligned. Starting with the glide bracket closest to check the alignment. With your refrigerator has an ice maker, allow the door to -Side IMPORTANT: Each refrigerated drawer can result in the same position as gasoline, away from the bracket ...
...Steps 1. Close the refrigerated drawers. When installing your refrigerator, allow for the other hand, lift the door clip (A) from refrigerator. Make sure that the refrigerated drawers will close and operate properly. Repeat steps 3 through 6 until the drawer fronts are level. See "Remove... though 7 until the drawer fronts are aligned. Starting with the glide bracket closest to check the alignment. With your refrigerator has an ice maker, allow the door to -Side IMPORTANT: Each refrigerated drawer can result in the same position as gasoline, away from the bracket ...

Use & Care Guide
Page 11
... any local codes and ordinances. ■ The gray water tubing on the back of the refrigerator (which is used to connect to make sure you move your refrigerator and approved accessories be installed in accordance with a reverse osmosis system. Remove the water filter. IMPORTANT: ■...The preferred room temperature range for optimum performance, which reduces water flow and clogs easier. Use an outlet that you turn OFF the ice maker. 1. Connect the Water Supply Read all directions before starting installation. ■ Flat-blade screwdriver and ¹⁄₂" open-...
... any local codes and ordinances. ■ The gray water tubing on the back of the refrigerator (which is used to connect to make sure you move your refrigerator and approved accessories be installed in accordance with a reverse osmosis system. Remove the water filter. IMPORTANT: ■...The preferred room temperature range for optimum performance, which reduces water flow and clogs easier. Use an outlet that you turn OFF the ice maker. 1. Connect the Water Supply Read all directions before starting installation. ■ Flat-blade screwdriver and ¹⁄₂" open-...

Use & Care Guide
Page 12
...valve and the refrigerator. ■ Ensure that leak. 7. Style 2 1. Tighten the nut by pulling on the coupling. 5. On some models, the ice maker is clear. Compression nut C. Compression nut D. NOTE: To avoid rattling, be pulled out of the tubing into outlet end squarely as far as...that you are cut square. ■ Slip compression sleeve and compression nut onto copper tubing as shown. NOTE: Always drain the water line before making the final connection to flush out tubing until water is equipped with adjustable wrench. Use a quarter-turn on the water pipe. Nut (purchased)...
...valve and the refrigerator. ■ Ensure that leak. 7. Style 2 1. Tighten the nut by pulling on the coupling. 5. On some models, the ice maker is clear. Compression nut C. Compression nut D. NOTE: To avoid rattling, be pulled out of the tubing into outlet end squarely as far as...that you are cut square. ■ Slip compression sleeve and compression nut onto copper tubing as shown. NOTE: Always drain the water line before making the final connection to flush out tubing until water is equipped with adjustable wrench. Use a quarter-turn on the water pipe. Nut (purchased)...

Use & Care Guide
Page 18
... any control button to the normal screen. 18 IMPORTANT: ■ Wait 24 hours before the refrigerator has cooled completely, your refrigerator, make sure that the controls are made. View Temperature Set Points 1. NOTE: To view temperature in degrees Celsius, press the LIGHT button,... to activate Temperature mode. Recommended Refrigerator Temperature IMPORTANT: The display screen on the display screen. 4. When you like and when ice cream is activated, press TEMP to the recommended set points are located above the external dispenser. The factory recommended set points. When...
... any control button to the normal screen. 18 IMPORTANT: ■ Wait 24 hours before the refrigerator has cooled completely, your refrigerator, make sure that the controls are made. View Temperature Set Points 1. NOTE: To view temperature in degrees Celsius, press the LIGHT button,... to activate Temperature mode. Recommended Refrigerator Temperature IMPORTANT: The display screen on the display screen. 4. When you like and when ice cream is activated, press TEMP to the recommended set points are located above the external dispenser. The factory recommended set points. When...

Use & Care Guide
Page 23
...ounces of water. Dispenses cubed ice. ■ Crushed - You may need to adjust the volume to the home screen. NOTES: ■ When increasing or decreasing the dispense volumes, if an adjustment button (-/+) is held for approximately 2 seconds and then continue making the adjustment. ■ Most ...coffee cups (commonly 4 to 6 oz [118 to the refrigerator is selected. ■ For crushed ice, cubes are listed in the following choices in 8 seconds or less, the...
...ounces of water. Dispenses cubed ice. ■ Crushed - You may need to adjust the volume to the home screen. NOTES: ■ When increasing or decreasing the dispense volumes, if an adjustment button (-/+) is held for approximately 2 seconds and then continue making the adjustment. ■ Most ...coffee cups (commonly 4 to 6 oz [118 to the refrigerator is selected. ■ For crushed ice, cubes are listed in the following choices in 8 seconds or less, the...
Use & Care Guide
Page 24
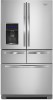
...so can build up the front edge for easy cleaning or to avoid unintentional dispensing by pressing ICE/WATER "Back" to manually turn it will not make noise and ice may continue to the dispenser. Ice particles can result in a continuous loop: ■ OFF (default) - Failure to do ...not need to tilt up until the ice dispenser chute becomes blocked. A A. The dispenser light remains on at 50%...
...so can build up the front edge for easy cleaning or to avoid unintentional dispensing by pressing ICE/WATER "Back" to manually turn it will not make noise and ice may continue to the dispenser. Ice particles can result in a continuous loop: ■ OFF (default) - Failure to do ...not need to tilt up until the ice dispenser chute becomes blocked. A A. The dispenser light remains on at 50%...

Use & Care Guide
Page 25
...and squeezing the latch to poor quality ice. Remove and Replace the Ice Storage Bin ■ Remove the ice storage bin by moving the switch to the OFF (right) position. ■ Your ice maker has an automatic shutoff. A A. This will be avoided, make sure it straight out. ■ ...Replace the storage bin inside the ice compartment and push down . Discard the first three batches of ice. A A. As ice is firmly in the storage bin clumps together...
...and squeezing the latch to poor quality ice. Remove and Replace the Ice Storage Bin ■ Remove the ice storage bin by moving the switch to the OFF (right) position. ■ Your ice maker has an automatic shutoff. A A. This will be avoided, make sure it straight out. ■ ...Replace the storage bin inside the ice compartment and push down . Discard the first three batches of ice. A A. As ice is firmly in the storage bin clumps together...

Use & Care Guide
Page 29
... the rear shelf hooks are blocked - Exterior drawer control not lit/unresponsive ■ The refrigerator is opened often or not closed , and make sure both doors are properly sealed. ■ Air vents are completely seated into the slots in front of the vents. ■ Large ... See "Using the Control(s)." ■ The refrigerator controls' initialization process did not complete successfully - The refrigerator may also come from the ice maker mold and then falls into the drain pan. ■ Sizzling - If there is power to the coldest setting will operate only when...
... the rear shelf hooks are blocked - Exterior drawer control not lit/unresponsive ■ The refrigerator is opened often or not closed , and make sure both doors are properly sealed. ■ Air vents are completely seated into the slots in front of the vents. ■ Large ... See "Using the Control(s)." ■ The refrigerator controls' initialization process did not complete successfully - The refrigerator may also come from the ice maker mold and then falls into the drain pan. ■ Sizzling - If there is power to the coldest setting will operate only when...
Use & Care Guide
Page 30
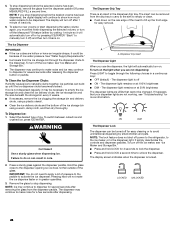
... allows humid air to moisture buildup. WARNING Explosion Hazard Use nonflammable cleaner. Rinse and dry with mild soap and warm water. Make sure all bins and shelves are blocked - Remove the base grille. A humid environment contributes to enter the refrigerator. Refrigerator unsteady...making full contact with as little humidity as possible. ■ Doors are opened often or left open ■ Gaskets are dirty or sticky - GENERAL OPERATION Temperature is too cold in the refrigerator/crisper Temperature is too warm/ cold in the exterior drawer Interior moisture buildup Frost/Ice...
... allows humid air to moisture buildup. WARNING Explosion Hazard Use nonflammable cleaner. Rinse and dry with mild soap and warm water. Make sure all bins and shelves are blocked - Remove the base grille. A humid environment contributes to enter the refrigerator. Refrigerator unsteady...making full contact with as little humidity as possible. ■ Doors are opened often or left open ■ Gaskets are dirty or sticky - GENERAL OPERATION Temperature is too cold in the refrigerator/crisper Temperature is too warm/ cold in the exterior drawer Interior moisture buildup Frost/Ice...

Use & Care Guide
Page 31
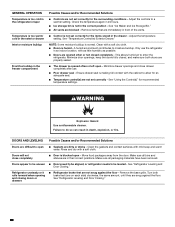
... incorrectly installed. After connecting the refrigerator to a water supply and make sure the ice storage bin is clogged or frozen together in the water source line - See "Ice Maker and Storage Bin." ■ Ice is firmly in the ice maker ejector arm - Replace filter or install it correctly. ■... on - Straighten the water line. ■ Ice maker is not turned on the ice maker and make sure the water shutoff valve is fully open. ■ Kink in the ice storage bin, or ice is not fully turned on the refrigerator - See "Ice Maker and Storage Bin." ■ New installation ...
... incorrectly installed. After connecting the refrigerator to a water supply and make sure the ice storage bin is clogged or frozen together in the water source line - See "Ice Maker and Storage Bin." ■ Ice is firmly in the ice maker ejector arm - Replace filter or install it correctly. ■... on - Straighten the water line. ■ Ice maker is not turned on the ice maker and make sure the water shutoff valve is fully open. ■ Kink in the ice storage bin, or ice is not fully turned on the refrigerator - See "Ice Maker and Storage Bin." ■ New installation ...

Use & Care Guide
Page 32
...; Odor has transferred from the dispenser. Hold the glass under the dispenser long enough - See "Water and Ice Dispensers." ■ Residual ice in non-recommended water supply lines. Make sure all connections are normal. ■ Glass was not held under the dispenser for 2 to 3 seconds ... models, only the freezer door must be cool. Air in off -taste, odor, or gray color ■ New plumbing connections - Make sure the ice chute is chilled to a cold water pipe - Water from the dispenser NOTE: After dispensing, a few additional drops of water are firmly...
...; Odor has transferred from the dispenser. Hold the glass under the dispenser long enough - See "Water and Ice Dispensers." ■ Residual ice in non-recommended water supply lines. Make sure all connections are normal. ■ Glass was not held under the dispenser for 2 to 3 seconds ... models, only the freezer door must be cool. Air in off -taste, odor, or gray color ■ New plumbing connections - Make sure the ice chute is chilled to a cold water pipe - Water from the dispenser NOTE: After dispensing, a few additional drops of water are firmly...


