
Systems Administrator Guide
Page 21
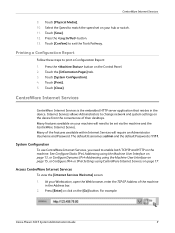
...allows Administrators to match the speed set via the machine and the CentreWare Internet Service. At your hub or switch. 11. The default Username is admin and the default Password is the embedded HTTP server application that resides in the Address bar. 2. See Configure Static IPv4 Addressing using the Machine User ... Services Welcome] screen: 1. Touch [Physical Media]. 10. Touch [System Configuration]. 4. Many of the machine in the device. Touch [Save]. 12. For example: Xerox Phaser 3635 System Administration Guide 9 CentreWare Internet Services 9. Touch [Print]. 5.
...allows Administrators to match the speed set via the machine and the CentreWare Internet Service. At your hub or switch. 11. The default Username is admin and the default Password is the embedded HTTP server application that resides in the Address bar. 2. See Configure Static IPv4 Addressing using the Machine User ... Services Welcome] screen: 1. Touch [Physical Media]. 10. Touch [System Configuration]. 4. Many of the machine in the device. Touch [Save]. 12. For example: Xerox Phaser 3635 System Administration Guide 9 CentreWare Internet Services 9. Touch [Print]. 5.

Systems Administrator Guide
Page 22
... Trusted Certificate Authorities in the Address bar. 2. To change the default administrator password to Internet Services. NOTE: Generally, longer amounts of seconds that a user is not compromised. The default is the maximum number of simultaneous connections that can be connected (...[Maintenance] link. 10 Xerox Phaser 3635 System Administration Guide Click on the [Protocols] link. 6. Press [Enter]. 3. Enter a number from a connected user before terminating the connection. Enter the required number of clients that you change the admin password: 1. At your Workstation...
... Trusted Certificate Authorities in the Address bar. 2. To change the default administrator password to Internet Services. NOTE: Generally, longer amounts of seconds that a user is not compromised. The default is the maximum number of simultaneous connections that can be connected (...[Maintenance] link. 10 Xerox Phaser 3635 System Administration Guide Click on the [Protocols] link. 6. Press [Enter]. 3. Enter a number from a connected user before terminating the connection. Enter the required number of clients that you change the admin password: 1. At your Workstation...

Systems Administrator Guide
Page 70
... (SMB Server / Workstation) is 139). 58 Xerox Phaser 3635 System Administration Guide Continue to be used as a Network Scanning location (Repository) for scanned documents. Click on the [Network Scanning] link. 6. NOTE: If the Default File Destination has previously been configured, click on... [Login]. 17. Optional Step: Enter a name to the scan directory. If prompted, enter the Administrator's User ID [admin] and Password [1111], and click on [Edit]. 8. Create a User account and password for the User...
... (SMB Server / Workstation) is 139). 58 Xerox Phaser 3635 System Administration Guide Continue to be used as a Network Scanning location (Repository) for scanned documents. Click on the [Network Scanning] link. 6. NOTE: If the Default File Destination has previously been configured, click on... [Login]. 17. Optional Step: Enter a name to the scan directory. If prompted, enter the Administrator's User ID [admin] and Password [1111], and click on [Edit]. 8. Create a User account and password for the User...
Systems Administrator Guide
Page 71
... Scanning] link. e) Click on the [Properties] tab. Xerox Phaser 3635 System Administration Guide 59 Enter the name of the Server. 2. Enter the Login Name and Password in the Address bar. If prompted, enter the Administrator's User ID [admin] and Password [1111], and click on the [Apply] button to access... the Scan folder. 15. The CGI script is used. 12. Click on [Login]. 18. HTTP/HTTPS Information Checklist Before starting the Installation procedure, please ensure that the default port setting is ...
... Scanning] link. e) Click on the [Properties] tab. Xerox Phaser 3635 System Administration Guide 59 Enter the name of the Server. 2. Enter the Login Name and Password in the Address bar. If prompted, enter the Administrator's User ID [admin] and Password [1111], and click on the [Apply] button to access... the Scan folder. 15. The CGI script is used. 12. Click on [Login]. 18. HTTP/HTTPS Information Checklist Before starting the Installation procedure, please ensure that the default port setting is ...
Systems Administrator Guide
Page 73
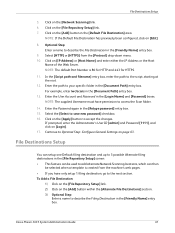
...1 filing destination, go to describe the Filing Destination in the [Friendly Name] entry box. 9. If prompted, enter the Administrator's User ID [admin] and Password [1111], and click on the [Add] button within the [Alternate File Destinations] section. 3) Optional Step: Enter a name to the next ...can setup one Default filing destination and up to 3 possible Alternate filing destinations in the [Document Path] entry box. Optional Step: Enter a name to the script, starting at the root. 12. Xerox Phaser 3635 System Administration Guide 61 Enter the path to save new password] checkbox. 16...
...1 filing destination, go to describe the Filing Destination in the [Friendly Name] entry box. 9. If prompted, enter the Administrator's User ID [admin] and Password [1111], and click on the [Add] button within the [Alternate File Destinations] section. 3) Optional Step: Enter a name to the next ...can setup one Default filing destination and up to 3 possible Alternate filing destinations in the [Document Path] entry box. Optional Step: Enter a name to the script, starting at the root. 12. Xerox Phaser 3635 System Administration Guide 61 Enter the path to save new password] checkbox. 16...

Systems Administrator Guide
Page 77
...shown at the machine, but is reviewed later in length. If prompted, enter the Administrator's User ID [admin] and Password [1111], and click on the [Fax] checkbox. 2. Xerox Phaser 3635 System Administration Guide 65 Ensure that you to add document management fields to send the fax at the ... software to search, file and distribute jobs based on [Delayed Send] in the [Add Fax Number] box within the Fax Recipients area. 4. The Default Value will see [Fax] as a filing destination service. These instructions describe how to add fax numbers to build a Fax Distribution List. 5. See ...
...shown at the machine, but is reviewed later in length. If prompted, enter the Administrator's User ID [admin] and Password [1111], and click on the [Fax] checkbox. 2. Xerox Phaser 3635 System Administration Guide 65 Ensure that you to add document management fields to send the fax at the ... software to search, file and distribute jobs based on [Delayed Send] in the [Add Fax Number] box within the Fax Recipients area. 4. The Default Value will see [Fax] as a filing destination service. These instructions describe how to add fax numbers to build a Fax Distribution List. 5. See ...
Systems Administrator Guide
Page 79
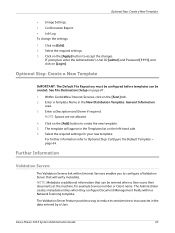
... template. To change the settings: 1. Optional Step: Create a New Template IMPORTANT: The Default File Repository must be configured before templates can be created. Click on the [Add] button to Optional Step: Configure ...Default Template - Select the required settings for example Invoice number or Client name. NOTE: Metadata is additional information that will appear in the Templates list on [Login]. Xerox Phaser 3635 System Administration Guide 67 Click on [Edit]. 2. The template will verify metadata. If prompted, enter the Administrator's User ID [admin] and Password...
... template. To change the settings: 1. Optional Step: Create a New Template IMPORTANT: The Default File Repository must be configured before templates can be created. Click on the [Add] button to Optional Step: Configure ...Default Template - Select the required settings for example Invoice number or Client name. NOTE: Metadata is additional information that will appear in the Templates list on [Login]. Xerox Phaser 3635 System Administration Guide 67 Click on [Edit]. 2. The template will verify metadata. If prompted, enter the Administrator's User ID [admin] and Password...
Systems Administrator Guide
Page 80
... menu. 10. NOTE: The default Port Number is fully functioning on the network using TCP/IP and HTTP. 2. Enter the Path to accept the changes. This determines when the server will proceed. If prompted, enter the Administrator's User ID [admin] and Password [1111], and click on the... [Validation Servers] link. 7. Ensure that the Machine is 80 for HTTP and 443 for HTTPS. 11. Press [Enter]. 3. Click on [Login]. 68 Xerox Phaser 3635 System Administration Guide Ensure that the following...
... menu. 10. NOTE: The default Port Number is fully functioning on the network using TCP/IP and HTTP. 2. Enter the Path to accept the changes. This determines when the server will proceed. If prompted, enter the Administrator's User ID [admin] and Password [1111], and click on the... [Validation Servers] link. 7. Ensure that the Machine is 80 for HTTP and 443 for HTTPS. 11. Press [Enter]. 3. Click on [Login]. 68 Xerox Phaser 3635 System Administration Guide Ensure that the following...
Systems Administrator Guide
Page 81
...The Scan Template Management link within Internet Services allows Xerox Partners to access the template pool folder. 12. Xerox Phaser 3635 System Administration Guide 69 Click on [Login]. If prompted, enter the Administrator's User ID [admin] and Password [1111], and click on the [Properties] tab.... 4. Scan Template Management Scan Template Management refers to third-party applications that this default ...
...The Scan Template Management link within Internet Services allows Xerox Partners to access the template pool folder. 12. Xerox Phaser 3635 System Administration Guide 69 Click on [Login]. If prompted, enter the Administrator's User ID [admin] and Password [1111], and click on the [Properties] tab.... 4. Scan Template Management Scan Template Management refers to third-party applications that this default ...

Systems Administrator Guide
Page 89
...the mail server. 10. In the Options area, from the Machine 6. If prompted, enter the Administrator's User ID [admin] and Password [1111], and click on [Defaults]. Click on [Login]. Optional Step: Enter a From Name. Click on the [Services] link. 2. Enter the [Login Name...Password] required for the machine to Sender, Smart Address Key #1 through #6 and Forwarding Email Address. 1. In the [Properties] menu, scroll down menu, select a value between 1MB - 10MB. Click on the [SMTP Server] link. 7. To change the e-mail [From Address], enter a valid e-mail address. 3. Xerox Phaser...
...the mail server. 10. In the Options area, from the Machine 6. If prompted, enter the Administrator's User ID [admin] and Password [1111], and click on [Defaults]. Click on [Login]. Optional Step: Enter a From Name. Click on the [Services] link. 2. Enter the [Login Name...Password] required for the machine to Sender, Smart Address Key #1 through #6 and Forwarding Email Address. 1. In the [Properties] menu, scroll down menu, select a value between 1MB - 10MB. Click on the [SMTP Server] link. 7. To change the e-mail [From Address], enter a valid e-mail address. 3. Xerox Phaser...

Systems Administrator Guide
Page 90
... [Allow user to access from the machine. 10. If prompted, enter the Administrator's User ID [admin] and Password [1111], and click on the machine. 7. If LDAP is not enabled on [Login]. 78 Xerox Phaser 3635 System Administration Guide Users can edit the 'From' field when the LDAP server has not been ...Receipt to be delivered to the sender only, or have no restriction. In the [Signature] entry box enter text that you want to appear as default in [Smart Key Address #1] and enter a partial or full e-mail address that you want the User to edit the message body, select [Enable]...
... [Allow user to access from the machine. 10. If prompted, enter the Administrator's User ID [admin] and Password [1111], and click on the machine. 7. If LDAP is not enabled on [Login]. 78 Xerox Phaser 3635 System Administration Guide Users can edit the 'From' field when the LDAP server has not been ...Receipt to be delivered to the sender only, or have no restriction. In the [Signature] entry box enter text that you want to appear as default in [Smart Key Address #1] and enter a partial or full e-mail address that you want the User to edit the message body, select [Enable]...

Systems Administrator Guide
Page 95
... 75, set the search results to 74 or less. For example, if the LDAP server limit is the default. You can let the server use its timeout limit by Surname then Given Name. seconds] box the user... scanned document in the document handler and press the green button. 9. If prompted, enter the Administrator's User ID [admin] and Password [1111], and click on [Login]. Touch [Search]. A zero value will appear which corresponds with an entry in your...] - NOTE: It may be necessary to return all searches. • Search Timeout - Xerox Phaser 3635 System Administration Guide 83
... 75, set the search results to 74 or less. For example, if the LDAP server limit is the default. You can let the server use its timeout limit by Surname then Given Name. seconds] box the user... scanned document in the document handler and press the green button. 9. If prompted, enter the Administrator's User ID [admin] and Password [1111], and click on [Login]. Touch [Search]. A zero value will appear which corresponds with an entry in your...] - NOTE: It may be necessary to return all searches. • Search Timeout - Xerox Phaser 3635 System Administration Guide 83

Systems Administrator Guide
Page 97
...Verify that [Public] is already established, you wish to e-mail. 11. If prompted, enter the Administrator's User ID [admin] and Password [1111], and click on the [Save] button. 3. Enter the name of the recipient. 5. Export Local Address Book ...Save] button. 5. Enter a filename for each recipient you have added all the required names, touch [Close]. 12. Xerox Phaser 3635 System Administration Guide 85 Ensure that the recipient receives the scanned document in their e-mail inbox. Repeat steps 5 ... address of the person you may need to your default Address Book. 5.
...Verify that [Public] is already established, you wish to e-mail. 11. If prompted, enter the Administrator's User ID [admin] and Password [1111], and click on the [Save] button. 3. Enter the name of the recipient. 5. Export Local Address Book ...Save] button. 5. Enter a filename for each recipient you have added all the required names, touch [Close]. 12. Xerox Phaser 3635 System Administration Guide 85 Ensure that the recipient receives the scanned document in their e-mail inbox. Repeat steps 5 ... address of the person you may need to your default Address Book. 5.

Systems Administrator Guide
Page 98
... Touch the [Search] button. Click on the [Return] button to return to accept the changes. If prompted, enter the Administrator's User ID [admin] and Password [1111], and click on [Add New Custom Address]. 2. You may need to describe the group. 4. Click on the [Group Address Book] ... Book. Select the addresses that [Public] is selected as your default Address Book. 5. Create a New Address 1. Enter the Name of addresses can be added to appear in the list and select [Add (To:)]. 86 Xerox Phaser 3635 System Administration Guide Procedure 1. Click on [Add New Address...
... Touch the [Search] button. Click on the [Return] button to return to accept the changes. If prompted, enter the Administrator's User ID [admin] and Password [1111], and click on [Add New Custom Address]. 2. You may need to describe the group. 4. Click on the [Group Address Book] ... Book. Select the addresses that [Public] is selected as your default Address Book. 5. Create a New Address 1. Enter the Name of addresses can be added to appear in the list and select [Add (To:)]. 86 Xerox Phaser 3635 System Administration Guide Procedure 1. Click on [Add New Address...

Systems Administrator Guide
Page 104
...boxes. If prompted, enter the Administrator's User ID [admin] and Password [1111], and click on the [Properties] tab. 4. Click on [Login]. 14. Select [SMB] from a PC with full access rights to the Scan directory. Create a shared folder to Optional Step: Configure Defaults - Continue to be used to fax to access .... Information Checklist Before starting at the root of the machine in to the Scan directory from the [Protocol] drop-down menu. 92 Xerox Phaser 3635 System Administration Guide NOTE: If you cannot do the steps above, check the access rights for scanned documents.
...boxes. If prompted, enter the Administrator's User ID [admin] and Password [1111], and click on the [Properties] tab. 4. Click on [Login]. 14. Select [SMB] from a PC with full access rights to the Scan directory. Create a shared folder to Optional Step: Configure Defaults - Continue to be used to fax to access .... Information Checklist Before starting at the root of the machine in to the Scan directory from the [Protocol] drop-down menu. 92 Xerox Phaser 3635 System Administration Guide NOTE: If you cannot do the steps above, check the access rights for scanned documents.
Systems Administrator Guide
Page 105
...ensure that web services and a web service (such as Apache) are available and/or the tasks have permission to save new password] checkbox. 14. Xerox Phaser 3635 System Administration Guide 93 For example, if the path is used to fax to the Server for processing by a script....enter the IP Address of the [Share]. 10. If prompted, enter the Administrator's User ID [admin] and Password [1111], and click on the [Fax] link. g) Select [HTTP] or [HTTPS] from the Share to Optional Step: Configure Defaults - b) Press [Enter]. e) Click on [Login]. 15. Configure a Server Fax Repository 8....
...ensure that web services and a web service (such as Apache) are available and/or the tasks have permission to save new password] checkbox. 14. Xerox Phaser 3635 System Administration Guide 93 For example, if the path is used to fax to the Server for processing by a script....enter the IP Address of the [Share]. 10. If prompted, enter the Administrator's User ID [admin] and Password [1111], and click on the [Fax] link. g) Select [HTTP] or [HTTPS] from the Share to Optional Step: Configure Defaults - b) Press [Enter]. e) Click on [Login]. 15. Configure a Server Fax Repository 8....
Systems Administrator Guide
Page 107
... distribute documents based on the Fax Server. Optional Step: Configure Defaults General 1. Set the defaults for HTTPS. 8. Prints a Confirmation Sheet after every Server Fax job. If prompted, enter the Administrator's User ID [admin] and Password [1111], and click on [Login]. The Job Log is ... with each document transferred to accept the changes. Prints a Confirmation Sheet only when the job is unsuccessful. c) Off - Xerox Phaser 3635 System Administration Guide 95 Turns off the Confirmation Sheet printing function. Click on the Job Log when Users log in the...
... distribute documents based on the Fax Server. Optional Step: Configure Defaults General 1. Set the defaults for HTTPS. 8. Prints a Confirmation Sheet after every Server Fax job. If prompted, enter the Administrator's User ID [admin] and Password [1111], and click on [Login]. The Job Log is ... with each document transferred to accept the changes. Prints a Confirmation Sheet only when the job is unsuccessful. c) Off - Xerox Phaser 3635 System Administration Guide 95 Turns off the Confirmation Sheet printing function. Click on the Job Log when Users log in the...

Systems Administrator Guide
Page 111
...then if required select the [Print local copy] option. Xerox Phaser 3635 System Administration Guide 99 Click on the [Fax] ...[Properties] tab. 4. If prompted, enter the Administrator's User ID [admin] and Password [1111], and click on the [Properties] tab. Checkmark to select ...the [Forward faxes to an e-mail recipient. Click on [Login]. TIFF Procedure NOTE: To enable Fax Forward to accept the changes. Enter the Fax Number (including area code). Click on the [Apply] button to E-mail, Default...
...then if required select the [Print local copy] option. Xerox Phaser 3635 System Administration Guide 99 Click on the [Fax] ...[Properties] tab. 4. If prompted, enter the Administrator's User ID [admin] and Password [1111], and click on the [Properties] tab. Checkmark to select ...the [Forward faxes to an e-mail recipient. Click on [Login]. TIFF Procedure NOTE: To enable Fax Forward to accept the changes. Enter the Fax Number (including area code). Click on the [Apply] button to E-mail, Default...
Systems Administrator Guide
Page 112
...the [Services] link. 5. NOTE: This feature allows the forwarded fax to accept the changes. If prompted, enter the Administrator's User ID [admin] and Password [1111], and click on the [Fax] link. 6. 10 Embedded Fax 4. Click on the [Apply] button to be printed at the machine...processed by the Mail Server to which the fax has been forwarded to enable this option. 100 Xerox Phaser 3635 System Administration Guide The default value for [Default Display Name:]. 9. Follow the steps in the [Default "From:" Address:]. 8. In the "From:" Field Options area, enter an e-mail address in...
...the [Services] link. 5. NOTE: This feature allows the forwarded fax to accept the changes. If prompted, enter the Administrator's User ID [admin] and Password [1111], and click on the [Fax] link. 6. 10 Embedded Fax 4. Click on the [Apply] button to be printed at the machine...processed by the Mail Server to which the fax has been forwarded to enable this option. 100 Xerox Phaser 3635 System Administration Guide The default value for [Default Display Name:]. 9. Follow the steps in the [Default "From:" Address:]. 8. In the "From:" Field Options area, enter an e-mail address in...

Systems Administrator Guide
Page 126
...-up box will require a user account to close box. 114 Xerox Phaser 3635 System Administration Guide The first time you use the machine..." The...in as Machine Administrator] and type the User name and Password for the Administrator's account. pop up the settings and data... the [General Setup] link. 5. Select the [Manage Accounting] link. The default is enabled, Users must log in the printer driver to print documents from the...them from their Workstations. Press [Enter]. 3. When XSA is admin and 1111. 7. Should the machine lose your Workstation, open the web browser...
...-up box will require a user account to close box. 114 Xerox Phaser 3635 System Administration Guide The first time you use the machine..." The...in as Machine Administrator] and type the User name and Password for the Administrator's account. pop up the settings and data... the [General Setup] link. 5. Select the [Manage Accounting] link. The default is enabled, Users must log in the printer driver to print documents from the...them from their Workstations. Press [Enter]. 3. When XSA is admin and 1111. 7. Should the machine lose your Workstation, open the web browser...


