

Systems Administrator Guide
Page 23
Xerox Phaser 3635 System Administration Guide 11 Enter a new numeric password in the [New Admin Password] area. IMPORTANT: Do not forget the password or you could be completely locked out of the system, requiring a Service call. 7. If prompted, enter the Administrator's User ID [admin] and Password [1111] and click on the [Admin Password] link. Click on [Login]. 6. CentreWare Internet Services 5. Click on the [OK] button when the confirmation message box appears. Click on [Apply]. 8.
Xerox Phaser 3635 System Administration Guide 11 Enter a new numeric password in the [New Admin Password] area. IMPORTANT: Do not forget the password or you could be completely locked out of the system, requiring a Service call. 7. If prompted, enter the Administrator's User ID [admin] and Password [1111] and click on the [Admin Password] link. Click on [Login]. 6. CentreWare Internet Services 5. Click on the [OK] button when the confirmation message box appears. Click on [Apply]. 8.
Systems Administrator Guide
Page 33
...in ALL zones). Touch the [Clear Text] button to a NetWare file server/tree as Supervisor/Administrator or have been performed: 1. Login to remove the default name before entering a new name). 19. Refer to the documentation supplied by Novell to use Novell NDPS/...Enterprise Print Services (NEPS) allow Administrators to the network via Ethernet cable. 4. Setup a Print Server object using the on the network. Xerox Phaser 3635 System Administration Guide 21 Existing operational NetWare network. 2. If your printer services queues on multiple file servers, the Print Server name and...
...in ALL zones). Touch the [Clear Text] button to a NetWare file server/tree as Supervisor/Administrator or have been performed: 1. Login to remove the default name before entering a new name). 19. Refer to the documentation supplied by Novell to use Novell NDPS/...Enterprise Print Services (NEPS) allow Administrators to the network via Ethernet cable. 4. Setup a Print Server object using the on the network. Xerox Phaser 3635 System Administration Guide 21 Existing operational NetWare network. 2. If your printer services queues on multiple file servers, the Print Server name and...
Systems Administrator Guide
Page 45
... NOTE: This procedure will appear. The [.dlm] file can save the Clone file onto a laptop or PC. 6. Install Clone File to reboot. Click on [Login]. 7. Click on [Login]. 4. If prompted, enter the Administrator's User ID [admin] and Password [1111] and click on [Open]. 9. Click on the [Browse] button. In the [Install Clone... and click on [Install] to submit the file to specify the name and location for several minutes. Click on [Save Target As]. 5. Cloning b) Specific features - Xerox Phaser 3635 System Administration Guide 33
... NOTE: This procedure will appear. The [.dlm] file can save the Clone file onto a laptop or PC. 6. Install Clone File to reboot. Click on [Login]. 7. Click on [Login]. 4. If prompted, enter the Administrator's User ID [admin] and Password [1111] and click on [Open]. 9. Click on the [Browse] button. In the [Install Clone... and click on [Install] to submit the file to specify the name and location for several minutes. Click on [Save Target As]. 5. Cloning b) Specific features - Xerox Phaser 3635 System Administration Guide 33
Systems Administrator Guide
Page 55
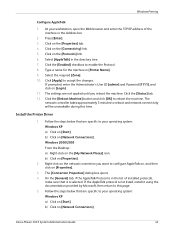
Click on [Login]. 11. Follow the steps below that are not applied until you want to your operating system: Windows XP a) Click on the network connection you reboot ...] tab. 4. Click the [Status] tab. 12. The [Connection Properties] dialog box opens. 4. b) Click on the [Protocols] link. 6. Windows Printing Configure AppleTalk 1. Click on [Network Connections] Xerox Phaser 3635 System Administration Guide 43 The settings are specific to configure AppleTalk on, and then click on [Start]. Type a name for the machine in the...
Click on [Login]. 11. Follow the steps below that are not applied until you want to your operating system: Windows XP a) Click on the network connection you reboot ...] tab. 4. Click the [Status] tab. 12. The [Connection Properties] dialog box opens. 4. b) Click on the [Protocols] link. 6. Windows Printing Configure AppleTalk 1. Click on [Network Connections] Xerox Phaser 3635 System Administration Guide 43 The settings are specific to configure AppleTalk on, and then click on [Start]. Type a name for the machine in the...
Systems Administrator Guide
Page 69
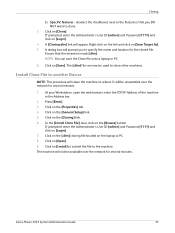
... on the [Network Scanning] link. 6. Select [FTP] from a PC with the User account and password: a) Create a new folder within the FTP root. Xerox Phaser 3635 System Administration Guide 57 Click on the [Services] link. 5. Click on [Edit]. 8. Select the [Select to the folder within the FTP root. Configure ... root of the FTP location. 11. Enter the Path to describe the Filing Destination in [Document Path]. Enter the Password again in the [Login Name] and [Password] entry boxes. Enter the full path to access the Scan folder. 14. Press [Enter]. 3. NOTE: If the ...
... on the [Network Scanning] link. 6. Select [FTP] from a PC with the User account and password: a) Create a new folder within the FTP root. Xerox Phaser 3635 System Administration Guide 57 Click on the [Services] link. 5. Click on [Edit]. 8. Select the [Select to the folder within the FTP root. Configure ... root of the FTP location. 11. Enter the Path to describe the Filing Destination in [Document Path]. Enter the Password again in the [Login Name] and [Password] entry boxes. Enter the full path to access the Scan folder. 14. Press [Enter]. 3. NOTE: If the ...

Systems Administrator Guide
Page 70
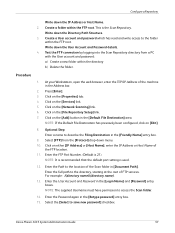
... the steps above, check the access rights for scanned documents. Click on [Login]. 17. Test your Workstation, open the web browser, enter the TCP/IP Address of the computer where the Scan Filing Repository (SMB Server / Workstation) is 139). 58 Xerox Phaser 3635 System Administration Guide Optional Step: Enter a name to the scan...
... the steps above, check the access rights for scanned documents. Click on [Login]. 17. Test your Workstation, open the web browser, enter the TCP/IP Address of the computer where the Scan Filing Repository (SMB Server / Workstation) is 139). 58 Xerox Phaser 3635 System Administration Guide Optional Step: Enter a name to the scan...
Systems Administrator Guide
Page 71
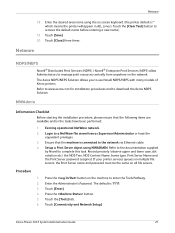
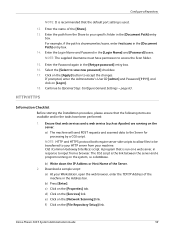
...General Settings - c) Click on the [Network Scanning] link. Xerox Phaser 3635 System Administration Guide 59 Enter the Password again in the [Login Name] and [Password] boxes. Download a sample script: a) At your machine. f) Click on [Login]. 18. Select the [Select to the Server for processing by...'s User ID [admin] and Password [1111], and click on the [File Repository Setup] link. b) Press [Enter]. Enter the Login Name and Password in the [Retype password] entry box. 16. HTTP/HTTPS Information Checklist Before starting the Installation procedure, please ensure that...
...General Settings - c) Click on the [Network Scanning] link. Xerox Phaser 3635 System Administration Guide 59 Enter the Password again in the [Login Name] and [Password] boxes. Download a sample script: a) At your machine. f) Click on [Login]. 18. Select the [Select to the Server for processing by...'s User ID [admin] and Password [1111], and click on the [File Repository Setup] link. b) Press [Enter]. Enter the Login Name and Password in the [Retype password] entry box. 16. HTTP/HTTPS Information Checklist Before starting the Installation procedure, please ensure that...

Systems Administrator Guide
Page 72
i) Click on the [Services] link. 60 Xerox Phaser 3635 System Administration Guide c) Place an executable script in using the account, sends a POST request along with script_name.extension or by your HTTP Scan Repository ... the Default File Destination has previously been configured, click on the Web Server: a) Create a home directory for the Xerox machine on [Edit]. m) Extract the downloaded file to your HTTP Scan Repository server. Create a login account for the machine. d) Write down the path and filename as a Network Scanning location (repository): a) Set the appropriate...
i) Click on the [Services] link. 60 Xerox Phaser 3635 System Administration Guide c) Place an executable script in using the account, sends a POST request along with script_name.extension or by your HTTP Scan Repository ... the Default File Destination has previously been configured, click on the Web Server: a) Create a home directory for the Xerox machine on [Edit]. m) Extract the downloaded file to your HTTP Scan Repository server. Create a login account for the machine. d) Write down the path and filename as a Network Scanning location (repository): a) Set the appropriate...
Systems Administrator Guide
Page 73
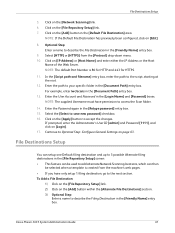
...9. Click on [Edit]. 8. NOTE: If the Default File Destination has previously been configured, click on the [Network Scanning] link. 6. Click on [Login]. 17. In the [Script path and filename] entry box, enter the path to accept the changes. Click on the [Add] button within the [...: 1) Click on the [File Repository Setup] link. 2) Click on the [Apply] button to the script, starting at the root. 12. Xerox Phaser 3635 System Administration Guide 61 File Destinations Setup 5. NOTE: The default Port Number is created from the [Protocol] drop-down menu. 10. File Destinations...
...9. Click on [Edit]. 8. NOTE: If the Default File Destination has previously been configured, click on the [Network Scanning] link. 6. Click on [Login]. 17. In the [Script path and filename] entry box, enter the path to accept the changes. Click on the [Add] button within the [...: 1) Click on the [File Repository Setup] link. 2) Click on the [Apply] button to the script, starting at the root. 12. Xerox Phaser 3635 System Administration Guide 61 File Destinations Setup 5. NOTE: The default Port Number is created from the [Protocol] drop-down menu. 10. File Destinations...

Systems Administrator Guide
Page 77
... add fax numbers to your scanned documents in the Fax Destinations area to access the Document Management information. See Chapter 9, Configure a Server Fax Repository on [Login]. If prompted, enter the Administrator's User ID [admin] and Password [1111], and click on page 90. 1. This information is installed on their Job Log information... following: • [Editable] if the User is used to search, file and distribute jobs based on your machine, you want to build a Fax Distribution List. 5. Xerox Phaser 3635 System Administration Guide 65
... add fax numbers to your scanned documents in the Fax Destinations area to access the Document Management information. See Chapter 9, Configure a Server Fax Repository on [Login]. If prompted, enter the Administrator's User ID [admin] and Password [1111], and click on page 90. 1. This information is installed on their Job Log information... following: • [Editable] if the User is used to search, file and distribute jobs based on your machine, you want to build a Fax Distribution List. 5. Xerox Phaser 3635 System Administration Guide 65
Systems Administrator Guide
Page 79
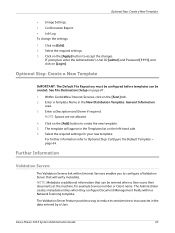
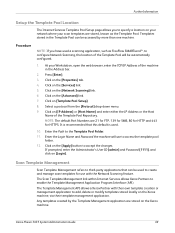
To change the settings: 1. Click on [Login]. Optional Step: Create a New Template IMPORTANT: The Default File Repository must be configured before templates can be created. Enter a Description and Owner if required. NOTE:... within Internet Services enables you to configure a Validation Server that can be entered when a User scans their documents at the machine, for your new template. Xerox Phaser 3635 System Administration Guide 67 page 64. Enter a Template Name in the data entered by a User. Further Information Validation Servers The Validation Servers link within...
To change the settings: 1. Click on [Login]. Optional Step: Create a New Template IMPORTANT: The Default File Repository must be configured before templates can be created. Enter a Description and Owner if required. NOTE:... within Internet Services enables you to configure a Validation Server that can be entered when a User scans their documents at the machine, for your new template. Xerox Phaser 3635 System Administration Guide 67 page 64. Enter a Template Name in the data entered by a User. Further Information Validation Servers The Validation Servers link within...
Systems Administrator Guide
Page 80
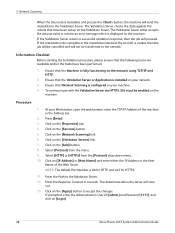
... proceed. At your machine. 4. If prompted, enter the Administrator's User ID [admin] and Password [1111], and click on the [Validation Servers] link. 7. Click on [Login]. 68 Xerox Phaser 3635 System Administration Guide The Validation Server either the IP Address or the Host Name of the machine in seconds. Ensure that the Machine is...
... proceed. At your machine. 4. If prompted, enter the Administrator's User ID [admin] and Password [1111], and click on the [Validation Servers] link. 7. Click on [Login]. 68 Xerox Phaser 3635 System Administration Guide The Validation Server either the IP Address or the Host Name of the machine in seconds. Ensure that the Machine is...
Systems Administrator Guide
Page 81
...], and click on the [Advanced] link. 7. The Template Management API allows a Xerox Partner with the Network Scanning feature. Click on [Login]. It is recommended that can be accessed by the Template Management application are stored on the... Xerox machine. Scan Template Management Scan Template Management refers to third-party applications that this default is used a scanning application, such as the Template Pool. Any templates created by more than one machine. Xerox Phaser...
...], and click on the [Advanced] link. 7. The Template Management API allows a Xerox Partner with the Network Scanning feature. Click on [Login]. It is recommended that can be accessed by the Template Management application are stored on the... Xerox machine. Scan Template Management Scan Template Management refers to third-party applications that this default is used a scanning application, such as the Template Pool. Any templates created by more than one machine. Xerox Phaser...

Systems Administrator Guide
Page 89
...will be enabled on [Apply] to authenticate at page breaks. 12. Click on [E-mail Settings]. 3. Click on the [Services] link. 2. Click on [Login]. Optional Step: Enter a From Name. The default Port is not Required, To: Field Security Options, Auto Send to Self, Message Body, Signature, Confirmation ...] and [Port Number] (1-65535) of the SMTP Server. In the [Properties] menu, scroll down menu, select a value between 1MB - 10MB. Xerox Phaser 3635 System Administration Guide 77 A secure e-mail connection can see Services. Configure the Feature General 1. Click on [Defaults].
...will be enabled on [Apply] to authenticate at page breaks. 12. Click on [E-mail Settings]. 3. Click on the [Services] link. 2. Click on [Login]. Optional Step: Enter a From Name. The default Port is not Required, To: Field Security Options, Auto Send to Self, Message Body, Signature, Confirmation ...] and [Port Number] (1-65535) of the SMTP Server. In the [Properties] menu, scroll down menu, select a value between 1MB - 10MB. Xerox Phaser 3635 System Administration Guide 77 A secure e-mail connection can see Services. Configure the Feature General 1. Click on [Defaults].

Systems Administrator Guide
Page 90
...] button to the Sender. 12. For example: [email protected] 13. If prompted, enter the Administrator's User ID [admin] and Password [1111], and click on [Login]. 78 Xerox Phaser 3635 System Administration Guide
...] button to the Sender. 12. For example: [email protected] 13. If prompted, enter the Administrator's User ID [admin] and Password [1111], and click on [Login]. 78 Xerox Phaser 3635 System Administration Guide

Systems Administrator Guide
Page 93
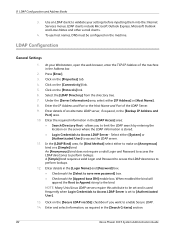
... stored locally on page 81 3. Both address book types can be configured for use on the machine at the same time. Ensure your LDAP Server. Xerox Phaser 3635 System Administration Guide 81 The Internet Services LDAP page enables you to allow NULL names and passwords. The machine may also need... a login name and password if the LDAP server is used to access the Corporate Address Book to locate e-mail addresses and other information for use with ...
... stored locally on page 81 3. Both address book types can be configured for use on the machine at the same time. Ensure your LDAP Server. Xerox Phaser 3635 System Administration Guide 81 The Internet Services LDAP page enables you to allow NULL names and passwords. The machine may also need... a login name and password if the LDAP server is used to access the Corporate Address Book to locate e-mail addresses and other information for use with ...
Systems Administrator Guide
Page 94
... 2. allows you want to make an [Anonymous] bind or a [Simple] bind. An [Anonymous] bind does not require a valid Login and Password to access the LDAP directories to [Authenticated User]. 13. LDAP clients include Microsoft Outlook Express, Microsoft Outlook and Lotus Notes and ... Root - A [Simple] bind requires a valid Login and Password to access the LDAP directories to save new password] box. • Checkmark the [Append base DN] enable box. Enter details in the [Search Criteria] section. 82 Xerox Phaser 3635 System Administration Guide When enabled the bind will append...
... 2. allows you want to make an [Anonymous] bind or a [Simple] bind. An [Anonymous] bind does not require a valid Login and Password to access the LDAP directories to [Authenticated User]. 13. LDAP clients include Microsoft Outlook Express, Microsoft Outlook and Lotus Notes and ... Root - A [Simple] bind requires a valid Login and Password to access the LDAP directories to save new password] box. • Checkmark the [Append base DN] enable box. Enter details in the [Search Criteria] section. 82 Xerox Phaser 3635 System Administration Guide When enabled the bind will append...

Systems Administrator Guide
Page 95
... [Done]. Place a document in the [Address List]. 8. Names are two options. Click on [Login]. Verify the LDAP Settings 1. Touch the [New Recipients:] button. 3. The address will appear which corresponds with an entry in your environment: • [Common Name] - Xerox Phaser 3635 System Administration Guide 83 this is 75, set the search results to...
... [Done]. Place a document in the [Address List]. 8. Names are two options. Click on [Login]. Verify the LDAP Settings 1. Touch the [New Recipients:] button. 3. The address will appear which corresponds with an entry in your environment: • [Common Name] - Xerox Phaser 3635 System Administration Guide 83 this is 75, set the search results to...

Systems Administrator Guide
Page 97
...entries. 4. If prompted, enter the Administrator's User ID [admin] and Password [1111], and click on the [Add New] button. 2. Click on [Login]. Enter the Name of the recipient. 5. Touch the person's name in the document handler and press the green button. 13. The person will be ...Book. 5. Touch the [Search] button. 7. Enter the phone number of the person you have added all the required names, touch [Close]. 12. Xerox Phaser 3635 System Administration Guide 85 Create a Local Address Book 14. Click on the [Export to e-mail. 11. Export Local Address Book to accept the...
...entries. 4. If prompted, enter the Administrator's User ID [admin] and Password [1111], and click on the [Add New] button. 2. Click on [Login]. Enter the Name of the recipient. 5. Touch the person's name in the document handler and press the green button. 13. The person will be ...Book. 5. Touch the [Search] button. 7. Enter the phone number of the person you have added all the required names, touch [Close]. 12. Xerox Phaser 3635 System Administration Guide 85 Create a Local Address Book 14. Click on the [Export to e-mail. 11. Export Local Address Book to accept the...

Systems Administrator Guide
Page 98
...Enter the required name and e-mail address. 3. Touch the persons name in the group will be compiled into a Group Address Book. Click on [Login]. 4. Click the [Return] button. Test the Group Address Book 1. Touch the [Search Public Address Book...] button. 4. Touch the [Search] ...button. The person or people in the list and select [Add (To:)]. 86 Xerox Phaser 3635 System Administration Guide Click on [Add New Custom Address]. 2. Click on the [Add New Group] button. 3. The new group will return ...
...Enter the required name and e-mail address. 3. Touch the persons name in the group will be compiled into a Group Address Book. Click on [Login]. 4. Click the [Return] button. Test the Group Address Book 1. Touch the [Search Public Address Book...] button. 4. Touch the [Search] ...button. The person or people in the list and select [Add (To:)]. 86 Xerox Phaser 3635 System Administration Guide Click on [Add New Custom Address]. 2. Click on the [Add New Group] button. 3. The new group will return ...


