Statement of Volatility - WorkCentre 4150
Page 1
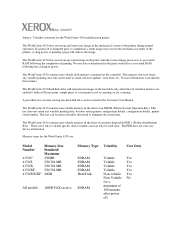
... details, configuration details, printer serial number. A procedure for securely erasing any hard disk data can be located in the Customer User Manual The WorkCentre 4150 contains non-volatile memory in the form of an MSOK (Master System Operation Key). This key can be removed and/or destroyed... Yes Non-volatile Yes Non-Volatile No for scanning. cycling power or printing a page will retain latent images in this memory. The WorkCentre 4150 hard disk drive will remove the image. These serve only to completion a latent image may exist in the print controller (raster image...
... details, configuration details, printer serial number. A procedure for securely erasing any hard disk data can be located in the Customer User Manual The WorkCentre 4150 contains non-volatile memory in the form of an MSOK (Master System Operation Key). This key can be removed and/or destroyed... Yes Non-volatile Yes Non-Volatile No for scanning. cycling power or printing a page will retain latent images in this memory. The WorkCentre 4150 hard disk drive will remove the image. These serve only to completion a latent image may exist in the print controller (raster image...

Getting Started Guide
Page 13
... Network Setup > TCP/ IP Options > TCP/IP Settings. • The allocated TCP/IP address is a 4150s, 4150x or 4150xf, follow these instructions to connect the WorkCentre to the RJ45 connector on page 31. NOTE: The Ethernet cable is the factory default setting. • Static IP ... Name/Address field. Test the WorkCentre Before connecting the WorkCentre to your network, make 3 copies. 2 If the copies are connecting your WorkCentre to a different type of the following methods: • DHCP: Use this method to manually assign an IP address provided by Xerox. 2 Continue on , it...
... Network Setup > TCP/ IP Options > TCP/IP Settings. • The allocated TCP/IP address is a 4150s, 4150x or 4150xf, follow these instructions to connect the WorkCentre to the RJ45 connector on page 31. NOTE: The Ethernet cable is the factory default setting. • Static IP ... Name/Address field. Test the WorkCentre Before connecting the WorkCentre to your network, make 3 copies. 2 If the copies are connecting your WorkCentre to a different type of the following methods: • DHCP: Use this method to manually assign an IP address provided by Xerox. 2 Continue on , it...

Getting Started Guide
Page 25
... - if a telephone handset is attached to several recipients to the Send List to send the same fax to the WorkCentre, select Manual Dial and dial the number on the Control Panel to the dial directory for individuals and groups. 4 Select the required features for your fax. set ...
... - if a telephone handset is attached to several recipients to the Send List to send the same fax to the WorkCentre, select Manual Dial and dial the number on the Control Panel to the dial directory for individuals and groups. 4 Select the required features for your fax. set ...

User Guide
Page 16
...it unlawful for any person to use a computer or other number for a Class A digital device, pursuant to maintain compliance with the instruction manual, may cause harmful interference to Fax Transmission Defaults in the Setups chapter on page 116. Cet appareil numérique de la classe A... must be a 900 number or any message unless such message clearly contains in a margin at their own expense. For further 12 Xerox WorkCentre 4150 User Guide Changes or modifications to this equipment. Regulatory Information FCC Part 15 This equipment has been tested and found to operate this...
...it unlawful for any person to use a computer or other number for a Class A digital device, pursuant to maintain compliance with the instruction manual, may cause harmful interference to Fax Transmission Defaults in the Setups chapter on page 116. Cet appareil numérique de la classe A... must be a 900 number or any message unless such message clearly contains in a margin at their own expense. For further 12 Xerox WorkCentre 4150 User Guide Changes or modifications to this equipment. Regulatory Information FCC Part 15 This equipment has been tested and found to operate this...

User Guide
Page 45
... set the Default View, refer to Job Status Default in the Setups chapter on page 127. 6 Stop the Copy Job Follow the steps below to manually cancel an activated copy job. 1) Press the Stop button on the control panel to cancel the current copy job. 2) To cancel a queued job press the... Confirm to delete the job or Cancel to return to the preset default job queue screen. Press Default View to return to previous screen. 3 Copy 6. Xerox WorkCentre 4150 User Guide 23
... set the Default View, refer to Job Status Default in the Setups chapter on page 127. 6 Stop the Copy Job Follow the steps below to manually cancel an activated copy job. 1) Press the Stop button on the control panel to cancel the current copy job. 2) To cancel a queued job press the... Confirm to delete the job or Cancel to return to the preset default job queue screen. Press Default View to return to previous screen. 3 Copy 6. Xerox WorkCentre 4150 User Guide 23

User Guide
Page 51
... an Auto feature is selected, the machine will scan the original twice. Both Pages: Use to common document sizes and orientations. Xerox WorkCentre 4150 User Guide 29 There are scanned using the scroll buttons or use Custom Size to copy a document containing mixed size originals.... Load documents in the document feeder when using this feature to manually adjust the scanning dimensions. Mixed Size Originals: Use this feature. Manual Size Input: Use this option to scan and copy the left page of the document scanning region...
... an Auto feature is selected, the machine will scan the original twice. Both Pages: Use to common document sizes and orientations. Xerox WorkCentre 4150 User Guide 29 There are scanned using the scroll buttons or use Custom Size to copy a document containing mixed size originals.... Load documents in the document feeder when using this feature to manually adjust the scanning dimensions. Mixed Size Originals: Use this feature. Manual Size Input: Use this option to scan and copy the left page of the document scanning region...

User Guide
Page 62
...information on dialing options, refer to the last number or list of your fax job, press the Job Status button on page 21. 40 Xerox WorkCentre 4150 User Guide Allows you to place a call to Dialing Options in the Setups chapter on page 122. 5 Job Status Screen To follow... stored numbers from the Individual Directory. The default Job Status screen displays all incomplete jobs, including the queued fax job. Option Description Keypad Dial Manual Dial Use this option to connect with the remote fax machine. 4 Fax 3 Dial the Number Select a dialing option to display the Job ...
...information on dialing options, refer to the last number or list of your fax job, press the Job Status button on page 21. 40 Xerox WorkCentre 4150 User Guide Allows you to place a call to Dialing Options in the Setups chapter on page 122. 5 Job Status Screen To follow... stored numbers from the Individual Directory. The default Job Status screen displays all incomplete jobs, including the queued fax job. Option Description Keypad Dial Manual Dial Use this option to connect with the remote fax machine. 4 Fax 3 Dial the Number Select a dialing option to display the Job ...

User Guide
Page 63
Xerox WorkCentre 4150 User Guide 41 4 Fax 6 Stop the Fax Job Follow the steps below to manually cancel an activated fax job. 1) Press the Stop button on the control panel to cancel the current fax job. 2) To cancel a queued job press the Job Status button on the control panel to display the Incomplete Printing Jobs screen. 3) Select the appropriate job from the queue to view the Progress of your Job screen. 4) Select Delete from the Job Commands list. 5) Select Confirm to delete the job or Cancel to return to previous screen.
Xerox WorkCentre 4150 User Guide 41 4 Fax 6 Stop the Fax Job Follow the steps below to manually cancel an activated fax job. 1) Press the Stop button on the control panel to cancel the current fax job. 2) To cancel a queued job press the Job Status button on the control panel to display the Incomplete Printing Jobs screen. 3) Select the appropriate job from the queue to view the Progress of your Job screen. 4) Select Delete from the Job Commands list. 5) Select Confirm to delete the job or Cancel to return to previous screen.

User Guide
Page 64
... If an incorrect entry is made, use Speed Dial, select the Speed Dial option and enter the 3 digit Speed Dial number required. 42 Xerox WorkCentre 4150 User Guide Dialing Options Use the Dialing Options to delete the number and then enter the correct number. Used when sharing a fax and phone... line. Manual Dial Allows you to listen to select the standard features for the fax job. To use the C button to enter the destination fax number...
... If an incorrect entry is made, use Speed Dial, select the Speed Dial option and enter the 3 digit Speed Dial number required. 42 Xerox WorkCentre 4150 User Guide Dialing Options Use the Dialing Options to delete the number and then enter the correct number. Used when sharing a fax and phone... line. Manual Dial Allows you to listen to select the standard features for the fax job. To use the C button to enter the destination fax number...

User Guide
Page 65
... dialing characters can be added to multiple destinations, the Send List option is required for the fax. To select the required character: Xerox WorkCentre 4150 User Guide 43 Information includes the recipient's name, fax number and transmission preferences, as well as asterisks (*). Pulse to Tone Switch...Ends a sequence of DTMF (Dual Tone Multi-frequency) / touch tone characters. The / character should be entered into the Send List manually using the keypad, using Speed Dial or by using any of the telephone number. The Directory stores and displays the fax recipient details. ...
... dialing characters can be added to multiple destinations, the Send List option is required for the fax. To select the required character: Xerox WorkCentre 4150 User Guide 43 Information includes the recipient's name, fax number and transmission preferences, as well as asterisks (*). Pulse to Tone Switch...Ends a sequence of DTMF (Dual Tone Multi-frequency) / touch tone characters. The / character should be entered into the Send List manually using the keypad, using Speed Dial or by using any of the telephone number. The Directory stores and displays the fax recipient details. ...

User Guide
Page 68
Manual Size Input Use Manual Size Input to describe the size of the document originals. Original Size Use to enter the dimensions of your original. 4 Fax Color Mode Use to ... documents of sizes from the list below: Size 1 Size 2 8.5 x 14" (landscape) & 8.5 x11" (landscape) A4 (landscape) & A5 (portrait) B4 (landscape) & B5 (portrait) 8.5 x 11" (landscape) & 8.5 x 5.5" (portrait) 46 Xerox WorkCentre 4150 User Guide Select the Originals appropriate valid pairs of varying sizes. Select the Save button to confirm Color Mode selection. Full Color Transmits a Color...
Manual Size Input Use Manual Size Input to describe the size of the document originals. Original Size Use to enter the dimensions of your original. 4 Fax Color Mode Use to ... documents of sizes from the list below: Size 1 Size 2 8.5 x 14" (landscape) & 8.5 x11" (landscape) A4 (landscape) & A5 (portrait) B4 (landscape) & B5 (portrait) 8.5 x 11" (landscape) & 8.5 x 5.5" (portrait) 46 Xerox WorkCentre 4150 User Guide Select the Originals appropriate valid pairs of varying sizes. Select the Save button to confirm Color Mode selection. Full Color Transmits a Color...
User Guide
Page 82
5 Network Scan 7 Stop the Network Scanning Job Follow the steps below to manually cancel an activated network scanning job. 1) Press the Stop button on the control panel to cancel the current network scanning job. 2) To cancel a queued job press the Job Status button on the control panel to display the Incomplete Printing Jobs screen. 3) Select the appropriate job from the queue to view the Progress of your Job screen. 4) Select Delete from the Job Commands list. 5) Select Confirm to delete the job or Cancel to return to previous screen. 60 Xerox WorkCentre 4150 User Guide
5 Network Scan 7 Stop the Network Scanning Job Follow the steps below to manually cancel an activated network scanning job. 1) Press the Stop button on the control panel to cancel the current network scanning job. 2) To cancel a queued job press the Job Status button on the control panel to display the Incomplete Printing Jobs screen. 3) Select the appropriate job from the queue to view the Progress of your Job screen. 4) Select Delete from the Job Commands list. 5) Select Confirm to delete the job or Cancel to return to previous screen. 60 Xerox WorkCentre 4150 User Guide

User Guide
Page 83
...8226; Options on page 69. • Refresh Destinations on page 71. The tabs available for a scan job. Xerox WorkCentre 4150 User Guide 61 The user manually retrieves the image from the scan repository. FreeFlow™ SMARTsend™ is gained using the Services button on the network..., called the scan repository. Depending on the options enabled and how your Xerox sales representative. For more ...
...8226; Options on page 69. • Refresh Destinations on page 71. The tabs available for a scan job. Xerox WorkCentre 4150 User Guide 61 The user manually retrieves the image from the scan repository. FreeFlow™ SMARTsend™ is gained using the Services button on the network..., called the scan repository. Depending on the options enabled and how your Xerox sales representative. For more ...

User Guide
Page 88
.... Option Description Lighten / Darken Background Suppression Adjusts the lightness or darkness of the originals automatically, or a size can be entered manually. The machine can determine the size of the output. Option Auto-Detect Description Use this option to allow the machine to determine ...originals being scanned. Image Options Use this option to select the size of the originals being fed through the document feeder. 66 Xerox WorkCentre 4150 User Guide 5 Network Scan Advanced Settings The Advanced Settings tab allows you to temporarily manipulate the scan template to enhance ...
.... Option Description Lighten / Darken Background Suppression Adjusts the lightness or darkness of the originals automatically, or a size can be entered manually. The machine can determine the size of the output. Option Auto-Detect Description Use this option to allow the machine to determine ...originals being scanned. Image Options Use this option to select the size of the originals being fed through the document feeder. 66 Xerox WorkCentre 4150 User Guide 5 Network Scan Advanced Settings The Advanced Settings tab allows you to temporarily manipulate the scan template to enhance ...

User Guide
Page 89
...several dimensions that has hole punch, staple or other marks. It produces the largest image file size, but delivers the best image quality. Xerox WorkCentre 4150 User Guide 67 Select a standard size or use with high quality photos and graphics. dots per inch) the better the image quality....to Edge is recommended for simple text documents. 200 x 200 dpi 300 x 300 dpi 400 x 400 dpi Recommended for use Custom to manually adjust the scanning dimensions. Recommended for medium quality photos and graphics. NOTE: If Color mode is selected, the maximum resolution is the default resolution...
...several dimensions that has hole punch, staple or other marks. It produces the largest image file size, but delivers the best image quality. Xerox WorkCentre 4150 User Guide 67 Select a standard size or use with high quality photos and graphics. dots per inch) the better the image quality....to Edge is recommended for simple text documents. 200 x 200 dpi 300 x 300 dpi 400 x 400 dpi Recommended for use Custom to manually adjust the scanning dimensions. Recommended for medium quality photos and graphics. NOTE: If Color mode is selected, the maximum resolution is the default resolution...

User Guide
Page 99
... original. color scanning, 2 sided originals, type, etc. For information on addressing options, refer to Address List in the recipient's email inbox. Xerox WorkCentre 4150 User Guide 77 Select Edit Subject to add a subject line that will appear in the Scan to E-mail chapter on the first few letters..., e.g. Repeat the process as an e-mail attachment. Basic Settings Use this tab to enter the settings of entering the e-mail address: • Manually enter the e-mail address. • Use the Address Book option to enter the full name, and can search the address book on page 80....
... original. color scanning, 2 sided originals, type, etc. For information on addressing options, refer to Address List in the recipient's email inbox. Xerox WorkCentre 4150 User Guide 77 Select Edit Subject to add a subject line that will appear in the Scan to E-mail chapter on the first few letters..., e.g. Repeat the process as an e-mail attachment. Basic Settings Use this tab to enter the settings of entering the e-mail address: • Manually enter the e-mail address. • Use the Address Book option to enter the full name, and can search the address book on page 80....

User Guide
Page 100
If there are no incomplete jobs in the Copy chapter on page 21. 6 Stop the E-mail Job Follow the steps below to manually cancel an activated e-mail job. 1) Press the Stop button on the control panel to cancel the current email job. 2) To cancel a queued job press the... Jobs screen. 3) Select the appropriate job from the Job Commands list. 5) Select Confirm to delete the job or Cancel to return to previous screen. 78 Xerox WorkCentre 4150 User Guide The default Job Status screen displays all incomplete jobs, including the queued scan to E-mail 5 Job Status Screen 1. 6 Scan to e-mail ...
If there are no incomplete jobs in the Copy chapter on page 21. 6 Stop the E-mail Job Follow the steps below to manually cancel an activated e-mail job. 1) Press the Stop button on the control panel to cancel the current email job. 2) To cancel a queued job press the... Jobs screen. 3) Select the appropriate job from the Job Commands list. 5) Select Confirm to delete the job or Cancel to return to previous screen. 78 Xerox WorkCentre 4150 User Guide The default Job Status screen displays all incomplete jobs, including the queued scan to E-mail 5 Job Status Screen 1. 6 Scan to e-mail ...

User Guide
Page 101
... under the Message field. Add/Edit Message Use this option to delete the selected address from the Internal or Public Address Book, or entered manually. Remove Use this option to add a new subject or edit the default e-mail subject. The subject is the title of the recipient. ...Address List. Add Me Use this option to be copied on the e-mail job, without their name being displayed on the e-mail job. Xerox WorkCentre 4150 User Guide 79 The information displayed is accessed via Authentication Mode, the information contained will be linked with the login name. Cc Use ...
... under the Message field. Add/Edit Message Use this option to delete the selected address from the Internal or Public Address Book, or entered manually. Remove Use this option to add a new subject or edit the default e-mail subject. The subject is the title of the recipient. ...Address List. Add Me Use this option to be copied on the e-mail job, without their name being displayed on the e-mail job. Xerox WorkCentre 4150 User Guide 79 The information displayed is accessed via Authentication Mode, the information contained will be linked with the login name. Cc Use ...

User Guide
Page 102
...not deleted. fields. the Address Book displays search results for the current scan to e-mail job. Highlight the recipient in the Address List. 80 Xerox WorkCentre 4150 User Guide The entered e-mail addresses will be entered in To..., Cc... Entering an E-mail Address You can change the keypad on the... first few letters. Manually If you already know that are found based on the search criteria, the matches display on the touch screen to support two types of e-...
...not deleted. fields. the Address Book displays search results for the current scan to e-mail job. Highlight the recipient in the Address List. 80 Xerox WorkCentre 4150 User Guide The entered e-mail addresses will be entered in To..., Cc... Entering an E-mail Address You can change the keypad on the... first few letters. Manually If you already know that are found based on the search criteria, the matches display on the touch screen to support two types of e-...

User Guide
Page 106
... the scanning dimensions. Resolution Resolution affects the appearance of the originals and the scanned document automatically. Manual Size Input Use this option to recognize the size of the originals being fed through the document feeder. 6 Scan to E-mail Original Size Use this ... dimensions that correspond to common document sizes and orientations. The current resolution setting is shown under the Resolution button on the Advanced Settings screen. 84 Xerox WorkCentre 4150 User Guide
... the scanning dimensions. Resolution Resolution affects the appearance of the originals and the scanned document automatically. Manual Size Input Use this option to recognize the size of the originals being fed through the document feeder. 6 Scan to E-mail Original Size Use this ... dimensions that correspond to common document sizes and orientations. The current resolution setting is shown under the Resolution button on the Advanced Settings screen. 84 Xerox WorkCentre 4150 User Guide


