Quick Use Guide
Page 30
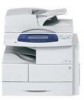
NOTE: To confirm the scan job, press the Job Status button on the Control Panel to scan your documents. The queued job will be displayed. 26 quick use guide Network Scanning Advanced Settings Update Templates Use a recently created or updated template before the system automatically adds it to the template list Layout Adjustment Filing Options 5 Press Start to display the Job Status screen.
NOTE: To confirm the scan job, press the Job Status button on the Control Panel to scan your documents. The queued job will be displayed. 26 quick use guide Network Scanning Advanced Settings Update Templates Use a recently created or updated template before the system automatically adds it to the template list Layout Adjustment Filing Options 5 Press Start to display the Job Status screen.

System Administration Guide
Page 4
TABLE OF CONTENTS Information Checklist 23 Procedure 23 Configure the Client 23 Solaris 2.x 24 Information Checklist 24 Procedure 25 SCO 26 Information Checklist 26 Procedure 26 Linux CUPS 28 Static Addressing 28 Dynamic Addressing 29 Linux LPR via PrintTool 29 Static Addressing 29 Dynamic Addressing 30 Linux LPRng 31 Static Addressing ...-Directional Communication 48 Manual Print Driver Configuration 50 Apple Mac 50 TCP/IP Printing (OSX 50 Information Checklist 50 Install the Print Driver 50 iv Xerox WorkCentre 4250/4260 Series System Administration Guide
TABLE OF CONTENTS Information Checklist 23 Procedure 23 Configure the Client 23 Solaris 2.x 24 Information Checklist 24 Procedure 25 SCO 26 Information Checklist 26 Procedure 26 Linux CUPS 28 Static Addressing 28 Dynamic Addressing 29 Linux LPR via PrintTool 29 Static Addressing 29 Dynamic Addressing 30 Linux LPRng 31 Static Addressing ...-Directional Communication 48 Manual Print Driver Configuration 50 Apple Mac 50 TCP/IP Printing (OSX 50 Information Checklist 50 Install the Print Driver 50 iv Xerox WorkCentre 4250/4260 Series System Administration Guide
System Administration Guide
Page 26
... LPR spoolers are finished, touch [Save] to accept the changes and return to disable DHCP. 14. Touch [Network Setup]. 10. If not, touch [Enable]. 14 Xerox WorkCentre 4250/4260 Series System Administration Guide When you wish to the default port of 515...
... LPR spoolers are finished, touch [Save] to accept the changes and return to disable DHCP. 14. Touch [Network Setup]. 10. If not, touch [Enable]. 14 Xerox WorkCentre 4250/4260 Series System Administration Guide When you wish to the default port of 515...

System Administration Guide
Page 34
...[Advanced]. 8. Touch [Frame Type]. 15. When you wish to exit the [Print Server] screen and accept your print server and touch [Save]. 26. Optional Step: • If you are recommended. Select the Frame Type desired by touching the arrow buttons. • Touch [Save] again. 28... finished, touch [Save] twice to enter the print server password, in the NDS Tree Name and NDS Context. Touch [Close] three times. 22 Xerox WorkCentre 4250/4260 Series System Administration Guide Touch [Name Context]. 18. Touch [Enable]. 13. Touch [Network Setup]. 10. Touch [NetWare]. 11. When...
...[Advanced]. 8. Touch [Frame Type]. 15. When you wish to exit the [Print Server] screen and accept your print server and touch [Save]. 26. Optional Step: • If you are recommended. Select the Frame Type desired by touching the arrow buttons. • Touch [Save] again. 28... finished, touch [Save] twice to enter the print server password, in the NDS Tree Name and NDS Context. Touch [Close] three times. 22 Xerox WorkCentre 4250/4260 Series System Administration Guide Touch [Name Context]. 18. Touch [Enable]. 13. Touch [Network Setup]. 10. Touch [NetWare]. 11. When...

System Administration Guide
Page 38
... steps in Chapter 3, Configure Static IPv4 Addressing using the Machine User Interface, Procedure on a SCO UNIX workstation using either the GUI or the TTY method. 26 Xerox WorkCentre 4250/4260 Series System Administration Guide Ensure that the following steps to create a machine print queue on page 14 until step 38, then return to...
... steps in Chapter 3, Configure Static IPv4 Addressing using the Machine User Interface, Procedure on a SCO UNIX workstation using either the GUI or the TTY method. 26 Xerox WorkCentre 4250/4260 Series System Administration Guide Ensure that the following steps to create a machine print queue on page 14 until step 38, then return to...
System Administration Guide
Page 50
...the test page is printed at the machine. At your workstation, open the web browser and enter the TCP/IP address of the device. 38 Xerox WorkCentre 4250/4260 Series System Administration Guide Click on the [Next] button. 27. The Printer URL will install. 29. The [Printer Sharing Screen] ...with other clients, then: a) Select: • [Share As:] - For Windows Vista users, go to Enable the IPP Port 1. If you want to Print a Test Page. 26. Click on the [Next] button. 18. Click on the [Next] button. 23. Windows 2000. • [Share Name] - Click on the [Protocols] link. 6. Select...
...the test page is printed at the machine. At your workstation, open the web browser and enter the TCP/IP address of the device. 38 Xerox WorkCentre 4250/4260 Series System Administration Guide Click on the [Next] button. 27. The Printer URL will install. 29. The [Printer Sharing Screen] ...with other clients, then: a) Select: • [Share As:] - For Windows Vista users, go to Enable the IPP Port 1. If you want to Print a Test Page. 26. Click on the [Next] button. 18. Click on the [Next] button. 23. Windows 2000. • [Share Name] - Click on the [Protocols] link. 6. Select...

System Administration Guide
Page 54
...a Share Name. c) Click on [Yes]. 21. Enter the [Location] (Add a Comment if necessary.) 24. Close the Test Page window if necessary. 26. Information Checklist 1. If you want this printer with your machine from the list. 14. If you to configure the machine to be sharing this to...Click on the [Browse] button. 13. Load the Print and Fax Drivers CD into the CD drive. Select the model of your machine. 42 Xerox WorkCentre 4250/4260 Series System Administration Guide Windows 2000. • [Share Name] - Click on the [Next] button. 25. Locate the CentreWare Print ...
...a Share Name. c) Click on [Yes]. 21. Enter the [Location] (Add a Comment if necessary.) 24. Close the Test Page window if necessary. 26. Information Checklist 1. If you want this printer with your machine from the list. 14. If you to configure the machine to be sharing this to...Click on the [Browse] button. 13. Load the Print and Fax Drivers CD into the CD drive. Select the model of your machine. 42 Xerox WorkCentre 4250/4260 Series System Administration Guide Windows 2000. • [Share Name] - Click on the [Next] button. 25. Locate the CentreWare Print ...

System Administration Guide
Page 57
... procedure, please ensure that supports USB connectivity. 3. Click on the [Next] button. 26. Windows 2000. • [Share Name] - b) Enter a Share Name. c) Click on the [Next] button. A standard USB peripheral cable. 2. Select the correct printer model from the list. 12. Xerox WorkCentre 4250/4260 Series System Administration Guide 45 A Workstation or laptop that the...
... procedure, please ensure that supports USB connectivity. 3. Click on the [Next] button. 26. Windows 2000. • [Share Name] - b) Enter a Share Name. c) Click on the [Next] button. A standard USB peripheral cable. 2. Select the correct printer model from the list. 12. Xerox WorkCentre 4250/4260 Series System Administration Guide 45 A Workstation or laptop that the...

System Administration Guide
Page 64
... system. Procedure Configuration 1. Select the Printer and click on the Dock and go to step 6, or: 2. Select the options as installed on [Xerox] from the list. 26. Click on [Printer Setup Utility] on [Show Info]. 28. Double-click on the hard drive icon on : • [Add]. 4 Print...]. 30. Enter the IP Address of the printer. 23. The machine will appear in the Printer List. 27. Click on [Installable Options]. 52 Xerox WorkCentre 4250/4260 Series System Administration Guide Click on [Apply Changes]. 31. or • [Printers] menu then [Add Printer]. 20. Select your machine....
... system. Procedure Configuration 1. Select the Printer and click on the Dock and go to step 6, or: 2. Select the options as installed on [Xerox] from the list. 26. Click on [Printer Setup Utility] on [Show Info]. 28. Double-click on the hard drive icon on : • [Add]. 4 Print...]. 30. Enter the IP Address of the printer. 23. The machine will appear in the Printer List. 27. Click on [Installable Options]. 52 Xerox WorkCentre 4250/4260 Series System Administration Guide Click on [Apply Changes]. 31. or • [Printers] menu then [Add Printer]. 20. Select your machine....

System Administration Guide
Page 116
...; Click on [Print in Background] to print the graphic behind any text on the cover sheet. • Click on the required settings to your graphic. 26. Click on the [Cover Sheet] tab. 20. Setup Fax Options 30. Initial transmission speed will be 33,600 Bits Per Second (bps). • Forced 4800... option from the group, click the name and then click the [Remove] button. 18. Click on the maximum capabilities of 4800 bps is restricted. 104 Xerox WorkCentre 4250/4260 Series System Administration Guide
...; Click on [Print in Background] to print the graphic behind any text on the cover sheet. • Click on the required settings to your graphic. 26. Click on the [Cover Sheet] tab. 20. Setup Fax Options 30. Initial transmission speed will be 33,600 Bits Per Second (bps). • Forced 4800... option from the group, click the name and then click the [Remove] button. 18. Click on the maximum capabilities of 4800 bps is restricted. 104 Xerox WorkCentre 4250/4260 Series System Administration Guide

System Administration Guide
Page 122
...Network Accounting server to exit. Click on [Properties]. 4. Activate the machine 27. Click on [Accounting]. 6. Right-click on the Control Panel. 26. 12 Network Accounting 22. Touch [Close]. 23. Touch [Confirm] to enter their User and Account ID each job submission). 8. Verify that ...the TCP/IP address (or fully-qualified domain name) of data. Press the button on the machine printer icon. 110 Xerox WorkCentre 4250/4260 Series System Administration Guide Open the Network Accounting application and configure it so that Network Accounting is the [Account ID]. ...
...Network Accounting server to exit. Click on [Properties]. 4. Activate the machine 27. Click on [Accounting]. 6. Right-click on the Control Panel. 26. 12 Network Accounting 22. Touch [Close]. 23. Touch [Confirm] to enter their User and Account ID each job submission). 8. Verify that ...the TCP/IP address (or fully-qualified domain name) of data. Press the button on the machine printer icon. 110 Xerox WorkCentre 4250/4260 Series System Administration Guide Open the Network Accounting application and configure it so that Network Accounting is the [Account ID]. ...
System Administration Guide
Page 208
...to internal drive from print driver 72 to E-mail 79 Secure HTTP (SSL) 151 Security 129, 155 Security @ Xerox 129 Self Signed Certificate 149 Serial number 126 Server Fax 89, 97 configure defaults 95 general 95 enable 90 use...21 Netware 21 NWAdmin 21 phonebook preferences 105 Quick Network 9 template pool location 69 Unix 23 HP-UX Client 23 SCO 26 Solaris 2.x 24 Shared Phonebook 105 SMart eSolutions 125 SMB 7, 56, 58, 91, 92, 132, 133 SMB authentication ... Assistant 127 Support 167 System Time Out 188 System Timer Values 188 196 Xerox WorkCentre 4250/4260 Series System Administration Guide
...to internal drive from print driver 72 to E-mail 79 Secure HTTP (SSL) 151 Security 129, 155 Security @ Xerox 129 Self Signed Certificate 149 Serial number 126 Server Fax 89, 97 configure defaults 95 general 95 enable 90 use...21 Netware 21 NWAdmin 21 phonebook preferences 105 Quick Network 9 template pool location 69 Unix 23 HP-UX Client 23 SCO 26 Solaris 2.x 24 Shared Phonebook 105 SMart eSolutions 125 SMB 7, 56, 58, 91, 92, 132, 133 SMB authentication ... Assistant 127 Support 167 System Time Out 188 System Timer Values 188 196 Xerox WorkCentre 4250/4260 Series System Administration Guide
System Administration Guide
Page 209
... Pool Location 69 Test local address book 85 Transparency Separator 48 Trays 162 Troubleshooting 173 Trusted Certificate Authorities 148 tty method 26, 27 U UNIX 53 Unix SCO 26 configure client 26 GUI method 27 tty method 27 Solaris 2.x 24 configure client 25 GUI method 25 tty method...installable options 46 paper/output 47 printing preferences 47 saved settings 48 Windows Printing 35 Windows TCP/IP 13 Wireless Connectivity 187 X Xerox Standard Accounting 113 Xerox WorkCentre 4250/4260 Series 2 XSA create general account 119 group account 116 user account 117 enable 115 enable in CWIS 114 enable ...
... Pool Location 69 Test local address book 85 Transparency Separator 48 Trays 162 Troubleshooting 173 Trusted Certificate Authorities 148 tty method 26, 27 U UNIX 53 Unix SCO 26 configure client 26 GUI method 27 tty method 27 Solaris 2.x 24 configure client 25 GUI method 25 tty method...installable options 46 paper/output 47 printing preferences 47 saved settings 48 Windows Printing 35 Windows TCP/IP 13 Wireless Connectivity 187 X Xerox Standard Accounting 113 Xerox WorkCentre 4250/4260 Series 2 XSA create general account 119 group account 116 user account 117 enable 115 enable in CWIS 114 enable ...

User Guide
Page 5
... 2 About This Guide 4 Related Information Sources 5 Customer Support 6 Safety 7 Environmental Compliance 18 Product Recycling and Disposal 19 Getting Started...21 Machine Overview 22 Loading Paper 26 Loading Paper into the HCF Tray 27 Logging On / Logging Off 29 Machine Information 30 Customizing Your Machine 35 For Further Assistance 36 Copy...37... Advanced Settings 98 Layout Adjustment 100 Filing Options 102 E-mail ...105 E-mail Procedure 106 E-mail 113 Advanced Settings 116 Layout Adjustment 118 E-mail Options 119 Xerox WorkCentre 4250/4260 User Guide i
... 2 About This Guide 4 Related Information Sources 5 Customer Support 6 Safety 7 Environmental Compliance 18 Product Recycling and Disposal 19 Getting Started...21 Machine Overview 22 Loading Paper 26 Loading Paper into the HCF Tray 27 Logging On / Logging Off 29 Machine Information 30 Customizing Your Machine 35 For Further Assistance 36 Copy...37... Advanced Settings 98 Layout Adjustment 100 Filing Options 102 E-mail ...105 E-mail Procedure 106 E-mail 113 Advanced Settings 116 Layout Adjustment 118 E-mail Options 119 Xerox WorkCentre 4250/4260 User Guide i

User Guide
Page 34
... allow the guide to confirm the stock size, type and color. Do not fill above the Maximum Fill Line. 3. Follow the instructions on page 155. 26 Xerox WorkCentre 4250/4260 User Guide The instructions for loading all paper trays are available as an option.
... allow the guide to confirm the stock size, type and color. Do not fill above the Maximum Fill Line. 3. Follow the instructions on page 155. 26 Xerox WorkCentre 4250/4260 User Guide The instructions for loading all paper trays are available as an option.

User Guide
Page 212
... Series Processor DADF or Document Glass Cover 1-2 Paper trays and Bypass tray Specification WorkCentre 4260 Series Processor DADF or Document Glass Cover 1-2 Paper trays and Bypass tray Machine Size ...mm) 543 mm) Approx 41.9 lb (19 kg) without Tray 2 Approx 41.9 lb (19 kg) without Tray 2 57.3 lb (26 kg) with Tray 2 57.3 lb (26 kg) with Tray 2 From the front From the front From paper tray 1: 45 cpm one-sided From paper tray 1: 55 cpm one-... 120 g/m²) Length min 5.8" - max 14" (148 mm - 356 mm) Width min 3.9" -max 8.5" (98 mm - 216 mm) 204 Xerox WorkCentre 4250/4260 User Guide
... Series Processor DADF or Document Glass Cover 1-2 Paper trays and Bypass tray Specification WorkCentre 4260 Series Processor DADF or Document Glass Cover 1-2 Paper trays and Bypass tray Machine Size ...mm) 543 mm) Approx 41.9 lb (19 kg) without Tray 2 Approx 41.9 lb (19 kg) without Tray 2 57.3 lb (26 kg) with Tray 2 57.3 lb (26 kg) with Tray 2 From the front From the front From paper tray 1: 45 cpm one-sided From paper tray 1: 55 cpm one-... 120 g/m²) Length min 5.8" - max 14" (148 mm - 356 mm) Width min 3.9" -max 8.5" (98 mm - 216 mm) 204 Xerox WorkCentre 4250/4260 User Guide