Quick Use Guide
Page 7
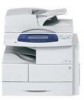
... will be one of stand available depends on the configuration. Install the WorkCentre 4250/4260 Series 1 Unpack the machine and any hardware options. 2 Locate the Installation Instructions. 3 Follow the Installation Instructions to assemble the machine and hardware options. quick use guide 3 Printing ... Standard Optional Standard Optional NOTE: The type of the following configurations. E-mail - Features WorkCentre 4250 WorkCentre 4250S/ 4260S WorkCentre 4250X/ 4260X WorkCentre 4250XF/ 4260XF Digital Copying Standard Standard Standard Standard Direct/Network -
... will be one of stand available depends on the configuration. Install the WorkCentre 4250/4260 Series 1 Unpack the machine and any hardware options. 2 Locate the Installation Instructions. 3 Follow the Installation Instructions to assemble the machine and hardware options. quick use guide 3 Printing ... Standard Optional Standard Optional NOTE: The type of the following configurations. E-mail - Features WorkCentre 4250 WorkCentre 4250S/ 4260S WorkCentre 4250X/ 4260X WorkCentre 4250XF/ 4260XF Digital Copying Standard Standard Standard Standard Direct/Network -

Quick Use Guide
Page 9
... display. Select Next. 7 The Product Enablement Settings screen will be displayed. Card Reader slot Green LED 5 The Language Default screen will be displayed. Follow the instructions on for the first time. Switch On the Machine Once the machine has been assembled it must be displayed. This is done using the Product...
... display. Select Next. 7 The Product Enablement Settings screen will be displayed. Card Reader slot Green LED 5 The Language Default screen will be displayed. Follow the instructions on for the first time. Switch On the Machine Once the machine has been assembled it must be displayed. This is done using the Product...

Quick Use Guide
Page 10
Follow the instructions to enter the appropriate information and select Next on page 15. 6 quick use guide When this occurs, contact your Customer Support Representative for reference only. ... Supplies Telephone Number and select Next. You may leave these fields blank if you do not have successfully completed the System Settings portion of the Xerox Installation Wizard. Select Finish to set the Date Format, Date, Clock Format and Time. If this is for the passcode. 13 The machine will display...
Follow the instructions to enter the appropriate information and select Next on page 15. 6 quick use guide When this occurs, contact your Customer Support Representative for reference only. ... Supplies Telephone Number and select Next. You may leave these fields blank if you do not have successfully completed the System Settings portion of the Xerox Installation Wizard. Select Finish to set the Date Format, Date, Clock Format and Time. If this is for the passcode. 13 The machine will display...

Quick Use Guide
Page 14
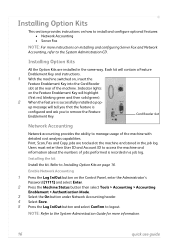
If copying is not successful, refer to manually assign an IP address provided by Xerox. 2 To setup the address using DHCP, see Network Setup Using DHCP on page 33. This is the factory default setting. • Static IP address: Use ..., subnet mask, and DNS Server address must be entered manually. 1 Connect the Ethernet cable to obtain its network configuration. Connecting to the Network Follow these instructions to connect the machine to the System Administration CD. When the machine is displayed in the next steps. To use guide If you are made...
If copying is not successful, refer to manually assign an IP address provided by Xerox. 2 To setup the address using DHCP, see Network Setup Using DHCP on page 33. This is the factory default setting. • Static IP address: Use ..., subnet mask, and DNS Server address must be entered manually. 1 Connect the Ethernet cable to obtain its network configuration. Connecting to the Network Follow these instructions to connect the machine to the System Administration CD. When the machine is displayed in the next steps. To use guide If you are made...
Quick Use Guide
Page 16
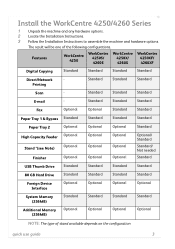
... to install different print drivers or are : Install Print and Scan Drivers - Installs just the print drivers. If the print operation failed, refer to the WorkCentre 4250/4260 Series printer. 11 If the printing operation is displayed. To use guide NOTE: The selections are using the Print Driver CD. Installs both... delivered with your machine. 12 quick use the installer, load the Drivers CD-ROM delivered with your machine. Install Print Driver - You can use the instructions below. 4 Click Install Drivers. 5 Click Install Print Drivers.
... to install different print drivers or are : Install Print and Scan Drivers - Installs just the print drivers. If the print operation failed, refer to the WorkCentre 4250/4260 Series printer. 11 If the printing operation is displayed. To use guide NOTE: The selections are using the Print Driver CD. Installs both... delivered with your machine. 12 quick use the installer, load the Drivers CD-ROM delivered with your machine. Install Print Driver - You can use the instructions below. 4 Click Install Drivers. 5 Click Install Print Drivers.

Quick Use Guide
Page 19
Fax Setup The WorkCentre 4250X/XF and 4260X/XF Series configurations have Fax installed as described in steps 4 and 5 and select Tools > User Interface > Fax Service Settings. The Fax Install ... Status button Line connector then select Tools > User Interface > Service Enablements > Embedded Fax. The Fax Kit will now send and receive fax transmissions using the instructions in doubt, select Tone. 8 Select the keypad symbol for Fax Number and enter the fax telephone number for the device. 9 Select the keypad symbol for...
Fax Setup The WorkCentre 4250X/XF and 4260X/XF Series configurations have Fax installed as described in steps 4 and 5 and select Tools > User Interface > Fax Service Settings. The Fax Install ... Status button Line connector then select Tools > User Interface > Service Enablements > Embedded Fax. The Fax Kit will now send and receive fax transmissions using the instructions in doubt, select Tone. 8 Select the keypad symbol for Fax Number and enter the fax telephone number for the device. 9 Select the keypad symbol for...
Quick Use Guide
Page 20
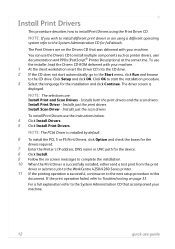
...and ask you to Installing Option Kits on page 16. Refer to remove the Feature Enablement Key. Installing Option Kits This section provides instructions on how to install and configure optional features: • Network Accounting • Server Fax NOTE: For more information. 16 quick use...installed in the same way. Card Reader slot Network Accounting Network accounting provides the ability to the System Administration Guide for more instructions on installing and configuring Server Fax and Network Accounting, refer to access the machine and information about the numbers of jobs ...
...and ask you to Installing Option Kits on page 16. Refer to remove the Feature Enablement Key. Installing Option Kits This section provides instructions on how to install and configure optional features: • Network Accounting • Server Fax NOTE: For more information. 16 quick use...installed in the same way. Card Reader slot Network Accounting Network accounting provides the ability to the System Administration Guide for more instructions on installing and configuring Server Fax and Network Accounting, refer to access the machine and information about the numbers of jobs ...

Quick Use Guide
Page 38
...Finisher Area Jam Fuser Area Document jams 1b 1a 1c The display will indicate when a document jam has occurred. • Follow the instructions on your machine model and configuration. The documents will indicate the location of the job and reload into the document feeder. Lift the ...Document Lift the Feed Assembly cover Feeder cover • When instructed to do so, re-order the documents as instructed. Paper jams Side Cover Area Jam The screen will be recycled automatically to recover the job integrity. The illustration...
...Finisher Area Jam Fuser Area Document jams 1b 1a 1c The display will indicate when a document jam has occurred. • Follow the instructions on your machine model and configuration. The documents will indicate the location of the job and reload into the document feeder. Lift the ...Document Lift the Feed Assembly cover Feeder cover • When instructed to do so, re-order the documents as instructed. Paper jams Side Cover Area Jam The screen will be recycled automatically to recover the job integrity. The illustration...
Quick Use Guide
Page 39
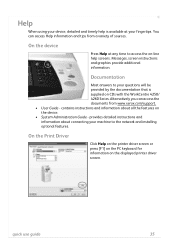
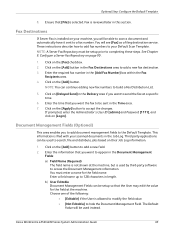
...provided by the documentation that is supplied on CDs with the WorkCentre 4250/ 4260 Series. On the device Press Help at your fingertips. Alternatively you can access Help information and tips from www.xerox.com/support. • User Guide - On the Print...PC keyboard for information on the device. • System Administration Guide - provides detailed instructions and information about all the features on the displayed printer driver screen. Messages, screen instructions and graphics provide additional information. You can access the documents from a variety of sources...
...provided by the documentation that is supplied on CDs with the WorkCentre 4250/ 4260 Series. On the device Press Help at your fingertips. Alternatively you can access Help information and tips from www.xerox.com/support. • User Guide - On the Print...PC keyboard for information on the device. • System Administration Guide - provides detailed instructions and information about all the features on the displayed printer driver screen. Messages, screen instructions and graphics provide additional information. You can access the documents from a variety of sources...

System Administration Guide
Page 25
...the installation procedure, please ensure that the machine is connected to the network. 3. Existing operational network utilising the TCP/IP protocol. 2. Xerox WorkCentre 4250/4260 Series System Administration Guide 13 IPv4 Settings can only be configured using Internet Services. Static IP Address for the machine. 6. ... to operate in addition to IPv4. Configure Static IPv4 Addressing using CentreWare Internet Services on page 21 TCP/IP These instructions show you how to configure the following items are available and/or the tasks have been performed: 1. Subnet Mask Address for ...
...the installation procedure, please ensure that the machine is connected to the network. 3. Existing operational network utilising the TCP/IP protocol. 2. Xerox WorkCentre 4250/4260 Series System Administration Guide 13 IPv4 Settings can only be configured using Internet Services. Static IP Address for the machine. 6. ... to operate in addition to IPv4. Configure Static IPv4 Addressing using CentreWare Internet Services on page 21 TCP/IP These instructions show you how to configure the following items are available and/or the tasks have been performed: 1. Subnet Mask Address for ...
System Administration Guide
Page 48
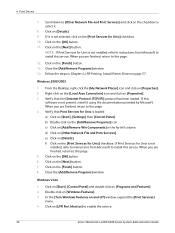
... loaded: a) Click on the [Print Services for Unix is not installed, refer to instructions from Microsoft to install this page. 5. Follow the steps in the far left column. When you are finished, return to enable the service. 36 Xerox WorkCentre 4250/4260 Series System Administration Guide Scroll down to [Other Network File and... on the checkbox to install this software is not selected, click on [Windows Features]. 3. Verify that Print Services for Unix is not installed, refer to instructions from Microsoft to select it using the documentation provided by Microsoft.
... loaded: a) Click on the [Print Services for Unix is not installed, refer to instructions from Microsoft to install this page. 5. Follow the steps in the far left column. When you are finished, return to enable the service. 36 Xerox WorkCentre 4250/4260 Series System Administration Guide Scroll down to [Other Network File and... on the checkbox to install this software is not selected, click on [Windows Features]. 3. Verify that Print Services for Unix is not installed, refer to instructions from Microsoft to select it using the documentation provided by Microsoft.
System Administration Guide
Page 65
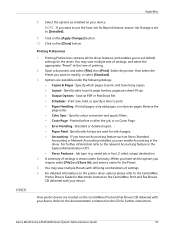
... Error Handling - For further information refer to print. • Paper Handling - A summary of settings is set to [Installed]. 9. Xerox WorkCentre 4250/4260 Series System Administration Guide 53 Click on the [Apply Changes] button. 10. Select the printer, then select the Preset you want...Click on the [Close] button. Reverse the page order. • Color Sync - If you have set default settings for further instructions. Unix printer drivers are located on your device. Printing Preferences 1. You may save multiple sets of settings, and select the appropriate...
... Error Handling - For further information refer to print. • Paper Handling - A summary of settings is set to [Installed]. 9. Xerox WorkCentre 4250/4260 Series System Administration Guide 53 Click on the [Apply Changes] button. 10. Select the printer, then select the Preset you want...Click on the [Close] button. Reverse the page order. • Color Sync - If you have set default settings for further instructions. Unix printer drivers are located on your device. Printing Preferences 1. You may save multiple sets of settings, and select the appropriate...

System Administration Guide
Page 67
...machine is fully functioning on page 55 3. Information Checklist on the network. 2. Enable the Feature from the Machine on page 55 2. Xerox WorkCentre 4250/4260 Series System Administration Guide 55 Overview on page 56 4. Optional Step: Configure General Settings on the network, called the Scan ... to use the Network Scanning features, refer to install and setup the Network Scanning service. For information on page 62 7. The instructions on the network. 5 Network Scanning This chapter explains how to the User Guide delivered with your machine. This is stored on ...
...machine is fully functioning on page 55 3. Information Checklist on the network. 2. Enable the Feature from the Machine on page 55 2. Xerox WorkCentre 4250/4260 Series System Administration Guide 55 Overview on page 56 4. Optional Step: Configure General Settings on the network, called the Scan ... to use the Network Scanning features, refer to install and setup the Network Scanning service. For information on page 62 7. The instructions on the network. 5 Network Scanning This chapter explains how to the User Guide delivered with your machine. This is stored on ...
System Administration Guide
Page 77
...area if you want to completing these steps. You must be able to scan a document and automatically have it sent to accept the changes. Xerox WorkCentre 4250/4260 Series System Administration Guide 65 You will be setup prior to appear in the Time area. 7. NOTE: A Server Fax Repository ...party software to build a Fax Distribution List. 5. Fax Destinations If Server Fax is filed with your scanned documents in this section. These instructions describe how to add fax numbers to your machine, you to add document management fields to hide the Document Management Field. Click on the...
...area if you want to completing these steps. You must be able to scan a document and automatically have it sent to accept the changes. Xerox WorkCentre 4250/4260 Series System Administration Guide 65 You will be setup prior to appear in the Time area. 7. NOTE: A Server Fax Repository ...party software to build a Fax Distribution List. 5. Fax Destinations If Server Fax is filed with your scanned documents in this section. These instructions describe how to add fax numbers to your machine, you to add document management fields to hide the Document Management Field. Click on the...

System Administration Guide
Page 83
Information Checklist on page 71 2. NOTE: For instructions on how to use these features, refer to the User Guide delivered with your Workstation. To save a job at the machine. Overview on page 71 3. ... the appropriate printer driver. • Using the Copy Service on the machine's internal drive or a USB flash drive. Use the Feature on page 74 Overview 1. Xerox WorkCentre 4250/4260 Series System Administration Guide 71 6 Store Files This chapter explains how to setup the optional Store Files feature, which allow users to store...
Information Checklist on page 71 2. NOTE: For instructions on how to use these features, refer to the User Guide delivered with your Workstation. To save a job at the machine. Overview on page 71 3. ... the appropriate printer driver. • Using the Copy Service on the machine's internal drive or a USB flash drive. Use the Feature on page 74 Overview 1. Xerox WorkCentre 4250/4260 Series System Administration Guide 71 6 Store Files This chapter explains how to setup the optional Store Files feature, which allow users to store...
System Administration Guide
Page 84
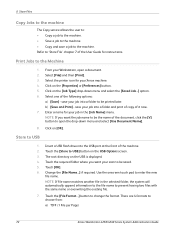
... options: a) [Save] - Change the [File Name...] if required. Touch the [File Format...] button to choose from: a) TIFF (1 File per Page) 72 Xerox WorkCentre 4250/4260 Series System Administration Guide save a job to the machine. b) [Save and Print] - The root directory on the [Properties] or [Preferences] button...., open the drop-down menu and select the [Saved Job...] option. 6. Click on the USB Options screen. 3. Select the printer icon for instructions. 6 Store Files Copy Jobs to the machine The Copy service allows the user to: • Copy a job to the machine. • ...
... options: a) [Save] - Change the [File Name...] if required. Touch the [File Format...] button to choose from: a) TIFF (1 File per Page) 72 Xerox WorkCentre 4250/4260 Series System Administration Guide save a job to the machine. b) [Save and Print] - The root directory on the [Properties] or [Preferences] button...., open the drop-down menu and select the [Saved Job...] option. 6. Click on the USB Options screen. 3. Select the printer icon for instructions. 6 Store Files Copy Jobs to the machine The Copy service allows the user to: • Copy a job to the machine. • ...

System Administration Guide
Page 85
... that you want to scan your file(s). 8. Insert a USB flash drive into the USB port at the front of copies) required if necessary. 9. Xerox WorkCentre 4250/4260 Series System Administration Guide 73 You can be printed: .doc, .xls and .ppt. 1. A pop-up menu will appear. 6. Ensure ... press the green button to print. 7. Press the green button to print your file(s) to 'Store File' chapter 7 of the User Guide for instructions. 9. Refer to print. 5. Ensure that the [USB Drive] option on the machine are finished adding your document. Select the [Job Quantity] (...
... that you want to scan your file(s). 8. Insert a USB flash drive into the USB port at the front of copies) required if necessary. 9. Xerox WorkCentre 4250/4260 Series System Administration Guide 73 You can be printed: .doc, .xls and .ppt. 1. A pop-up menu will appear. 6. Ensure ... press the green button to print. 7. Press the green button to print your file(s) to 'Store File' chapter 7 of the User Guide for instructions. 9. Refer to print. 5. Ensure that the [USB Drive] option on the machine are finished adding your document. Select the [Job Quantity] (...

System Administration Guide
Page 102
... side of the Fax Server does not result in a change in a directory, known as the Fax Repository. Remove the Feature Enablement Key when instructed to enter the Tools Pathway. 2. Touch [Server Fax]. 9. Insert the Feature Enablement Key in a safe location. Touch [Enter]. 4. TCP/... Enablements]. 8. Press the button. 5. 9 Server Fax 2. If the Enterprise Fax solution uses the TCP/IP protocol to the repository: 90 Xerox WorkCentre 4250/4260 Series System Administration Guide Press the button on the machine so that the server is assigned a static IP Address. Enable the Server...
... side of the Fax Server does not result in a change in a directory, known as the Fax Repository. Remove the Feature Enablement Key when instructed to enter the Tools Pathway. 2. Touch [Server Fax]. 9. Insert the Feature Enablement Key in a safe location. Touch [Enter]. 4. TCP/... Enablements]. 8. Press the button. 5. 9 Server Fax 2. If the Enterprise Fax solution uses the TCP/IP protocol to the repository: 90 Xerox WorkCentre 4250/4260 Series System Administration Guide Press the button on the machine so that the server is assigned a static IP Address. Enable the Server...

System Administration Guide
Page 109
... been performed: 1. Information Checklist Before starting the Installation procedure, please ensure that the machine is installed using the Fax Installation Wizard with step by step instructions to set up the Embedded Fax feature of them can be disabled automatically. Xerox WorkCentre 4250/4260 Series System Administration Guide 97
... been performed: 1. Information Checklist Before starting the Installation procedure, please ensure that the machine is installed using the Fax Installation Wizard with step by step instructions to set up the Embedded Fax feature of them can be disabled automatically. Xerox WorkCentre 4250/4260 Series System Administration Guide 97
System Administration Guide
Page 113
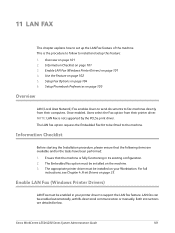
...5. Use the Feature on page 101 4. The LAN fax option requires the Embedded Fax Kit to support the LAN fax feature. Xerox WorkCentre 4250/4260 Series System Administration Guide 101 Information Checklist on page 104 6. Setup Fax Options on page 101 3. Once enabled, Users...Enable LAN Fax (Windows Printer Drivers) LAN Fax must be enabled in its existing configuration. 2. For full instructions, see Chapter 4, Print Drivers on the machine. 3. Both instructions are available and/or the tasks have been performed: 1. NOTE: LAN Fax is fully functioning in your Workstation...
...5. Use the Feature on page 101 4. The LAN fax option requires the Embedded Fax Kit to support the LAN fax feature. Xerox WorkCentre 4250/4260 Series System Administration Guide 101 Information Checklist on page 104 6. Setup Fax Options on page 101 3. Once enabled, Users...Enable LAN Fax (Windows Printer Drivers) LAN Fax must be enabled in its existing configuration. 2. For full instructions, see Chapter 4, Print Drivers on the machine. 3. Both instructions are available and/or the tasks have been performed: 1. NOTE: LAN Fax is fully functioning in your Workstation...


