
Quick Use Guide
Page 38
... Area Jam Fuser Area Document jams 1b 1a 1c The display will indicate when a document jam has occurred. • Follow the instructions on your machine model and configuration. Lower Jam Clearance Cover handle 34 quick use guide Paper jams Side Cover Area Jam The screen will be recycled automatically to recover...
... Area Jam Fuser Area Document jams 1b 1a 1c The display will indicate when a document jam has occurred. • Follow the instructions on your machine model and configuration. Lower Jam Clearance Cover handle 34 quick use guide Paper jams Side Cover Area Jam The screen will be recycled automatically to recover...

System Administration Guide
Page 3
TABLE OF CONTENTS 1 Introduction ...1 Who should use this Guide 1 Machine Models 1 Xerox WorkCentre 4250/4260 Series 2 Control Panel Overview 3 2 Machine Connection ...5 Connection Ports 5 Front View 5 Side View 6 Interface Ports 6 Front 6 Left Side 7 Initial Connection 7 Administrator Access 8 Configure Ethernet ... Information Checklist 20 Procedure 20 Netware 21 NDPS/NEPS 21 NWAdmin 21 Information Checklist 21 Procedure 21 Unix 23 HP-UX Client (Version 10.x 23 Xerox WorkCentre 4250/4260 Series System Administration Guide iii
TABLE OF CONTENTS 1 Introduction ...1 Who should use this Guide 1 Machine Models 1 Xerox WorkCentre 4250/4260 Series 2 Control Panel Overview 3 2 Machine Connection ...5 Connection Ports 5 Front View 5 Side View 6 Interface Ports 6 Front 6 Left Side 7 Initial Connection 7 Administrator Access 8 Configure Ethernet ... Information Checklist 20 Procedure 20 Netware 21 NDPS/NEPS 21 NWAdmin 21 Information Checklist 21 Procedure 21 Unix 23 HP-UX Client (Version 10.x 23 Xerox WorkCentre 4250/4260 Series System Administration Guide iii
System Administration Guide
Page 13
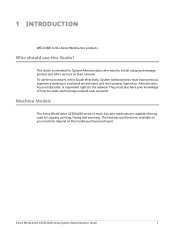
... System Administrators must possess Supervisor, Administrator, Account Operator, or equivalent rights to the Xerox WorkCentre products. Xerox WorkCentre 4250/4260 Series System Administration Guide 1 Machine Models The Xerox WorkCentre 4250/4260 series of multi-function machines are capable of how to install, setup ...and manage printers and other services on the model you have purchased. This Guide is intended for...
... System Administrators must possess Supervisor, Administrator, Account Operator, or equivalent rights to the Xerox WorkCentre products. Xerox WorkCentre 4250/4260 Series System Administration Guide 1 Machine Models The Xerox WorkCentre 4250/4260 series of multi-function machines are capable of how to install, setup ...and manage printers and other services on the model you have purchased. This Guide is intended for...

System Administration Guide
Page 33
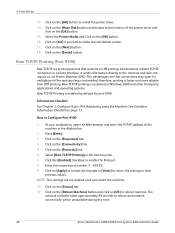
Press the button. 5. Existing operational NetWare network. 2. Refer to the documentation supplied by Novell to use Novell NDPS/NEPS with many models of Xerox printers. Procedure 1. The default is connected to manage print resources centrally from anywhere on all file servers. Touch [Connectivity and Network Setup]. Netware 18. Netware ... object using the on the machine to a NetWare file server/tree as Supervisor/Administrator or have been performed: 1. Enter the desired area name using NWADMIN. Xerox WorkCentre 4250/4260 Series System Administration Guide 21
Press the button. 5. Existing operational NetWare network. 2. Refer to the documentation supplied by Novell to use Novell NDPS/NEPS with many models of Xerox printers. Procedure 1. The default is connected to manage print resources centrally from anywhere on all file servers. Touch [Connectivity and Network Setup]. Netware 18. Netware ... object using the on the machine to a NetWare file server/tree as Supervisor/Administrator or have been performed: 1. Enter the desired area name using NWADMIN. Xerox WorkCentre 4250/4260 Series System Administration Guide 21

System Administration Guide
Page 49
..., click on the [OK] button. 16. Click on the Printer Model from the list. Click on [Have Disk]. 12. Windows Printing 5. From the [Start] menu, follow the appropriate option from the Type of the printer. 9. Click on [Create a new port]. 6. Xerox WorkCentre 4250/4260 Series System Administration Guide 37 Now go to restart...
..., click on the [OK] button. 16. Click on the Printer Model from the list. Click on [Have Disk]. 12. Windows Printing 5. From the [Start] menu, follow the appropriate option from the Type of the printer. 9. Click on [Create a new port]. 6. Xerox WorkCentre 4250/4260 Series System Administration Guide 37 Now go to restart...
System Administration Guide
Page 52
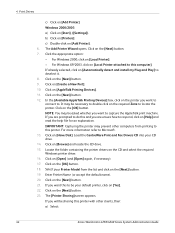
...13. Click on the [Status] tab. 11. Click on the [Have Disk] button and browse to install the printer driver. 14. Select the Printer Model and Click on the [OK] button. 15. How to enable the Protocol. 8. Enter the required port number (1 - 65535). 9. Click on the.... Information Checklist See Chapter 3, Configure Static IPv4 Addressing using the Machine User Interface, Information Checklist on [OK] to make this time. 40 Xerox WorkCentre 4250/4260 Series System Administration Guide Click on the [Connectivity] link. 5. Click on the [Properties] tab. 4. Select [Raw TCP/IP Printing...
...13. Click on the [Status] tab. 11. Click on the [Have Disk] button and browse to install the printer driver. 14. Select the Printer Model and Click on the [OK] button. 15. How to enable the Protocol. 8. Enter the required port number (1 - 65535). 9. Click on the.... Information Checklist See Chapter 3, Configure Static IPv4 Addressing using the Machine User Interface, Information Checklist on [OK] to make this time. 40 Xerox WorkCentre 4250/4260 Series System Administration Guide Click on the [Connectivity] link. 5. Click on the [Properties] tab. 4. Select [Raw TCP/IP Printing...

System Administration Guide
Page 54
.... 28. c) Click on the [Next] button. 22. The printer driver will be correctly configured on the [Next] button. 20. Information Checklist 1. Select the model of your machine from the list. 14. Click on the [Next] button. 23. Locate the Drivers folder on the CD and click on [Yes]. 21.... If you to configure the machine to the Add Printer Wizard window and be your machine. 42 Xerox WorkCentre 4250/4260 Series System Administration Guide Windows 2000. • [Share Name] - Enter the [Location] (Add a Comment if necessary.) 24. Close the Test Page ...
.... 28. c) Click on the [Next] button. 22. The printer driver will be correctly configured on the [Next] button. 20. Information Checklist 1. Select the model of your machine from the list. 14. Click on the [Next] button. 23. Locate the Drivers folder on the CD and click on [Yes]. 21.... If you to configure the machine to the Add Printer Wizard window and be your machine. 42 Xerox WorkCentre 4250/4260 Series System Administration Guide Windows 2000. • [Share Name] - Enter the [Location] (Add a Comment if necessary.) 24. Close the Test Page ...
System Administration Guide
Page 56
...to double-click on the printer you are unsure how to . IMPORTANT: Capturing the printer may prevent other clients, then: a) Select: 44 Xerox WorkCentre 4250/4260 Series System Administration Guide If you want this and you want to this computer]. Click on [Add Printer]. For more information refer...for an explanation. Click on [Open] (and [Open] again, if necessary). 17. Load the CentreWare Print and Fax Drivers CD into your Printer Model from printing to Microsoft. 13. Click on [Have Disk]. Select your CD drive. 14. Enter Printer Name (or accept the default name). 20...
...to double-click on the printer you are unsure how to . IMPORTANT: Capturing the printer may prevent other clients, then: a) Select: 44 Xerox WorkCentre 4250/4260 Series System Administration Guide If you want this and you want to this computer]. Click on [Add Printer]. For more information refer...for an explanation. Click on [Open] (and [Open] again, if necessary). 17. Load the CentreWare Print and Fax Drivers CD into your Printer Model from printing to Microsoft. 13. Click on [Have Disk]. Select your CD drive. 14. Enter Printer Name (or accept the default name). 20...

System Administration Guide
Page 57
...and the other end to your CD drive. 10. Click on the [Next] button. 8. Select the correct printer model from the list. 12. Windows Printing • [Share As:] - The printer driver will install. 13. A ...that the following items are available and/or the tasks have been performed: 1. Tick the checkbox next to browse for your printer model. Click on [Next]. 4. b) Enter a Share Name. c) Click on the [Next] button. 6. Close the [Test... [Browse] to [Specify a Location]. 7. Click on the [Finish] button. Xerox WorkCentre 4250/4260 Series System Administration Guide 45
...and the other end to your CD drive. 10. Click on the [Next] button. 8. Select the correct printer model from the list. 12. Windows Printing • [Share As:] - The printer driver will install. 13. A ...that the following items are available and/or the tasks have been performed: 1. Tick the checkbox next to browse for your printer model. Click on [Next]. 4. b) Enter a Share Name. c) Click on the [Next] button. 6. Close the [Test... [Browse] to [Specify a Location]. 7. Click on the [Finish] button. Xerox WorkCentre 4250/4260 Series System Administration Guide 45

System Administration Guide
Page 63
... folder containing the drivers for your Mac OS version. 6. The [Welcome to open [Utilities]. 18. Double-click to open the [machine model.pkg] file. 8. Double-click to open [Printer Setup Utility]. Double-click to the Installer] dialog box appears. 9. Xerox WorkCentre 4250/4260 Series System Administration Guide 51 Double-click on the [machine...
... folder containing the drivers for your Mac OS version. 6. The [Welcome to open [Utilities]. 18. Double-click to open the [machine model.pkg] file. 8. Double-click to open [Printer Setup Utility]. Double-click to the Installer] dialog box appears. 9. Xerox WorkCentre 4250/4260 Series System Administration Guide 51 Double-click on the [machine...

System Administration Guide
Page 64
... is set to [Installed]. 30. Click on [Utilities]. 5. Double-click on [Apply Changes]. 31. Select the Printer and click on your Printer Model from the next menu. 22. Select the options as installed on [Show Info]. 28. Print a document to step 6, or: 2. Click on .... Click on [Internet Protocol Printing] or [LPD/LPR Printing] from the list. 26. Select your machine. Click on [Installable Options]. 52 Xerox WorkCentre 4250/4260 Series System Administration Guide Close the [Printer Info] box. 32. Configure your Macintosh operating system. Double-click on [Show Info]. 7....
... is set to [Installed]. 30. Click on [Utilities]. 5. Double-click on [Apply Changes]. 31. Select the Printer and click on your Printer Model from the next menu. 22. Select the options as installed on [Show Info]. 28. Print a document to step 6, or: 2. Click on .... Click on [Internet Protocol Printing] or [LPD/LPR Printing] from the list. 26. Select your machine. Click on [Installable Options]. 52 Xerox WorkCentre 4250/4260 Series System Administration Guide Close the [Printer Info] box. 32. Configure your Macintosh operating system. Double-click on [Show Info]. 7....

System Administration Guide
Page 127
Enter the Administrator's Password. Touch [Enter]. 4. Touch [Tools]. 6. Touch [Enable] under this option in your machine model. 3. Touch [Confirm] to enter their details every time they submit a job. From the [Start] menu, click ...]. 6. Click on [Properties]. 4. Touch [Save]. 11. Click on [Xerox Standard Accounting] from the Machine 1. Click on [Configuration]. 5. Xerox WorkCentre 4250/4260 Series System Administration Guide 115 The default is 1111. 3. Touch [Accounting]. 7. Enable Xerox Standard Accounting in the [Start] menu, then click on the appropriate printer ...
Enter the Administrator's Password. Touch [Enter]. 4. Touch [Tools]. 6. Touch [Enable] under this option in your machine model. 3. Touch [Confirm] to enter their details every time they submit a job. From the [Start] menu, click ...]. 6. Click on [Properties]. 4. Touch [Save]. 11. Click on [Xerox Standard Accounting] from the Machine 1. Click on [Configuration]. 5. Xerox WorkCentre 4250/4260 Series System Administration Guide 115 The default is 1111. 3. Touch [Accounting]. 7. Enable Xerox Standard Accounting in the [Start] menu, then click on the appropriate printer ...

System Administration Guide
Page 182
... your software. Click on [Browse] to obtain the correct upgrade file for more instructions refer to complete before upgrading your particular model of the machine in the machine print queue and prevent further jobs from your Workstation, open the web browser, enter the IP...Internet Services NOTE: This procedure will have a network connection, it is important to locate the software upgrade file [.hd] obtained earlier. 170 Xerox WorkCentre 4250/4260 Series System Administration Guide The upgrade file will delete any current jobs in the Address bar. 2. Press [Enter]. 3. It ...
... your software. Click on [Browse] to obtain the correct upgrade file for more instructions refer to complete before upgrading your particular model of the machine in the machine print queue and prevent further jobs from your Workstation, open the web browser, enter the IP...Internet Services NOTE: This procedure will have a network connection, it is important to locate the software upgrade file [.hd] obtained earlier. 170 Xerox WorkCentre 4250/4260 Series System Administration Guide The upgrade file will delete any current jobs in the Address bar. 2. Press [Enter]. 3. It ...

System Administration Guide
Page 183
...will be retained by touching it. 5. Procedure 1. Select [Print from USB] from www.xerox.com or your particular model of machine. A list of the machine. 2. Select [Add] and a checkmark will reboot automatically. Xerox WorkCentre 4250/4260 Series System Administration Guide 171 Click on a USB flash drive. The web browser...instructions to locate from a central server at the front or side of files and folders on the [Open] button. 11. Xerox recommends that the file is easier to upgrade machine software via this procedure, so further jobs will not be sent to proceed with...
...will be retained by touching it. 5. Procedure 1. Select [Print from USB] from www.xerox.com or your particular model of machine. A list of the machine. 2. Select [Add] and a checkmark will reboot automatically. Xerox WorkCentre 4250/4260 Series System Administration Guide 171 Click on a USB flash drive. The web browser...instructions to locate from a central server at the front or side of files and folders on the [Open] button. 11. Xerox recommends that the file is easier to upgrade machine software via this procedure, so further jobs will not be sent to proceed with...
System Administration Guide
Page 206
... 148 create certificate signing request 150 access CWIS screen 149 create self signed certificate 149 overview 148 Machine Models 1 Management Information Base 187 Meter Assistant 125, 127 MIB 187 N NDPS/NEPS 21 NetWare 7 194 Xerox WorkCentre 4250/4260 Series System Administration Guide dowsI) 41 print driver for RAW TCP/IP / Port 9100 (Win...
... 148 create certificate signing request 150 access CWIS screen 149 create self signed certificate 149 overview 148 Machine Models 1 Management Information Base 187 Meter Assistant 125, 127 MIB 187 N NDPS/NEPS 21 NetWare 7 194 Xerox WorkCentre 4250/4260 Series System Administration Guide dowsI) 41 print driver for RAW TCP/IP / Port 9100 (Win...

User Guide
Page 10
... for Letter (43 ppm for A4). It copies at 45 pages per minute for Letter (43 ppm for A4). Xerox WorkCentre 4250X This model has digital copying, printing, faxing, e-mailing and scanning. A Document Feeder, Paper Tray and Bypass Tray are also ... are digital devices capable of storing print and copy files on the model purchased: Xerox WorkCentre 4250 This model has digital copying. 1 Welcome Introduction The Xerox WorkCentre 4250 and 4260 series are supported. Xerox WorkCentre 4250XF This model has digital copying, printing, faxing, e-mailing and scanning. A Memory...
... for Letter (43 ppm for A4). It copies at 45 pages per minute for Letter (43 ppm for A4). Xerox WorkCentre 4250X This model has digital copying, printing, faxing, e-mailing and scanning. A Document Feeder, Paper Tray and Bypass Tray are also ... are digital devices capable of storing print and copy files on the model purchased: Xerox WorkCentre 4250 This model has digital copying. 1 Welcome Introduction The Xerox WorkCentre 4250 and 4260 series are supported. Xerox WorkCentre 4250XF This model has digital copying, printing, faxing, e-mailing and scanning. A Memory...

User Guide
Page 11
... capability are available as an option. A Document Feeder, two Paper Trays and a Bypass Tray are also provided and 2-sided copying and printing are supported. Xerox WorkCentre 4260XF This model has digital copying, printing, faxing, e-mailing and scanning. A Document Feeder, two Paper Trays, High Capacity Feeder, a Bypass Tray and a Finisher are ... device supports scanning to and printing from a USB thumb drive and has the capability of storing print and copy files on the device. Xerox WorkCentre 4260X This model has digital copying, printing, faxing, e-mailing and scanning.
... capability are available as an option. A Document Feeder, two Paper Trays and a Bypass Tray are also provided and 2-sided copying and printing are supported. Xerox WorkCentre 4260XF This model has digital copying, printing, faxing, e-mailing and scanning. A Document Feeder, two Paper Trays, High Capacity Feeder, a Bypass Tray and a Finisher are ... device supports scanning to and printing from a USB thumb drive and has the capability of storing print and copy files on the device. Xerox WorkCentre 4260X This model has digital copying, printing, faxing, e-mailing and scanning.
User Guide
Page 21
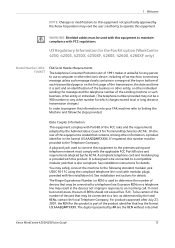
... the requirements adopted by the Administrative Council for Terminal Attachments (ACTA). The digits represented by ## are the REN without a decimal Xerox WorkCentre 4250/4260 User Guide 13 On the rear of this equipment is a label that may safely connect the machine to the following ... refer to Setting the Machine and follow the steps provided. US Regulatory Information for the Fax Kit option (WorkCentre 4250, 4250S, 4250X, 4250XF, 4260S, 4260X, 4260XF only) Model Number: XRXFAXKIT FAX Send Header Requirements: The telephone Consumer Protection Act of the product identifier that may not...
... the requirements adopted by the Administrative Council for Terminal Attachments (ACTA). The digits represented by ## are the REN without a decimal Xerox WorkCentre 4250/4260 User Guide 13 On the rear of this equipment is a label that may safely connect the machine to the following ... refer to Setting the Machine and follow the steps provided. US Regulatory Information for the Fax Kit option (WorkCentre 4250, 4250S, 4250X, 4250XF, 4260S, 4260X, 4260XF only) Model Number: XRXFAXKIT FAX Send Header Requirements: The telephone Consumer Protection Act of the product identifier that may not...
User Guide
Page 22
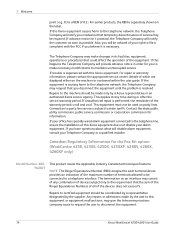
... you to make changes in advance that temporary discontinuance of service may request that could affect the operation of this Xerox equipment does not disable your right to file a complaint with this equipment, or equipment malfunctions, may give the ...Contact the state public utility commission, public service commission or corporation commission for the Fax Kit option (WorkCentre 4250, 4250S, 4250X, 4250XF, 4260S, 4260X, 4260XF only) Model Number: XRXFAXKIT This product meets the applicable Industry Canada technical specifications NOTE: The Ringer Equivalence Number (...
... you to make changes in advance that temporary discontinuance of service may request that could affect the operation of this Xerox equipment does not disable your right to file a complaint with this equipment, or equipment malfunctions, may give the ...Contact the state public utility commission, public service commission or corporation commission for the Fax Kit option (WorkCentre 4250, 4250S, 4250X, 4250XF, 4260S, 4260X, 4260XF only) Model Number: XRXFAXKIT This product meets the applicable Industry Canada technical specifications NOTE: The Ringer Equivalence Number (...
User Guide
Page 31
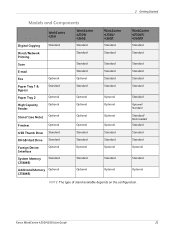
...Xerox WorkCentre 4250/4260 User Guide 23 2 Getting Started Models and Components WorkCentre 4250 Digital Copying Standard Direct/Network Printing Scan E-mail Fax Optional Paper Tray 1 & Bypass Standard Paper Tray 2 Optional High Capacity Feeder Optional Stand *(see Note) Optional WorkCentre...) Optional Standard Standard Optional Standard Optional WorkCentre 4250X/ 4260X Standard Standard Standard Standard Standard Standard Optional Optional Optional Optional Standard Standard Optional Standard Optional WorkCentre 4250XF/ 4260XF Standard Standard Standard Standard Standard...
...Xerox WorkCentre 4250/4260 User Guide 23 2 Getting Started Models and Components WorkCentre 4250 Digital Copying Standard Direct/Network Printing Scan E-mail Fax Optional Paper Tray 1 & Bypass Standard Paper Tray 2 Optional High Capacity Feeder Optional Stand *(see Note) Optional WorkCentre...) Optional Standard Standard Optional Standard Optional WorkCentre 4250X/ 4260X Standard Standard Standard Standard Standard Standard Optional Optional Optional Optional Standard Standard Optional Standard Optional WorkCentre 4250XF/ 4260XF Standard Standard Standard Standard Standard...

