

User Guide
Page 5
...at the Exit and Jam at the Rear (with Duplex Unit 6-9 Jam at the Stacker 6-18 Paper Size Jam 6-20 Phaser® 4510 Laser Printer iii Contents Solving Print-Quality Problems 4-3 Light Prints 4-4 Blank Prints 4-5 Black Prints 4-6 Horizontal Line Deletions 4-7 Vertical Line Deletions...4-14 Random or Spot Deletions 4-14 Repeating Defects 4-15 Setting the Fuser Temperature 4-16 Print Area Is Not Centered on the Paper 4-17 5 Maintenance Cleaning the Printer 5-2 Cleaning the Outside of the Printer 5-2 Cleaning the Feed Roller 5-2 Ordering Supplies 5-5 Consumables 5-5 Routine ...
...at the Exit and Jam at the Rear (with Duplex Unit 6-9 Jam at the Stacker 6-18 Paper Size Jam 6-20 Phaser® 4510 Laser Printer iii Contents Solving Print-Quality Problems 4-3 Light Prints 4-4 Blank Prints 4-5 Black Prints 4-6 Horizontal Line Deletions 4-7 Vertical Line Deletions...4-14 Random or Spot Deletions 4-14 Repeating Defects 4-15 Setting the Fuser Temperature 4-16 Print Area Is Not Centered on the Paper 4-17 5 Maintenance Cleaning the Printer 5-2 Cleaning the Outside of the Printer 5-2 Cleaning the Feed Roller 5-2 Ordering Supplies 5-5 Consumables 5-5 Routine ...
User Guide
Page 9
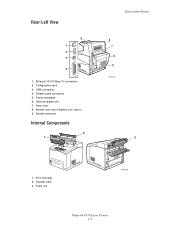
Parallel cable connection 5. Stacker extension Internal Components 2 1 Parts of the Printer 8 7 6 5 4510-067 3 1. USB connection 4. Print cartridge 2. Rear cover 8. Transfer roller 3. Optional duplex unit 7. Configuration card 3. Stacker rear cover (Stacker is an option.) 9. Rear-Left View 9 1 2 3 4 1. Power receptacle 6. Fuser unit 4510-094 Phaser® 4510 Laser Printer 1-3 Ethernet 10/100 Base-Tx connection 2.
Parallel cable connection 5. Stacker extension Internal Components 2 1 Parts of the Printer 8 7 6 5 4510-067 3 1. USB connection 4. Print cartridge 2. Rear cover 8. Transfer roller 3. Optional duplex unit 7. Configuration card 3. Stacker rear cover (Stacker is an option.) 9. Rear-Left View 9 1 2 3 4 1. Power receptacle 6. Fuser unit 4510-094 Phaser® 4510 Laser Printer 1-3 Ethernet 10/100 Base-Tx connection 2.

User Guide
Page 84
Caution: Damage caused by using unsupported paper, transparencies, and other specialty media is not covered by the Xerox warranty, service agreement, or Total Satisfaction Guarantee. please contact your local representative for details. Note: If you change the paper type ...Fuser Temperature on page 4-16 ■ Print Area Is Not Centered on the Paper on page 3-3. For best results, use the information in this topic to produce consistently high-quality prints. For information on supported paper types and weights, see Supported Paper and Media on page 4-17 Phaser® 4510 Laser Printer...
Caution: Damage caused by using unsupported paper, transparencies, and other specialty media is not covered by the Xerox warranty, service agreement, or Total Satisfaction Guarantee. please contact your local representative for details. Note: If you change the paper type ...Fuser Temperature on page 4-16 ■ Print Area Is Not Centered on the Paper on page 3-3. For best results, use the information in this topic to produce consistently high-quality prints. For information on supported paper types and weights, see Supported Paper and Media on page 4-17 Phaser® 4510 Laser Printer...

User Guide
Page 90
Solving Print-Quality Problems Horizontal Dark Streaks There are black lines that appear horizontally on the page. Possible Causes Solutions The print cartridge may be defective or at the end of paper to remove the toner accumulations. Replace the print cartridge. Print several blank sheets of its life. Replace the fuser (in the maintenance kit). The paper path may be contaminated with toner. The fuser may be defective. Phaser® 4510 Laser Printer 4-9
Solving Print-Quality Problems Horizontal Dark Streaks There are black lines that appear horizontally on the page. Possible Causes Solutions The print cartridge may be defective or at the end of paper to remove the toner accumulations. Replace the print cartridge. Print several blank sheets of its life. Replace the fuser (in the maintenance kit). The paper path may be contaminated with toner. The fuser may be defective. Phaser® 4510 Laser Printer 4-9
User Guide
Page 91
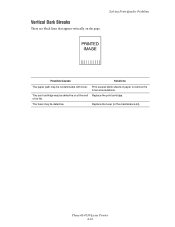
The print cartridge may be defective. The fuser may be contaminated with toner. Phaser® 4510 Laser Printer 4-10 of paper to remove the toner accumulations. Replace the fuser (in the maintenance kit). Solving Print-Quality Problems Possible Causes Solutions The paper path may be defective or at the end Replace the print cartridge. Vertical Dark Streaks There are black lines that appear vertically on the page. Print several blank sheets of its life.
The print cartridge may be defective. The fuser may be contaminated with toner. Phaser® 4510 Laser Printer 4-10 of paper to remove the toner accumulations. Replace the fuser (in the maintenance kit). Solving Print-Quality Problems Possible Causes Solutions The paper path may be defective or at the end Replace the print cartridge. Vertical Dark Streaks There are black lines that appear vertically on the page. Print several blank sheets of its life.
User Guide
Page 92
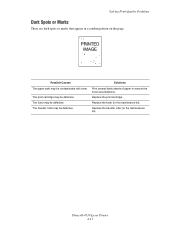
The fuser may be defective. The transfer roller may be defective. Replace the fuser (in the maintenance kit). Possible Causes Solutions The paper path may be contaminated with toner. Replace the transfer roller (in the maintenance kit). Phaser® 4510 Laser Printer 4-11 The print cartridge may be defective. Replace the print cartridge. Solving Print-Quality Problems Dark Spots or Marks There are dark spots or marks that appear in a random pattern on the page. Print several blank sheets of paper to remove the toner accumulations.
The fuser may be defective. The transfer roller may be defective. Replace the fuser (in the maintenance kit). Possible Causes Solutions The paper path may be contaminated with toner. Replace the transfer roller (in the maintenance kit). Phaser® 4510 Laser Printer 4-11 The print cartridge may be defective. Replace the print cartridge. Solving Print-Quality Problems Dark Spots or Marks There are dark spots or marks that appear in a random pattern on the page. Print several blank sheets of paper to remove the toner accumulations.

User Guide
Page 93
...Phaser® 4510 Laser Printer 4-12 The fuser may be in the maintenance kit). Solutions Replace the paper. Replace the paper with the temperature between 5° and 35° C (41° and 95° F) and the relative humidity between 15% and 85%. The printer may be damp. Verify that the printer...to a suitable area, away from air conditioning vents, open loading docks, etc. Replace the fuser (in the tray. Heavy or unusual paper may be defective. Move the printer to the paper and easily rubs off. Solving Print-Quality Problems Unfused or Partially Fused Image The...
...Phaser® 4510 Laser Printer 4-12 The fuser may be in the maintenance kit). Solutions Replace the paper. Replace the paper with the temperature between 5° and 35° C (41° and 95° F) and the relative humidity between 15% and 85%. The printer may be damp. Verify that the printer...to a suitable area, away from air conditioning vents, open loading docks, etc. Replace the fuser (in the tray. Heavy or unusual paper may be defective. Move the printer to the paper and easily rubs off. Solving Print-Quality Problems Unfused or Partially Fused Image The...
User Guide
Page 94
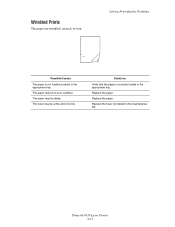
The paper may be at the end of its life. Solutions Verify that the paper is not loaded correctly in poor condition. Replace the fuser (contained in the appropriate tray. Phaser® 4510 Laser Printer 4-13 Replace the paper. The fuser may be in the appropriate tray. The paper may be damp. Replace the paper. Wrinkled Prints The pages are wrinkled, creased, or torn. Solving Print-Quality Problems Possible Causes The paper is correctly loaded in the maintenance kit).
The paper may be at the end of its life. Solutions Verify that the paper is not loaded correctly in poor condition. Replace the fuser (contained in the appropriate tray. Phaser® 4510 Laser Printer 4-13 Replace the paper. The fuser may be in the appropriate tray. The paper may be damp. Replace the paper. Wrinkled Prints The pages are wrinkled, creased, or torn. Solving Print-Quality Problems Possible Causes The paper is correctly loaded in the maintenance kit).

User Guide
Page 96
... go to Replace print cartridge print cartridge print cartridge transfer roller fuser Different supplies may create print defects with similar measurements. Replace the print cartridge (do not discard the packaging). 2. c. To order Xerox supplies, contact your Customer Support Center. Phaser® 4510 Laser Printer 4-15 Defect Spacing 38 mm (1.5 in.) 52 mm (2.0 in.) 94.4 mm...
... go to Replace print cartridge print cartridge print cartridge transfer roller fuser Different supplies may create print defects with similar measurements. Replace the print cartridge (do not discard the packaging). 2. c. To order Xerox supplies, contact your Customer Support Center. Phaser® 4510 Laser Printer 4-15 Defect Spacing 38 mm (1.5 in.) 52 mm (2.0 in.) 94.4 mm...
User Guide
Page 97
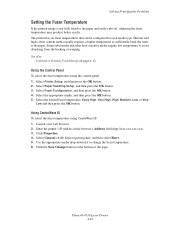
...3. Click the Save Changes button at the bottom of the page. Select Printer Setup, and then press the OK button. 2. Select Fuser Configuration, and then press the OK button. 4. Select the desired fuser temperature, Extra High, Very High, High, Medium, Low, or Very ...fuser temperature may produce better results. Select the appropriate media, and then press the OK button. 5. Enter the printer's IP address in the browser's Address field (http://xxx.xxx.xxx.xxx). 3. The printer has six fuser temperatures that can be configured for each media type. Phaser® 4510 Laser Printer...
...3. Click the Save Changes button at the bottom of the page. Select Printer Setup, and then press the OK button. 2. Select Fuser Configuration, and then press the OK button. 4. Select the desired fuser temperature, Extra High, Very High, High, Medium, Low, or Very ...fuser temperature may produce better results. Select the appropriate media, and then press the OK button. 5. Enter the printer's IP address in the browser's Address field (http://xxx.xxx.xxx.xxx). 3. The printer has six fuser temperatures that can be configured for each media type. Phaser® 4510 Laser Printer...
User Guide
Page 103
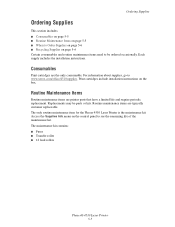
.... The maintenance kit contains: ■ Fuser ■ Transfer roller ■ 12 feed rollers Phaser® 4510 Laser Printer 5-5 The only routine maintenance item for the Phaser 4510 Laser Printer is the maintenance kit. Access the Supplies Info menu on the control panel to www.xerox.com/office/4510supplies. Consumables Print cartridges are printer parts that have a limited life and...
.... The maintenance kit contains: ■ Fuser ■ Transfer roller ■ 12 feed rollers Phaser® 4510 Laser Printer 5-5 The only routine maintenance item for the Phaser 4510 Laser Printer is the maintenance kit. Access the Supplies Info menu on the control panel to www.xerox.com/office/4510supplies. Consumables Print cartridges are printer parts that have a limited life and...

User Guide
Page 114
Remove the jammed paper. Clearing Paper Jams 2. Close the rear cover. 4510-002 Phaser® 4510 Laser Printer 6-8 Confirm that all paper fragments are removed. 4510-021 3. If you did not find jammed paper in Step 2, open the fuser exit cover and pull the jammed paper completely out of the printer. 4510-022 Note: When you let go of the fuser exit cover it will return to it's original position. 4.
Remove the jammed paper. Clearing Paper Jams 2. Close the rear cover. 4510-002 Phaser® 4510 Laser Printer 6-8 Confirm that all paper fragments are removed. 4510-021 3. If you did not find jammed paper in Step 2, open the fuser exit cover and pull the jammed paper completely out of the printer. 4510-022 Note: When you let go of the fuser exit cover it will return to it's original position. 4.

User Guide
Page 116
Remove the jammed paper. If you do not find jammed paper in Step 3, open the fuser exit cover and pull the jammed paper completely out of the printer. 4510-025 Note: When you let go of the fuser exit cover it will return to it's original position. 5. Close the rear cover. 4510-026 Phaser® 4510 Laser Printer 6-10 Clearing Paper Jams 3. Confirm that all paper fragments are removed. 4510-024 4.
Remove the jammed paper. If you do not find jammed paper in Step 3, open the fuser exit cover and pull the jammed paper completely out of the printer. 4510-025 Note: When you let go of the fuser exit cover it will return to it's original position. 5. Close the rear cover. 4510-026 Phaser® 4510 Laser Printer 6-10 Clearing Paper Jams 3. Confirm that all paper fragments are removed. 4510-024 4.
User Guide
Page 138
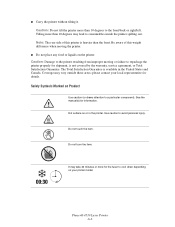
... to avoid personal injury. Safety Symbols Marked on the printer. Use caution to a particular component). Coverage may lead to repackage the printer properly for details. Do not touch the item. Phaser® 4510 Laser Printer A-6 Caution: Do not tilt the printer more than 10 degrees to cool down depending on or.... It may take 30 minutes or more than the front. Note: The rear side of this printer is heavier than 10 degrees may vary outside these areas; See the manual(s) for the fuser to the front/back or right/left. Tilting more for information. ■ Carry the...
... to avoid personal injury. Safety Symbols Marked on the printer. Use caution to a particular component). Coverage may lead to repackage the printer properly for details. Do not touch the item. Phaser® 4510 Laser Printer A-6 Caution: Do not tilt the printer more than 10 degrees to cool down depending on or.... It may take 30 minutes or more than the front. Note: The rear side of this printer is heavier than 10 degrees may vary outside these areas; See the manual(s) for the fuser to the front/back or right/left. Tilting more for information. ■ Carry the...


