

Owner's Manual
Page 3
... disassemble the internal parts or modify them periodically using a multiple-connector. Pulling by qualified Yamaha service personnel. • Only use the voltage specified as correct for a long period ... the volume controls while playing the instrument to prevent the possibility of the key cover and the keyboard. The instrument contains no user-serviceable parts. If it...assembly process. PRECAUTIONS PLEASE READ CAREFULLY BEFORE PROCEEDING * Please keep these precautions in use. (1)B-6 CLP-950/930 3 If you or others, or damage to the instrument or other objects between the...
... disassemble the internal parts or modify them periodically using a multiple-connector. Pulling by qualified Yamaha service personnel. • Only use the voltage specified as correct for a long period ... the volume controls while playing the instrument to prevent the possibility of the key cover and the keyboard. The instrument contains no user-serviceable parts. If it...assembly process. PRECAUTIONS PLEASE READ CAREFULLY BEFORE PROCEEDING * Please keep these precautions in use. (1)B-6 CLP-950/930 3 If you or others, or damage to the instrument or other objects between the...

Owner's Manual
Page 4
... resonance of a piano soundboard, special "Sustain Samples" which provides graded key weight and response throughout the keyboard range. G Metronome feature with Yamaha's original "AWM Dynamic Stereo Sampling" tone generation technology on the CLP-950 and "AWM Stereo Sampling" on the keyboard. G Split mode (CLP-950) allows different voices to be removed to allow placement of a laptop...
... resonance of a piano soundboard, special "Sustain Samples" which provides graded key weight and response throughout the keyboard range. G Metronome feature with Yamaha's original "AWM Dynamic Stereo Sampling" tone generation technology on the CLP-950 and "AWM Stereo Sampling" on the keyboard. G Split mode (CLP-950) allows different voices to be removed to allow placement of a laptop...

Owner's Manual
Page 5
...Key Cover & Music Stand 10 Selecting & Playing Voices 11 Playing the Demonstration Tunes 12 I Voice Demo 12 I Preset Song 13 I Preset Song A-B Repeat 14 I Preset Song Part Cancel 15 G Synchro Start 15 G Left Pedal Start/Stop 15 The Dual Mode 16 G Other Dual Mode Functions 16 The Split Mode (CLP-950...(such as the Yamaha UX256) .... 39 Factory Preset Recall 40 Troubleshooting 40 Options & Expander Modules 40 Voice Descriptions 41 Demo Song List 42 Factory Setting List 42 MIDI Data Format 43 MIDI Implementation Chart 47 CLP-950: Keyboard Stand Assembly 48 CLP-930: Keyboard Stand...
...Key Cover & Music Stand 10 Selecting & Playing Voices 11 Playing the Demonstration Tunes 12 I Voice Demo 12 I Preset Song 13 I Preset Song A-B Repeat 14 I Preset Song Part Cancel 15 G Synchro Start 15 G Left Pedal Start/Stop 15 The Dual Mode 16 G Other Dual Mode Functions 16 The Split Mode (CLP-950...(such as the Yamaha UX256) .... 39 Factory Preset Recall 40 Troubleshooting 40 Options & Expander Modules 40 Voice Descriptions 41 Demo Song List 42 Factory Setting List 42 MIDI Data Format 43 MIDI Implementation Chart 47 CLP-950: Keyboard Stand Assembly 48 CLP-930: Keyboard Stand...

Owner's Manual
Page 6
...B4 C5 D5 E5 F5 G5 A5 B5 C6 D6 E6 F6 G6 A6 B6 C7 Tuning keys (See page 22) PHONES jacks on and off. The [-/NO] and [+/YES] buttons...TEMPO/FUNCTION/SONG -/NO +/YES PRESET TRACK TRACK START/ REC STOP SONG 1 2 STOP MASTER VOLUME 2 CLP-950 CLP-950 MIN MAX MELLOW DEMO TRANSPOSE FUNCTION METRONOME 4 56 7 8 SONG 9 0! @ BRIGHT ON ON START/...STOP SONG 1 2 STOP MASTER VOLUME 2 BRILLIANCE 3 DEMO TRANSPOSE FUNCTION METRONOME 4 56 7 8 SONG 9 0! @ CLP-950 MIN MAX MELLOW BRIGHT ON ON START/ TEMPO/FUNCTION TEMPO/FUNCTION/SONG -/NO +/YES PRESET TRACK TRACK START/ REC STOP...
...B4 C5 D5 E5 F5 G5 A5 B5 C6 D6 E6 F6 G6 A6 B6 C7 Tuning keys (See page 22) PHONES jacks on and off. The [-/NO] and [+/YES] buttons...TEMPO/FUNCTION/SONG -/NO +/YES PRESET TRACK TRACK START/ REC STOP SONG 1 2 STOP MASTER VOLUME 2 CLP-950 CLP-950 MIN MAX MELLOW DEMO TRANSPOSE FUNCTION METRONOME 4 56 7 8 SONG 9 0! @ BRIGHT ON ON START/...STOP SONG 1 2 STOP MASTER VOLUME 2 BRILLIANCE 3 DEMO TRANSPOSE FUNCTION METRONOME 4 56 7 8 SONG 9 0! @ CLP-950 MIN MAX MELLOW BRIGHT ON ON START/ TEMPO/FUNCTION TEMPO/FUNCTION/SONG -/NO +/YES PRESET TRACK TRACK START/ REC STOP...

Owner's Manual
Page 10
...cover over the keys. This could cause electric shock, short circuit, fire or other equipment on top of the instrument. 10 CLP-950/930 XSlide the cover open the key cover: ZLift the cover slightly. To close the key cover: ZSlide the cover toward you. Key Cover & Music Stand Key Cover Be ...careful to the instrument. CLP-930 To open . Be careful to avoid catching ...
...cover over the keys. This could cause electric shock, short circuit, fire or other equipment on top of the instrument. 10 CLP-950/930 XSlide the cover open the key cover: ZLift the cover slightly. To close the key cover: ZSlide the cover toward you. Key Cover & Music Stand Key Cover Be ...careful to the instrument. CLP-930 To open . Be careful to avoid catching ...

Owner's Manual
Page 11
... After making sure that the Clavinova's AC cord is turned ON, one of the AC wall outlets in your area. Then, when you play the keys. In some areas a plug adaptor may be controlled according to how "hard" you start playing, re-adjust the [MASTER VOLUME] control for details. ...end of the keyboard will light. Set the Volume Initially set the [MASTER VOLUME] control about half way between the "MIN" and "MAX" settings. CLP-950/930 11 GRAND GRAND E. When the power is properly plugged into the Clavinova itself and plugged into a convenient AC wall outlet, press the [POWER] ...
... After making sure that the Clavinova's AC cord is turned ON, one of the AC wall outlets in your area. Then, when you play the keys. In some areas a plug adaptor may be controlled according to how "hard" you start playing, re-adjust the [MASTER VOLUME] control for details. ...end of the keyboard will light. Set the Volume Initially set the [MASTER VOLUME] control about half way between the "MIN" and "MAX" settings. CLP-950/930 11 GRAND GRAND E. When the power is properly plugged into the Clavinova itself and plugged into a convenient AC wall outlet, press the [POWER] ...

Owner's Manual
Page 17
... Right Voice will be turned off at the same time. see page 18) will be decided according to a number of the current split-point key appears on the keyboard - Effect depth setting via the panel controls (i.e. The split mode can also be applied to the right of (and including... Voice Octave Shift 31 • Right Voice Effect Depth 31 • Left Voice Effect Depth 31 • Damper Range 31 • Reset 31 CLP-950/930 17 Depth will remain lit. Other Split Mode Functions The Clavinova Function mode provides access to the depth default value of the Left Voice...
... Right Voice will be turned off at the same time. see page 18) will be decided according to a number of the current split-point key appears on the keyboard - Effect depth setting via the panel controls (i.e. The split mode can also be applied to the right of (and including... Voice Octave Shift 31 • Right Voice Effect Depth 31 • Left Voice Effect Depth 31 • Damper Range 31 • Reset 31 CLP-950/930 17 Depth will remain lit. Other Split Mode Functions The Clavinova Function mode provides access to the depth default value of the Left Voice...

Owner's Manual
Page 21
... maximum of one octave) through 127. Touch Sensitivity Four different types of a singer or other than "0" is "0". HARD The HARD setting requires the keys to be selected to the "Voice Descriptions" on the display). This is 64. FIXED (no indicator lit) All notes are not normally responsive to ... or no matter how hard the keyboard is selected, the volume of the entire keyboard up or down one octave up as required. CLP-950/930 21 When the FIXED type is played. "Transposing" the pitch of the Clavinova keyboard facilitates playing in the FIXED mode can easily...
... maximum of one octave) through 127. Touch Sensitivity Four different types of a singer or other than "0" is "0". HARD The HARD setting requires the keys to be selected to the "Voice Descriptions" on the display). This is 64. FIXED (no indicator lit) All notes are not normally responsive to ... or no matter how hard the keyboard is selected, the volume of the entire keyboard up or down one octave up as required. CLP-950/930 21 When the FIXED type is played. "Transposing" the pitch of the Clavinova keyboard facilitates playing in the FIXED mode can easily...

Owner's Manual
Page 22
... tuning setting is shown on the LED display by the appearance and position of pitch adjustment.) C Release the A-1, A#-1 and B-1 keys. X Press any key between C3 and B3. Tenths of a Hertz are indicated on the LED display while the tuning is being adjusted. The [-/NO]... ...Z To tune up , respectively, in the following example: Display 440 44. 0 440. 440. 44. 0. Each time a key in approximately 0.2 Hertz intervals. page 28. 22 CLP-950/930 Pitch control is useful for tuning the Clavinova to recall standard tuning (A3 = 440 Hz). Press the [-/NO] and [+/YES...
... tuning setting is shown on the LED display by the appearance and position of pitch adjustment.) C Release the A-1, A#-1 and B-1 keys. X Press any key between C3 and B3. Tenths of a Hertz are indicated on the LED display while the tuning is being adjusted. The [-/NO]... ...Z To tune up , respectively, in the following example: Display 440 44. 0 440. 440. 44. 0. Each time a key in approximately 0.2 Hertz intervals. page 28. 22 CLP-950/930 Pitch control is useful for tuning the Clavinova to recall standard tuning (A3 = 440 Hz). Press the [-/NO] and [+/YES...

Owner's Manual
Page 25
...which will not be changed : "Dual balance (F3)", "Dual detune (F3)", "Dual octave shift (F3)", "Split balance (F4:CLP950)" or "Split octave shift (F4:CLP-950)". The indicator of the recorded track will glow green to indicate that point will stop automatically. (All recorded data up to a maximum of the recorder...] button twice without recording any data. Erasing a Single Track All data can be careful not to press the SONG [START/STOP] button or a key on the keyboard, either the [REC] or SONG [START/STOP] button to stop recording via the "Left Pedal Mode" function described on pages 31...
...which will not be changed : "Dual balance (F3)", "Dual detune (F3)", "Dual octave shift (F3)", "Split balance (F4:CLP950)" or "Split octave shift (F4:CLP-950)". The indicator of the recorded track will glow green to indicate that point will stop automatically. (All recorded data up to a maximum of the recorder...] button twice without recording any data. Erasing a Single Track All data can be careful not to press the SONG [START/STOP] button or a key on the keyboard, either the [REC] or SONG [START/STOP] button to stop recording via the "Left Pedal Mode" function described on pages 31...

Owner's Manual
Page 26
...current measure number appears on the display during playback, the playback effect may be started playing. 26 CLP-950/930 Playback starts from the beginning of the recorded data, and will automatically stop playback at the..."0" (i.e. To mute a track so that it to an external MIDI storage device such as the Yamaha MIDI Data Filer MDF3 by using the Bulk Data Dump function described on page 35. • ... ON and the Synchro Start mode will begin automatically as soon as you begin playing on the key- If not, press the corresponding track button(s) so that they are lit. If you want ...
...current measure number appears on the display during playback, the playback effect may be started playing. 26 CLP-950/930 Playback starts from the beginning of the recorded data, and will automatically stop playback at the..."0" (i.e. To mute a track so that it to an external MIDI storage device such as the Yamaha MIDI Data Filer MDF3 by using the Bulk Data Dump function described on page 35. • ... ON and the Synchro Start mode will begin automatically as soon as you begin playing on the key- If not, press the corresponding track button(s) so that they are lit. If you want ...

Owner's Manual
Page 28
... default settings "C". F2.2: Base Note ...Unlike Equal Temperament tuning, these classic tunings must be accomplished via the F1 function. The selected key will appear on page 22, overall tuning can select and use the [TEMPO/FUNCTION t, s] buttons to select the desired scale function,... 44. 0. Use the [-/NO] and [+/YES] buttons to select the key you can also be tuned to a specific key. "F~"). The overall tuning range is effective for tunings other than the Equal Temperament tuning. 28 CLP-950/930 Press the [-/NO] and [+/YES] buttons simultaneously to recall the default ...
... default settings "C". F2.2: Base Note ...Unlike Equal Temperament tuning, these classic tunings must be accomplished via the F1 function. The selected key will appear on page 22, overall tuning can select and use the [TEMPO/FUNCTION t, s] buttons to select the desired scale function,... 44. 0. Use the [-/NO] and [+/YES] buttons to select the key you can also be tuned to a specific key. "F~"). The overall tuning range is effective for tunings other than the Equal Temperament tuning. 28 CLP-950/930 Press the [-/NO] and [+/YES] buttons simultaneously to recall the default ...

Owner's Manual
Page 29
...default setting (different for each voice combination). A setting of pitch variation increases toward the lower key range (±60 cents at the A-1 key), and decreases toward the higher key range (±5 cents at the C7 key). 100 cents = 1 semitone. The detune range is from -10 through 20. NOTE &#...8226; The maximum amount of "10" produces equal balance between the two dual-mode voices. Use the [-/NO] and [+/YES] buttons to set individually for each voice combination. CLP-950/930 29 I ...
...default setting (different for each voice combination). A setting of pitch variation increases toward the lower key range (±60 cents at the A-1 key), and decreases toward the higher key range (±5 cents at the C7 key). 100 cents = 1 semitone. The detune range is from -10 through 20. NOTE &#...8226; The maximum amount of "10" produces equal balance between the two dual-mode voices. Use the [-/NO] and [+/YES] buttons to set individually for each voice combination. CLP-950/930 29 I ...
Owner's Manual
Page 30
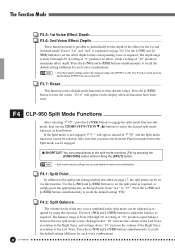
... adjusted as required by pressing the [FUNCTION] button while holding the [SPLIT] button. F3.7: Reset ...This function resets all functions have been reset. F4 CLP-950 Split Mode Functions After selecting "F4.Y", press the [+/YES] button to engage the split-mode function submode, then use the [TEMPO/FUNCTION t, s] buttons... is from "A-1" to "C7". Use the [-/NO] and [+/YES] buttons to set the split point as required, or simply press the appropriate key on page 17, the split point can be changed unless the EFFECT is ON. The depth range is from the Function mode before EFFECT can...
... adjusted as required by pressing the [FUNCTION] button while holding the [SPLIT] button. F3.7: Reset ...This function resets all functions have been reset. F4 CLP-950 Split Mode Functions After selecting "F4.Y", press the [+/YES] button to engage the split-mode function submode, then use the [TEMPO/FUNCTION t, s] buttons... is from "A-1" to "C7". Use the [-/NO] and [+/YES] buttons to set the split point as required, or simply press the appropriate key on page 17, the split point can be changed unless the EFFECT is ON. The depth range is from the Function mode before EFFECT can...

Owner's Manual
Page 40
...'t work, or notes are sustained even when the pedal is fed by the same AC mains line as your Clavinova. 5. Contact your Yamaha dealer. Turn off settings (F8: CLP-930, F9: CLP-950) to "OFF". Options & Expander Modules G Options G Expander Modules BC-8 Bench A comfortable bench styled to turning ON or OFF a household appliance or... sensitivity, tuning POWER settings, and the settings affected by the Backup Functions can be restored to their original factory preset values by holding the C7 key (rightmost key on the display an internal malfunction has occurred.
...'t work, or notes are sustained even when the pedal is fed by the same AC mains line as your Clavinova. 5. Contact your Yamaha dealer. Turn off settings (F8: CLP-930, F9: CLP-950) to "OFF". Options & Expander Modules G Options G Expander Modules BC-8 Bench A comfortable bench styled to turning ON or OFF a household appliance or... sensitivity, tuning POWER settings, and the settings affected by the Backup Functions can be restored to their original factory preset values by holding the C7 key (rightmost key on the display an internal malfunction has occurred.
Owner's Manual
Page 43
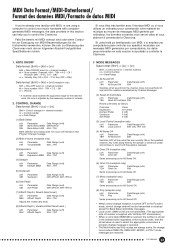
... turned OFF in the Function mode, control change message is received. • The Multi-timbre and Poly modes are always active. CLP-950/930 43 Si vous êtes très familier avec l'interface MIDI ou si vous utilisez un ordinateur pour commander votre mat&#...] -> [vv] 9nH = Note ON/OFF event (n = channel number) kk = Note number (Transmit: 09H ~ 78H = A-2 ~ C8 / Receive: 00H ~ 7FH = C-2 ~ G8)* vv = Velocity (Key ON = 01H ~ 7FH, Key OFF = 00H) Data format: [8nH] -> [kk] -> [vv] (reception only) 8nH = Note OFF event (n = channel number) kk = Note number: 00H ~ 7FH = C-2 ~ G8 vv = Velocity...
... turned OFF in the Function mode, control change message is received. • The Multi-timbre and Poly modes are always active. CLP-950/930 43 Si vous êtes très familier avec l'interface MIDI ou si vous utilisez un ordinateur pour commander votre mat&#...] -> [vv] 9nH = Note ON/OFF event (n = channel number) kk = Note number (Transmit: 09H ~ 78H = A-2 ~ C8 / Receive: 00H ~ 7FH = C-2 ~ G8)* vv = Velocity (Key ON = 01H ~ 7FH, Key OFF = 00H) Data format: [8nH] -> [kk] -> [vv] (reception only) 8nH = Note OFF event (n = channel number) kk = Note number: 00H ~ 7FH = C-2 ~ G8 vv = Velocity...

Owner's Manual
Page 45
...] -> [xxH] -> [nnH] -> [F7H] F0H = Exclusive status 43H = Yamaha ID 73H = Clavinova ID xxH = Product ID (CLP-950/930 common ID: 67H or CLP common ID: 01H) nnH = Substatus nn Control 02H Internal MIDI clock 03H External MIDI...Key On. Note that the table's Total Size value gives the size of Exclusive or F0H = Exclusive status 7EH = Universal Non-Realtime XnH = When received, n=0~F. SYSTEM EXCLUSIVE MESSAGES (Special Control) Data format: [F0H] -> [43H] -> [73H] -> [xxH] -> [11H] -> [0nH] -> [ccH] -> [vvH] -> [F7H] F0H = Exclusive status 43H = Yamaha ID 73H = Clavinova ID 67H = CLP-950...
...] -> [xxH] -> [nnH] -> [F7H] F0H = Exclusive status 43H = Yamaha ID 73H = Clavinova ID xxH = Product ID (CLP-950/930 common ID: 67H or CLP common ID: 01H) nnH = Substatus nn Control 02H Internal MIDI clock 03H External MIDI...Key On. Note that the table's Total Size value gives the size of Exclusive or F0H = Exclusive status 7EH = Universal Non-Realtime XnH = When received, n=0~F. SYSTEM EXCLUSIVE MESSAGES (Special Control) Data format: [F0H] -> [43H] -> [73H] -> [xxH] -> [11H] -> [0nH] -> [ccH] -> [vvH] -> [F7H] F0H = Exclusive status 43H = Yamaha ID 73H = Clavinova ID 67H = CLP-950...

Owner's Manual
Page 47
YAMAHA [Clavinova] Model: CLP-950/930 Function MIDI Implementation Chart Transmitted Recognized Basic Default Channel Changed 1 1~16 Mode Default Messages Altered 3 X Note Number : True voice 9~120 Velocity Note on Note off Reset All Controllers Mode 1: OMNI ON, POLY Mode 3: OMNI OFF, POLY Mode 2: OMNI ON, MONO Mode 4: OMNI OFF, MONO O: Yes X: No CLP-950.../930 47 Date: 1 March, 2000 Version: 1.0 Remarks Poly Mode only Bank Select Volume Expression Damper Sostenuto Soft pedal Reverb Depth Effect Depth All sounds off O 9nH, v=1~127 X 9nH, v=0 After key's ...
YAMAHA [Clavinova] Model: CLP-950/930 Function MIDI Implementation Chart Transmitted Recognized Basic Default Channel Changed 1 1~16 Mode Default Messages Altered 3 X Note Number : True voice 9~120 Velocity Note on Note off Reset All Controllers Mode 1: OMNI ON, POLY Mode 3: OMNI OFF, POLY Mode 2: OMNI ON, MONO Mode 4: OMNI OFF, MONO O: Yes X: No CLP-950.../930 47 Date: 1 March, 2000 Version: 1.0 Remarks Poly Mode only Bank Select Volume Expression Damper Sostenuto Soft pedal Reverb Depth Effect Depth All sounds off O 9nH, v=1~127 X 9nH, v=0 After key's ...


