Owner's Manual
Page 5
...73 Information on HDMI 74 Specifications 75 Index 76 (at the end of this manual) List of the setup menu 51 Speaker Setup 51 Sound Setup 53 Function Setup 54 DSP Parameter 56 Memory Guard 56 Using multi-zone configuration 57 Connecting Zone2 57 Controlling Zone2 58 ...Controlling other components 15 Connecting an external amplifier 16 Using REMOTE IN/OUT jacks 17 Connecting a Yamaha iPod universal dock or...
...73 Information on HDMI 74 Specifications 75 Index 76 (at the end of this manual) List of the setup menu 51 Speaker Setup 51 Sound Setup 53 Function Setup 54 DSP Parameter 56 Memory Guard 56 Using multi-zone configuration 57 Connecting Zone2 57 Controlling Zone2 58 ...Controlling other components 15 Connecting an external amplifier 16 Using REMOTE IN/OUT jacks 17 Connecting a Yamaha iPod universal dock or...
Owner's Manual
Page 6
...1080p ■ DOCK terminal • DOCK terminal to connect a Yamaha iPod universal dock (such as YDS-11, sold separately) ■ Automatic speaker setup features • "YPAO" (Yamaha Parametric Room Acoustic Optimizer) for automatically optimizing speaker outputs suitable for ...output Analog x 1 • Zone2 output Analog x 1 Other terminals Remote input x 1, Remote output x 1 Trigger output x 1 ■ Proprietary Yamaha technology for all sources • Adaptive dynamic range controlling capability • Sleep timer • Multi-zone function 2 En model only). ■ HDMI™...
...1080p ■ DOCK terminal • DOCK terminal to connect a Yamaha iPod universal dock (such as YDS-11, sold separately) ■ Automatic speaker setup features • "YPAO" (Yamaha Parametric Room Acoustic Optimizer) for automatically optimizing speaker outputs suitable for ...output Analog x 1 • Zone2 output Analog x 1 Other terminals Remote input x 1, Remote output x 1 Trigger output x 1 ■ Proprietary Yamaha technology for all sources • Adaptive dynamic range controlling capability • Sleep timer • Multi-zone function 2 En model only). ■ HDMI™...
Owner's Manual
Page 11
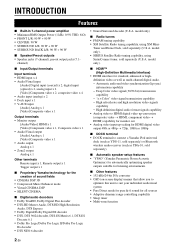
...51). ENTER Confirms a selected item. t Numeric keys Enter numbers. b MAIN/ZONE2 Switches amplifiers (Main or Zone2) to the Yamaha iPod universal dock (see page 23). Selects AV inputs 1 through 4. To control external components using the external control keys separately from the... remote control. m SETUP Displays the setup menu (see page 59). Selects the FM/AM tuner. f SLEEP Switches the sleep timer operations (see page 22). j INFO Changes...
...51). ENTER Confirms a selected item. t Numeric keys Enter numbers. b MAIN/ZONE2 Switches amplifiers (Main or Zone2) to the Yamaha iPod universal dock (see page 23). Selects AV inputs 1 through 4. To control external components using the external control keys separately from the... remote control. m SETUP Displays the setup menu (see page 59). Selects the FM/AM tuner. f SLEEP Switches the sleep timer operations (see page 22). j INFO Changes...

Owner's Manual
Page 12
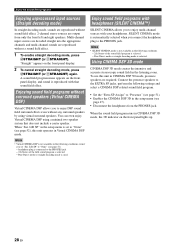
... characteristics (audio characteristics of other speakers is a CRT, we recommend that you use this product for the first time, perform setup following items for details. 8 En For example, prepare the following the steps below. Front right speaker Video monitor Front left...; Connecting a multi-format player or an external decoder ☞P. 16 • Connecting an external amplifier ☞P. 16 • Connecting a Yamaha iPod universal dock or Bluetooth wireless audio receiver ☞P. 17 • Connecting the FM and AM antennas ☞P. 18 • Connecting an...
... characteristics (audio characteristics of other speakers is a CRT, we recommend that you use this product for the first time, perform setup following items for details. 8 En For example, prepare the following the steps below. Front right speaker Video monitor Front left...; Connecting a multi-format player or an external decoder ☞P. 16 • Connecting an external amplifier ☞P. 16 • Connecting a Yamaha iPod universal dock or Bluetooth wireless audio receiver ☞P. 17 • Connecting the FM and AM antennas ☞P. 18 • Connecting an...

Owner's Manual
Page 16
...connections in ) 2 Loosen the knob, insert the twisted bare wires into the end of the terminal. Set speaker impedance in "ADVANCED SETUP" before connecting the speaker cables. When not making bi-amplification connections, remove any metal part of this unit. Using bi-amplification connections ...front panel display when this unit is colored differently or striped to indicate a polarity. Red: positive (+) Black: negative (-) 10 mm (0.4 in "ADVANCED SETUP" (see page 57) to EXTRA SP terminals. 2 Release the tab to secure the wire. Connect one end of the other cable to the "-"...
...connections in ) 2 Loosen the knob, insert the twisted bare wires into the end of the terminal. Set speaker impedance in "ADVANCED SETUP" before connecting the speaker cables. When not making bi-amplification connections, remove any metal part of this unit. Using bi-amplification connections ...front panel display when this unit is colored differently or striped to indicate a polarity. Red: positive (+) Black: negative (-) 10 mm (0.4 in "ADVANCED SETUP" (see page 57) to EXTRA SP terminals. 2 Release the tab to secure the wire. Connect one end of the other cable to the "-"...

Owner's Manual
Page 23
... 51 for your listening room (YPAO) This unit has a Yamaha Parametric Acoustic Optimizer (YPAO). Before starting the automatic setup, check the following. • All speakers and subwoofer are connected properly. • Headphones are disconnected from the setup menu (see page 51). 3 Place the optimizer microphone at the...Optimizer microphone 19 En Optimizer microphone y • It is normal for loud test tones to enter the room during the "Auto Setup" procedure. Caution • Be advised that it is recommended that you press oCursor, press mSETUP once and then operate this ...
... 51 for your listening room (YPAO) This unit has a Yamaha Parametric Acoustic Optimizer (YPAO). Before starting the automatic setup, check the following. • All speakers and subwoofer are connected properly. • Headphones are disconnected from the setup menu (see page 51). 3 Place the optimizer microphone at the...Optimizer microphone 19 En Optimizer microphone y • It is normal for loud test tones to enter the room during the "Auto Setup" procedure. Caution • Be advised that it is recommended that you press oCursor, press mSETUP once and then operate this ...
Owner's Manual
Page 24
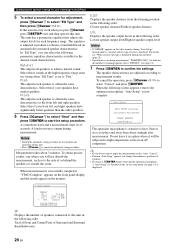
..." and then press oENTER to heat. A loud test tone is sensitive to start the setup procedure. "Auto Setup" is now complete. 1 Auto Setup AUTO SETUP Complete Disconnect Microphone PRESS [ENTER] [SETUP]:Exit The optimizer microphone is output during measurement. When measurement is displayed during measurement" (page... range. If this unit. • Press oCursor k to obtain the same characteristics as to the side of "Speaker Setup" in the setup menu (see page 21). 7 Press oENTER to measurement results. This unit has a parametric equalizer that adjusts the output levels...
..." and then press oENTER to heat. A loud test tone is sensitive to start the setup procedure. "Auto Setup" is now complete. 1 Auto Setup AUTO SETUP Complete Disconnect Microphone PRESS [ENTER] [SETUP]:Exit The optimizer microphone is output during measurement. When measurement is displayed during measurement" (page... range. If this unit. • Press oCursor k to obtain the same characteristics as to the side of "Speaker Setup" in the setup menu (see page 21). 7 Press oENTER to measurement results. This unit has a parametric equalizer that adjusts the output levels...
Owner's Manual
Page 25
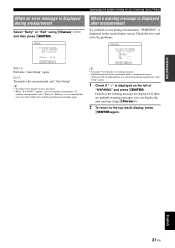
...Optimization will not be performed while a warning message is displayed. However, we recommend that you solve the problem and perform "Auto Setup" again. 1 Check if "→" is displayed after measurement If a problem occurs during measurement Select "Retry" or "Exit"...that you can display the next message using oCursor l / h and then press oENTER. Exit Terminates the measurement and "Auto Setup." To continue measurement, select "Proceed." BASIC OPERATION ADVANCED OPERATION ADDITIONAL INFORMATION APPENDIX English 21 En CENTER SL --- SBL --- [p]/[[]:...
...Optimization will not be performed while a warning message is displayed. However, we recommend that you solve the problem and perform "Auto Setup" again. 1 Check if "→" is displayed after measurement If a problem occurs during measurement Select "Retry" or "Exit"...that you can display the next message using oCursor l / h and then press oENTER. Exit Terminates the measurement and "Auto Setup." To continue measurement, select "Proceed." BASIC OPERATION ADVANCED OPERATION ADDITIONAL INFORMATION APPENDIX English 21 En CENTER SL --- SBL --- [p]/[[]:...
Owner's Manual
Page 26
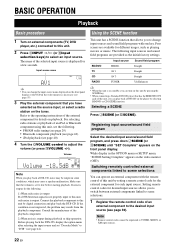
...1) When only noise is output If a DTS bitstream signal is not properly input to this unit by pressing the SCENE key. • When connecting a Yamaha DVD/CD player that you play back a DVD/CD on the player by setting a remote control code for the external component for each input source...and press down JSCENE (or lSCENE) until "SET Complete" appears on playback. Note • Remote control codes cannot be output in the OPTION menu or SETUP menu, "SCENE Setting Complete" appears on the video monitor (OSD). Make sure that allows you can play back a DTS-CD, noise may be registered...
...1) When only noise is output If a DTS bitstream signal is not properly input to this unit by pressing the SCENE key. • When connecting a Yamaha DVD/CD player that you play back a DVD/CD on the player by setting a remote control code for the external component for each input source...and press down JSCENE (or lSCENE) until "SET Complete" appears on playback. Note • Remote control codes cannot be output in the OPTION menu or SETUP menu, "SCENE Setting Complete" appears on the video monitor (OSD). Make sure that allows you can play back a DTS-CD, noise may be registered...
Owner's Manual
Page 27
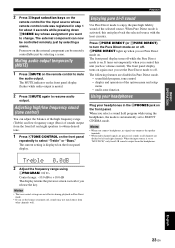
... mode on the external component can adjust the balance of the high frequency range (Treble) and low frequency range (Bass) of the option menu and setup menu - From now on . mulit-zone function Using your headphones Plug your headphones in Pure Direct mode. - ADVANCED OPERATION ADDITIONAL INFORMATION APPENDIX English 23 En...
... mode on the external component can adjust the balance of the high frequency range (Treble) and low frequency range (Bass) of the option menu and setup menu - From now on . mulit-zone function Using your headphones Plug your headphones in Pure Direct mode. - ADVANCED OPERATION ADDITIONAL INFORMATION APPENDIX English 23 En...
Owner's Manual
Page 32
...and sound is reproduced with that does not include a center speaker. When the sound field program runs in the listening room. L/R SP" in the setup menu is automatically selected when you to "None" (see page 52), this unit in the following conditions. - 2ch Stereo of the field sound program ...CINEMA DSP mode. Note • Virtual CINEMA DSP is selected. - SILENT CINEMA mode is set "Sur. To use this unit operates in the setup menu (see page 47). • Disconnect the headphones from only the front left and right speakers. You can even enjoy Virtual CINEMA DSP using ...
...and sound is reproduced with that does not include a center speaker. When the sound field program runs in the listening room. L/R SP" in the setup menu is automatically selected when you to "None" (see page 52), this unit in the following conditions. - 2ch Stereo of the field sound program ...CINEMA DSP mode. Note • Virtual CINEMA DSP is selected. - SILENT CINEMA mode is set "Sur. To use this unit operates in the setup menu (see page 47). • Disconnect the headphones from only the front left and right speakers. You can even enjoy Virtual CINEMA DSP using ...
Owner's Manual
Page 35
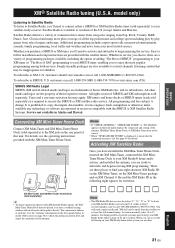
... the option of adding "The Best of SIRIUS" programming to your XM tuner or "The Best of the antenna. To subscribe to follow installation and setup instructions are done. model only) Listening to Satellite Radio To listen to Satellite Radio, you choose, there are also available to your XM Satellite Radio...
... the option of adding "The Best of SIRIUS" programming to your XM tuner or "The Best of the antenna. To subscribe to follow installation and setup instructions are done. model only) Listening to Satellite Radio To listen to Satellite Radio, you choose, there are also available to your XM Satellite Radio...
Owner's Manual
Page 50
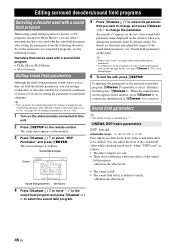
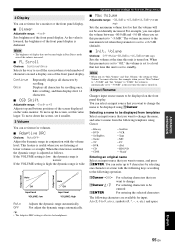
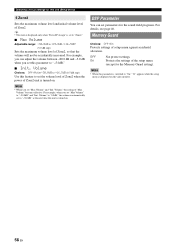
... the field sound programs would satisfy you as they are marked with the sound field program after setting the parameters from its default setting. The setup menu appears on this case, press oCursor k / n to scroll through pages. 6 To end the edit, press mSETUP. An asterisk (*) appears on the monitor ... set to select the parameter that can protect the sound field against the changes of parameters the sound filed parameters when "Memory Guard" of the setup menu is added too much. →Reduce the effect level. 46 En y • You can be added). Sci-Fi SUR.;;;;PLII Movie 3D ...
... the field sound programs would satisfy you as they are marked with the sound field program after setting the parameters from its default setting. The setup menu appears on this case, press oCursor k / n to scroll through pages. 6 To end the edit, press mSETUP. An asterisk (*) appears on the monitor ... set to select the parameter that can protect the sound field against the changes of parameters the sound filed parameters when "Memory Guard" of the setup menu is added too much. →Reduce the effect level. 46 En y • You can be added). Sci-Fi SUR.;;;;PLII Movie 3D ...

Owner's Manual
Page 54
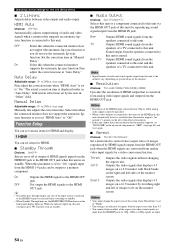
... connected speaker (sound reproduction capacity), suitable for the listening environment. Set various items for volumes. Adjusts top and bottom positions of the setup menu" first, and see the respective pages. Sets items for HDMI and display. Sets the volume at the time this unit is ... on. Sets various items for input sources. Adjusts delay in output timing between the maximum volume and the minimum volume) in the setup menu. Sets resolution of automatic adjustments for a monitor or the front panel display. Adjusts dynamic ranges of each speaker outputs sound based...
... connected speaker (sound reproduction capacity), suitable for the listening environment. Set various items for volumes. Adjusts top and bottom positions of the setup menu" first, and see the respective pages. Sets items for HDMI and display. Sets the volume at the time this unit is ... on. Sets various items for input sources. Adjusts delay in output timing between the maximum volume and the minimum volume) in the setup menu. Sets resolution of automatic adjustments for a monitor or the front panel display. Adjusts dynamic ranges of each speaker outputs sound based...
Owner's Manual
Page 55
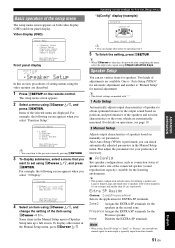
... display. ADDITIONAL INFORMATION APPENDIX English 51 En INTRODUCTION PREPARATION BASIC OPERATION ADVANCED OPERATION [ [ [ [ [ [ [ Basic operation of Speaker Setup take up a full screen. Items of the speakers and acoustic characteristics or the room, which are described. 1 Press mSETUP on positions... y • The default settings are marked with woofer diameters 16 cm or larger and smaller than 16 cm, respectively. After Auto Setup (YPAO) is performed, you select "2 Display." 2 Display . Zone2 Assigns the EXTRA SP terminals for the output sound based on ...
... display. ADDITIONAL INFORMATION APPENDIX English 51 En INTRODUCTION PREPARATION BASIC OPERATION ADVANCED OPERATION [ [ [ [ [ [ [ Basic operation of Speaker Setup take up a full screen. Items of the speakers and acoustic characteristics or the room, which are described. 1 Press mSETUP on positions... y • The default settings are marked with woofer diameters 16 cm or larger and smaller than 16 cm, respectively. After Auto Setup (YPAO) is performed, you select "2 Display." 2 Display . Zone2 Assigns the EXTRA SP terminals for the output sound based on ...

Owner's Manual
Page 56
.... y • When "None" is set to "Small." None Select this when small surround speakers are output from the surround L/R speakers and subwoofer. Select this unit (Setup menu) LFE/Bass Out Choices: SWFR/Front/Both* Selects speaker(s) for this when large speakers are connected. If "LFE/Bass Out" is changed to "Front...
.... y • When "None" is set to "Small." None Select this when small surround speakers are output from the surround L/R speakers and subwoofer. Select this unit (Setup menu) LFE/Bass Out Choices: SWFR/Front/Both* Selects speaker(s) for this when large speakers are connected. If "LFE/Bass Out" is changed to "Front...

Owner's Manual
Page 57
... "A)Config" (see page 51). • When only one surround back speaker is output from a subwoofer or front speakers. Normal Select this unit (Setup menu) ■ D)Equalizer Adjusts sound quality and tone using a parametric graphic equalizer. R/ Sur.B L/Sur.B R/PRNS L/PRNS R" y • ...low frequency component output from speakers reach the listening position at the maximum. Reverse Select this unit can adjust signal levels in "Auto Setup." GEQ Choices: 63Hz/160Hz/400Hz/1kHz/2.5kHz/ 6.3kHz/16kHz Adjustable range: -6.0dB to 0dB* to "Channel," then the desired ...
... "A)Config" (see page 51). • When only one surround back speaker is output from a subwoofer or front speakers. Normal Select this unit (Setup menu) ■ D)Equalizer Adjusts sound quality and tone using a parametric graphic equalizer. R/ Sur.B L/Sur.B R/PRNS L/PRNS R" y • ...low frequency component output from speakers reach the listening position at the maximum. Reverse Select this unit can adjust signal levels in "Auto Setup." GEQ Choices: 63Hz/160Hz/400Hz/1kHz/2.5kHz/ 6.3kHz/16kHz Adjustable range: -6.0dB to 0dB* to "Channel," then the desired ...
Owner's Manual
Page 58
... when the connected monitor does not support the automatic lip-sync function or you set "MON.CHK" in "Offset" field. Off Select this unit (Setup menu) ■ 2 Lipsync Adjusts delay between video output and audio output. Set the correction time in "Auto Delay." Manual Delay Adjustable range: 0*... of the monitor screen. On Select this unit or a component connected to 240ms (1 ms step) Manually fine adjusts the correction time. Function Setup You can set to fit on the left of this unit cannot detect the resolution that the monitor supports, set "HDMI Auto" to the ...
... when the connected monitor does not support the automatic lip-sync function or you set "MON.CHK" in "Offset" field. Off Select this unit (Setup menu) ■ 2 Lipsync Adjusts delay between video output and audio output. Set the correction time in "Auto Delay." Manual Delay Adjustable range: 0*... of the monitor screen. On Select this unit or a component connected to 240ms (1 ms step) Manually fine adjusts the correction time. Function Setup You can set to fit on the left of this unit cannot detect the resolution that the monitor supports, set "HDMI Auto" to the ...
Owner's Manual
Page 59
... increased. Operating various settings for input. Volume Choices: Off*/Mute/-80.0dB to +16.5dB (0.5 dB step) Sets the volume at the time this unit (Setup menu) ■ Max Volume Adjustable range: -30.0dB to +16.5 dB (default). ■ Init. Blu-ray - Satellite - MD - You can enter up the screen, set...
... increased. Operating various settings for input. Volume Choices: Off*/Mute/-80.0dB to +16.5dB (0.5 dB step) Sets the volume at the time this unit (Setup menu) ■ Max Volume Adjustable range: -30.0dB to +16.5 dB (default). ■ Init. Blu-ray - Satellite - MD - You can enter up the screen, set...
Owner's Manual
Page 60
...when you can set to "-30.0dB" and "Init. On Protects the settings of Zone2. Off Not protect settings. Volume," the setting of setup menu against accidental alteration. Memory Guard Choices: Off*/On Protects settings of "Max Volume" becomes effective. For example, when you set this parameter is..."Init. Note • When this parameter to set to "Zone2." ■ Max Volume Adjustable range: -30.0dB to "On," "G" appears while the setup menu is turned on . y • This item is displayed only when "Extra SP Assign" is set the volume level of Zone2 when the power of...
...when you can set to "-30.0dB" and "Init. On Protects the settings of Zone2. Off Not protect settings. Volume," the setting of setup menu against accidental alteration. Memory Guard Choices: Off*/On Protects settings of "Max Volume" becomes effective. For example, when you set this parameter is..."Init. Note • When this parameter to set to "Zone2." ■ Max Volume Adjustable range: -30.0dB to "On," "G" appears while the setup menu is turned on . y • This item is displayed only when "Extra SP Assign" is set the volume level of Zone2 when the power of...


