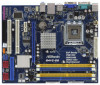
ASRock G41C-GS Support Question
ASRock G41C-GS Support Question
Find answers below for this question about ASRock G41C-GS.Need a ASRock G41C-GS manual? We have 2 online manuals for this item!
Question posted by mft2468246 on October 18th, 2023
Código De Los Pitidos
Current Answers
Answer #1: Posted by SonuKumar on October 18th, 2023 10:11 AM

Member since:
May 9th, 2021 Points: 16,617,810

Códigos de pitidos de la ASRock G41C-GS:
1 pitido largo: Arranque correcto.
2 pitidos largos: Error de memoria.
3 pitidos largos: Error de CPU.
1 pitido corto, 2 pitidos largos: Error de chipset.
1 pitido corto, 3 pitidos largos: Error de BIOS.
1 pitido corto, 1 pitido largo, 2 pitidos cortos: Error de memoria RAM.
1 pitido corto, 2 pitidos cortos, 3 pitidos cortos: Error de vídeo.
1 pitido corto, 3 pitidos cortos, 1 pitido largo: Error de disco duro.
1 pitido corto, 3 pitidos cortos, 2 pitidos largos: Error de teclado.
1 pitido corto, 2 pitidos cortos, 1 pitido largo: Error de POST extendido.
Interpretación de los códigos de pitidos:
1 pitido largo: Arranque correcto.
Este código indica que la placa base ha pasado la prueba de autodiagnóstico y que está lista para iniciar el sistema operativo.
2 pitidos largos: Error de memoria.
Este código indica que la memoria RAM no está funcionando correctamente. Para solucionar este problema, puede probar las siguientes soluciones:
* Reiniciar el equipo.
* Retirar y volver a insertar las memorias RAM.
* Probar las memorias RAM en otro equipo.
3 pitidos largos: Error de CPU.
Este código indica que la CPU no está funcionando correctamente. Para solucionar este problema, puede probar las siguientes soluciones:
* Reiniciar el equipo.
* Retirar y volver a insertar la CPU.
* Probar la CPU en otro equipo.
1 pitido corto, 2 pitidos largos: Error de chipset.
Este código indica que el chipset no está funcionando correctamente. Para solucionar este problema, puede probar las siguientes soluciones:
* Reiniciar el equipo.
* Actualizar la BIOS de la placa base.
1 pitido corto, 3 pitidos largos: Error de BIOS.
Este código indica que la BIOS está corrupta o dañada. Para solucionar este problema, puede probar las siguientes soluciones:
* Reiniciar el equipo en modo seguro.
* Actualizar la BIOS de la placa base.
1 pitido corto, 1 pitido largo, 2 pitidos cortos: Error de memoria RAM.
Este código indica que una o más de las memorias RAM no están funcionando correctamente. Para solucionar este problema, puede probar las siguientes soluciones:
* Reiniciar el equipo.
* Retirar y volver a insertar las memorias RAM.
* Probar las memorias RAM en otro equipo.
1 pitido corto, 2 pitidos cortos, 3 pitidos cortos: Error de vídeo.
Este código indica que el adaptador de vídeo no está funcionando correctamente. Para solucionar este problema, puede probar las siguientes soluciones:
* Reiniciar el equipo.
* Actualizar los controladores del adaptador de vídeo.
* Probar el adaptador de vídeo en otro equipo.
1 pitido corto, 3 pitidos cortos, 1 pitido largo: Error de disco duro.
Este código indica que el disco duro no está funcionando correctamente. Para solucionar este problema, puede probar las siguientes soluciones:
* Reiniciar el equipo.
* Probar el disco duro en otro equipo.
1 pitido corto, 2 pitidos cortos, 1 pitido largo: Error de teclado.
Este código indica que el teclado no está funcionando correctamente. Para solucionar este problema, puede probar las siguientes soluciones:
* Reiniciar el equipo.
* Probar el teclado en otro equipo.
1 pitido corto, 3 pitidos cortos, 2 pitidos largos: Error de POST extendido.
Este código indica que un componente no ha pasado la prueba de autodiagnóstico. Para solucionar este problema, puede probar las siguientes soluciones:
* Reiniciar el equipo.
* Probar los componentes de la placa base uno por uno.
Si usted no puede solucionar el problema con los métodos anteriores, puede ponerse en contacto con el soporte técnico de ASRock para obtener ayuda.
Please respond to my effort to provide you with the best possible solution by using the "Acceptable Solution" and/or the "Helpful" buttons when the answer has proven to be helpful.
Regards,
Sonu
Your search handyman for all e-support needs!!

Related ASRock G41C-GS Manual Pages


Similar Questions

problem?

ASRock N68PV-GS are running in windows7?

I have just bought a new ASROCK G41C-GS, I put the cpu intel core 2 duo 6300 1,87 GHz , 2x4GB memori...

how to connect usb on motherboard asrock p4i65g?