Acer Aspire V5-471 Support Question
Acer Aspire V5-471 Support Question
Find answers below for this question about Acer Aspire V5-471.Need a Acer Aspire V5-471 manual? We have 1 online manual for this item!
Question posted by japihapee on April 22nd, 2013
How Can I Remove The Battery From Acer Aspire V5-431?
The person who posted this question about this Acer product did not include a detailed explanation. Please use the "Request More Information" button to the right if more details would help you to answer this question.
Current Answers
Related Acer Aspire V5-471 Manual Pages
Acer V5-471 Notebook Service Guide - Page 2

..., chemical, manual or otherwise, without notice.
ii Date
Chapter
Updates
Service guide files and updates are trademarks or registered trademarks of Acer Incorporated. Copyright
© 2012 by any defect in this Aspire MS2360 Service Guide.
The software described in this publication may be reproduced, transmitted, transcribed, stored in a retrieval system, or translated...
Acer V5-471 Notebook Service Guide - Page 6

... Disassembly Flowchart 3-17 Removing the Palmrest Module/Upper Case 3-18 Removing the Touchpad Board 3-21 Removing the Power Button Board 3-23 Removing the HDD Module 3-25 Removing the WLAN Module 3-26 Removing the Mainboard 3-28 Removing the Thermal Module 3-31 Removing the DC In Module 3-33 Removing the Battery Connector 3-34 Removing the Speaker Module 3-35 Removing the LCD Module...
Acer V5-471 Notebook Service Guide - Page 7

... Flowchart 3-39 Removing the LCD Bezel 3-40 Removing the Camera Board 3-41 Removing the LCD Panel 3-42 Removing the LCD FPC Cable 3-43 Removing the LCD Brackets 3-44 Removing the Microphone 3-45... 3-52 Reinstalling the LCD Module 3-52 Reinstalling the Speaker Module 3-54 Reinstalling the Battery Connector 3-56 Reinstalling the DC In Module 3-57 Reinstalling the Thermal Module 3-58...
Acer V5-471 Notebook Service Guide - Page 17

...0
WLAN:
IEEE 802.11b/g/n
Supports Acer SignalUp technology
LAN on Feature Port (thru bundled Y Cable):
...;Kensington lock slot
Power Adapter and Battery 0
19 V 3-pin 65 W AC adapter 4-Cell 2.8 Ah Li-ion battery pack Battery life: 4 hours Charging period...
Acer V5-471 Notebook Service Guide - Page 20

...; Height: 342 x 245 x 19.9mm (13.46× 9.64 × 0.78 in)
Weight
0
1.97 kg (4.343 lb) (including battery) for UMA models
2.01 kg (4.431 lb) (including battery) for Discrete models
Environment 0
Temperature: Operating: 0 to 40 °C Non-operating: -20 to 60 °...
Acer V5-471 Notebook Service Guide - Page 25

Icon
Item
1
Battery pack
2
Battery release latch
Description
Provides power to the computer when the power cord is unplugged. Hardware Specifications and Configurations
1-15 Base View
Table 1-5. Releases the battery for removal.
3
DIMM compartment Houses the computer's memory modules.
4
Speaker
Outputs sounds. Base View
No.
Base View 0
Figure 1-5.
Acer V5-471 Notebook Service Guide - Page 33

... in
Depth
24.5 cm
9.64 in
Height
1.99 cm
0.78 in
Weight (equipped with 6-cell 1.97 kg for UMA battery pack, HDD, and ODD) 2.01 kg for Discrete
4.343 lb for UMA 4.431 lb for Discrete
Input power
Operating voltage
19 V, 65 W
Operating current (max)
3.42 A
Temperature
Operating (not writing to optical...
Acer V5-471 Notebook Service Guide - Page 77

... system defaults. 11. Clearing the BIOS Passwords 0
1. Reinstall the DIMM module, DIMM cover and battery pack. 9. If the prompt appears, repeat steps 4-9 until the BIOS passwords have been cleared....Utilities
2-17 After the BIOS POST, remove the tool from the computer.
2. If no
password prompt appears, the BIOS passwords have been cleared. 10. Remove the battery pack and DIMM cover. 3. While...
Acer V5-471 Notebook Service Guide - Page 80

... the Palmrest Module/Upper Case 3-18 Removing the Touchpad Board 3-21 Removing the Power Button Board 3-23 Removing the HDD Module 3-25 Removing the WLAN Module 3-26 Removing the Mainboard 3-28 Removing the Thermal Module 3-31 Removing the DC In Module 3-33 Removing the Battery Connector 3-34 Removing the Speaker Module 3-35 Removing the LCD Module 3-37
LCD Module Disassembly Process...
Acer V5-471 Notebook Service Guide - Page 85

...x L3 (black) M2.5 x L5 M2 x 3
Thermal Screw
Quantity 10 10 27 1 5
Acer Part Number 86.9A552.3R0 86.00J40.323 86.00J51.535 N/A
Machine Maintenance
3-7 Table 3-1. Disassembly Process...in that order. Observe the order of the sequence to avoid damage to remove the main board, you must first remove the keyboard, then disassemble the inside assembly frame in the succeeding disassembly sections ...
Acer V5-471 Notebook Service Guide - Page 87

Machine Maintenance
3-9 Lift the battery pack from its bay (2). Detach the battery and follow local regulations for disposal. Slide and hold the battery release latch to release the battery pack (1). 3. Battery Pack
NOTE: NOTE:
The battery has been highlighted with the yellow rectangle in Figure 3-3. Figure 3-3. Removing the Battery Pack 0
1.
Turn the computer over so that the ...
Acer V5-471 Notebook Service Guide - Page 88

Perform the "Removing the Battery Pack" procedure described on the base door's notch to the lower case assembly. Screws
Step DIMM Cover Disassembly
Screw M2.5 × L5
Quantity 2
Screw Type
3. Remove the two screws securing the DIMM cover to release the DIMM cover, and then detach the cover from the computer.
3-10
Figure 3-5. Insert...
Acer V5-471 Notebook Service Guide - Page 90

Perform the "Removing the Battery Pack" procedure described on page 3-9. 2. Gently pull out the ODD module from the ODD drive bay.
3-12
Figure 3-8. Figure 3-7. ODD Module Screw
Table 3-7. ODD Module
Machine Maintenance Removing the ODD Module 0
1.
Screw Step
ODD Module Disassembly
Screw M2.5 × L5
Quantity 1
Screw Type
3. Remove the screw securing the ODD module...
Acer V5-471 Notebook Service Guide - Page 93

... to the lower case.
Base Side
Table 3-12. Perform the "Removing the ODD Module" procedure described on page 3-9. 2. Figure 3-12.
Perform the "Removing the Battery Pack" procedure described on page 3-12. 3. Machine Maintenance
3-15 Remove the screw securing the keyboard to use excessive force when removing. 1. Screw Step
Keyboard Disassembly
Screw M2.5 × L5
Quantity...
Acer V5-471 Notebook Service Guide - Page 95

...215; L5 M2 × 3
Quantity 17 3 3 1 1 4 1 5 2 1 1
Acer Part Number 86.00J51.535 86.00J51.535 86.9A552.3R0 86.9A552.3R0 86.9A552.3R0 86....Flowchart 0
EXTERNAL MODULE
PALM REST / UPPER CASE
HDD MODULE
MAIN BOARD
TOUCHPAD BOARD
WLAN BOARD
POWER BUTTON BOARD
BATTERY CONNECTOR
LCD MODULE
THERMAL MODULE
SPEAKER MODULE
DC IN MODULE
Figure 3-15. Main Unit Disassembly Flowchart
Table 3-15...
Acer V5-471 Notebook Service Guide - Page 112

... the lower case assembly. Figure 3-41. Battery Connector Screws
Table 3-41. Detach the battery connector from the lower case assembly.
3-34
Figure 3-42. Perform the "Removing the Mainboard" procedure described on the preceding on page 3-28.
2. Battery Connector
Machine Maintenance Removing the Battery Connector 0
1.
Screws Step
Battery Connector Disassembly
Screw M2.5 × L5...
Acer V5-471 Notebook Service Guide - Page 164

... Information on adjusting the settings. Check the Device Manager to the computer and switch between the internal display and the external display by removing the power cable and the battery pack. Connect an external monitor to determine that the computer is properly installed. Disconnect power and all Windows.
If display...
Acer V5-471 Notebook Service Guide - Page 177
... is operating correctly. 1.
If the problem does not recur, connect the removed devices one at least 10 times. 2. If the problem remains, replace the following devices:
Non-Acer devices Printer, mouse, and other external devices Battery pack Hard disk drive DIMM ...
Acer V5-471 Notebook Service Guide - Page 197
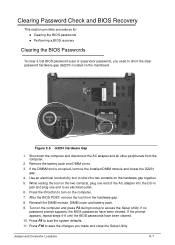
... F9 to short the two contacts on the computer. 7.
If the DIMM2 slot is occupied, remove the installed DIMM module and locate the G2201
gap. 4. If no
password prompt appears, the ... from the hardware gap. 8. Remove the battery pack and DIMM cover. 3. After the BIOS POST, remove the tool from the computer.
2. Reinstall the DIMM module, DIMM cover and battery pack. 9. If the prompt ...
Acer V5-471 Notebook Service Guide - Page 203

... will not be noted on the regional web or channel. Users MUST use the local FRU list provided by the regional Acer office on how to repair or for the Aspire MS2360.
NOTE: NOTE:
To scrap or to return the defective parts, users should follow the local government ordinance or regulations on...
Similar Questions


How To Remove The Battery Of Acer Aspire V5-431 Series Model Ms2360
(Posted by robjorgin 9 years ago)

How To Remove Battery Acer Aspire Laptop V5-571-6726
(Posted by vmnic 10 years ago)
