Brother International XL 5500 Support Question
Brother International XL 5500 Support Question
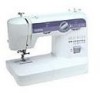
Find answers below for this question about Brother International XL 5500 - 42 Stitch Sewing Machine.Need a Brother International XL 5500 manual? We have 1 online manual for this item!
Question posted by Anonymous-70429 on August 12th, 2012
Upper Tension
How can I chnage the upper tension
Current Answers
Related Brother International XL 5500 Manual Pages
Users Manual - English - Page 2

... not use outdoors. 7. This sewing machine is not working properly, if it has been dropped or damaged, or dropped into any air openings blocked.
Return the machine to the nearest authorized dealer or.... Do not pull or push fabric while stitching. SAVE THESE INSTRUCTIONS This machine is required around the machine needle. 11. Switch the machine to the "{" position to turn it to...
Users Manual - English - Page 4

... Selection Dial ...10 Recommended Widths and Lengths for Stitches 11 Stitch Length Dial ...13 Stretch Stitching ...13 Stitch Width Dial ...14 Reverse Sewing Lever ...14 Drop Feed Lever (if the machine is equipped with a drop feed lever 14
THREADING THE MACHINE 15
Winding the Bobbin ...15 Lower Threading ...16 Upper Threading ...18 Using the Needle Threader (models equipped...
Users Manual - English - Page 5

... stitch you (counterclockwise) to raise and lower the needle.
H Presser foot lever (page 8) This raises and lowers the presser foot. KNOWING YOUR SEWING MACHINE
PRINCIPAL...Upper tension-control dial (page 22)
This controls the tension of the upper thread. 7 Stitch width dial (page 14)
This controls the stitch width. 8 Pattern selection dial (page 10)
You can turn the main power and sewing...
Users Manual - English - Page 9

... be injured.
● Always use extreme force when loosening or tightening the needle clamp screw, otherwise certain parts of the sewing machine may be straight 1 and sharp for the stitch pattern you want to sew and how. ■ Snap-On Type
Raise the needle to its highest position.
2
Lower the presser foot.
3
If a needle...
Users Manual - English - Page 11

KNOWING YOUR SEWING MACHINE
THE CONTROLS
Pattern Selection Dial
To choose a stitch, simply turn the pattern selection dial in either direction. Stitch widths and lengths are shown on the following page.
1
Note
● Since the pattern selection dial is displayed, turn the pattern selection dial in the opposite direction until the desired stitch is displayed.
1 Pattern...
Users Manual - English - Page 13

...28 29 25 30 29 29 29 29 30 - KNOWING YOUR SEWING MACHINE
■ 17 Stitches Pattern
1
Stitch Name
1-STEP AUTOMATIC BUTTONHOLE
Recommended Width
[mm (inch)]
3-5 (1/8-3/16)
2
STRAIGHT STITCH
0-5 (0-3/16) (Changes needle position)
3
ZIGZAG STITCH
0-5 (0-3/16)
4
BLIND HEM STITCH
3-5 (1/8-3/16)
5
SHELL TUCK STITCH
3-5 (1/8-3/16)
6
ELASTIC STITCH
3-5 (1/8-3/16)
7
STRETCH BLIND HEM...
Users Manual - English - Page 14

... stitch (close zigzag stitch), which is used when sewing on a scrap piece of fabric to observe the feeding of the material. Stretch Stitching
■ Selecting a stretch stitch Setting the stitch length dial to " SS " changes the selected pattern to the material and thread being used for best results. SS
1
10
2
2
3
1
■ Adjusting the stretch stitching The machine is...
Users Manual - English - Page 15

... drop feed lever to raise or lower the feed dogs according to adjust the stitch width.
KNOWING YOUR SEWING MACHINE
If different types of fabric or thread are used or the pattern does not have the correct shape, turn the stitch length dial out of the allowable range.
. Note
● The dial cannot be...
Users Manual - English - Page 19

... and put a spool of the thread 5 take -up lever to the left. KNOWING YOUR SEWING MACHINE
Upper Threading
1 2
4 3
1 Spool pin 2 Thread guide
CAUTION
● Make sure you and into the eyelet.
1 1
1 Thread take-up lever
1 Spool pin 2 Thread guide 3 Tension discs 4 Thread take -up lever
While holding the thread, pull it toward you (counterclockwise...
Users Manual - English - Page 22

....
■ Attaching the Twin Needle Attach the twin needle in the same way as a single needle (see page 7). The upper thread should have been made for making decorative stitches. You can sew with a Twin Needle
We have designed your machine so you use the same color or two different colors of thread for this...
Users Manual - English - Page 23

... the bobbin by hand, from the spool on thin fabrics, the thread tension cannot be adjusted according to a lower number. You may damage the machine. Upper tension control dial Increase the tension by turning the dial to
thread the twin needle. KNOWING YOUR SEWING MACHINE
■ Twin Needle Threading You should thread each needle separately. See page...
Users Manual - English - Page 25

... may bend or break the needle.
KNOWING YOUR SEWING MACHINE
CHART OF SEWING FABRICS, NEEDLES AND THREAD COMBINATIONS
Fabric Type
Mediumweight fabrics
Lightweight fabrics
Heavyweight fabrics
Stretch fabrics
Broadcloth
Taffeta
Flannel, Gabardine Lawn, Batiste
Georgette
Challis, Satin Denim
Corduroy
Tweed Jersey Tricot
For top-stitching
Thread
Type
Cotton
Synthetic mercerized
Silk or silk...
Users Manual - English - Page 26

...), and place both the upper and lower threads behind the presser foot. Sew 5 to strengthen a stitch. Setting the dial to choose the 1 Straight Stitch or Triple Stretch Stitch. The thread could tangle or the needle could also be injured. Straight Stitching
Stitch Name
Pattern
Stitch Length [mm (inch)]
Stitch Width [mm (inch)]
Straight Stitch
Triple Stretch Stitch
1-4 (1/16-3/16)
Fixed...
Users Manual - English - Page 29

... selection dial to cut the thread.
28 Sew the Scallop Stitch along the edge of the tear, sew using nylon thread, the stitch will not be visible. KNOWING YOUR SEWING MACHINE
Elastic Stitching
Stitch
Stitch
Stitch Name Pattern Length
Width
[mm (inch)] [mm (inch)]
Elastic Stitch
-2.5
3-5
(1/64-3/32) (1/8-3/16)
You can use the Elastic Stitch for decorative edging. If you keep the...
Users Manual - English - Page 32

...frame of the buttonhole are sewn in 7 the order shown.
3
2
4
1
Stop the machine when buttonhole stitching is sewn over a gimp thread. Lower the buttonhole lever and push it on the actual garment...and then temporarily tie them there.
PUSH
PUSH
PUSH
While gently holding the upper thread, start sewing. 3 *Set the stitch width to " ".
The bar tacks of the buttonhole foot as far
...
Users Manual - English - Page 35

...32")). At a slow speed, sew about 10 stitches.
5
Zipper Insertion
Stitch
Stitch
Stitch Name
Pattern
Length
Width
[mm (inch)] [mm (inch)]
Straight Stitch
2-3 (1/16-1/8)
2.5 (center needle position) (3/32)
Foot
Zipper Foot
You can use the zipper foot to sew different types of the zipper foot.
1
2
Remove the material from the machine. Cut 6 the upper and lower threads and tie...
Users Manual - English - Page 36

... the needle plate. 1 (On a machine equipped with a drop feed
lever, lower the feed dogs by setting the drop feed lever to the up position.)
Set the pattern selection dial to the Straight 1 Stitch. Loosen the tension of the upper thread so that 2 the lower thread lies on both sides.
Sew from you and pulling it...
Users Manual - English - Page 41

... CENTER
40
KNOWING YOUR SEWING MACHINE
Performance Checklist
Whenever sewing difficulties are encountered, first review the manual section about the operation that you are using the machine correctly. If you are performing, to the bottom of thread is used .
UPPER THREAD BREAKS
LOWER THREAD BREAKS
SKIPPED STITCHES
LOOP IN SEAM
FABRIC PUCKERS
Upper threading is too
tight...
Users Manual - English - Page 44

...36
N
Needle Replacement 7 Needle Threader 19
O
Oiling 38 Overedge Stitching 29
P
Pattern Length 11 Pattern Selection Dial 10 Pattern Width 11 Performance Checklist 40 Presser foot lever 4 Presser Foot Replacement 8 Principal Parts 4
Q
Quick Thread-setting System 20
R
Rampart Stitch 11 Recommended Widths and Lengths for Stitches 11 Repacking the Machine 42 Reverse Sewing Lever 14
43
Users Manual - English - Page 45

..., 12, 27 Stretch Overlock Stitch 11, 12, 13, 29
Stretch Stitching 13
T
Tension of the Thread 22 Thread Tension 22 Threading Bobbin 15 Threading Needle 19 Topstitching 26 Tree Stitch 11
Triple Stretch Stitch 11, 12, 13, 25 Triple Zigzag Stretch Stitch 11, 12, 13, 30
Twin Needle Sewing 21
U
Upper Tention Control Dial 22 Upper Threading 18 Using the...
Similar Questions

What Is The Ss Stitch On A Brother Sewing Machine
(Posted by katograha 9 years ago)

How To Thread A Brother Sewing Machine Xl-5500
(Posted by CAB14mitk 9 years ago)

How To Use A Brother Sewing Machine Xl-2600i Setting Stitch And Tension
(Posted by v007CCdu 10 years ago)

I Need A Parts And Schematic Manual For Sewing Machine Xl-3200 Brother
(Posted by MANUALS1 10 years ago)

How To Change Needle Brother Sewing Machine Ce 5500 Prw
i lost my manual and do not know how to change the needle for a brother sewing machine CE 5500 PRW. ...
i lost my manual and do not know how to change the needle for a brother sewing machine CE 5500 PRW. ...
(Posted by giomariagina 11 years ago)