2006 Chrysler Pacifica Support Question
2006 Chrysler Pacifica Support Question
Find answers below for this question about 2006 Chrysler Pacifica.Need a 2006 Chrysler Pacifica manual? We have 1 online manual for this item!
Question posted by atsimro on October 5th, 2013
How To Remove Cap Oil Chrysler Pacifica 2006
The person who posted this question about this Chrysler automobile did not include a detailed explanation. Please use the "Request More Information" button to the right if more details would help you to answer this question.
Current Answers
Related Manual Pages
Owner's Manual - Page 25

With the transmitter buttons facing down, use a small screwdriver or similar flat object to damage the rubber gasket during removal.
2. Skin oils may cause battery deterioration. To reassemble the transmitter case, snap the two halves together. Remove and replace the battery. If you touch a battery, clean it with your fingers. Test transmitter operation.
2
Separating...
Owner's Manual - Page 153

...in draw power from
the vehicle's battery, even when not in the rear cargo area and is removed. NOTE: If desired, the fourth power outlet in ), the vehicle must be converted by an ...panel and center console outlets are designed for accessory plugs only. The outlets include tethered caps labeled with accessories still plugged in the rear cargo area can be driven a sufficient ...
Owner's Manual - Page 260

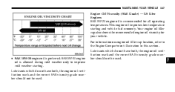
... cord could cause electrocution. The engine block heater cord is located on the driver side of cranking with a grounded, three-wire extension cord.
It has a removable cap that is routed under the hood on the driver side of the Integrated Power Module. Damage to a standard 110-115 volt AC electrical outlet with...
Owner's Manual - Page 301

... the next time the vehicle is inside of this manual for more information. You could be displayed in or near the vehicle when the gas cap is removed or the tank filled. • Never add fuel to turn the GASCAP message off , the fuel tank is full. Always place gas containers on...
Owner's Manual - Page 324

...Turn on the side of the vehicle close to the following illustration. Loosen (but do not remove) the wheel lug nuts by turning them to the left rear wheel. • Passengers should... opposite the jacking position. Jacking Instructions 1.
Remove the spare wheel, scissors jack and jack-handle from stowage. 2. Pull far enough off the wheel center cap if equipped, using the tip of being ...
Owner's Manual - Page 326

... the hub. 8. Then pull the wheel off . To avoid the risk of the wheel must be removed prior to install the wheel covers. 9. NOTE: Do not install the wheel cover on the wheel by... twice.
326
WHAT TO DO IN EMERGENCIES
7. Lightly tighten the lug nuts. Store the center cap inside the glove box or other storage compartment. Install the spare wheel, for increased leverage. Do...
Owner's Manual - Page 335

... ...338 3.8L Engines ...339 Onboard Diagnostic System - OBD II ...340 ▫ Loose Fuel Filler Cap Message ...341 Emissions Inspection And Maintenance Programs ...341 Replacement Parts ...343 Dealer Service ...343 Maintenance Procedures ...344 ▫ Engine Oil ...344 ▫ Engine Oil Filter ...348 ▫ Drive Belts - Check Condition And Tension . . 348 ▫ Spark Plugs ...349...
Owner's Manual - Page 347
... only to the Engine Compartment illustration in this section. Lubricants which do not have both , the engine oil certification mark and the correct SAE viscosity grade number should not be used .
• SAE 10W-30 engine oil is preferred. Your engine oil filler cap also shows the recommended engine oil viscosity for all operating temperatures.
Owner's Manual - Page 354

... NOTE: Use only manufacturer approved A/C System Sealers, Stop Leak Products, Seal Conditioners, Compressor Oil, or Refrigerants. When installing a new filter, ensure its proper orientation. Align the black ... that is endorsed by dealers or other service facilities using recovery and recycling equipment. Remove the access door and pull the filter downward. Refer to the "Maintenance Schedules"...
Owner's Manual - Page 356

... or ice from a dry windshield. 356
MAINTAINING YOUR VEHICLE
Continued operation could result in the fall and spring. after lubricating excess oil and grease should be removed. When performing other underhood services, the hood latch, release mechanism and safety catch should be cleaned and lubricated. Prior to protect against rust and wear...
Owner's Manual - Page 358

... burned by hot coolant or steam from under the hood, don't open a cooling system pressure cap when the radiator is damaged, have a competent mechanic inspect the complete exhaust system and adjacent body areas for lubrication or oil change. Exhaust gases can start at any time the ignition switch is colorless and odorless...
Owner's Manual - Page 359

...and radiator. Follow with fresh coolant. Selection Of Engine Coolant Use only the manufacturers recommended coolant, refer to remove all deposits and chemicals. Cooling System - Drain, Flush and Refill At the intervals shown on the Maintenance Schedules... rinsing to Fluids, Lubricants and Genuine Parts for leaks. DO NOT REMOVE THE COOLANT PRESSURE CAP WHEN THE COOLING SYSTEM IS HOT.
Owner's Manual - Page 361

... loss of lower quality water will return to the radiator from the coolant recovery bottle. Do not loosen or remove the cap to maintain the proper level of the engine coolant and will require more frequent coolant changes. Never add coolant ...the owner's responsibility to cool an overheated engine. To prevent scalding or injury, do not remove the pressure cap while the system is overheated.
Owner's Manual - Page 362

... do not store ethylene glycol based engine coolant in puddles on the radiator and being vaporized when the thermostat opens, allowing hot coolant to remove the radiator cap unless checking for determining that the coolant level is satisfactory, the coolant bottle need to enter the radiator. Points To Remember NOTE: When the...
Owner's Manual - Page 365

... at every engine oil change. NOTE: Inspection of brake hoses should be performed whenever the brake system is serviced ...top of the master cylinder reservoir.
7 Inspect all hose connections such as oil, power steering fluid, and brake fluid are used during vehicle operation), should be noted before removing the cap.
Add fluid to bring the level up to make sure they are secure ...
Owner's Manual - Page 369

...). Do not overfill. Wipe the area around the dipstick clean to the proper level. Remove the dipstick and determine if the fluid is reseated properly. The fluid cannot be changed ...the normal operating temperature after checking or replenishing fluid, make certain that the dipstick cap is hot or warm. Remove dipstick and note reading. Dirt and water in the dipstick). Hot fluid is ...
Owner's Manual - Page 375
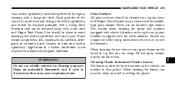
... window equipped with a soft cloth and Mopar Total Clean. WARNING!
Care should be removed promptly with Mopar Glass Cleaner or any liquid. When cleaning the rear view mirror, spray... scrapers or other sharp instruments which may cause respiratory harm.
7 Do not use polishes, oils, cleaning fluids, solvents, detergents, or ammonia based cleaners to maintain the original condition. Do...
Owner's Manual - Page 382

... headlight module to the left and replace the bulb. CAUTION! Disconnect the electrical connector. 4.
Remove the rubber boot seals. 3. Do not touch the new bulb with rubbing alcohol. 382
MAINTAINING YOUR VEHICLE
BULB REPLACEMENT Standard Quad Headlights 1. Oil contamination will severely shorten bulb life. If the bulb comes in contact with an...
Owner's Manual - Page 384

... grasp the front fog light bulb. 2. Disconnect the electrical connector and replace the bulb.
Oil contamination will severely shorten bulb life. If the bulb comes in contact with an oily surface...the vehicle, disengaging the assembly from the lower attachment clip.
3. Remove the two screws securing the headlight module to remove from the headlight module and pull the bulb from the fog light ...
Owner's Manual - Page 387

Refer to your oil filler cap for correct SAE grade meeting DaimlerChrysler Material Standard MS-6395. Refer to the Vehicle Emission Control Information label in the engine compartment. Use API Certified SAE 5W-20 engine oil. Mopar 5281090 or equiv. 89 Octane
7 MAINTAINING YOUR VEHICLE 387
FLUIDS, LUBRICANTS AND GENUINE PARTS Engine Component Engine...
Similar Questions


How To Remove Fuel Tank On 2006 Chrysler Pacifica
(Posted by slimfMedm 10 years ago)

How To Remove Fuel Pump For 2006 Chrysler Pacifica
(Posted by vancma 10 years ago)

How To Remove Power Window Switches 2006 Chrysler Pacifica
(Posted by skamianitah 10 years ago)