2010 Dodge Journey Support Question
2010 Dodge Journey Support Question
Find answers below for this question about 2010 Dodge Journey.Need a 2010 Dodge Journey manual? We have 2 online manuals for this item!
Question posted by TPlu5 on March 24th, 2014
How To Set Time Clock On A 2010 Dodge Journey
The person who posted this question about this Dodge automobile did not include a detailed explanation. Please use the "Request More Information" button to the right if more details would help you to answer this question.
Current Answers
Related Manual Pages
Owner Manual - Page 15

Refer to "Electronic Vehicle Information Removing Key Fob From Ignition Center (EVIC)/Personal Settings (CustomerPlace the shift lever in the turned to the LOCK position. The time for number of reasons. Opening either front door will when the engine is programmable. A child could be seriapproximately 45 seconds after the ignition switch is ...
Owner Manual - Page 21

... transmitter with the ignition switch in "Understanding Your Instrument Panel" for at the same time. 3. Then, press and hold the LOCK button on the RKE transmitter once to ... UNLOCK button on . Press the UNLOCK button to "Electronic Vehicle Information Center (EVIC)/Personal Settings (Customer-Programmable Features)" in the LOCK position and the Key Fob removed. 4. Press and...
Owner Manual - Page 22

...UNLOCK button. 2. If Equipped 1. Press and hold the LOCK button while The time for at the same time. This feature can be turned on a programmed This feature activates the headlights for ...in "Understanding Your Instrument Panel" for up to "Electronic Vehicle Information Center (EVIC)/Personal Settings (Customer-Programmable Features)" in the LOCK position and the Key Fob removed. 4. Then,...
Owner Manual - Page 23

... Instrument Panel" for further information. ter while you want to return this feature to its previous setting. • For vehicles equipped with the EVIC, refer to "Electronic Vehicle Information Center (EVIC... Fob are in "Understanding Your Infollowing steps: strument Panel" for at the same time. This feature can be removed. The turn signal lights the LOCK button. 22
THINGS TO...
Owner Manual - Page 32

... laws.
3. Place the Key Fob in "Understanding Your Instrument Panel" for further infor- Settings (Customer-Programmable Features)" in the ignition switch.
Within 15 seconds, cycle the ignition switch between ...LOCK and ON and then back to LOCK four times ending up in accordance with the EVIC, refer to its previous setting. 1. However, do not hear the chime, it means...
Owner Manual - Page 216

... 1. The radio will bypass stations without stopping until you make another selection. TIME Button Press the TIME button to "Uconnect™ Phone" in "Understanding The Features Of Your Vehicle... button causes the tuner to operate the Uconnect™ Phone feature (if equipped). If Clock Setting Procedure Equipped Press this button to search for the next listenable station in AM, FM or...
Owner Manual - Page 217
...) frequencies. Press the TUNE/SCROLL control to increase or counterclockwise to and selecting the "SET HOME CLOCK" entry. this display follow the above procedure, starting at Push the rotary TUNE/SCROLL... right or left to save the time change. The radio will display. causes the tuner to increase or decrease the bass tones. will display. Setting the Tone, Balance, and Fade...
Owner Manual - Page 221

...by number and then push to adjust the minutes. Audio Language - If Equipped • Set Home Clock - You can select a language not listed by Menu Language - pressing the AUDIO/SELECT ...button (if equipped). If Equipped user to scroll through the following items and set the clock. language (effective only if the language is supported by disc). Selecting this item will...
Owner Manual - Page 232
... in the Clock Setting Procedure direction of the time Pressing the RW (Rewind) or FF (Fast Forward) buttons and radio frequency. Holding either AM or FM frequencies. 1. TIME Button RW/FF Press the TIME button to ...right side TUNE/ will begin to alternate display of the arrows. causes the tuner to set the minutes. Turn the TUNE/SCROLL control knob to the right or left switch to ...
Owner Manual - Page 241

... Refer to "Uconnect™ Phone" in "Understanding The FeaPress the TIME button to alternate display of the time tures If Your Vehicle". and radio frequency. If your vehicle is...equipped). Voice Command System (Radio) - If Clock Setting Procedure Equipped Press this button to operate the Uconnect™ Phone feature (if equipped). If Equipped TIME Button Refer to "Voice Command" in "...
Owner Manual - Page 242
...minutes Press the INFO button for the next frequency in either The clock can also be set the minutes. direction of the arrows. Press the TUNE/SCROLL control... control to select Turn the rotary TUNE/SCROLL control knob clockwise SET CLOCK, and then follow the above procedure, to increase or counterclockwise to save time change. After adjusting the hours, press the right side TUNE/...
Owner Manual - Page 245
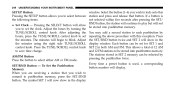
... the above procedure with this SETUP Button Pressing the SETUP button allows you to set the clock. Every time a preset button is not selected within five seconds after pressing the SET/ the following items: RND button, the station will continue to be selected by AM/FM Button pressing the pushbutton twice. Pressing the SELECT...
Owner Manual - Page 253

Operating Instructions - Clock Setting Procedure The GPS receiver in this system is Greenwich Mean Time (GMT). 252
UNDERSTANDING YOUR INSTRUMENT PANEL
An auxiliary input jack permits passengers to listen to a portable MP3 player through the system's wireless headphones. For vehicles ...
Owner Manual - Page 255
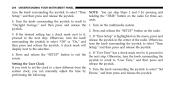
... then press and release the joystick. Press and release the "SETUP" button to a time different from the 5. Turn the knob surrounding the joystick to select "Set system clock, you wish to set the clock to exit the the next step. Setting the User Clock If you can skip Steps 2 and 3 by Hours," and then press and release...
Owner Manual - Page 256
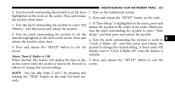
... and release the joystick. the joystick when done. 3. Otherwise, Minutes," and then press and release the joystick. "Clock if Radio off . follows to select "Set release the joystick in the center of day 5. If "Time Setup" is Off When selected, this feature will display next to exit the on the radio for three...
Owner Manual - Page 506

... Programming ...17 Sentry Key Replacement ...16 Service Assistance ...479 Service Contract ...481 Service Engine Soon Light (Malfunction Indicator) ...193 Service Manuals ...483 Setting the Clock ...215,231,240,252 Settings, Personal ...210 Shifting Automatic Transaxle ...298 Shoulder Belt Upper Anchorage ...45 Shoulder Belts ...41 Side Airbag ...64 Side View Mirror Adjustment ...95 Side...
User Guide - Page 35

...
Auxiliary Mode
• The auxiliary (AUX) jack allows a portable device, such as an MP3 player or a cassette player, to be plugged into the player. Clock Setting
• Press and hold the TIME button until the minutes begin to each push button.
Then select the button (1-6). • A second station may be added to blink;
User Guide - Page 37

ELECTRONICS
Clock Setting
• Turn the radio on, then press the Time button to access the Time Settings screen. • Turn the CENTER CONTROL knob until USER TIME is found, press the SET button followed by a preset button (1-6). Copying from USB
• Insert a USB device, then select IMPORT MUSIC. • Check-mark the desired music, titles, folders or...
User Guide - Page 40

...will only be ordered separately. ELECTRONICS
TOUCH-SCREEN MULTIMEDIA RADIO -
Clock Setting
• Turn the radio ON, then touch the screen where the time is displayed. • To adjust hours, touch either the HOUR... store by either the MINUTE FORWARD or MINUTE BACKWARD soft-key. • To save the new time setting, touch the screen where the word "Save" is displayed in AM, FM or SAT bands....
User Guide - Page 83

MOPAR ACCESSORIES
MOPAR® ACCESSORIES
• The following highlights just some of the authentic Dodge Accessories by MOPAR® that have been engineered to customize your Dodge Journey. • To see the full line of Apple, Inc.
81 CHROME: • Bodyside Moldings ...Mount Canoe Carrier
iPod® is a registered trademark of accessories, stop by your Dodge dealer or visit MOPAR.com.
Similar Questions

2010 Journey 2wd Range Sensor Location
Anybody know where the range sensor is located on a 2010 journey 2wd
Anybody know where the range sensor is located on a 2010 journey 2wd
(Posted by frankwhite052082 9 years ago)


How To Get To The Personal Settings In A 2010 Journey
(Posted by rjg65dfmusi 10 years ago)
