Gateway ML6732 Support Question
Gateway ML6732 Support Question
Find answers below for this question about Gateway ML6732 - ML - Pentium Dual Core 1.73 GHz.Need a Gateway ML6732 manual? We have 4 online manuals for this item!
Question posted by korall on January 10th, 2011
What Is Ml6732 Adapter & Battery Specs? Can I Add Or Upgrade Ram?
The person who posted this question about this Gateway product did not include a detailed explanation. Please use the "Request More Information" button to the right if more details would help you to answer this question.
Current Answers
Related Gateway ML6732 Manual Pages
8512564 - Component Replacement Manual R0 - Page 1

... toggle the status lights on .
Replacing the AC Adapter
Replacing the AC Adapter
To connect the AC adapter:
1 Connect the power cord to disassemble the AC adapter. Contact Gateway about returning defective AC adapters.
Important
If the battery charge indicator does not turn on: • Unplug the adapter from your notebook's power connector.
1
3 Plug the power cord...
8512564 - Component Replacement Manual R0 - Page 3

... moving parts, turn off your notebook.
4 Close the LCD panel.
5 Disconnect the AC adapter, modem cable, and network cable.
6 Disconnect all peripheral devices and remove any surface.
...
Do not lay components on your notebook and unplug the AC adapter, modem cable, and network cable and remove the battery before replacing a component.
All other countries.
Avoid touching the edge...
8512564 - Component Replacement Manual R0 - Page 4

... 10. 14 Replace the memory bay cover, then tighten the six cover screws. 15 Replace the keyboard screw. 16 Insert the battery, then turn your notebook over. 17 Connect the power adapter, modem cable, and network cable,
then turn on the bottom of their respective companies. All rights reserved. See your notebook...
8512564 - Component Replacement Manual R0 - Page 5

...exposure to dangerous electrical voltages and moving parts, turn off your notebook.
4 Disconnect the AC adapter, modem cable, and network cable.
5 Disconnect all peripheral devices and remove any Express, ... the old drive. See your notebook and unplug the AC adapter, modem cable, and network cable and remove the battery before replacing a component. Never slide components over so the bottom...
8512564 - Component Replacement Manual R0 - Page 6

Technical Support See the label on -screen instructions. Replacing the Hard Drive Kit
2
13 Insert the battery, then turn your notebook over.
14 Connect the power adapter, modem cable, and network cable.
15 Turn on your notebook.
17 Follow the on the bottom of their respective companies.
All rights reserved. Gateway and ...
8512564 - Component Replacement Manual R0 - Page 7

... and moving parts, turn off your notebook. 3 Close the LCD panel. 4 Disconnect the AC adapter, modem cable, and network cable. 5 Disconnect all peripheral devices and remove any surface.
•...and memory cards. 6 Turn your notebook and unplug the AC adapter, modem cable, and network cable and remove the battery before replacing a component. All other countries.
ESD can permanently damage...
8512564 - Component Replacement Manual R0 - Page 8

...keyboard screw.
10 Replace the memory bay cover.
11 Replace the keyboard screw.
12 Insert the battery, then turn your notebook over so the bottom is part of the notebook, insert the cable into...panel, then replace the two hinge cover screws.
8 Turn your notebook over .
13 Connect the power adapter, the modem cable, and the network cable, then turn on the front of their corresponding slots.
15...
8512564 - Component Replacement Manual R0 - Page 9

...by their respective companies.
Important
The keyboard screw hole is facing up, then remove the battery.
See your notebook. All other countries. To replace the memory module:
1 Follow ...discharge-sensitive components in your notebook and unplug the AC adapter, modem cable, and network cable and remove the battery before replacing a component. Replacing the Memory Module
Replacing ...
8512564 - Component Replacement Manual R0 - Page 10

... direction. Technical Support See the label on your notebook over. 16 Connect the power adapter, the modem cable, and the network
cable. 17 Reconnect all peripheral devices and replace... cover, then tighten the six cover screws. 14 Replace the keyboard screw. 15 Insert the battery, then turn your notebook. Gateway and eMachines are trademarks or registered trademarks of the notebook for...
8512564 - Component Replacement Manual R0 - Page 11

... use them. in your notebook and unplug the AC adapter, modem cable, and network cable and remove the battery before replacing a component. Replacing the Wireless Network Module
...a Gateway authorized representative, explicitly for your notebook. 3 Close the LCD panel. 4 Disconnect the AC adapter, modem cable, and network cable. 5 Disconnect all peripheral devices and remove any surface.
•...
8512488 - Gateway Notebook Reference Guide R2 - Page 70

... the CD or DVD drive only when necessary. Save
the battery for times when you plan on your notebook completely off .
• Hibernate - (also called save to disk) writes all current
memory (RAM) information to the hard drive so
you cannot use a power adapter.
• To find AC power outlets in airports, look...
8512488 - Gateway Notebook Reference Guide R2 - Page 101

... SO-DIMMs (Small Outline Dual Inline Memory Modules).
The modules are available in various capacities and any module can be placed in any PC Cards or Express Cards.
5 Turn your Gateway notebook. For more information, see "Changing the battery" on page 94.
2 Turn off your notebook. 3 Disconnect the AC adapter, modem cable, and...
8512488 - Gateway Notebook Reference Guide R2 - Page 106

... notebook. 5 Disconnect the AC adapter, modem cable, and network
cable.
6 Disconnect all peripheral devices connected to replace the hard drive kit.
For more hard drive capacity, you want to transfer to the new hard
drive.
If you would like more information, see "Backing up , then
remove the battery. For more information, see...
8512488 - Gateway Notebook Reference Guide R2 - Page 108

... 8: Upgrading Your Notebook
11 Remove the screws that secure the cover to the drive.
15 Slide the new hard drive kit into your notebook, then
replace the cover screws.
16 Insert the battery, then...insert the
Windows DVD, close the DVD drive, then restart your notebook over.
17 Connect the power adapter, modem cable, and network
cable.
18 Turn on -screen instructions. Screw Screw
Screw
Screw
12 ...
8512488 - Gateway Notebook Reference Guide R2 - Page 153
...adapter 73 management 59, 63 plans 66 Sleep mode 21, 26, 64 source problems 18 SpeedStep settings 66 status indicator 6 surge protector 18 troubleshooting 125 turning off notebook 21 turning on notebook 20
power adapters... 71
radio frequency wireless connections 71
RAM See memory
rebooting notebook 22
recalibrating battery 62
recharging battery 60
recovering defaults 89 drivers 80 programs...
8513067 - Gateway Notebook Hardware Reference R3 - Page 70

... telephones. The next time you turn off.
• Hibernate - (also called save to disk) writes all current
memory (RAM) information to lengthen the life of power.
• Recharge the battery often, take electrical adapters.
while your notebook, it switches
to an EmPower™ in large areas such as the display and drives, turn...
8513067 - Gateway Notebook Hardware Reference R3 - Page 101

...battery" on page 94.
2 Turn off your notebook. 3 Disconnect the AC adapter, modem cable, and network
cable.
4 Disconnect all peripheral devices connected to replace memory modules. Your notebook uses memory modules called SO-DIMMs (Small Outline Dual... the bottom is facing up, then
remove the battery. Memory bay
To add or replace memory modules:
1 Follow the guidelines under "Preventing static electricity
discharge" on...
8513067 - Gateway Notebook Hardware Reference R3 - Page 106

... Follow the guidelines under "Preventing static electricity
discharge" on page 61.
100 CHAPTER 8: Upgrading Your Notebook
Replacing the hard drive kit
Tools
You need a small Phillips screwdriver and the ... If you would like more information, see "Changing the battery" on page 94.
4 Turn off your notebook. 5 Disconnect the AC adapter, modem cable, and network
cable.
6 Disconnect all peripheral ...
8513067 - Gateway Notebook Hardware Reference R3 - Page 108

CHAPTER 8: Upgrading Your Notebook
11 Remove the screws that secure the cover to the drive.
15 Slide the new hard drive kit into your notebook, then
replace the cover screws.
16 Insert the battery, then turn your notebook over.
17 Connect the power adapter, modem cable, and network
cable.
18 Turn on your notebook...
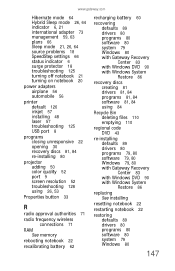
8513067 - Gateway Notebook Hardware Reference R3 - Page 153

...adapter 73 management 59, 63 plans 66 Sleep mode 21, 26, 64 source problems 18 SpeedStep settings 66 status indicator 6 surge protector 18 troubleshooting 125 turning off notebook 21 turning on notebook 20
power adapters... 71
radio frequency wireless connections 71
RAM See memory
rebooting notebook 22
recalibrating battery 62
recharging battery 60
recovering defaults 89 drivers 80 programs...
Similar Questions


What Cpu Can I Upgrade To For Ml6732
(Posted by jefrafle 10 years ago)
How To Remove Power Button Gateway Ml6732
(Posted by daY2ndb 10 years ago)

Ml6732 Fan Warning. No Boot
I have an ML6732 that posts. Then the fan spins up for a second. Then I get a fan failure warning ...
I have an ML6732 that posts. Then the fan spins up for a second. Then I get a fan failure warning ...
(Posted by Mustash7 12 years ago)

Notebook
What i sthe difference between the Gateway MT6840 and the Gateway MT6728. Is one better then the oth...
What i sthe difference between the Gateway MT6840 and the Gateway MT6728. Is one better then the oth...
(Posted by corrine2020 12 years ago)