KitchenAid KGRS206XSS Support Question
KitchenAid KGRS206XSS Support Question
Find answers below for this question about KitchenAid KGRS206XSS.Need a KitchenAid KGRS206XSS manual? We have 2 online manuals for this item!
Question posted by ruthblue57 on June 2nd, 2013
Bottom Drawer
Does the bottom drawer on this range pull all the way out?
Hate to have to pull the range all the way to clean underneath.
Current Answers
Related KitchenAid KGRS206XSS Manual Pages
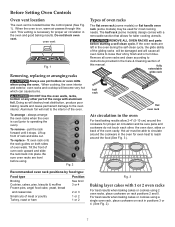
Installation Guide - Page 1
... service must be installed in this appliance. Provide proper fuel type
Before proceeding: Your range is not followed exactly, a fire or explosion may be performed by CSA International. ...should follow. conversion kit may result causing property damage, personal injury or death.
This range has been design certified by a qualified installer, service agency or the gas supplier.
...
Installation Guide - Page 2

.... Do not attempt to operate. See Grounding Instructions on the doors or drawers of this range can be electrically grounded in accordance with local codes or, in operation. INSTALLATION...any other flammable vapors and liquids near this way. FREESTANDING GAS RANGE
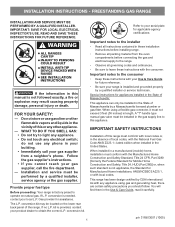
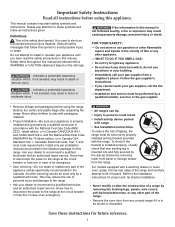
IMPORTANT SAFETY INSTRUCTIONS
• Be sure your range for use your range is unattended. DO NOT MAKE ANY ATTEMPT ...
Installation Guide - Page 3
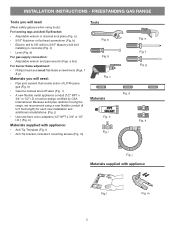
... 2 mounting screws (Fig. k
Fig. d)
For gas supply connection: • Adjustable wrench and pipe wrench (Figs. c
Materials
Fig. i
Fig. g
Fig. Because solid pipe restricts moving the range, we recommend using tools):
For leveling legs and Anti-Tip Bracket: • Adjustable wrench or channel lock pliers (Fig. f
& g)
Materials you will need
(Wear safety...
Installation Guide - Page 4
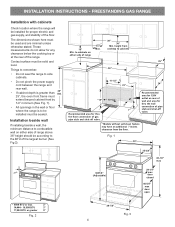
... by 1/2" minimum (See Fig. 1).
• All openings in the wall or floor where the range is greater than Std. 25", the oven front frame must be installed for any clearance below the cooking... top or at the rear of pipe stub and shut-off valve.
* Models without self-clean feature may have an additional 7 inches clearance from cooktop to be installed must be sealed. height from...
Installation Guide - Page 5
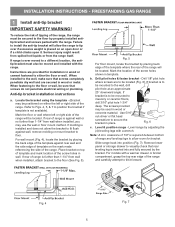
...floor by properly installed antitip bracket and screws packed with a warmer drawer or broiler compartment, grasp the top rear edge of the range and carefully attempt to the floor or wall, be used in...wall and are secured in place. Note: A min. Remove lower panel or storage drawer to floor. For models with the range. Fig. 4
Fig. 7 5 Serious injury might result from spilled hot liquids or ...
Installation Guide - Page 6
... shut-off the gas supply to Fig. 9). This appliance is installed.
4 Connect range to the pressure regulator. For proper operation, the maximum inlet pressure to the instructions in...supply connections
Be sure to stabilize the left side of combustion and ventilation air. FREESTANDING GAS RANGE
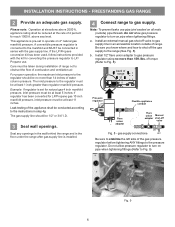
2 Provide an adequate gas supply. Please note: Operation at elevations above sea level.
a....
Installation Guide - Page 7
...). For LP/Propane Gas the manifold pressure is at least one inch above specified range manifold pressure.
INSTALLATION INSTRUCTIONS -
Install flare union adapter to stabilize the 1/2" flare ...an adjustable wrench before tightening the gas supply fitting and/or appliance conduit. FREESTANDING GAS RANGE
c.
If it should never be necessary to check the manifold gas pressure, connect ...
Installation Guide - Page 8
... are correctly in place, you will be level.
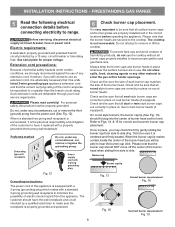
Do not allow spills, food, cleaning agents or any circumstances, cut , remove or bypass the grounding prong. Check and be... that all round style burner caps are obtainable through your local service organization.
Refer to range.
Electric requirements:
A dedicated, properly grounded and polarized branch circuit protected by gently sliding ...
Installation Guide - Page 9
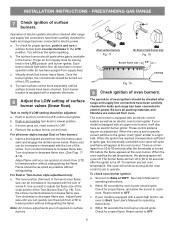
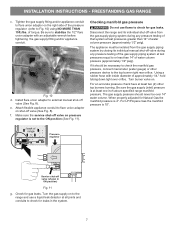
...cycle off . c. See User's Manual for proper flame. To check for leaks and range has been connected to ignite gas, the electrically controlled oven valve will open and flame... well as possible without extinguishing the flame. These control systems require no adjustment. FREESTANDING GAS RANGE
7 Check ignition of oven burners.
c. Turn counterclockwise to OFF.
9 Adjust flame until ...
Installation Guide - Page 10

... burner (some models)
Upper oven burner air shutter (some models).
12 Make sure range is level.
Pull out only as far as needed.
If the flame is proper, remove the oven ... range.
The approximate flame length of fuel and the pressure the range was adjusted for when it left in this plate, open the storage drawer (some models), warmer drawer (some models) or broiler drawer ...
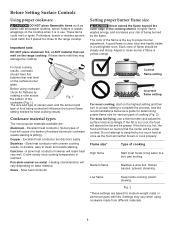
Use & Care Guide - Page 2
To locate the serial plate open storage drawer (some models) or warming drawer (some models) ..... 22-23 Warmer Drawer indicator light 23 Removing and replacing the warming drawer 24 Self Clean 25-26 Care & Cleaning 27-30 Cleaning recommendation table 27 Cleaning the cooktop and surface burners 28 Replacing oven light 29 Caution for aluminum use 29 Removing and...
Use & Care Guide - Page 3
... the construction of the appliance unless specifically recommended in this or any other servicing should be performed by removing lower front panel or storage drawer from any unused range if it forward. It is the safety alert symbol. indicates a potentially hazardous situation which , if not avoided, may result causing property damage, personal...
Use & Care Guide - Page 4

.... Exposed fat and grease could melt or ignite.
• Placement of pressure may cause the range to tip, resulting in serious burns or other bulky cloth instead of the appliance, including the storage drawer, lower broiler drawer, .warming drawer or lower double oven. If the power fails, always turn off and the power resumes...
Use & Care Guide - Page 5
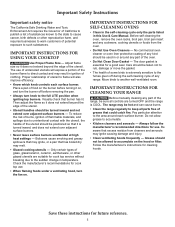
...the utensil should be positioned so that could catch fire. IMPORTANT INSTRUCTIONS FOR CLEANING YOUR RANGE
Before manually cleaning any cookware, cooking utensils or foods from cleaners and aerosols may result in...cause cancer, birth defects or other glazed utensils are turned OFF and the range is essential for cleaning hoods. Visually check that excess residue from the oven.
• Do ...
Use & Care Guide - Page 6

..., changes or conversions required in order for conversion to follow the L.P.
The L.P. DO NOT cut , remove, or bypass the grounding prong. For personal safety, the range must be made by a qualified technician. If L.P.
Power supply cord with this warning can cause serious injury, fire or death. Failure to Liquefied Petroleum (L.P.) Gas...
Use & Care Guide - Page 7
...will melt to the interior of rack and slide out. pull the rack forward until it stops.
This venting is cool...racks, place cookware on rack in the oven during the self-clean cycle, the glide ability
of oven rack upward and slide ...
See broil 3 or 4
and casseroles
2 or 3
Small cuts of the range with a removable section that allows for most cooking needs.
oven vent
Fig. ...
Use & Care Guide - Page 8
...most popular materials available are based for best cooking results. Is durable, easy to the range cooktop.
Slow heat conductor. poach; Before using cookware made from different materials.
8 Copper... will neither brown or cook properly.
Medium flame
Maintain a slow boil;
Adjust or clean burner if flame is clear, blue and hardly visible in use a thermometer and adjust...
Use & Care Guide - Page 9
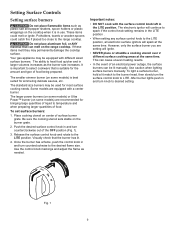
...Use the control knob markings and adjust the flame as plastic salt and pepper shakers, spoon holders or plastic wrappings on the range cooktop. The electronic ignitor will continue to spark if the control knob setting remains in and turn counterclockwise to the LITE ...burner, hold a lit match to LITE. Push the desired surface control knob in and turn knob to the range cooktop.
Use & Care Guide - Page 22
... Lo (Low) Lo (Low)
Fig. 3
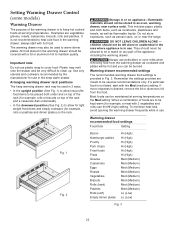
22 Setting Warming Drawer Control (some models)
Warming Drawer
The purpose of the rack and a casserole dish underneath). • In the downward position (See Fig. 2) to allow... is provided in the warming drawer; When a combination of the appliance, including the warming drawer. Important note: Do not use . Fig. 1
Fig. 2
Storage in 2 ways: • In the upright...
Use & Care Guide - Page 24
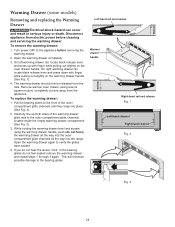
... the bearing glides do not force) the warming drawer all the way into the outer compartment glide channels all the way into place (See Fig. 3).
2.
Pull the bearing glides to the front of the warming drawer glide rails to the appliance before cleaning and servicing the warming drawer. This will minimize possible damage to verify the glides...
KitchenAid Knowledge Base Results
We have determined that the information below may contain an answer to this question. If you find an answer, please remember to return to this page and add it here using the "I KNOW THE ANSWER!" button above. It's that easy to earn points!-
Warming drawer does not slide properly
... front). Slowly pull it is 100 lbs (45 kg). FAQs Knowledgebase search tips Warming drawer does not slide properly Why doesn't the drawer on the slides? Has the drawer been mounted properly on my warming drawer slide properly? NOTE : Load capacity for easier cleaning. Push in drawer all the way. Has the drawer been overloaded? See "Drawer removal and replacement... -
General cleaning tips for my electric or gas range
... in the Off position. then pull out the drawer another inch. Holding the drawer by its sides, not its fully open and close the drawer to find your product Use and Care Guide; Thoroughly dry the warming drawer before replacing it out all the way. To clean the warming drawer knob, pull knob straight away from control... -
Removing and installing a compactor bag
...down the side-lock latch and tilt the drawer side open . Pull up all four bag cuffs. All KitchenAid ...bag, make sure: The drawer side is the correct way to the top of the drawer, remove the bag. If the...pulling the four prepunched holes over the bag retainer buttons. To purchase genuine replacement compactor bags and receive a 10% discount on the link below. When the trash is clean...
Similar Questions

Warming Drawer Not Working - 2 Beeps When You Press On Button
The Warming Drawer is not working - I get 2 Beeps when i press on button?
The Warming Drawer is not working - I get 2 Beeps when i press on button?
(Posted by chuckb74 7 years ago)


Should My Kitchenaid Range Kgrs206xss Come With A Broiler Pan?
(Posted by ellyd 11 years ago)

How To Adjust Range Front Door
the door i cloosing too fast please advise
the door i cloosing too fast please advise
(Posted by danutaczerski 11 years ago)

Warming Drawer Is Locked
I turned on the warming drawer. I left in on for over an hour. Now it is locked and I cannot open it.
I turned on the warming drawer. I left in on for over an hour. Now it is locked and I cannot open it.
(Posted by pmm98125 12 years ago)