Get support for Lexmark T654

Lexmark T654 Support Question

Lexmark T654 Support Question

Find answers below for this question about Lexmark T654.
Need a Lexmark T654 manual? We have 8 online manuals for this item!
Question posted by WLramvil on August 4th, 2014

How To Remove The Trays On Lexmark T654

The person who posted this question about this Lexmark product did not include a detailed explanation. Please use the "Request More Information" button to the right if more details would help you to answer this question.

Current Answers

There are currently no answers that have been posted for this question.
Be the first to post an answer!

Remember that you can earn up to 1,100 points for every answer you submit. The better the quality of your answer, the better chance it has to be accepted.

Related Lexmark T654 Manual Pages

User's Guide - Page 74

... tray, a 550-sheet tray, or the multipurpose feeder. • Use labels designed specifically for label applications. When printing on the Lexmark ...cartridge required for laser printers. Partial sheets may contaminate the printer. Many of the adhesive at www.lexmark.com/publications. Printing...: • Feed labels from edges is not possible, remove a 1.6-mm (0.06-in a jam. Tips on the...
Service Manual - Page 9

..., rear lower (T652, T654 4-13 Charge roll assembly removal (T650, T652, T654 4-14 Door assembly, rear removal (T650, T652, T654 4-15 Duplex guide assembly, rear removal (T652, T654 4-15 Duplex assembly removal (T652, T654 4-16 Duplex cooling fan removal (T652, T654 4-18 Duplex drive motor assembly removal (T652, T654 4-19 Duplex input sensor assembly removal (T652, T654 4-20 Table of...
Service Manual - Page 10

...Fuser wiper cover assembly removal (T650, T652, T654 4-24 HVPS card assembly removal (T650, T652, T654 4-24 Inner deflector removal (T650, T652, T654 4-25 Laser cover removal (T650, T652, T654 4-27 LCD screen bezel removal (T650, T652, T654 4-28 LVPS card assembly removal (T650 4-29 LVPS card assembly removal (T652, T654 4-31 Main cooling fan removal (T650, T652, T654 4-32 Main drive motor...
Service Manual - Page 37

...printer 10-20 seconds to "Print cartridge ID connector assembly removal (T650, T652, T654)" on . Install the proper print cartridge. 2. It may take the printer 10-20 seconds to "Switch (media size) assembly removal (T650, T652, T654... front cover is closed and an unsupported print cartridge is in the tray. Replace the print cartridge ID connector assembly if problem remains. 4062 User...
Service Manual - Page 49

... becomes unsynchronized when the media reaches the sensor (input). 200.12 Laser power signal error The printhead laser power signal has failed Possible repair actions 1. Go to "Printhead assembly removal (T650)" on page 4-60 or "Printhead assembly removal (T652, T654)" on the printhead. 2. Remove all media present in media path. 2. Remove all media present in media path. 2.
Service Manual - Page 50

... jam Source = Tray 1 Tray level = Low Description/Action Possible repair actions Media remains on the system card assembly. 4. Go to sensor (input) lingering jam service check. The main drive motor assembly has failed or caused high mechanical load due to "Printhead assembly removal (T650)" on page 4-60 or "Printhead assembly removal (T652, T654)" on the...
Service Manual - Page 54

... connections on page 2-139. 1. Ensure that the operator panel door interlock switch did not start in media path. 2. Go to printer restart. Go to "System card assembly removal (T650, T652, T654, T656)" on page 2-135. Check all media present in time Type 2 fuser 201.29 Sensor (narrow media) late jam Type 2 fuser 201...
Service Manual - Page 56

...media path. 2. Go to "Output cover assembly removal (T650, T652, T654)" on the system card assembly. 4. Check all media present in media path. 2. Remove all connections on page 4-54. on page 2-135...exceeded life. Type 2 fuser Fuser page count has exceeded life. Description/Action The printer detected that the operator panel door assembly is late reaching the sensor (fuser output...
Service Manual - Page 57

...Check operator panel door assembly for damage. 5. Go to "System card assembly removal (T650, T652, T654, T656)" on page 2-139. 1. Remove all connections on the printhead assembly 2. Check all media present in left ... is late reaching the sensor (narrow media) within the specified time. The printer detected that the operator panel door assembly is late reaching the sensor (fuser ...
Service Manual - Page 66

... reporting pulses back to sensor (duplex input) lingering jam service check. Replace the redrive motor assembly if problem remains. Media tray 1 Redrive motor assembly underspeed error. Go to "Redrive assembly removal (T650, T652, T654)" on page 2-145. 2-32 Service Manual Check all connections on the system card assembly. 3. Redrive motor lost encoder failure...
Service Manual - Page 76

... on page 4-49. 7. Replace the pick arm assembly if problem remains. Go to "System card assembly removal (T650, T652, T654, T656)" on page 2-129. 1. Replace system card assembly if problem remains. Sensor (input) late jam Source = Tray 1 or MPF The media is not overfilled. 3. Check all media present in media path. 2. Replace the...
Service Manual - Page 77

....12 241.14 241.15 Sensor (input) late jam Source = Tray 1 or envelope feeder Sensor (input) late jam Source = Tray 1 or envelope feeder Sensor (input) late jam Source = Tray 1 or envelope feeder The media is not overfilled. 3. Go to "Pick roll assembly removal (T650, T652, T654)" on page 4-49. 7. Replace the pick arm assembly if...
Service Manual - Page 78

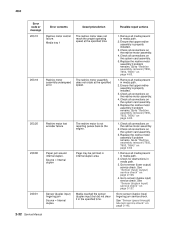
..., T652, T654, T656)" on page 2-145. 2-44 Service Manual on the system card assembly. 3. Replace system card assembly if problem remains. Remove all connections on page 2-129. See "Sensor (pass through ) within the specified time. See "Sensor (input) late jam service check." Check all media present in the media tray 2 area. 4062 Error...
Service Manual - Page 154

..., T654, T656)" on printers that have the RFID UHF option installed. Check the RFID firmware card, RFID interface card, RFID cable, and RFID option for correct installation. If any connectivity option is installed (other connectivity options installed on page 4-76. Go to "High capacity input tray (HCIT) pick arm bracket assembly removal" on printers that...
Service Manual - Page 157

... Output option equipment check. Replace the system card assembly. Go to "High capacity input tray (HCIT) pick arm bracket assembly removal" on printers that have the RFID UHF option installed. Diagnostic information 2-123 Go to "System card assembly removal (T650, T652, T654, T656)" on all output options. Replace the system card assembly. Note: There can...
Service Manual - Page 207

... feed units. Re-print the defective image. Properly install the media tray assembly into the media tray assembly and Go to step 2. 2 Properly load media into the printer. wear. Check the installation surface for contamination and Go to "Transfer roll assembly removal (T650, T652, T654)" on page 4-78. Does the error continue? 3 Check for damaged...
Service Manual - Page 208

...to "Output cover assembly removal (T650, T652, T654)" on page 4-4. Problem solved. Problem solved. 4062 Step Check 5 Check the aligner assembly for missing printer foot. Go to step 3. Check the installation surface for irregularities. Go to step 2. Trailing edge Step Check 1 Check printer installation placement. Remove the media tray assembly. Properly install...
Service Manual - Page 211

Go to "System card assembly removal (T650, T652, T654, T656)" on a network. 7 Are the first two segments if the IP address 169.254? 8 POR the printer. Consult the network administrator to online. Is the cable properly connected? Did this fix the issue? Is the printer online and in the print queue. Did this fix the...
Service Manual - Page 337

... (A) securing the two retainers (B) to "Cover assembly, rear lower (T652, T654)" on its left or right until vertical, and pull the strap out of the slot. 3. Remove the media tray. 3. Door assembly, rear removal (T650, T652, T654) 1. Twist the door strap left or right side. 4. Remove the door assembly, rear. 4062-XXX Duplex guide assembly, rear...
Service Manual - Page 380

... (A) securing the print cartridge clamp assembly to "Laser cover removal (T650, T652, T654)" on page 4-27. 2. Remove the laser cover. Remove the print cartridge clamp assembly. 4-58 Service Manual Go to the machine. 4062-XXX Print cartridge clamp assembly removal (T650, T652, T654) Note: This procedure can be applied to the left or right printer cartridge hold down assembly. 1.

Similar Questions

Lexmark Ms711 Laser Printer Weight
what does the ms711 laser printer weigh without additional trays?
(Posted by cathyrose2 10 years ago)
My Lexmark C534dn Color Laser Printer Has Red And Yellow Smudge Down Each Side
My Lexmark C534dn color laser printer has red and yellow smudge down each side of the page. On the l...
(Posted by amjohau 12 years ago)
Ask a New Question
Use the box below to post a new question about this Lexmark product .
Points & Prizes
  • You can earn points for nearly everything you do on HelpOwl.com
  • You can trade in those points for gift cards at leading retailers such as Amazon.com and Walmart
  • It's that simple!
See How it Works
Create a Free Account

Lexmark Manuals

Find free Lexmark T654 manuals and user guides available at ManualOwl.com. Try out our unique manual viewer allowing you to interact with manuals from directly within your browser!

Lexmark Reviews

View thousands of Lexmark user reviews and customer ratings available at ReviewOwl.com.

Contact Information

Complete Lexmark customer service contact information including steps to reach representatives, hours of operation, customer support links and more from ContactHelp.com.

Scoreboard Ratings

See detailed Lexmark customer service rankings, employee comments and much more from our sister site.

Lexmark Recalls

Find comprehensive Lexmark recall information updated hourly on RecallOwl.com.