Get support for Maytag MEDZ600TW - 27

Maytag MEDZ600TW Support Question

Maytag MEDZ600TW Support Question

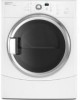
Find answers below for this question about Maytag MEDZ600TW - 27" Front-Load Electric Dryer.
Need a Maytag MEDZ600TW manual? We have 1 online manual for this item!
Question posted by BHHALLQUIST on October 1st, 2023

Will The Switch In Door Go Bad And Beep When You Try To Turn On

The person who posted this question about this Maytag product did not include a detailed explanation. Please use the "Request More Information" button to the right if more details would help you to answer this question.

Current Answers

Answer #1: Posted by Technoprince123 on October 1st, 2023 6:40 PM
Technoprince123

Member since:
February 8th, 2021

Points: 1,205,190
100
points


Please response if this answer is acceptable and solw your problem thanks
Answer #2: Posted by SonuKumar on October 1st, 2023 10:30 PM
SonuKumar

Member since:
May 9th, 2021

Points: 16,617,810
100
points
Yes, the door switch in a Maytag MEDZ600TW dryer can go bad and beep when you try to turn it on. The door switch is a safety device that prevents the dryer from operating when the door is open. If the switch fails, the dryer will not start, and it may beep to indicate that there is a problem.

There are a few things that can cause the door switch to go bad, including:

Wear and tear: The door switch is a mechanical component, and it can wear out over time.

Moisture: If the dryer is not properly ventilated, moisture can build up inside the dryer and damage the door switch.

Electrical problems: Electrical problems, such as a power surge or a short circuit, can also damage the door switch.

If you think that the door switch in your Maytag MEDZ600TW dryer may be bad, you can try the following:

Check the door switch for any signs of damage, such as cracks or breaks.

Make sure that the door is closing properly.

Clean the door switch with a dry cloth.

If you have a multimeter, you can test the door switch for continuity.

If you are still having problems with the door switch, you may need to replace it. You can purchase a replacement door switch from Maytag or from a third-party retailer.

Here are some tips for preventing the door switch in your Maytag MEDZ600TW dryer from going bad:

Clean the dryer regularly, especially the lint trap.

Make sure that the dryer is properly ventilated.

Avoid overloading the dryer.

If you have a power surge protector, plug the dryer into it.

If you have any concerns about the door switch in your Maytag MEDZ600TW dryer, you should contact Maytag customer service for assistance.


Please respond to my effort to provide you with the best possible solution by using the "Acceptable Solution" and/or the "Helpful" buttons when the answer has proven to be helpful.

Regards,
Sonu
Your search handyman for all e-support needs!!

Related Maytag MEDZ600TW Manual Pages

Use and Care Guide - Page 3

...dryer is removed from the accumulation of lint, dust, and dirt. ■ The interior of others . Always read and obey all instructions before or after each load. ■ Keep area around the exhaust opening and adjacent surrounding areas free from service or discarded, remove the door...the chance of fire, electric shock, or injury to play on your dryer. IMPORTANT SAFETY INSTRUCTIONS ...
Use and Care Guide - Page 5

... dimensions are using a pedestal, you are recommended for ease of the dryer. WARNING Location Requirements Dryer Dimensions 50" (128.27 cm) Explosion Hazard Keep flammable materials and vapors, such as gasoline, away from dryer. At lower temperatures, the dryer might be required for wall, door and floor moldings. ■ Additional spacing should be considered for this...
Use and Care Guide - Page 6

... confined area *Required spacing **For side or bottom venting, 0" (0 cm) spacing is allowed. closet or confined area B. Recessed area B. Dryer only 2"* (5 cm) 36" min (91.4 cm) 1"* (2.5 cm) *Required spacing Closet installation - Dryer only 27" (68.6 cm) 1"* (2.5 cm) 14" max.* (35.6 cm) 18" min.* (45.72 cm) 48 in.2* (310 cm2) 3"* (7.6 cm) 24 in...
Use and Care Guide - Page 7

...or circuit breaker is permanently connected to introduce outside air into the dryer. Electrical Connection To properly install your dryer, you must be using a power supply cord: Use a ... circuit, fused on both sides of electrical connection you will be made in .2 * (155 cm2) 3"* (7.6 cm) 1"* (2.5 cm) 6"* (15.2 cm) 72" (182.9 cm) 5 14 cm) 1" (2.5 cm) 27" (68.6 cm) 1" (2.5 cm...
Use and Care Guide - Page 14

... block. Tighten strain relief screws. 5. If using 3-wire cable with ground wire, cut bare wire even with up turned ends E 1.9 cm) UL listed strain relief F. Neutral ground wire C. B D E A C GF A. 3-...the hooked end of the wire under the screw of dryer rear panel. Direct wire cable must have completed your electrical connection. 3-wire connection: Power supply cord Use where local...
Use and Care Guide - Page 18

...one offset elbow) B. Refer to avoid kinking. ■ Use the fewest 90° turns possible. Over-the-top installation (also available with pedestal installations) Alternate installations for close ... Exhaust systems longer than those specified will: ■ Shorten the life of the dryer. ■ Reduce performance, resulting in longer drying times and increased energy usage. NOTE...
Use and Care Guide - Page 19

... kinks in dryer. Level Dryer Check the levelness of the dryer (not the console panel). To determine maximum exhaust length, add one 90º turn inside the dryer. Gently lay the dryer on the ...23 ft (7 m) 2 Rigid metal 44 ft (13.4 m) 38 ft (11.6 m) Flexible metal 27 ft (8.2 m) 19 ft (5.8 m) 3 Rigid metal 35 ft (10.7 m) 29 ft (8.8 m) Flexible metal 25 ft (7.6 m) 17 ft (5.2 m) 4...
Use and Care Guide - Page 20

Remove the 4 screws that you remove only the 6 indicated screws. Dryer front panel B. Lay the door assembly on a flat, protected surface with the inside (inner door assembly) facing up . 4. Lift the inner door assembly off the outer door assembly. 20 Slide the head of the dryer. Place a towel or soft cloth on the front panel of the...
Use and Care Guide - Page 21

Insert strike on the glass. Place the inner door assembly inside the outer door assembly edge. 6. Reattach door to the other side. Slide the head of the inner door. 4. Dryer front panel B. Door strike Reinstall the door 1. Check for fingerprints on opposite side of the screwdriver under the plugs, being certain not to remove plug strip from this...
Use and Care Guide - Page 22

... or "On" position. ■ Start button has been pushed firmly. ■ Dryer is plugged into an outlet and/or electrical supply is closed. 11. For direct wire installation, turn off the dryer and check the following : ■ Controls are set in a running for 5 minutes, open the dryer door and feel heat, cancel cycle and close the...
Use and Care Guide - Page 23

... before each load. Do not dry anything that has ever had anything that has ever had any type of fire, electric shock, or injury to follow these instructions can result in death, explosion, or fire. Clean lint screen before operating this manual for more detailed information. Place laundry into dryer and shut door. 3. Press POWER...
Use and Care Guide - Page 24

... where the cycle was interrupted if you close the door and press Start within 5 minutes of the drying process, the cycle time may turn the Cycle Signal off . Sensor Dry cycles take ...and hold the Timed Dry Cycle Adjust up , and a single beep tone is selected. If desired, you want the load. To restart the dryer Close the door. The CONTROLS LOCKED icon lights up or down arrow buttons until...
Use and Care Guide - Page 25

...Clean Lint Screen light will turn off. The damp light will flash until the desired temperature is not detected after approximately 5 minutes, the dryer goes directly into Cool ...level, depending on the load size and dryness level. If a Timed Dry Cycle is determined by pressing TEMPERATURE until the cycle is started or the door is selected. Laundry cools for permanent press,...
Use and Care Guide - Page 26

...as cotton towels or bedspreads. When a Timed Dry Cycle is also useful for drying small loads or loads that matches the type of drying time and a drying temperature. Timed Dry is selected,... the Estimated Time Remaining display shows the actual time remaining in the dryer too long. 26 ...
Use and Care Guide - Page 27

...select WRINKLE PREVENT in order to work clothes RAPID DRY Small loads, sturdy fabric FRESHEN UP Helps to dry. pillows, padded... to turn the signal off . 27 NOTE: Air Fluff is on the next time you do not select WRINKLE PREVENT, the dryer stops ... Shake and fluff pillows by pressing WRINKLE PREVENT or opening the dryer door. ■ WRINKLE PREVENT is finished. Select the desired cycle and...
Use and Care Guide - Page 28

...temperature setting and drying time. The drum turns, but the rack does not move. Put the wet items on the rack. Close the door. 5. Time* Wool Sweaters Timed Dry Low... model allows drying rack usage and for normal tumbling. If your model. Open dryer door. Place dryer rack inside dryer drum, positioning the back wire on ordering, please refer to complete drying. Reset...
Use and Care Guide - Page 29

...hard to your load is located in the dryer. Wet lint is in the door opening of combustion and ventilation air. Push the lint screen firmly back into the dryer during removal, ... result in dryer. To wash 1. IMPORTANT: ■ Do not run the dryer with powdered laundry detergent and very warm water. 2. Failure to stop before your dryer and will not stain future loads of lint ...
Use and Care Guide - Page 30

...in death or electrical shock. 1. Disconnect power. 2. Use masking tape to secure dryer door. The drum may be turning, but you may be 2 fuses or circuit breakers for the dryer. If the... have heat. Disconnect wiring. 3. TROUBLESHOOTING First try the solutions suggested here and possibly avoid the cost of the dryer? Electric dryers require 240-volt power supply. Replace the fuse...
Use and Care Guide - Page 31

..., away from dryer. Closet doors must have ventilation openings at least 18 inches (46 cm) above 45ºF (7ºC). ■ Is the dryer located in back...turns. The dryer may not be cleaned before each load. Separate the load to dry quickly? Failure to vibrate. Increasing or decreasing the dryness level will change the amount of the dryer requires 5" (12.7 cm). Run the dryer...
Use and Care Guide - Page 32

... appliances designated service company in your dryer is located? When the odors or fumes are made with the same precision used ? The new electric heating element may save you use only... below. Our consultants provide assistance with : ■ Features and specifications on load or drum ■ Was dryer fabric softener properly used to other clothing. This will be gone after the ...

Maytag Knowledge Base Results

We have determined that the information below may contain an answer to this question. If you find an answer, please remember to return to this page and add it here using the "I KNOW THE ANSWER!" button above. It's that easy to earn points!

  • Unable to see water spraying or steam in Steam cycle - Steam dryer
    ... Refresh cycle is larger than one to four dry items, then the load may block your view of the water spraying. Wrinkles in my steam dryer. I turn off when it sprays. Try turning on in the dryer drum? If the load is  best for about 4-5 minutes into the cycle for smoothing out...
  • Reasons to use rinse aid in my tall tub dishwasher
    ... most water conditions, set the adjuster to the "Lock" position. for about 1 to 3 months. Turn the rinse-aid dispenser knob to the "Add" level, add more rinse aid. Clean up any spilled...120 ml) of the arrow adjuster inside the dispenser and turn to 1 or 2. Spotting and filming on dishes, try a higher setting. Make sure the dishwasher door is fully open. The use a rinse aid in ...
  • Can I turn off the button tones on my Bravos® dryer?
    ... 5 seconds. This does not turn off the invalid selections beeps. washer? dryer does not dry Can I turn off the button tones on the tones: Touch any button or open the door or touch the controls. dryer? Yes, you can turn off the tones the dryer makes when you open the door to activate the controls. ...

Similar Questions

Trying To Attach Maytag Bravos Dryer Door To Panel. Should The Hinge Close Flush
Trying to attach dryer door to panel. Should the hinge be flush between the panel and door or if I t...
(Posted by Carolbcool 9 years ago)
My Maytag Medz600tw-27'front-load Electric Doesn't Heat
where can i locate the heating element,fuses and circuit breakers on the dryer?
(Posted by ridgenelson 10 years ago)
I Have A Maytag Front Loading Electric Dryer Model Med9600 Sq0. When I Attempt T
I have a Maytag front loading electric Dryer model MED9600 SQ0. When I attempt to start it by pressi...
(Posted by wrzimmerly 10 years ago)
Ask a New Question
Use the box below to post a new question about this Maytag product .
Points & Prizes
  • You can earn points for nearly everything you do on HelpOwl.com
  • You can trade in those points for gift cards at leading retailers such as Amazon.com and Walmart
  • It's that simple!
See How it Works
Create a Free Account

Maytag Manuals

Find free Maytag MEDZ600TW - 27inch Front-Load Electric Dryer manuals and user guides available at ManualOwl.com. Try out our unique manual viewer allowing you to interact with manuals from directly within your browser!

Maytag Reviews

View thousands of Maytag user reviews and customer ratings available at ReviewOwl.com.

Contact Information

Complete Maytag customer service contact information including steps to reach representatives, hours of operation, customer support links and more from ContactHelp.com.

Scoreboard Ratings

See detailed Maytag customer service rankings, employee comments and much more from our sister site.

Maytag Recalls

Find comprehensive Maytag recall information updated hourly on RecallOwl.com.