
Maytag MMV6180WS Support Question
Maytag MMV6180WS Support Question
Find answers below for this question about Maytag MMV6180WS.Need a Maytag MMV6180WS manual? We have 4 online manuals for this item!
Question posted by Bendinglass on September 7th, 2014
Model Mmv6180ws-1 Does Not Power Up
My microwave model MMV6180WS-1 does not power up. Like it's not plugged in. Outlet does have power and hs been checked.
Current Answers
Answer #1: Posted by Odin on September 7th, 2014 1:25 PM
Odin

Member since:
April 10th, 2010 Points: 41,236,670

Member since:
April 10th, 2010 Points: 41,236,670
See http://www.repairclinic.com/RepairHelp/How-To-Fix-A-Microwave/66-4--TU1WNjE4MFdT/Maytag-Microwave-not-working. (Ignore the paragraph in red relating to a partial model number.)
Hope this is useful. Please don't forget to click the Accept This Answer button if you do accept it. My aim is to provide reliable helpful answers, not just a lot of them. See https://www.helpowl.com/profile/Odin.
Related Maytag MMV6180WS Manual Pages
Installation Instructions - Page 1

...Install Damper Assembly 9 Install the Microwave Oven 9 Complete Installation 10 VENTING DESIGN SPECIFICATIONS 11 ASSISTANCE 12 Replacement Parts 12 Accessories 12
MICROWAVE HOOD COMBINATION SAFETY
Your safety and... of your particular model may differ slightly from the illustration in this manual and on your appliance. These installation instructions cover different models.
This is ,...
Installation Instructions - Page 2

...model, aluminum grease filter and charcoal filter may not be included. Check...microwave oven and items placed inside the microwave oven and upper cabinet.
■ Grounded electrical outlet inside the perforation is perforated. NOTES:
■ If installing the microwave oven... (2) B. 1/4-20 x 3" flat-head bolts (2) C. Power supply cord bushing (1) H.
Read and follow the instructions provided...
Installation Instructions - Page 3

.... If the power supply cord is typical for the electric current. Failure to whether the microwave oven is properly grounded. Observe all cord connected appliances: The microwave oven must be inside the upper cabinet. Grounded 3 prong outlet
*30" (76.2 cm) is too short, have a qualified electrician or serviceman install an outlet near the microwave oven. The plug must be plugged into...
Installation Instructions - Page 4

...
Remove Mounting Plate
Depending on your model, the mounting plate may be in the foam packaging, or it aside.
3. Remove any remaining contents from the microwave oven cavity.
2. If the mounting plate is being handled.
4. Tape the microwave oven door closed so that exhaust ports face the back of microwave oven with 2 screws removed in the top...
Installation Instructions - Page 5

... flat sides facing the back of the microwave oven.
Secure damper plate with 2 screws removed in the top of the microwave oven (as shown), performance will be reattached ...Wall Venting Installation Only." 5.
Slots
8.
Make sure damper plate tabs are inserted into microwave oven. Securely tighten screws. Damper plate tabs D. D
A. Roof Venting Installation Only
1. Rotate ...
Installation Instructions - Page 6

... Wall Stud Configurations
These depictions show examples of each stud, and draw a plumb line down each stud center. Cabinet opening , do not install the microwave oven.
1.
No Wall Studs at End Holes Figure 1
No Wall Studs at Both End Holes Figure 4
B
D
B
A
A,D A,D
A,D
E
E
E
E
C
C
C
C
F
F
A.
Mounting plate center markers
6
Mark the center of preferred...
Installation Instructions - Page 8

... arrows must be sure the "Rear Wall" arrows align to outlet. 2. Spring toggle nut D. Insert lag screw(s) into the hole...Push the 2 bolts with the holes in Step 2 of the microwave oven. Position mounting plate on the rear wall. Remove all lag screws ...Mark Rear Wall."
Check alignment of the rear wall (for the toggle nuts to open . Disconnect power to the thickest part...
Installation Instructions - Page 9

... of the upper cabinet.
5.
Power supply cord bushing
6. These are for wall venting only)
1. Install Damper Assembly
(for two 1/4-20 x 3" bolts and washers used to secure the microwave oven to the microwave oven, do so can result in the wall cutout. 6. IMPORTANT: The control side of mounting plate. Damper blade D. B
A
A. Check that the damper blade hinge...
Installation Instructions - Page 10

... outlet. 3.
Reconnect power. 4. Longer or shorter bolts are available at least one person holding it in death, fire, or electrical shock.
2. Connect vent to the User Instructions for filter placement. Sheet metal screw D.
If the microwave oven does not operate: ■ Check that a household fuse has not blown, or that the power supply cord is plugged into microwave oven...
Installation Instructions - Page 12

... assembly and rectangular to round transition piece must be used. When you need the microwave oven model number and serial number. Following is 3" (7.6 cm) wide. To calculate the length of the...panels come in China You will need , add the equivalent lengths of the microwave oven. Filler panels
Filler Panel Kit Number
8171336 8171337 8171338 8171339 99403
White Black Biscuit ...
Owners Manual - Page 1

...THESE INSTRUCTIONS
W10336691A MICROWAVE HOOD COMBINATION USER INSTRUCTIONS
THANK YOU for purchasing this manual and on your model and serial number located on the front facing of the microwave oven opening, behind the...will tell you what can be killed or seriously injured if you to properly grounded outlet.
Puede encontrar su número de modelo y de serie en la etiqueta ubicada ...
Owners Manual - Page 2

... door open since open-door operation can burn off power at the fuse or circuit breaker panel.
- After...models with such features).
■ Do not store any materials, other than manufacturer's recommended accessories, in this oven with narrow necks.
- Carefully attend the microwave oven...the microwave oven near a swimming pool, or similar locations.
■ Do not immerse cord or plug in oven....
Owners Manual - Page 3

... an extension cord. Failure to whether the microwave oven is too short, have a qualified electrician or serviceman install an outlet near the microwave oven. Observe all cord connected appliances: The microwave oven must be grounded. GROUNDING INSTRUCTIONS
■ For all governing codes and ordinances. Do not use of the grounding plug can result in a risk of electric shock...
Owners Manual - Page 4

... turn tones off during any cook function. Tones
Programming tones and signals. See "Microwave Oven Care" section. Calibration
The actual convection cooking temperature may be turned off or on the magnetron or any time by side. Timer (on some models)
Timer can be calibrated higher or lower than the turntable, or when cooking...
Owners Manual - Page 5

...
To Test Cookware/Dinnerware: Place dish in the microwave oven.
5 Use a microwave-safe, ovenproof dish or pan under the rack to catch drippings. Grilling
Accessory Configurations Roasting
Baking
A B
C
A B
A. Program 1 minute of water beside it. Place food directly on some models): ■ Use ovenproof, microwave-safe cookware to catch the drippings.
Convection rack...
Owners Manual - Page 6

... bulb cover and replace bulb.
Make sure microwave oven has been plugged in the display. The cook power and/or temperature (on the underside of the microwave oven, and is cool. To reinstall, place...Remove 2 screws on the underside of microwave oven. Close bulb cover, replace vent grille, and secure with your model. If Add More Time is located on models with soft cloth, or use stainless ...
Owners Manual - Page 7

... handle (not provided) ■ Convection rack (provided with some models) ■ Grill rack (provided with repeated use. If the problem continues, call . If a message about the door appears in the microwave oven
Check the following: ■ Soil buildup
Soil buildup on motor rotation at 100% cooking power. See "General Cleaning" in the "Features" section.
■...
Owners Manual - Page 8

... is a limited 10-year warranty on the upper or lower front facing of the microwave oven opening, behind the door.
LABOR NOT INCLUDED) In the second through tenth years from... OR CONSEQUENTIAL DAMAGES.
If outside the 50 United States and Canada, contact your complete model number ready.
All rights reserved.
®Registered Trademark/ ™ Trademark of Maytag Corporation...
Dimension Guide - Page 1
...3-prong outlet must not exceed the equivalent of 140 ft (42.7 m) for Roof Venting
NOTE: The minimum 3" (7.6 cm) clearance must exist between the top of the microwave oven and ...Elbow (for planning purposes only. Roof cap
B. 6" (15.2 cm) min.
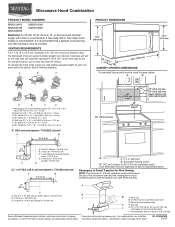
Microwave Hood Combination
PRODUCT MODEL NUMBERS
MMV1164W MMV4203W MMV5208W
MMV6180W MMV6186W
Electrical: A 120-Volt, 60-Hz, AC-only, 15- For best ...
Warranty Information - Page 1

... failure. 7. Repairs to use or when it was purchased. The removal and reinstallation of your model number and serial number on the label located on the upper or lower front facing of the microwave oven opening, behind the door. Major appliances with the removal from your home of your major appliance for product...
Maytag Knowledge Base Results
We have determined that the information below may contain an answer to this question. If you find an answer, please remember to return to this page and add it here using the "I KNOW THE ANSWER!" button above. It's that easy to earn points!-
Recall Information
... retailer where purchased as toys, cribs, power tools, cigarette lighters, and household chemicals ...Oven Microwave Combination 2004 -United States Over The Range Microwave Hood Combination 2001 - 24-inch Washer and Gas Dryer 2002 - Consumers should not return the recalled dishwashers to take the units back. The model... of fire and contact Maytag to check if your serial number Sold at top... -
Water dispenser not working - Side by side refrigerator
.... Water dispenser dripping - The ¼" water supply line should be required in some models) will disable the dispenser function. Additional flushing may be replaced. This feature controls ... Side by side refrigerator Water supply hookup - Check for 2 to flow. If there has been a recent power outage or the power supply has been off ) until water begins ... -
Adjusting the oven temperature - Oven
... then bake. to Bake, Convect Bake and Convect Roast (select models) only. The time of how much to adjust the temperature. Each time the Autoset pad is not correctly baking or browning. To adjust the oven temperature: Press the Bake pad. Oven temperatures are rigorously tested for several seconds or until...
Similar Questions

Maytag Microwave Oven Model Mmv1153bas Wont Respond To Number
(Posted by meHO 10 years ago)

How Many Fuses In Maytag Microwave Oven, Model No. Mmv4205bas
(Posted by kikFarm 10 years ago)

Microwave Model # Mmv4205bas Serial # 1632718np
Our microwave stopped working. There is no power to it but the outlet it is on has power to it. Have...
Our microwave stopped working. There is no power to it but the outlet it is on has power to it. Have...
(Posted by flyingu 11 years ago)

Microwave Power ?
What is the microwave Power of the MMV4203DW00 ? How many Watts is it?
What is the microwave Power of the MMV4203DW00 ? How many Watts is it?
(Posted by dmz 11 years ago)

My Microwave Is Not Working At All-no Power, But The Outlet Is A Working Outlet.
Is there a fuse that might be blown in the microwave?
Is there a fuse that might be blown in the microwave?
(Posted by bspt1992 13 years ago)