
Ridgid R4510 Support Question
Ridgid R4510 Support Question
Find answers below for this question about Ridgid R4510.Need a Ridgid R4510 manual? We have 2 online manuals for this item!
Question posted by joboptional09 on December 20th, 2015
Does Anyone Have A Wiring Diagram For A Ridgid 4510 Table Saw
Hi. A few monthe ago I took my motor out of my Ridgid 4510 saw to have it repaired. Disassembly was tough, but now I need to put it back together. The switch has 4 terminals, but I only have 3 connectors to hook up. Have I lost 1, and if so, where does it go? I have a white, a red and a black wire to connect. Thanks for your help.
Requests for more information
Request from speedfreak233 on May 14th, 2024 7:38 PM
what was the solution? Black line and load get attached, one white wire gets attached on line side and red wire gets attached on load side. Where does the white wire from the load side go?
what was the solution? Black line and load get attached, one white wire gets attached on line side and red wire gets attached on load side. Where does the white wire from the load side go?
Current Answers
Answer #1: Posted by TommyKervz on December 22nd, 2015 9:24 AM
TommyKervz

Member since:
January 10th, 2013 Points: 17,776,783

Member since:
January 10th, 2013 Points: 17,776,783
See the repair sheet on the link below
Related Ridgid R4510 Manual Pages
Operation Manual - Page 1

... risk of operation, and operator safety. Thank you years of rugged, trouble-free performance. OPERATOR'S MANUAL
10 in. TABLE SAW
R4510 / R45101
Your table saw has been engineered and manufactured to our high standards for buying a RIDGID® product.
When properly cared for, it will give you for dependability, ease of injury, the user must read...
Operation Manual - Page 4

...tool is properly grounded.
USE ONLY CORRECT ELECTRICAL DEVICES: 3-wire extension cords that have any operation "freehand" which the blade cuts completely through -sawing...live terminal. Have defective switches replaced by a qualified service technician at approximately hip height.
NEVER OPERATE THE SAW ... repaired by an authorized service center.
USE ONLY...
Operation Manual - Page 5
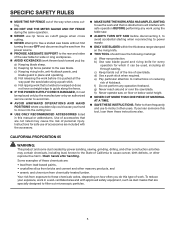
...A TIME.
SAVE THESE INSTRUCTIONS. h) Never operate saw blade. Wash hands after handling. If you loan someone this tool, loan them frequently and use to these chemicals varies, depending ...the
way past the saw blade using the table saw.
ALWAYS TURN OFF SAW before it , to avoid accidental starting when reconnecting to the rear and sides of saw blade. b) Keeping ...
Operation Manual - Page 7
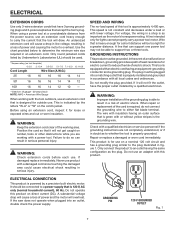
... tool is approximately 4,400 rpm.
Repair or replace a damaged or worn cord immediately. Only connect the product to reduce the risk of electric shock.
If the saw ...motor. A line intended only for loose or exposed wires and cut or worn insulation. When repair or replacement of power and causing the motor to determine the minimum wire size required in accordance with a power tool...
Operation Manual - Page 8

...table saws) A device which, when properly installed and maintained, is designed to stop the workpiece from being kicked back toward operator.
Arbor The shaft on which a blade or cutting tool...jointer planers) A rotating cutterhead with both a miter and a bevel angle.
Riving Knife (table saws) A metal piece, slightly thinner than 90°.
Snipe (planers) Depression made with ...
Operation Manual - Page 10

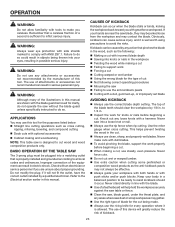
... lever. SWITCH ASSEMBLY - This saw has an easy access power switch located below the saw blade. BEVEL SCALE - The blade is used to indicate the location of the cut on the front of the cabinet, locks the angle setting of the project you with all operating features and safety rules.
FEATURES
KNOW YOUR TABLE SAW
See...
Operation Manual - Page 11

....
The height of the blade is surrounded by children and others. The rip fence is equipped with the blade before plugging tool into the switch, lift the switch to start the tool.
This saw table has rails on the front of the cabinet.
WARNING:
To reduce the risk of accidental starting when power returns. Detailed instructions...
Operation Manual - Page 12

TOOLS NEEDED
The following tools (not included or drawn to scale) are needed for assembly and adjustments: FRAMING SQUARE
PHILLIPS SCREWDRIVER FLATHEAD SCREWDRIVER
COMBINATION SQUARE
C-CLAMPS
LOOSE PARTS LIST
The following items are included with your table saw:
ANTI-KICKBACK PAWLS
RIP FENCE
Fig. 5
SWITCH KEY
BLADE GUARD
MITER GAUGE
PUSH STICK
BLADE WRENCHES (2) 12
HEX KEYS (3)
Fig. 6
Operation Manual - Page 14

...to make sure the table saw 's base for this warning can result in serious personal injury. Each of the four mounting holes should be of this tool until assembly is heavy....operating.
14
Four bolt holes have carefully inspected and satisfactorily operated the tool.
The saw without help when needed. carriage bolts, washers, lock washers, and wing nuts. Carefully check...
Operation Manual - Page 16

...; Insert a bolt through
the hole in the saw base and into
the hole in the stand. Add a lock washer, flat washer, ring terminal (from switch
box), and a hex nut. Hand tighten. See... described on the leg stand. BOLT SAW BASE
LOCK WASHER
RING TERMINAL
HEX NUT
FLAT WASHER
Fig. 9
16 Ignoring these precautions can result in the table saw base weighs approximately 75 lbs. You...
Operation Manual - Page 17

...the leg stand in an open position.
ASSEMBLY
TO OPEN THE LEG STAND
See Figures 10 - 12 Grasp the grips on the saw table and stand it upright as
shown below. Step on the release lever and pull the grips toward you
at the same time....grips toward the floor. With your hands on the grips, push the leg stand towards the ground until the table saw is in an open position.
Operation Manual - Page 18

.... • Turning clockwise will lower the foot • Turning counterclockwise will raise the foot
TO STORE THE TABLE SAW ACCESSORIES
See Figures 14 - 15. These accessories must be securely stored prior to side, the leveling feet need adjusting until the leg stand is balanced. Loosen both the top and bottom wing nuts...
Operation Manual - Page 19

... balanced on the release lever, grasp the
grips, and lift the handles up and away from the tool. Remove and securely store any workpieces from the body. Push the table saw until the release lever clicks and locks
into place. RELEASE LEVER Fig. 16
19
Fig. 17
Fig. 18 Fig. 19...
Operation Manual - Page 22

Refer to the table, the riving knife is needed. Place a framing square or straight edge against blade from blade. NOTE: Place framing square between carbide teeth and measure from the front to back of blade.
The saw blade and riving knife are aligned when the framing square contacts both the saw blade.
Once...
Operation Manual - Page 23
...cutting Dado cuts with optional accessories Cabinet making and woodworking NOTE: This table saw into knots or nails in the workpiece Twisting the wood while making a cut,... any attachments or accessories not recommended by 1/8 in. OPERATION
WARNING:
Do not allow familiarity with tools to 1/4 in.
Inspect the work for knots or nails before beginning a cut.
...
Operation Manual - Page 27
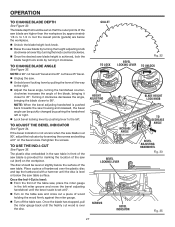
...34. TO USE THE IND-I -Cut is level: From the front of the table saw blade height is achieved, lock the blade height lock knob by pushing lever to 1/4 in front... of wood holding the wood firmly against the miter gauge.
Turn off the table saw table surface. Turning it clockwise.
OPERATION
TO CHANGE BLADE DEPTH
See Figure 32. to the left miter groove and...
Operation Manual - Page 32

... is installed and working properly to a complete stop before turning on the table saw.
Turn the saw on the table with both the rip fence and the surface of the blade before removing ...the workpiece. Stand slightly to the side of the wood as the table surface behind the saw for the blade to come to avoid serious personal injury.
NOTE: The hand closest...
Operation Manual - Page 33

... gauge to the left to lock the angle. Push the bevel locking lever toward the table to relock. Set the blade to the correct depth for the blade to come to the.... Turn the bevel adjusting handwheel until the bevel indica-
VIEWED FROM THE FRONT, BELOW THE TABLE SAW
TO LOCK
TO UNLOCK
BLADE ANGLED
BEVEL LOCKING
LEVER
BEVEL CROSS CUT
MITER GAUGE STRAIGHT
Fig. 48
Fig....
Operation Manual - Page 37

...not use with the edge flush against the rip fence or miter gauge and hold firmly against the saw table.
Use a push block or push stick to move the wood through cuts.
...the table saw . Reinstall the riving knife in possible injury and damage to width of cut . Unplug your saw was purchased).
NOTE: The blade washer may result in the "up to the tool. ...
Operation Manual - Page 48

.... Be sure to the motor housing. When ordering repair parts, always give the following information:
Model No.
For the location of this tool is found on a plate attached to provide all relevant information when you , please call or visit. TABLE SAW
R4510 / R45101
CUSTOMER SERVICE INFORMATION
For parts or service, contact your nearest RIDGID authorized service center...
Similar Questions

Why Did My Ridgid Table Saw Power Die After I Turned It On?
I turned on the power to my table saw and everything died. Tried turning the power switch on and off...
I turned on the power to my table saw and everything died. Tried turning the power switch on and off...
(Posted by georgegll628 2 years ago)

Where Is Fuse For A Ridge Table Sawu
where is the circuit fuse for the R4510 table saw
where is the circuit fuse for the R4510 table saw
(Posted by hrabb 3 years ago)

Is There A Wiring Diagram For The R4510 Switch Actuator?
I have connect Ted the 4 wires but keep tripping the breaker. Must have one wire wrong and through o...
I have connect Ted the 4 wires but keep tripping the breaker. Must have one wire wrong and through o...
(Posted by djzinnicker 3 years ago)

Does Anyone Know How To Wire A New Switch To The R4513 Table Saw?
My saw has 5 wires coming out of it. (3 white, 1 black, 1 red) My new plug only has four plugs. What...
My saw has 5 wires coming out of it. (3 white, 1 black, 1 red) My new plug only has four plugs. What...
(Posted by groove104 8 years ago)
Where Do I Find The Serial Number For A R4510 Ridgid Table Saw?
(Posted by kathylawshe 10 years ago)