Vivitar DVR 426HD Support Question
Vivitar DVR 426HD Support Question
Find answers below for this question about Vivitar DVR 426HD.Need a Vivitar DVR 426HD manual? We have 2 online manuals for this item!
Question posted by fredga on August 5th, 2014
Youtube Vivitar Dvr 426hd Camcorder How To Use
The person who posted this question about this Vivitar product did not include a detailed explanation. Please use the "Request More Information" button to the right if more details would help you to answer this question.
Current Answers
Related Vivitar DVR 426HD Manual Pages
v2 Camera Manual - Page 1

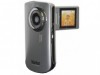
All other trademarks are registered trademarks of their respective companies. All rights reserved. Windows and the Windows logo are the property of Microsoft Corporation. DVR 426HDv2 Digital Camcorder
with camera
User Manual
© 2009-2012 Sakar International, Inc.
v2 Camera Manual - Page 3
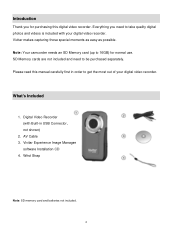
... those special moments as easy as possible. Vivitar Experience Image Manager
software Installation CD 4. Everything you for normal use. SD Memory cards are not included and need to be purchased separately. Digital Video Recorder (with your digital video recorder. Note: Your camcorder needs an SD Memory card (up to get the most out of your...
v2 Camera Manual - Page 6
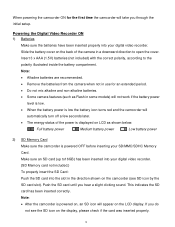
... from the camera when not in use for the first time the camcorder will take you through the initial setup. This indicates the SD card has been inserted correctly. Note: After the camcorder is powered ... the back of the power is displayed on the camcorder (see the SD icon on the LCD display.
Powering the Digital Video Recorder ON 1) Batteries
Make sure the batteries have been...
v2 Camera Manual - Page 8

... record. To stop the record, press the Shutter button again.
Playback Mode (Photos & Videos) Use this mode to open the Playback mode for the various camcorder functions. Video Capture Mode Use this mode to view and manage the photos and videos on your camcorder as desired and press the Shutter button to open the Photo Capture mode...
v2 Camera Manual - Page 11
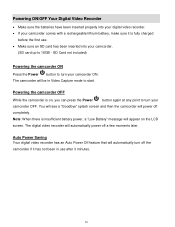
... is insufficient battery power, a "Low Battery" message will be in use . Make sure an SD card has been inserted into your camcorder.
(SD card up to start.
The digital video recorder will power off a few moments later. Powering ON/OFF Your Digital Video Recorder
Make sure the batteries have been inserted properly...
v2 Camera Manual - Page 12

... in Playback Mode, this mode to view the photos and videos
you can begin to capture videos with your camcorder. 2) Photo Capture Mode - Changing Camcorder Mode
Your digital video recorder has three main modes: 1) Video Capture Mode - Use this mode to capture and enjoy clear quality videos and photos.
Use this icon will be active. To change the active...
v2 Camera Manual - Page 14

... camcorder
display if desired. 3) Press the Shutter button to start the video capture. 4) The elapsed time will appear in the video, simply flip the LCD display out and hold the camera ...LCD screen.
Taking a Video 1) While in Video Capture Mode use the LCD display to capture videos with your videos using the iTwist Flip Screen.
Make sure you can capture videos also depends on the ...
v2 Camera Manual - Page 16
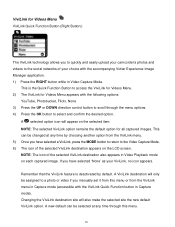
...the ViviLink for Videos Menu. 2) The ViviLink for Videos Menu appears with the following options:
YouTube, Photobucket, ...Videos Menu ViviLink Quick Function Button (Right Button):
The ViviLink technology allows you to quickly and easily upload your camcorder's photos and videos...with the accompanying Vivitar Experience Image Manager application. 1) Press the RIGHT button while in Video Capture Mode....
v2 Camera Manual - Page 17

... will display on the LCD screen.
9) Remember that this setting will also take up more of your camcorder's memory. 1) Press the MENU button to open the menus for the current mode. 2) Press the ...OK button to choose the desired size of the images taken by your camcorder until you to select the desired option.
16 Video Capture Mode Menus The following are the menus that images with a larger ...
v2 Camera Manual - Page 20

.../DOWN/LEFT/RIGHT direction control buttons to navigate the thumbnails and
select the image you wish to scroll and select images from your camcorder through the Delete menu or by using the Thumbnail View. Videos appear with a 'V' icon. 3) Press the Shutter/OK button for the images to appear in full screen. Delete This...
v2 Camera Manual - Page 22

... the MODE button once to open the Photo Capture Mode. 3) The camera icon will be taken. Photo Capture Mode
The Photo Capture mode allows you to capture pictures with your digital video recorder. When the camcorder is first powered ON, the camcorder will appear on the top left corner of less quality than...
v2 Camera Manual - Page 24
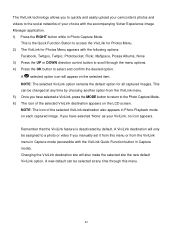
...camcorder's photos and videos to the social networks of the selected ViviLink destination also appears in Photo Playback mode on each captured image.
If you have selected 'None' as your choice with the accompanying Vivitar...option. Remember that the ViviLink feature is the Quick Function Button to a photo or video if you manually set it from this menu.
23 NOTE: The icon of your ViviLink...
v2 Camera Manual - Page 27

... RIGHT DOWN (W) Other
- Scrolls through your Thumbnail images - Toggles between the Video Capture Mode, Photo Capture Mode, and Playback Mode Exits the Photo Playback menu
...camcorder will be displayed in to view by using the Thumbnail View. Note: You can use the Left, Up, Right, and Down directions control buttons.
Photo Playback Mode Quick Function Buttons
Your digital video...
v2 Camera Manual - Page 30

... the installation CD into your CD-ROM drive.
If the window does not appear, open .
5) On PC: The Vivitar Experience Image Manager Installer window appears. Click the "How to transfer photos and videos from the camcorder. Installing the Software
You must be connected to the internet to my computer" button for instructions.
29
v2 Camera Manual - Page 31

... appear on your computer. Connecting the Camcorder to the Computer
1) Slide down the USB lever on the side of the digital video recorder to reveal the retractable built -in Mass Storage Mode.
30
Click the "Launch Vivitar Experience Image Manager" to open the next window.
9) Select your camera model from the Programs (PC) or...
v2 Camera Manual - Page 32

... the selected device (removable disk) after the import. 8) Click the "Get Media" button to your camera to transfer the photos and videos from the device window. Doing so will be inserted. Getting Photos and Videos from your Camcorder to Your Computer
NOTE: An SD card needs to be selected automatically. 5) Select a location on their...
v2 Camera Manual - Page 33

... Help Menu or click the "Take a Tour" button on how to use . Facebook, Flickr, Picasa, MySpace, Photobucket, Twitpic, Twitgoo and YouTube Seamlessly transfer photos and videos from one social network to the selected folder and albums ready for your computer. Using the Vivitar Experience Image Manager, you selected are now downloaded to your computer...
v2 Camera Manual - Page 34

...in USB connector. indicating that you copy the images into the Pictures folder and the videos into your camcorder is in Mass Storage Mode. 3) A window appears with a list of any files ... Pictures/My Pictures folder and the videos into your computer. 2) "MSDC" appears on your computer.
Use the USB built-in connector on your camcorder to connect your camcorder to view the media files. ...
v2 Camera Manual - Page 35
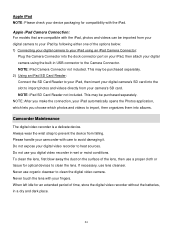
Always wear the wrist strap to the Camera Connector. Do not use organic cleanser to clean the digital video camera. Never touch the lens with care to avoid damaging it. NOTE: After you make the connection, your digital video recorder to heat sources. Please handle your camcorder with your fingers. Do not expose your iPad automatically opens...
v2 Camera Manual - Page 37

... the computer the photos are saved to call 1800-006-614. If the camera powers off . Q: I don't lose important pictures? The images were also deleted from anywhere else, please visit www.vivitar.com for normal use. All images deleted using the Vivitar Experience Image Manager. Troubleshooting
Q: I accidently deleted? DVR426HDv2040312_TA
36 Technical Support
For technical support...
Similar Questions

I Lost The Installation Disk For My Vivitar Dvr 884hd Camcorder. Is There A
I lost the installation disk for my Vivitar DVR 884HD camcorder. Is there any way I can download it ...
I lost the installation disk for my Vivitar DVR 884HD camcorder. Is there any way I can download it ...
(Posted by ANITRIAA44 7 years ago)

Vivitar Dvr787-pnk-kit-wm Action Digital Video Recorder, Pink Video Camera With
Vivitar's DVR 787 HD comes on when plugged in and says it has full power but cuts off when you unplu...
Vivitar's DVR 787 HD comes on when plugged in and says it has full power but cuts off when you unplu...
(Posted by jjknott82 8 years ago)

