Whirlpool GMH3204XVS Support Question
Whirlpool GMH3204XVS Support Question
Find answers below for this question about Whirlpool GMH3204XVS.Need a Whirlpool GMH3204XVS manual? We have 4 online manuals for this item!
Question posted by mcdonougheric78 on August 1st, 2013
Handle Replacement
i cannot remove the old door handle on my gmh3204xvs. took off black face plate on door interior, removed two screws (top and bottom near handle end of door, unclipped all tabs to black frame and still cannot remove black frame or door close tabs
Current Answers
Related Whirlpool GMH3204XVS Manual Pages
Installation Instructions - Page 1

...Install the Microwave Oven 9 Complete Installation 10 VENTING DESIGN SPECIFICATIONS 11 ASSISTANCE 12 Replacement Parts 12 Accessories 12
MICROWAVE HOOD ...MICROWAVE HOOD COMBINATION SAFETY 1 INSTALLATION REQUIREMENTS 2
Tools and Parts 2 Remove Cardboard Template 2 Location Requirements 2 Product Dimensions 3 Electrical Requirements 3 INSTALLATION INSTRUCTIONS 4 Remove Mounting Plate...
Installation Instructions - Page 2

...
■ Duct tape
Parts Supplied
For reorder information, see "Replacement Parts" section. Sheet metal screws (2) G. Materials needed
■ Standard fittings for 1/4" x 2" lag screws
■ Scissors
■ 1½" (3.8 cm) diam. See "Venting Design Specifications" section.
See "Rectangular to back of microwave oven)
Cardboard template (part of installation. Read and follow the...
Installation Instructions - Page 3

...properly installed and grounded. Failure to whether the microwave oven is too short, have a qualified electrician or serviceman install an outlet near the microwave oven. Required: ■ A 120 Volt, 60...can
result in death, fire, or electrical shock. Do not remove ground prong. Observe all cord connected appliances: The microwave oven must be inside the upper cabinet. Grounded 3 prong outlet
...
Installation Instructions - Page 4

... method is
changed, or the microwave oven is being handled.
Damper plate tabs D. Wall Venting Installation Only 1. Remove screws attaching damper plate to the venting system. Reattach damper plate. Screws (in another location
where wall or roof venting may be attached to the back of the microwave oven.
Rotate blower motor 180° so that door does not swing open while...
Installation Instructions - Page 5

..., the 2 screws removed in the top of microwave oven. Roof Venting Installation Only
1.
A
6. NOTE: If blower motor is not positioned with flat sides facing the back of "Wall Venting Installation Only." Slots
8. A
B
C
A. Repeat Step 3 from "Wall Venting Installation Only." 5. D
A. Damper plate tabs D. Rotate blower motor so that exhaust ports face the top of
microwave oven, and...
Installation Instructions - Page 6

...the opening.
Holes for lag screws E.
Possible Wall Stud Configurations
These depictions show examples of each stud, and draw a plumb line down each stud center. Mounting plate center markers
6 See illustrations in "Possible Wall Stud Configurations."
2. End holes (on mounting plate) B. Cabinet opening , do not install the microwave oven.
1. Wall stud centerlines D. Using a stud...
Installation Instructions - Page 7

... cardboard template so that the end holes are over a wall stud, use 2 lag screws. Holding the mounting plate in place, find and clearly mark the vertical centerline of the upper cabinet.
9. Set the mounting plate aside. Measure down from the bottom edge of the cutout area.
14. With the support tabs facing forward (see illustrations in...
Installation Instructions - Page 8

... toggle nut
3. Check alignment of the microwave oven. Remove all lag screws and bolts. The "rear wall" arrows must be secured to use as guides. ■ If the wall behind the microwave oven (as at End Holes" in the "Drill Holes in Step 2 of the tiles rather than the drywall). 4. Mounting plate C.
Make sure the template centerline aligns...
Installation Instructions - Page 9

... the supply cord hole, as shown. Handle the microwave oven gently. 1. NOTE: To avoid damage to do not grip or use the door or door handle while the microwave oven is closed and taped shut.
3. Support tabs
4. B
A
A. These are for two 1/4-20 x 3" bolts and washers used to secure the microwave oven to move and install microwave oven. Damper blade D. Check that the damper...
Installation Instructions - Page 10

..., or electrical shock.
2. Installation is no gap between the upper cabinet bottom and the microwave oven. Bolts
For Roof Venting Installation Only
1. Long tab F. Do not use an adapter. Replace the fuse or reset the circuit breaker. Loosen mounting plate screws.
Connect vent to follow these instructions can result in place, insert bolts through the cabinet...
Installation Instructions - Page 11

...: ■ Vent materials needed for installation are for the damper to Round Transition NOTE: The minimum 3" (7.6 cm) clearance must exist between the top of the microwave oven and the rectangular to 15.2 cm = 1.5 m)
B. Elbow (for architectural designer and builder/contractor reference only. A
B
C
Roof venting
Roof cap
Wall venting
Wall cap
D
E
F
G
A. Vent extension...
Installation Instructions - Page 12

... type of the microwave oven opening . In addition, a rectangular 3" (7.6 cm) extension vent between the damper assembly and rectangular to round transition piece = 5 ft (1.5 m) D. 2 ft (0.6 m) + 6 ft (1.8 m) straight = 8 ft (2.4 m)
If the existing vent is located behind the door. ■ Damper Assembly
■ Mounting Plate
■ Upper Cabinet Template
■ Mounting Screw Kit (includes...
Owners Manual - Page 2
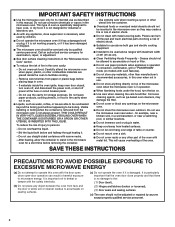
... with the safety interlocks.
(b) Do not place any object between the oven front face and the door or allow the container to heat, cook, or dry food. Carefully attend the microwave oven when paper, plastic, or other combustible materials are placed inside the oven ignite, keep oven door closed, turn the fan on sealing surfaces.
(c) Do not operate...
Owners Manual - Page 3
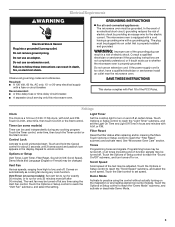
... outlet near the microwave oven. SAVE THESE INSTRUCTIONS
This device complies with a grounding plug. Repeat to reach the "Scroll Speed" submenu, and select the scroll speed.
Vent Fan
Various speeds, ranging from high to reach the "Filter Reset" submenu and activate reset. Touch Options or Setup control to low, and off after replacing and...
Owners Manual - Page 4
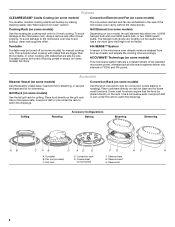
.... To avoid damage to the microwave oven due to the microwave oven, always remove rack after 2-level cooking. Turntable cannot be visible. ACCUWAVE® Technology (on some models)
This microwave system delivers a constant stream of the selected microwave power, whereas typical microwave systems deliver only intervals of the microwave oven cavity, behind the metal screen.
Accessories...
Owners Manual - Page 6
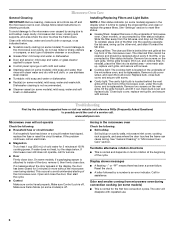
... the microwave oven being started. To reinstall, place end of the microwave oven, under the bulb cover, and is cool. Remove bulb cover screw, and open the bulb cover. Replace bulb, close the door, then start the cycle.
■ Control
Make sure control is replaceable. If the problem continues, call .
To reinstall, place the filter into the opening opposite the tab...
Owners Manual - Page 7
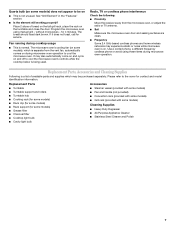
...models) ■ Pan and handle (not provided) ■ ...microwave oven using these items during cooktop usage
■ This is not unusual. Replacement Parts, Accessories and Cleaning Supplies
Following is on. Radio, TV or cordless phone interference
Check the following:
■ Proximity
Move the receiver away from the vent fan, automatically comes on the turntable and close the door...
Owners Manual - Page 8

... replacement under this limited warranty. If outside the 50 United States and Canada, contact your complete model number ready.
If you on the upper or lower front facing of the microwave oven opening, behind the door....SHALL BE PRODUCT REPAIR AS PROVIDED HEREIN. If you do not have been removed, altered or cannot be provided by an authorized Whirlpool servicer is void if the factory applied...
Warranty - Page 1
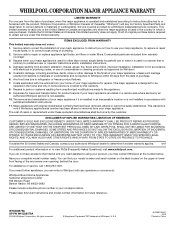
... the factory applied serial number has been altered or removed from unauthorized modifications made to the appliance.
9.
Service... service company. Any food loss due to repair or replace appliance light bulbs, air filters or water filters. Expenses..., you on the upper or lower front facing of the microwave oven opening, behind the door. Cosmetic damage, including scratches, dents, chips...
Dimension Guide - Page 1

... commitment to round transition piece so that a separate circuit serving only this microwave oven be provided. For complete details, see Installation
our products, we reserve the right to 15.2 cm = 1.5 m)
B. Ref. Microwave Hood Combination
PRODUCT MODEL NUMBERS
GMH3204XV GMH5205XV GMH6185XV WMH1162XV WMH1163XV
WMH1164XW WMH2175XV WMH2205XV WMH3205XV
WMH31017A WMH32517A WMH53520A WMH32L19A...
Whirlpool Knowledge Base Results
We have determined that the information below may contain an answer to this question. If you find an answer, please remember to return to this page and add it here using the "I KNOW THE ANSWER!" button above. It's that easy to earn points!-
What are the features on my touch screen display for my 30-inch Built-In High-Speed Microwave Oven?
What are the features on my touch screen display for my 30-inch Built-In High-Speed Microwave Oven? My display on my touch screen display for my Built-In High-Speed Microwave Oven? What are the features on my microwave oven is showing messages French Door Refrigerator LCD Touch Screen Dispenser Simulator -
How do I replace the oven light in my SpeedCook microwave oven with convection?
... using recirculating exhaust venting, skip Step 8. Remove the burned-out bulb by removing the mounting screws (one from each end) and lifting out the vent deflector. You will automatically come on when the door is opened and when the oven is closed How do I replace the oven light in my SpeedCook microwave oven with convection? How do I operate the... -
How do I use the bi-level rack in my microwave?
...: Do not attempt to the oven could result due to order replacement parts. How do I use the bi-level rack in my microwave? Do not let food container on...oven. Remove rack before using Grill function. Cleaning the rack supports Clean the rack supports often to use it ? How do I use any other rack (besides those supplied with the oven) in your microwave oven...
Similar Questions

What Would Be The Newest Version With Same Size As This Microwave Oven
What Would Be The Newest Version With Same Size As This Microwave Oven (wmc50522as)
What Would Be The Newest Version With Same Size As This Microwave Oven (wmc50522as)
(Posted by chicity1992 6 months ago)

What Are The Instructions For Installing The Gmh3204xvs
(Posted by Cowaboonega2013 10 years ago)

Whirlpool Gold Model Gmh3204xvs-3
Microwave oven stopped heating after 13 months! I called Lowes and they said I can pay 89.00 for som...
Microwave oven stopped heating after 13 months! I called Lowes and they said I can pay 89.00 for som...
(Posted by Maureenfischels 10 years ago)

How To Replace The Door Handle - Can't Get To The Inside Of This Door. Help!
How do you remove the parts to get to the handle on this model?
How do you remove the parts to get to the handle on this model?
(Posted by ddaz2003 11 years ago)

Need P/n To Replace Face Plate
I need to replace the whole face plate..the part with the Whirlpool name is on...the plastic on the ...
I need to replace the whole face plate..the part with the Whirlpool name is on...the plastic on the ...
(Posted by kjr03841 11 years ago)