Whirlpool WED8300SW Support Question
Whirlpool WED8300SW Support Question
Find answers below for this question about Whirlpool WED8300SW - w/ Accents Duet Sport Electric Dryer.Need a Whirlpool WED8300SW manual? We have 1 online manual for this item!
Question posted by denisebeery on December 3rd, 2021
Two Wires Inside The Dryer Vent
Inside the dryer there are 2 wires with clips to go on the vent. I do not know which wire goes on which metal prong. They control the two metal strips on the front thank you.
Current Answers
Answer #1: Posted by Technoprince123 on December 3rd, 2021 6:29 AM
Technoprince123

Member since:
February 8th, 2021 Points: 1,205,190

Member since:
February 8th, 2021 Points: 1,205,190
https://www.manualslib.com/products/Whirlpool-Wed8300sw-W-Accents-Duet-Sport-Electric-Dryer-33467.html
https://www.manualshelf.com/manual/whirlpool/wed8300sw/owner-s-manual-english.html
Please response if this answer is acceptable and solw your problem thanks
Related Whirlpool WED8300SW Manual Pages
Use and Care Guide - Page 2

... 3 Optional Pedestal 4 Location Requirements 4 Electrical Requirements 6 Electrical Connection 8 Venting Requirements 13 Plan Vent System 14 Install Vent System 15 Install Leveling Legs 15 Connect Vent 15 Level Dryer 15 Reverse Door Swing 16 Complete Installation 17
DRYER USE 18 Starting Your Dryer 18 Stopping or Restarting Your Dryer 19
Lock Controls 19 Drying and Cycle Tips 19...
Use and Care Guide - Page 3

... tamper with controls.
■ Do not repair or replace any part of the dryer or attempt any tools listed here.
■ Flat-blade screwdriver
■ Vent clamps
■ #2 Phillips screwdriver
■ Adjustable wrench that connect to the dryer must end in your dryer. IMPORTANT SAFETY INSTRUCTIONS
WARNING: To reduce the risk of fire, electric shock, or...
Use and Care Guide - Page 4

... or fire. Contact your DUET SPORT™ washer and dryer? For a garage installation, you purchased your dryer at least 18 inches ...electrical outlet
located within 2 ft (61 cm) of either side of the dryer. Some codes limit, or do so, you purchased your dryer...See
"Venting Requirements." ■ A separate 30-amp circuit. ■ If you placing the dryer on a pedestal? The dryer must not...
Use and Care Guide - Page 5

... recommended for spacing of 0" (0 cm) clearance on the sides and rear. Side view - closet or confined area
*Required spacing **For side or bottom venting, 0" (0 cm) spacing is allowed. Dryer only
14" max.* (35.6 cm)
15" min.* (38.1 cm)
48 in .2* (155 cm2)
1"* 28.65" 5"** (2.5 cm) (72.77 cm) (12.7 cm)
A
B
3"* (7.6 cm)
A. Recessed...
Use and Care Guide - Page 6

...Electrical Code, ANSI/NFPA 70-latest edition and all mobile home installations. Mobile home installations require:
■ Metal exhaust system hardware, which is your responsibility ■ To contact a qualified electrical... or bottom venting, 0" (0 cm) spacing is adequate.
6 The National Electric Code requires a 4-wire supply connection for homes built after 1996, dryer circuits involved in...
Use and Care Guide - Page 7

...; For a permanently connected dryer: This dryer must be connected to a grounded metal, permanent wiring system, or an equipment-grounding conductor must be run with the circuit conductors and connected to whether the dryer is manufactured ready to the neutral conductor (white wire) within the dryer.
If using and follow the instructions provided for electric current. If your outlet...
Use and Care Guide - Page 8

... B. Clamp section D.
Be sure that one tab is inside the strain relief. Fire Hazard
Use 10 gauge solid copper wire. Ground wire (green or bare wire) must be in death, fire, or electrical shock.
1. Install strain relief.
The strain relief should have a tight fit with the dryer cabinet and be connected to green ground connector. Power...
Use and Care Guide - Page 9

... relief). Removable conduit connector B.
Strain relief threads
■ Put direct wire cable through the hole below terminal block opening C. Ground prong D. Remove center silver-colored terminal block screw.
9 Reaching inside the terminal block opening . Electrical Connection Options
If your type of 3-wire connections. Hole below the terminal block opening , screw the removable...
Use and Care Guide - Page 10

...Connect the other wires to
"Venting Requirements."
10
D
E
A. B. Strip insulation back 1" (2.5 cm). Dotted line shows position of dryer rear panel. Remove center silver-colored terminal block screw. 2. Insert tab of NEUTRAL ground wire before being moved to center silver-colored terminal block screw. Direct wire cable must have completed your electrical connection. Neutral...
Use and Care Guide - Page 11

... F. Insert tab of terminal block cover into slot of the other wires to outer terminal block screws. B
D
E
A
C
GF
A. 3-wire receptacle (NEMA type 10-30R) B. 3-wire plug C.
C
A
B
D
E
A. You have completed your electrical connection. Now go to "Venting Requirements."
3-wire connection: Power supply cord
Use where local codes permit connecting cabinet-ground conductor to...
Use and Care Guide - Page 12

... of dryer rear panel. Loosen or remove center silver-colored terminal block screw. 2. Tighten screws. Grounding path determined by a qualified electrician
3. Tighten strain relief screw.
5. Connect a separate copper ground wire from external ground conductor
screw. Tighten screw. Connect neutral ground wire and the neutral wire (white or center wire) of the other wires to "Venting...
Use and Care Guide - Page 13

... rodents and insects from the ground or any object that may be fully extended and supported when the dryer is recommended to seal all governing codes and ordinances. Flexible metal vent ■ Flexible metal vents are recommended. ■ Rigid metal vent is in its final location. Box hood style
The angled hood style (shown here) is a new...
Use and Care Guide - Page 14

.... Contact your installation.
Clamps F. Rigid metal or flexible metal vent G. A
B
C
A. Bottom exhaust installation (not an option with pedestal installations)
14
Determine vent path
■ Select the route that will provide the straightest and most direct path outdoors.
■ Plan the installation to use with dryer vent to wall vent mismatch):
Part Number 4396037 - 0" (0 cm...
Use and Care Guide - Page 15
... dryer vent must fit inside the exhaust hood. Determine vent length and elbows needed for levelness.
15
Vent must fit over the dryer exhaust outlet and inside exhaust hood. Do not use . Exhaust systems longer than those specified will help to connect the exhaust vent. Level Dryer
Check the levelness of vent
Box or louvered hoods
Angled hoods
0
Rigid metal
64...
Use and Care Guide - Page 16

...
Inner ring B. Place a towel or soft cloth on opposite side of the dryer or work space to remove 2 plug strips from the inner door assembly, as indicated below.
Remove the 6 Phillips head screws... door assembly
Reverse hinge
1.
To fit correctly, the inner door assembly edge fits completely inside the outer door assembly edge. Reverse Door Swing
You can change your door swing from ...
Use and Care Guide - Page 17

... dryer and check the following :
■ Controls are set in a running for 5 minutes, open the dryer ...wire installation, reconnect power.
7. Wipe the dryer drum interior thoroughly with the 6 screws. Use a small flat-blade screwdriver to remove plug strip from this angle) B. Reassemble the inner and outer door assemblies with a damp cloth to see which step was skipped.
2. Be sure the vent...
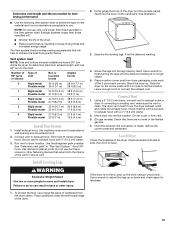
Use and Care Guide - Page 22

... Failure to do so can reach all the surfaces. A
A. Place drying rack inside dryer drum, positioning the back wire on the amount of moisture items hold ) START button (about 1 second).
Refer...temperature setting and drying time.
Wet lint is located in death, explosion, or fire.
2. Place dryer at least 18 inches (46 cm) above the floor for a garage installation.
Front edge
2. ...
Use and Care Guide - Page 23

... denim blue jeans or brightly colored cotton items, may discolor the dryer interior. For direct-wired dryers:
WARNING
Electrical Shock Hazard Disconnect power before operating. Use masking tape to secure dryer door. As needed cleaning Laundry detergent and fabric softener residue can result in the dryer. To wash 1. Thoroughly dry lint screen with the brush to do...
Use and Care Guide - Page 24

...See "Venting Requirements."
24 Electric dryers require 240-volt power supply. Dryer Results
Clothes... small objects. WARNING
Fire Hazard Use a heavy metal vent.
In U.S.A. There may be 2 fuses or ...dryer for a while, there may be a thumping sound during the first few minutes of operation.
■ Is a coin, button, or paper clip caught between the drum and front or rear of the dryer...
Use and Care Guide - Page 26

... in your nearest designated service center.
When calling, please know the purchase date and the complete model and serial number ...dryer connector installation kit
PT220L
4" (10.2 cm) dryer cord, 3-wire, 30 amp
PT400L
4" (10.2 cm) dryer cord, 4-wire, 30 amp
PT600L
6" (15.2 cm) dryer cord, 4-wire, 30 amp
4210463
Dryer vent lint brush
31682
All-purpose appliance cleaner
1903WH
Laundry...
Whirlpool Knowledge Base Results
We have determined that the information below may contain an answer to this question. If you find an answer, please remember to return to this page and add it here using the "I KNOW THE ANSWER!" button above. It's that easy to earn points!-
Washer fills slowly - Duet Sport® front-load washer
... and load size to find them online. Top-load washer with only one incoming source of the washer. Inside the inlet valve are turned on. if you the proper care for each load. The water level on the.... Top-load washer FAQs Knowledgebase search tips Display shows an error code - My Duet Sport ® The water level will not properly operate with Dispensers in the back of water. -
Display shows an error code - Dryer
..., F25, F26, F28, F29, F30, F31, F50, F70, F71, F72 and F78 Duet Sport TM dryer - F01, F02, F22, F23, F24, F25, F26, F28, F29, F30 and F50 To remove the error display, select Pause/Cancel twice. E1, E2 and E3 dryer (some models) - Front-load washer Check the following answers for service... -
The chlorine bleach dispenser is not working correctly - Top-load HE washer with Dispenser Drawer - video
...chlorine bleach in Corners Dispenser not working correctly - Wipe up spills. If using an oxi laundry boost product or color-safe bleach, add it to the liquid chlorine bleach dispenser. ... when loading or unloading the washer. Find Manuals & Front-load Duet Sport washer Top-load HE washer with Dispensers in the correct dispenser compartment?
Similar Questions

How To Reset Whirlpool Duet Sport Dryer Wed8300sw2
(Posted by jayveEli 9 years ago)

Control Panel Comes On Dryer Will Not Start
(Posted by foxy9400 10 years ago)
Will This Wed86hebw Dryer Fit On Same Pedestal As The Duet Sport Wgd8300sw0?
I have a Duet Sport (WGD8300SW0) but am moving to a house with no gas. Was going to buy a Duet WED86...
I have a Duet Sport (WGD8300SW0) but am moving to a house with no gas. Was going to buy a Duet WED86...
(Posted by scottcraig5 10 years ago)

Whirlpool Duet Sport Dryer Wed8300sw1 Drum Won't Turn
(Posted by akonailin 10 years ago)

Where Is The Heating Element On My Ler4634 Jqo Dryer
(Posted by jontravis1 11 years ago)