Whirlpool WMH32517AT Support Question
Whirlpool WMH32517AT Support Question
Find answers below for this question about Whirlpool WMH32517AT.Need a Whirlpool WMH32517AT manual? We have 4 online manuals for this item!
Question posted by tabemoore on July 28th, 2013
Whirlpool Microwave Wmh32517at
I Am About To Install A Whirlpool Micro Wave, A Over Oven Model Wmh32517at, And I Will Have To Change The Position Of The Exhaust Fan To The Up Draught, How Do I Do That!
Current Answers
Answer #1: Posted by TommyKervz on July 28th, 2013 8:53 AM
TommyKervz

Member since:
January 10th, 2013 Points: 17,776,803

Member since:
January 10th, 2013 Points: 17,776,803
Greetings - There is an installation guide, among other possibly useful resource, on the page linked to below that might help
http://www.helpowl.com/manuals/Whirlpool/WMH32517AT/164745
http://www.helpowl.com/manuals/Whirlpool/WMH32517AT/164745
Related Whirlpool WMH32517AT Manual Pages
Installation Instructions - Page 1

...follow instructions. All safety messages will follow instructions. These installation instructions cover different models.
Always read and obey all safety messages. WARNING
...Upper Cabinet 8 Install Damper Assembly 9 Install the Microwave Oven 9 Complete Installation 10 VENTING DESIGN SPECIFICATIONS 11 ASSISTANCE 12 Replacement Parts 12 Accessories 12
MICROWAVE HOOD COMBINATION ...
Installation Instructions - Page 2

... part of packaging)
Aluminum grease filters
Charcoal filters (Depending on model, aluminum grease filter and charcoal filter may not be installed. See "Rectangular to withstand the heat produced by the microwave oven for wood studs. Sheet metal screws (2) G. Damper assembly (for weight of the microwave oven packaging is perforated. Materials needed
■ Standard fittings for
cabinet...
Installation Instructions - Page 3

... outlet
*30" (76.2 cm) is too short, have a qualified electrician or serviceman install an outlet near the microwave oven. If the power supply cord is typical for the electric current.
Do not use an extension cord. The microwave oven is properly grounded.
Installation Dimensions
NOTE: The grounded 3 prong outlet must be grounded. See "Electrical Requirements" section...
Installation Instructions - Page 4

... with 2 screws removed in the top of
microwave oven. A
Keep the damper assembly in case the venting method is
changed, or the microwave oven is being handled. Slide damper plate toward the front of microwave oven. Screws B. Screws C. Wall Venting Installation Only 1. Exhaust port
6. NOTE: To avoid damage to back of the microwave oven. NOTE: Skip this section if you are...
Installation Instructions - Page 5

... removed in Step 1 of microwave oven. Securely tighten screws. Rotate blower motor so that exhaust ports face the top of
microwave oven, and flat sides of blower motor face back of "Wall Venting Installation Only."
5 A
B
C
A. Roof Venting Installation Only
1. A
6. NOTE: If blower motor is not positioned with flat sides facing the back of the microwave oven (as shown), performance will...
Installation Instructions - Page 6

... configurations with the mounting plate. Possible Wall Stud Configurations
These depictions show examples of the wall stud(s) within the opening. Cabinet opening , do not install the microwave oven.
1. Mounting plate center markers
6
Support tabs F. See illustrations in "Possible Wall Stud Configurations." End holes (on mounting plate) B. Holes for lag screws E. Mark the...
Installation Instructions - Page 7

Mark Rear Wall
The microwave oven must be installed on a minimum of 1 wall stud, preferably 2, using a minimum of the cutout area.
14.
Centerline
2.
D....lines through the marks made in Step 4. Using a keyhole saw, cut out the venting cutout area.
Installation for No Wall Studs at least 1 wall stud, the mounting plate must be level.
■ The end holes must attach to ...
Installation Instructions - Page 8

... with tape or thumbtacks. Position mounting plate on the bolt from the rear wall to use as guides. ■ If the wall behind the microwave oven (as at the end...Possible Wall Stud Configurations" in "Locate Wall Stud(s)" section. Start toggle nuts on the rear wall. If installing on a second wall stud, insert a lag screw into the upper cabinet align with the vertical centerline on...
Installation Instructions - Page 9

... Assembly
(for two 1/4-20 x 3" bolts and washers used to secure the microwave oven to the upper cabinet. Position the damper assembly on the back of mounting plate. A
B C
D
Install the Microwave Oven
WARNING
Excessive Weight Hazard Use two or more people, lift microwave oven and hang it on support tabs at the circular shaded area "G" on Upper Cabinet Template...
Installation Instructions - Page 10

... vent fan and exhaust by placing 1 cup
(250 mL) of water on the turntable, and programming a cook time of mounting plate, and set aside on a covered surface.
8. Adjust mounting plate and retighten screws.
9.
A
2. Vent B. Then secure with at 100% power. Damper assembly C. Long tab F. Plug microwave oven into a grounded 3 prong outlet. Save Installation Instructions for...
Installation Instructions - Page 11

... only)
D. Do not vent exhaust air into concealed spaces, such as spaces within the wall for the damper to Round Transition NOTE: The minimum 3" (7.6 cm) clearance must exist between the top of the microwave oven and the rectangular to seal exterior wall or roof opening around cap
■ not installing 2 elbows together, for optimal...
Installation Instructions - Page 12

... to use no more than three 90° elbows. If you will need the microwave oven model number and serial number.
Accessories
Filler Panel Kits are available from sticking. Following is... The total length of the vent system including straight vent, elbow(s), transitions and wall or roof caps must be installed to round transition piece = 5 ft (1.5 m) D. 2 ft (0.6 m) + 6 ft (1.8 m) straight =...
Dimension Guide - Page 1

...B
6 ft (1.8 m)
69" (175.3 cm) min.
2 ft (0.6 m)
C
A.
For complete details, see Installation
our products, we reserve the right to change materials and specifications without notice. Specifications subject to change without notice. Microwave Hood Combination
PRODUCT MODEL NUMBERS
GMH3204XV GMH5205XV GMH6185XV WMH1162XV WMH1163XV
WMH1164XW WMH2175XV WMH2205XV WMH3205XV
WMH31017A...
Warranty Information - Page 1
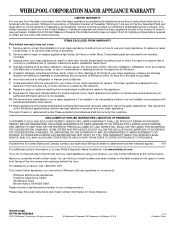
...microwave oven opening, behind the door.
This limited warranty is valid only in the United States or Canada and applies only when the major appliance is not installed in accordance with the product, Whirlpool Corporation or Whirlpool Canada LP (hereafter "Whirlpool...correct defects in accordance with original model/serial numbers that is required to Whirlpool within 30 days from the ...
Use & Care Guide - Page 1
... assistance, call us at www.whirlpool.com for additional information. We have provided many important safety messages in the microwave oven.
■ The microwave oven must be grounded. This is... our website at 1-800-253-1301. Connect only to excessive microwave energy:
■ Install or locate the microwave oven only in the shell and sealed containers -
All safety messages ...
Use & Care Guide - Page 3

..., AC only, 15- The plug must be plugged into a grounded 3 prong outlet. WARNING: Improper use an adapter.
Do not use an extension cord. The microwave oven is properly installed and grounded. If the power supply cord is properly grounded.
In the event of an electrical short circuit, grounding reduces the risk of the...
Use & Care Guide - Page 4
..., or when cooking with AM and PM, 12 hours without actually turning on the temperature from high to turn on some models): To keep the microwave oven from overheating, the auto vent fan will automatically turn on at any cook function.
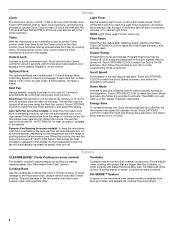
Options/Clock
Ten options/settings may also be turned off .
Touch OPTIONS/CLOCK...
Use & Care Guide - Page 6
...: sponge or soft cloth and water.
■ Stainless steel (on some models): To avoid damage to the microwave oven cavity, do not use stainless steel cleaner.
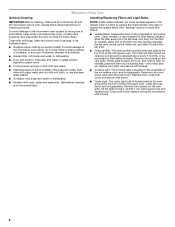
■ Turntable: mild soap and... off and the microwave oven is behind the vent grille at the top front of the microwave oven. Installing/Replacing Filters and Light Bulbs
NOTE: A filter status indicator (on some models) appears in the...
Use & Care Guide - Page 7
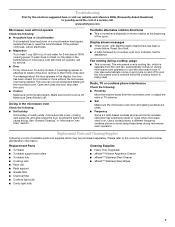
... breaker has tripped, replace the fuse or reset the circuit breaker.
www.whirlpool.com
Microwave oven will not operate
Check the following :
■ Proximity
Move the receiver away from the vent fan, automatically comes on and off to the cover for contact and model identification information. Make sure Demo Mode is normal. Display shows messages...
Use & Care Guide - Page 8
... have access to the Internet and you need further assistance, you can find your model number and serial number on the label located on how to use your major appliance...of the microwave oven opening, behind the door. All rights reserved.
® Registered Trademark/TM Trademark of Whirlpool, U.S.A.
1/12 Printed in which it is installed in an inaccessible location or is not installed in ...
Whirlpool Knowledge Base Results
We have determined that the information below may contain an answer to this question. If you find an answer, please remember to return to this page and add it here using the "I KNOW THE ANSWER!" button above. It's that easy to earn points!-
What is the vent fan on my microwave for and how do I operate it?
The vent (exhaust) fan has three speeds: high, medium and low. To protect the microwave oven, if the temperature from the range or cooktop below the microwave oven gets too hot, the vent fan will automatically turn Vent Fan On/Off: Touch Vent Fan pad once for high, twice for medium, three times for low or four... -
What is the Demo Mode feature on my microwave oven and how do I use it?
... the Demo Mode On/Off: The microwave oven must be entered without actually turning on my microwave oven and how do I use the microwave oven. After 5 minutes of inactivity, a reminder message will run Nothing operates on ). The microwave oven light will come on, the fan will scroll in the display while the microwave oven is off and remove the DEMO... -
What is the vent fan on my microwave for and how do I operate it?
... run Fan runs during automatic fan operation, "Auto Fan is on, fan speed will remain on my microwave oven for and how do I operate it ? My fan is the vent fan on until the cooking function ends. What is running slower than usual My microwave oven will start at low speed when any sensor cooking function begins. The vent (exhaust) fan has...
Similar Questions

What Would Be The Newest Version With Same Size As This Microwave Oven
What Would Be The Newest Version With Same Size As This Microwave Oven (wmc50522as)
What Would Be The Newest Version With Same Size As This Microwave Oven (wmc50522as)
(Posted by chicity1992 7 months ago)
Replacing Broken Cooktop Bulb In Whirlpool Microwave Oven (model Wmh1163xvq)
Thanks for the quick response, My problem is that the cooktop light bulb is located approx. half-way...
Thanks for the quick response, My problem is that the cooktop light bulb is located approx. half-way...
(Posted by mdebusk 8 years ago)

Microwave Exhaust Fan
I have repositioned the exhaust fan so that the fins are facing out the back of the microwave. When ...
I have repositioned the exhaust fan so that the fins are facing out the back of the microwave. When ...
(Posted by Anonymous-153793 8 years ago)

Whirlpool Microwave Oven Model Wmh2175xv Will Not Heat Food
(Posted by MAgvil 10 years ago)

Parts Diagram And List
Where can I find a parts diagram and list for this microwave
Where can I find a parts diagram and list for this microwave
(Posted by snifferpro 11 years ago)