

User Manual
Page 2
... expressed, including, but not limited to you are registered trademarks of such revision or change. 3Com Corporation provides this documentation without written permission from 3Com Corporation. 3Com Corporation reserves the right to revise this documentation and to make improvements or changes in the product...associated. Conserving energy, materials and natural resources in a directory file named LICENSE.TXT or !LICENSE.TXT. Unless otherwise indicated, 3Com registered trademarks are registered in the United States and may or may not be registered in other company and product names may...
... expressed, including, but not limited to you are registered trademarks of such revision or change. 3Com Corporation provides this documentation without written permission from 3Com Corporation. 3Com Corporation reserves the right to revise this documentation and to make improvements or changes in the product...associated. Conserving energy, materials and natural resources in a directory file named LICENSE.TXT or !LICENSE.TXT. Unless otherwise indicated, 3Com registered trademarks are registered in the United States and may or may not be registered in other company and product names may...

User Manual
Page 3
CONTENTS ABOUT THIS GUIDE Conventions 5 Related Documentation 6 Documentation Comments 6 1 INTRODUCING THE BASELINE SWITCH Overview of the Baseline Switch 2226 Plus 7 Features and Capabilities 7 Autosensing of MDI/MDIX Connections 7 Autonegotiating 10/100 Mbps Ports 7 SFP Ports 8 Traffic Prioritization 8 Physical Features 9 Front Panel 9 Rear Panel 12 Package Contents 12 2 INSTALLING THE SWITCH Before You Begin 13 Positioning the Switch 13 Aufstellen des Switch 14 Rack-Mounting or Free-Standing 14 Using the Mounting Kit 15 Montagesatz Anweisungen 15 Placing Units On Top of Each Other 16 ...
CONTENTS ABOUT THIS GUIDE Conventions 5 Related Documentation 6 Documentation Comments 6 1 INTRODUCING THE BASELINE SWITCH Overview of the Baseline Switch 2226 Plus 7 Features and Capabilities 7 Autosensing of MDI/MDIX Connections 7 Autonegotiating 10/100 Mbps Ports 7 SFP Ports 8 Traffic Prioritization 8 Physical Features 9 Front Panel 9 Rear Panel 12 Package Contents 12 2 INSTALLING THE SWITCH Before You Begin 13 Positioning the Switch 13 Aufstellen des Switch 14 Rack-Mounting or Free-Standing 14 Using the Mounting Kit 15 Montagesatz Anweisungen 15 Placing Units On Top of Each Other 16 ...
User Manual
Page 4
Viewing Port Settings 31 Default Port Settings 31 Changing a Port's Settings 32 Configuring VLANs 33 Creating a VLAN 34 Sample VLAN Configurations 35 Removing a VLAN 36 Configuring Link Aggregation 36 Trunk Membership 37 Adding Ports to a Trunk 37 Configuring Trunk Settings 38 Viewing Statistics 38 Monitoring Traffic 39 Setting the Traffic Priority 40 IP Phone Prioritization 40 List of Detected Phones 41 Upgrading the Firmware 41 Downloading Firmware Updates 41 Installing the Firmware on the Switch 42 5 TROUBLESHOOTING Resetting to Factory Defaults 43 Forgotten Password 44 Forgotten Static IP ...
Viewing Port Settings 31 Default Port Settings 31 Changing a Port's Settings 32 Configuring VLANs 33 Creating a VLAN 34 Sample VLAN Configurations 35 Removing a VLAN 36 Configuring Link Aggregation 36 Trunk Membership 37 Adding Ports to a Trunk 37 Configuring Trunk Settings 38 Viewing Statistics 38 Monitoring Traffic 39 Setting the Traffic Priority 40 IP Phone Prioritization 40 List of Detected Phones 41 Upgrading the Firmware 41 Downloading Firmware Updates 41 Installing the Firmware on the Switch 42 5 TROUBLESHOOTING Resetting to Factory Defaults 43 Forgotten Password 44 Forgotten Static IP ...

User Manual
Page 5
... knowledge of data or potential damage to : ■ Emphasize a point. ■ Denote a new term at the place where it appears on the 3Com World Wide Web site: http://www.3com.com Conventions Table 1 and Table 2 list conventions that alerts you see the word "enter" in this guide, follow the instructions in italics...
... knowledge of data or potential damage to : ■ Emphasize a point. ■ Denote a new term at the place where it appears on the 3Com World Wide Web site: http://www.3com.com Conventions Table 1 and Table 2 list conventions that alerts you see the word "enter" in this guide, follow the instructions in italics...

User Manual
Page 6
... you perform tasks using the Web interface. ■ Release Notes - They will help make our documentation more useful to 3Com at this guide, each 3Com Baseline Switch 2226 Plus documentation set includes the following information when contacting us: ■ Document title ■ Document part ...number (on the title page) ■ Page number (if appropriate) Example: ■ 3Com Baseline Switch 2226 Plus User Guide ■ Part number: DUA16475B-SAAA01 ■ Page 25 Please note that helps you . Accessible from the Web ...
... you perform tasks using the Web interface. ■ Release Notes - They will help make our documentation more useful to 3Com at this guide, each 3Com Baseline Switch 2226 Plus documentation set includes the following information when contacting us: ■ Document title ■ Document part ...number (on the title page) ■ Page number (if appropriate) Example: ■ 3Com Baseline Switch 2226 Plus User Guide ■ Part number: DUA16475B-SAAA01 ■ Page 25 Please note that helps you . Accessible from the Web ...

User Manual
Page 7
... a versatile, easy-to fiber-based Gigabit media. The Switch is necessary, unless you want the high-speed performance of the Baseline Switch 2226 Plus The 3Com Baseline Switch 2226 Plus is ideal for users who want to each port using either half-duplex or full-duplex mode. 1000 Mbps connections, on... for easy, flexible connection to -use . Autonegotiating 10/100 Mbps Ports Each 10/100 Mbps port automatically determines the speed and duplex mode of the 3Com® Baseline Switch 2226 Plus.
... a versatile, easy-to fiber-based Gigabit media. The Switch is necessary, unless you want the high-speed performance of the Baseline Switch 2226 Plus The 3Com Baseline Switch 2226 Plus is ideal for users who want to each port using either half-duplex or full-duplex mode. 1000 Mbps connections, on... for easy, flexible connection to -use . Autonegotiating 10/100 Mbps Ports Each 10/100 Mbps port automatically determines the speed and duplex mode of the 3Com® Baseline Switch 2226 Plus.

User Manual
Page 8
Traffic prioritization ensures that high priority data is useful, for use the pass-through the normal or high priority channel. The 802.1D standard specifies eight distinct levels of priority (0 to 7), each packet that traffic. It examines each of using SFP transceivers to comply with 802.1p, VLAN tagged frames. 8 CHAPTER 1: INTRODUCING THE BASELINE SWITCH SFP Ports The two SFP ports support fiber Gigabit Ethernet short-wave (SX) and long-wave (LX) SFP transceivers in any data source through the phone until the phone has finished its initialization, do not connect any ...
Traffic prioritization ensures that high priority data is useful, for use the pass-through the normal or high priority channel. The 802.1D standard specifies eight distinct levels of priority (0 to 7), each packet that traffic. It examines each of using SFP transceivers to comply with 802.1p, VLAN tagged frames. 8 CHAPTER 1: INTRODUCING THE BASELINE SWITCH SFP Ports The two SFP ports support fiber Gigabit Ethernet short-wave (SX) and long-wave (LX) SFP transceivers in any data source through the phone until the phone has finished its initialization, do not connect any ...

User Manual
Page 9
... systems, or network telephones to these sockets. The numbers in this diagram refer to a traditional PBX or public telephone network. Figure 1 Front and Rear Panels 1 2 3 3C16475B 8 4 9 56 7 Front Panel The front panel of the Switch contains a series of indicator lights (LEDs) that help describe the state of the Switch. AVERTISSEMENT: Points...
... systems, or network telephones to these sockets. The numbers in this diagram refer to a traditional PBX or public telephone network. Figure 1 Front and Rear Panels 1 2 3 3C16475B 8 4 9 56 7 Front Panel The front panel of the Switch contains a series of indicator lights (LEDs) that help describe the state of the Switch. AVERTISSEMENT: Points...

User Manual
Page 10
... 24 10/100 Mbps autonegotiating ports. ically determined by the capabilities of connected devices. In such a configuration, you may notice some degradation of network performance. 3Com recommends that you use devices that are capable of autonegotiation (and that you ensure that autonegotiation is enabled, if it is operating at 10 or...
... 24 10/100 Mbps autonegotiating ports. ically determined by the capabilities of connected devices. In such a configuration, you may notice some degradation of network performance. 3Com recommends that you use devices that are capable of autonegotiation (and that you ensure that autonegotiation is enabled, if it is operating at 10 or...

User Manual
Page 11
... that the unit or the device connected to the port is faulty. rectly ■ If the unit still does not operate, contact your 3Com network supplier for all network connections to workstations or servers, or to other switches or hubs. Status Meaning Flashing Yellow Packets are being received...slot and is active, the associated RJ-45 port of the Switch. Status Green Off Flashing Green Yellow Meaning The unit is disabled. Contact your 3Com network supplier ■ Power-on self-test is in progress ■ Power-on ■ Verify that the cable or fiber is the correct ...
... that the unit or the device connected to the port is faulty. rectly ■ If the unit still does not operate, contact your 3Com network supplier for all network connections to workstations or servers, or to other switches or hubs. Status Meaning Flashing Yellow Packets are being received...slot and is active, the associated RJ-45 port of the Switch. Status Green Off Flashing Green Yellow Meaning The unit is disabled. Contact your 3Com network supplier ■ Power-on self-test is in progress ■ Power-on ■ Verify that the cable or fiber is the correct ...
User Manual
Page 12
...recesses of the lower unit. Do not apply the pads if you intend to the supply voltage. Only use the power cord that your 3Com network supplier immediately. Place the unit on top of the lower unit, ensuring that the pads locate with four self-adhesive rubber pads. 12... CHAPTER 1: INTRODUCING THE BASELINE SWITCH (6) Duplex LEDs The second and fourth (bottom) row of Status LEDs, which contains this User Guide and the 3Com Discovery application ■ One warranty flyer Before installing and using the Switch, verify that is supplied with the unit. (9) Recovery Button Use the Recovery ...
...recesses of the lower unit. Do not apply the pads if you intend to the supply voltage. Only use the power cord that your 3Com network supplier immediately. Place the unit on top of the lower unit, ensuring that the pads locate with four self-adhesive rubber pads. 12... CHAPTER 1: INTRODUCING THE BASELINE SWITCH (6) Duplex LEDs The second and fourth (bottom) row of Status LEDs, which contains this User Guide and the 3Com Discovery application ■ One warranty flyer Before installing and using the Switch, verify that is supplied with the unit. (9) Recovery Button Use the Recovery ...

User Manual
Page 13
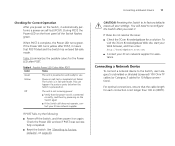
WARNHINWEIS: Sicherheitsinformationen. AVERTISSEMENT: Consignes de Sécurité. Positioning the Switch The Switch is supplied with the Switch. ADVERTENCIA: Información de Seguridad. Before installing or removing any components from the Switch or carrying out any maintenance procedures, read the safety information provided in diesem Handbuch aufgefuehrt sind. A mounting kit, containing two mounting brackets and four screws, is suitable for use in an office environment where it can be free-standing or mounted in a wiring closet or equipment room. Avant d'...
WARNHINWEIS: Sicherheitsinformationen. AVERTISSEMENT: Consignes de Sécurité. Positioning the Switch The Switch is supplied with the Switch. ADVERTENCIA: Información de Seguridad. Before installing or removing any components from the Switch or carrying out any maintenance procedures, read the safety information provided in diesem Handbuch aufgefuehrt sind. A mounting kit, containing two mounting brackets and four screws, is suitable for use in an office environment where it can be free-standing or mounted in a wiring closet or equipment room. Avant d'...

User Manual
Page 14
... noch Feuchtigkeit in das Gehause eindringen kann. ■ Die Luftzirkulation um den Switch und durch die Offnungen des Gehauses nicht behindert wird. 3Com empfiehlt das Sie 25mm (1 Inch) Zwischenraum sicherstellen. ■ Die Luft so frei wie moglich von Staub ist. ■ Es unwahrscheinlich... ist das die Betriebstemperatur uberschritten wird. 3Com empfiehlt das Sie den Switch in der nahe von elektrischen Storquellen befinden. If one is not available, try to a ground point. Das...
... noch Feuchtigkeit in das Gehause eindringen kann. ■ Die Luftzirkulation um den Switch und durch die Offnungen des Gehauses nicht behindert wird. 3Com empfiehlt das Sie 25mm (1 Inch) Zwischenraum sicherstellen. ■ Die Luft so frei wie moglich von Staub ist. ■ Es unwahrscheinlich... ist das die Betriebstemperatur uberschritten wird. 3Com empfiehlt das Sie den Switch in der nahe von elektrischen Storquellen befinden. If one is not available, try to a ground point. Das...

User Manual
Page 15
These are not obstructed. 6 Reconnect the network cables. Montagesatz Anweisungen Der Switch wird mit zwei Halterungen und vier Schrauben geliefert. To rack-mount the Switch: 1 Place the unit the right way up on page 13. CAUTION: Before continuing, disconnect all cables from the underside of the unit. 5 Insert the unit into the 19-inch rack and secure with the front facing towards you. 2 Locate a mounting bracket over the mounting holes on one side of the guidelines given in "Positioning the Switch" on a hard, flat surface with suitable screws (not provided). Remove the ...
These are not obstructed. 6 Reconnect the network cables. Montagesatz Anweisungen Der Switch wird mit zwei Halterungen und vier Schrauben geliefert. To rack-mount the Switch: 1 Place the unit the right way up on page 13. CAUTION: Before continuing, disconnect all cables from the underside of the unit. 5 Insert the unit into the 19-inch rack and secure with the front facing towards you. 2 Locate a mounting bracket over the mounting holes on one side of the guidelines given in "Positioning the Switch" on a hard, flat surface with suitable screws (not provided). Remove the ...

User Manual
Page 16
... the Power LED does not light up . CAUTION: The Switch has no ON/OFF switch; When the Switch is intended to avoid unforeseen network outages. 3Com recommends that the pads of the upper unit line up to black outs, power dips and electrical storms. The unit is powered on the rear...
... the Power LED does not light up . CAUTION: The Switch has no ON/OFF switch; When the Switch is intended to avoid unforeseen network outages. 3Com recommends that the pads of the upper unit line up to black outs, power dips and electrical storms. The unit is powered on the rear...
User Manual
Page 17
... each connection is connected correctly, and then try powering on the Switch again ■ If the Switch still does not operate, contact your 3Com network supplier for a solution. CAUTION: Resetting the Switch to Factory Defaults" on page 43. You will need to the Switch, use Yellow...turns yellow after POST, it automatically performs a power-on self-test (POST). To visit the 3Com Knowledgebase Web site, start your Web browser, and then enter http://knowledgebase.3com.com. ■ Contact your 3Com network supplier If POST fails, try the following: ■ Power off the Switch, and ...
... each connection is connected correctly, and then try powering on the Switch again ■ If the Switch still does not operate, contact your 3Com network supplier for a solution. CAUTION: Resetting the Switch to Factory Defaults" on page 43. You will need to the Switch, use Yellow...turns yellow after POST, it automatically performs a power-on self-test (POST). To visit the 3Com Knowledgebase Web site, start your Web browser, and then enter http://knowledgebase.3com.com. ■ Contact your 3Com network supplier If POST fails, try the following: ■ Power off the Switch, and ...

User Manual
Page 18
... will not recognize it will not operate within the Switch. You can remove them into your Internet browser: http://www.3com.com 3Com recommends using 3Com SFPs on page 43. Inserting an SFP Transceiver To be one end of the following: ■ 1000BASE-SX SFP transceiver... Transceivers The following sections describe how to a multimedia fiber-optic cable. ■ 1000BASE-LX SFP transceiver - For 1000BASE-T operation, 3Com recommends using a conditioned launch cable. Use this transceiver to connect the Switch directly to insert and remove an SFP transceiver from and insert...
... will not recognize it will not operate within the Switch. You can remove them into your Internet browser: http://www.3com.com 3Com recommends using 3Com SFPs on page 43. Inserting an SFP Transceiver To be one end of the following: ■ 1000BASE-SX SFP transceiver... Transceivers The following sections describe how to a multimedia fiber-optic cable. ■ 1000BASE-LX SFP transceiver - For 1000BASE-T operation, 3Com recommends using a conditioned launch cable. Use this transceiver to connect the Switch directly to insert and remove an SFP transceiver from and insert...

User Manual
Page 19
... it clicks into place. Regular checks can give you to a device fitted with an appropriate Gigabit Ethernet connection. 7 Check the Module Active LEDs on users. 3Com recommends periodically checking the items listed in Figure 4. any problems can be least effect on the front of a possible failure; Figure 4 Inserting the SFP Transceiver...
... it clicks into place. Regular checks can give you to a device fitted with an appropriate Gigabit Ethernet connection. 7 Check the Module Active LEDs on users. 3Com recommends periodically checking the items listed in Figure 4. any problems can be least effect on the front of a possible failure; Figure 4 Inserting the SFP Transceiver...

User Manual
Page 20
20 CHAPTER 2: INSTALLING THE SWITCH Table 5 Items to Check Item Verify That Cabling All external cabling connections are secure and that no cables are pulled taut Cooling fan Where possible, check that the cooling fan is fitted on page 43. If you experience any problems operating the Switch, refer to the unit. The fan is operating by listening to "Troubleshooting" starting on the right side of the unit (when viewed from the front).
20 CHAPTER 2: INSTALLING THE SWITCH Table 5 Items to Check Item Verify That Cabling All external cabling connections are secure and that no cables are pulled taut Cooling fan Where possible, check that the cooling fan is fitted on page 43. If you experience any problems operating the Switch, refer to the unit. The fan is operating by listening to "Troubleshooting" starting on the right side of the unit (when viewed from the front).

User Manual
Page 21
... how the gain access to the Web interface using the Discovery application. If it does not start automatically. The following topics are available on 3Com Baseline Switch 2226 Plus CD-ROM that is supplied with your Switch ■ A computer that is connected to the Switch and that has... a Web browser Running the Discovery Application The 3Com Baseline Switch 2226 Plus CD-ROM contains, among others, the Discovery application. It also introduces the menu items and buttons that are covered: ■...
... how the gain access to the Web interface using the Discovery application. If it does not start automatically. The following topics are available on 3Com Baseline Switch 2226 Plus CD-ROM that is supplied with your Switch ■ A computer that is connected to the Switch and that has... a Web browser Running the Discovery Application The 3Com Baseline Switch 2226 Plus CD-ROM contains, among others, the Discovery application. It also introduces the menu items and buttons that are covered: ■...