

Owners Manual
Page 5
... Storage specifications...61 Audio specifications...61 Video specifications...62 Webcam specifications...62 Wired communications...63 Wireless communications ...63 Ports and Connectors...68 Display specifications...69 Keyboards Hot Key Definitions...69 Function short cut keys...70 Touchpad...70 Battery specifications...71 Adapter options...72 System dimensions ...72 Security options ...72 Operating conditions...
... Storage specifications...61 Audio specifications...61 Video specifications...62 Webcam specifications...62 Wired communications...63 Wireless communications ...63 Ports and Connectors...68 Display specifications...69 Keyboards Hot Key Definitions...69 Function short cut keys...70 Touchpad...70 Battery specifications...71 Adapter options...72 System dimensions ...72 Security options ...72 Operating conditions...

Owners Manual
Page 43
d hard drive e fan f WLAN card g WWAN card h display assembly 3 Disconnect the following cables and connectors: a VGA cable [1] b Unroute the VGA cable from the routing channel [2] c Speaker cable connector [3] d DC-in cable [4] 4 Disconnect the following cables : a Power button board cable [1] b I/O cable and fingerprint reader cable [2] c Touchpad cable [3] d Keyboard backlight cable [4] e Keyboard cable [5] Disassembly and reassembly 43
d hard drive e fan f WLAN card g WWAN card h display assembly 3 Disconnect the following cables and connectors: a VGA cable [1] b Unroute the VGA cable from the routing channel [2] c Speaker cable connector [3] d DC-in cable [4] 4 Disconnect the following cables : a Power button board cable [1] b I/O cable and fingerprint reader cable [2] c Touchpad cable [3] d Keyboard backlight cable [4] e Keyboard cable [5] Disassembly and reassembly 43

Owners Manual
Page 47
... with the screw holders on the computer. 3 Tighten the M2x4 screw to secure the system board to the computer. 4 Connect the Power button board, I/O, touchpad, keyboard backlight, and the keyboard cables to their respective connectors. 5 Connect the DC-in After working inside your computer. Disassembly and reassembly 47
... with the screw holders on the computer. 3 Tighten the M2x4 screw to secure the system board to the computer. 4 Connect the Power button board, I/O, touchpad, keyboard backlight, and the keyboard cables to their respective connectors. 5 Connect the DC-in After working inside your computer. Disassembly and reassembly 47

Owners Manual
Page 60
...; Storage specifications • Audio specifications • Video specifications • Webcam specifications • Wired communications • Wireless communications • Ports and Connectors • Display specifications • Keyboards Hot Key Definitions • Touchpad • Battery specifications • Adapter options • System dimensions • Security options • Operating conditions Processor > Settings > System > About. Supported...
...; Storage specifications • Audio specifications • Video specifications • Webcam specifications • Wired communications • Wireless communications • Ports and Connectors • Display specifications • Keyboards Hot Key Definitions • Touchpad • Battery specifications • Adapter options • System dimensions • Security options • Operating conditions Processor > Settings > System > About. Supported...

Owners Manual
Page 68
...) Internal Interface - Ports and Connectors Feature USB Modem Audio Expansion Express Card Specifications USB Type-C with camera) No volume control buttons, only support hot-key keyboard button SD 3.0 Memory card reader NA 68 Technical specifications External Interface -
...) Internal Interface - Ports and Connectors Feature USB Modem Audio Expansion Express Card Specifications USB Type-C with camera) No volume control buttons, only support hot-key keyboard button SD 3.0 Memory card reader NA 68 Technical specifications External Interface -

Owners Manual
Page 69
Keyboards Hot Key Definitions Fn Key Combination Fn+ESC Fn+ F1 Fn + F2 Fn + F3 Function Fn Toggle Speaker Mute Volume ... 40 degrees Vertical Viewing Angle (min) HD +10/-30 degrees Pixel Pitch HD 0.226 mm Power Consumption (max) HD 3.0 W 14.0- Table 12. 3490 Display specifications 14.0- HD Non touch Type HD Anti-Glare Luminance/ Brightness (typical) HD 220nits Diagonal 14.0 inches Native Resolution HD 1366x768 Megapixels (millions of...157 for FHD 600:1 for FHD 60 Hz FHD +80/- 80 degrees FHD +80/-80 degrees FHD 0.161 mm FHD 2.85 W Keyboards Hot Key Definitions Table 13.
Keyboards Hot Key Definitions Fn Key Combination Fn+ESC Fn+ F1 Fn + F2 Fn + F3 Function Fn Toggle Speaker Mute Volume ... 40 degrees Vertical Viewing Angle (min) HD +10/-30 degrees Pixel Pitch HD 0.226 mm Power Consumption (max) HD 3.0 W 14.0- Table 12. 3490 Display specifications 14.0- HD Non touch Type HD Anti-Glare Luminance/ Brightness (typical) HD 220nits Diagonal 14.0 inches Native Resolution HD 1366x768 Megapixels (millions of...157 for FHD 600:1 for FHD 60 Hz FHD +80/- 80 degrees FHD +80/-80 degrees FHD 0.161 mm FHD 2.85 W Keyboards Hot Key Definitions Table 13.

Owners Manual
Page 70
...F6 Fn + F8 Fn + F9 Fn + F10 Fn + F11 Fn + F12 Fn + Printscreen Rewind Play/Pause Fast forward Display Toggle (Win + P) Search Increase Keyboard Backlight Brightness Brightness up Brightness down Wireless • Primary behavior is for increasing volume, then you must press the Fn key and F3 keys together...key lock. Touchpad Table 14. Supported gestures for each action, then you wish to activate the function key lock. TouchPad Dimensions Width Height 3490 105 mm 65 mm Table 15. This activates the function key. Secondary behavior is media keys. • Fn Lock only switches primary ...
...F6 Fn + F8 Fn + F9 Fn + F10 Fn + F11 Fn + F12 Fn + Printscreen Rewind Play/Pause Fast forward Display Toggle (Win + P) Search Increase Keyboard Backlight Brightness Brightness up Brightness down Wireless • Primary behavior is for increasing volume, then you must press the Fn key and F3 keys together...key lock. Touchpad Table 14. Supported gestures for each action, then you wish to activate the function key lock. TouchPad Dimensions Width Height 3490 105 mm 65 mm Table 15. This activates the function key. Secondary behavior is media keys. • Fn Lock only switches primary ...

Owners Manual
Page 75
... new ON-FLASH-FLASH or ON-FLASH-ON failure code. Figure 1. It dramatically simplified the connection between host computers and peripheral devices like mice, keyboards, external drivers, and printers. Notch difference Increased thickness DDR4 modules are slightly thicker than DDR3, to the table below. Curved edge Memory Errors Memory...Troubleshoot for possible memory failure by trying known good memory modules in the memory connectors on the bottom of the system or under the keyboard, as in some portable systems. USB features Universal Serial Bus, or USB, was introduced in 1996.
... new ON-FLASH-FLASH or ON-FLASH-ON failure code. Figure 1. It dramatically simplified the connection between host computers and peripheral devices like mice, keyboards, external drivers, and printers. Notch difference Increased thickness DDR4 modules are slightly thicker than DDR3, to the table below. Curved edge Memory Errors Memory...Troubleshoot for possible memory failure by trying known good memory modules in the memory connectors on the bottom of the system or under the keyboard, as in some portable systems. USB features Universal Serial Bus, or USB, was introduced in 1996.
Owners Manual
Page 83
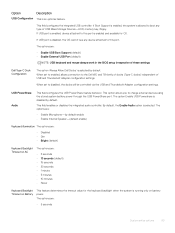
...-C Dock Configuration The option 'Always Allow Dell Docks' is selected. By default, the Enable Audio option is selected by default. The options are : • Enable USB Boot Support (default) • Enable External USB Port (default) NOTE: USB keyboard and mouse always work in the BIOS setup ...default. If USB port is enabled, device attached to this port is enabled and available for the keyboard backlight when the system is allowed to boot any device attached to the Dell WD and TB family of docks (Type-C docks) independent of these settings. When set to ...
...-C Dock Configuration The option 'Always Allow Dell Docks' is selected. By default, the Enable Audio option is selected by default. The options are : • Enable USB Boot Support (default) • Enable External USB Port (default) NOTE: USB keyboard and mouse always work in the BIOS setup ...default. If USB port is enabled, device attached to this port is enabled and available for the keyboard backlight when the system is allowed to boot any device attached to the Dell WD and TB family of docks (Type-C docks) independent of these settings. When set to ...

Owners Manual
Page 86
Enable CPU XD Support-enabled by default OROM Keyboard Access options: Enabled (default) Disabled One Time Enable Admin Setup Lockout Allows you to enable the Execute Disable mode of the processor. Default Setting: The ...
Enable CPU XD Support-enabled by default OROM Keyboard Access options: Enabled (default) Disabled One Time Enable Admin Setup Lockout Allows you to enable the Execute Disable mode of the processor. Default Setting: The ...

Owners Manual
Page 89
...health. After you enable this option, your battery at a standard rate. • ExpressCharge-The battery charges over a shorter time using Dell's fast charging technology This option is enabled by default. • Primarily AC use • Custom If Custom Charge is disabled by default...) Advanced Battery Charge Configuration This option enables you use the key on the computer's internal keyboard. • Enable Fn key Emulation - Enable Advanced Battery Charge Mode is selected, you use certain power adapters. POST behavior screen...
...health. After you enable this option, your battery at a standard rate. • ExpressCharge-The battery charges over a shorter time using Dell's fast charging technology This option is enabled by default. • Primarily AC use • Custom If Custom Charge is disabled by default...) Advanced Battery Charge Configuration This option enables you use the key on the computer's internal keyboard. • Enable Fn key Emulation - Enable Advanced Battery Charge Mode is selected, you use certain power adapters. POST behavior screen...

Owners Manual
Page 90
... to create an extra preboot delay. enabled by default • GPS (on Warnings and Errors Sign of Life Indication The option " Enable Sign of Life Keyboard Backlight Indication" is not selected by default. 90 System setup options The options are: • 0 seconds-enabled by default. • 5 seconds • 10 seconds Full...
... to create an extra preboot delay. enabled by default • GPS (on Warnings and Errors Sign of Life Indication The option " Enable Sign of Life Keyboard Backlight Indication" is not selected by default. 90 System setup options The options are: • 0 seconds-enabled by default. • 5 seconds • 10 seconds Full...

Owners Manual
Page 91
The following actions after the Dell logo is displayed • With keyboard - Allows you to erase the data securely from all internal storage devices. To enter the Boot selection menu, tap F12. 3 On the left pane, select ... Option Description Auto OS Recovery The Auto OS Recovery Threshold setup option controls the automatic boot flow for SupportAssist System Threshold Resolution Console and for Dell OS Recovery Tool. • OFF •1 • 2 (default) •3 Verifying system memory in system setup BIOS 1 Turn on Next boot' is enabled by default •...
The following actions after the Dell logo is displayed • With keyboard - Allows you to erase the data securely from all internal storage devices. To enter the Boot selection menu, tap F12. 3 On the left pane, select ... Option Description Auto OS Recovery The Auto OS Recovery Threshold setup option controls the automatic boot flow for SupportAssist System Threshold Resolution Console and for Dell OS Recovery Tool. • OFF •1 • 2 (default) •3 Verifying system memory in system setup BIOS 1 Turn on Next boot' is enabled by default •...

Owners Manual
Page 96
Serial IO driver Graphics controller driver Verify if the graphics controller driver is already installed in the computer. 96 Software • Management Engine • Realtek PCI-E memory card Serial IO driver Verify if the drivers for Touchpad, IR camera, and keyboard and are already installed in the computer. Table 22. Graphics controller driver Before Installation None After Installation USB drivers Verify if the USB drivers are installed. Figure 5.
Serial IO driver Graphics controller driver Verify if the graphics controller driver is already installed in the computer. 96 Software • Management Engine • Realtek PCI-E memory card Serial IO driver Verify if the drivers for Touchpad, IR camera, and keyboard and are already installed in the computer. Table 22. Graphics controller driver Before Installation None After Installation USB drivers Verify if the USB drivers are installed. Figure 5.

Owners Manual
Page 100
...System Password • HDD Password • TPM on and Active • Key Databases • System Logs The following actions after the Dell logo is displayed: • With keyboard - Real Time Clock reset The Real Time Clock (RTC) reset function allows you see the desktop. NOTE: If AC power is ...disconnected from No POST/No Boot/No Power situations. Testing memory using ePSA 1 Turn on or restart your Dell system from the system ...
...System Password • HDD Password • TPM on and Active • Key Databases • System Logs The following actions after the Dell logo is displayed: • With keyboard - Real Time Clock reset The Real Time Clock (RTC) reset function allows you see the desktop. NOTE: If AC power is ...disconnected from No POST/No Boot/No Power situations. Testing memory using ePSA 1 Turn on or restart your Dell system from the system ...


