
User's Guide
Page 3
... Remote Control Button Map Optional Accessories Registration and Warranty Using This Manual Setting Up the Projector Choosing a Location Installing the Projector Connecting the Cables Connecting Video and Computer Equipment Making Other Connections Installing Batteries in the Remote Control Turning the Projector On and Off Turning On the Projector Turning Off the Projector...
... Remote Control Button Map Optional Accessories Registration and Warranty Using This Manual Setting Up the Projector Choosing a Location Installing the Projector Connecting the Cables Connecting Video and Computer Equipment Making Other Connections Installing Batteries in the Remote Control Turning the Projector On and Off Turning On the Projector Turning Off the Projector...

User's Guide
Page 13
Setting Up the Projector Follow the instructions in this section to choose a location for various viewing setups, as shown below. Choosing a Location You can install the projector for the projector, connect the cables, and display an image. Center Side Ceiling Setting Up the Projector 13
Setting Up the Projector Follow the instructions in this section to choose a location for various viewing setups, as shown below. Choosing a Location You can install the projector for the projector, connect the cables, and display an image. Center Side Ceiling Setting Up the Projector 13

User's Guide
Page 14
The image display position cannot be as close as possible to the calculated projector position when installing the projector. Try to be moved to the maximum distance in image dimensions. For example, the image cannot be shifted up to 9 percent of the ...
The image display position cannot be as close as possible to the calculated projector position when installing the projector. Try to be moved to the maximum distance in image dimensions. For example, the image cannot be shifted up to 9 percent of the ...

User's Guide
Page 16
... a guide to the center of the projector: 4.33 inches (110 mm), 0.30 inch (7.7 mm) maximum horizontal lens shift 16 Setting Up the Projector Installing the Projector To install the projector, you first need to determine the location, based on top of loose materials that could block the vents underneath. ■ Make sure...
... a guide to the center of the projector: 4.33 inches (110 mm), 0.30 inch (7.7 mm) maximum horizontal lens shift 16 Setting Up the Projector Installing the Projector To install the projector, you first need to determine the location, based on top of loose materials that could block the vents underneath. ■ Make sure...

User's Guide
Page 17
... must be capable of supporting a weight of oil or lubricant. Warning: When installing or adjusting the ceiling mount, do not use adhesives to prevent the screws from loosening and do not use any type of 85.6 pounds. Follow .... 12.20 in. 6.30 in . These may cause the projector casing to crack and the projector may fall, causing serious injury and serious damage to install the projector, which weighs 12.3 pounds.
... must be capable of supporting a weight of oil or lubricant. Warning: When installing or adjusting the ceiling mount, do not use adhesives to prevent the screws from loosening and do not use any type of 85.6 pounds. Follow .... 12.20 in. 6.30 in . These may cause the projector casing to crack and the projector may fall, causing serious injury and serious damage to install the projector, which weighs 12.3 pounds.

User's Guide
Page 18
.... 3. Connecting the Cables Connecting Video and Computer Equipment You can also connect it appears right side up. Press the Menu button when done. If you install the projector on the wall or ceiling. Press the menu navigation buttons to a desktop or laptop PC or Apple® Macintosh® system. 18 Setting...
.... 3. Connecting the Cables Connecting Video and Computer Equipment You can also connect it appears right side up. Press the Menu button when done. If you install the projector on the wall or ceiling. Press the menu navigation buttons to a desktop or laptop PC or Apple® Macintosh® system. 18 Setting...

User's Guide
Page 21
... open the cover. 2. If the buttons do not glow red, replace the batteries. Connect a 3.5-mm mini jack to a dark room and press the illumination button. Installing Batteries in use. Warning: Keep batteries away from the infrared receivers. Insert two new AA batteries as shown. If you are weak, take the remote...
... open the cover. 2. If the buttons do not glow red, replace the batteries. Connect a 3.5-mm mini jack to a dark room and press the illumination button. Installing Batteries in use. Warning: Keep batteries away from the infrared receivers. Insert two new AA batteries as shown. If you are weak, take the remote...

User's Guide
Page 41
... control. 1. Note: Saved settings are indicated by using your settings. Selecting Memory Settings and Resetting the Projector Your projector comes with 10 memory locations for installers to save your selected setting. Select Load Memory.
... control. 1. Note: Saved settings are indicated by using your settings. Selecting Memory Settings and Resetting the Projector Your projector comes with 10 memory locations for installers to save your selected setting. Select Load Memory.

User's Guide
Page 43
... page 28 for the type of the image that subtitles are not normally visible in this setting lets you see the edges of picture you install a new projector lamp. Signal > Zoom Caption Pos. Use Zoom Size to zero. 3. Do one of the image on -screen text, and select basic setup options...
... page 28 for the type of the image that subtitles are not normally visible in this setting lets you see the edges of picture you install a new projector lamp. Signal > Zoom Caption Pos. Use Zoom Size to zero. 3. Do one of the image on -screen text, and select basic setup options...

User's Guide
Page 56
... is off. ■ The projector may be replaced (see page 18). 56 Problem Solving Check to make sure the lamp and lamp cover are securely installed. Solving Picture Problems You cannot turn on High Altitude Mode so the fan can properly cool the projector at one of the Source buttons on... page 32). There is plenty of the projector, and unplug it back on the projector (see page 48). Turn off the lamp automatically. Then contact Epson for ventilation. No picture appears on the screen or you must use the remote control to select the correct input source. Make sure you 've...
... is off. ■ The projector may be replaced (see page 18). 56 Problem Solving Check to make sure the lamp and lamp cover are securely installed. Solving Picture Problems You cannot turn on High Altitude Mode so the fan can properly cool the projector at one of the Source buttons on... page 32). There is plenty of the projector, and unplug it back on the projector (see page 48). Turn off the lamp automatically. Then contact Epson for ventilation. No picture appears on the screen or you must use the remote control to select the correct input source. Make sure you 've...

User's Guide
Page 69
If this equipment does cause interference to radio and television reception, which can radiate radio frequency energy and, if not installed and used in accordance with the limits for a Class B digital device, pursuant to Part 15 of the FCC Rules. WARNING ... different from that interference will invalidate the FCC Certification of a non-shielded equipment interface cable to this equipment will not occur in a residential installation. For Canadian Users This Class B digital apparatus meets all requirements of the user to unused interfaces. However, there is the responsibility of the...
If this equipment does cause interference to radio and television reception, which can radiate radio frequency energy and, if not installed and used in accordance with the limits for a Class B digital device, pursuant to Part 15 of the FCC Rules. WARNING ... different from that interference will invalidate the FCC Certification of a non-shielded equipment interface cable to this equipment will not occur in a residential installation. For Canadian Users This Class B digital apparatus meets all requirements of the user to unused interfaces. However, there is the responsibility of the...

User's Guide
Page 71
...the date of original purchase (except that the warranty period is not responsible for replacement of a part, the item replaced becomes Epson property. IF THESE LAWS APPLY, THEN ALL EXPRESS AND IMPLIED WARRANTIES ARE LIMITED TO THE WARRANTY PERIOD IDENTIFIED ABOVE. This warranty ...covers only normal use of misuse, abuse, improper installation, neglect, improper shipping, damage caused by disasters such as instructed by Epson. Epson is 90 days for warranty service should the Epson label or logo or the rating label or serial number be properly maintained...
...the date of original purchase (except that the warranty period is not responsible for replacement of a part, the item replaced becomes Epson property. IF THESE LAWS APPLY, THEN ALL EXPRESS AND IMPLIED WARRANTIES ARE LIMITED TO THE WARRANTY PERIOD IDENTIFIED ABOVE. This warranty ...covers only normal use of misuse, abuse, improper installation, neglect, improper shipping, damage caused by disasters such as instructed by Epson. Epson is 90 days for warranty service should the Epson label or logo or the rating label or serial number be properly maintained...

User's Guide
Page 74
..., 28 positioning, 25 to 26, 43 resizing, 28, 43 selecting source, 23 size, 15 Image menu, 42 Image problems, 56 to 59 Info menu, 53 Installing projector, 16 to 18 Interference, signal, 58 K Kensington anti-theft device, 8, 11 74 Index L Lamp checking usage timer, 53 life, 61 ordering, 11, 50 replacing...
..., 28 positioning, 25 to 26, 43 resizing, 28, 43 selecting source, 23 size, 15 Image menu, 42 Image problems, 56 to 59 Info menu, 53 Installing projector, 16 to 18 Interference, signal, 58 K Kensington anti-theft device, 8, 11 74 Index L Lamp checking usage timer, 53 life, 61 ordering, 11, 50 replacing...

User's Guide
Page 75
... control, 59 Progressive mode setting, 37 Projection distance, 15, 61 Projection Distance Calculator, 15 Projector checking status, 53 cleaning, 48 control panel, 9 dimensions, 17, 62 installing, 16 to 18 lights, 55 to 56 locking buttons, 32 menus, 35 to 45 parts, 8 to 9 positioning, 13 to 16 resetting menu options, 42 security...
... control, 59 Progressive mode setting, 37 Projection distance, 15, 61 Projection Distance Calculator, 15 Projector checking status, 53 cleaning, 48 control panel, 9 dimensions, 17, 62 installing, 16 to 18 lights, 55 to 56 locking buttons, 32 menus, 35 to 45 parts, 8 to 9 positioning, 13 to 16 resetting menu options, 42 security...

Installation Guide
Page 3
... Introduction 5 Important Safety Instructions 6 Parts List 10 Included Cables 11 Additional Accessories 11 Where To Get Help 12 Planning the Installation 13 Required Tools 14 Laying Out the Home Theater 14 Locating the Screen 15 Locating the Projector 16 Locating Other Components 16 ...Routing the Cables 16 Making Optional Connections 17 Cable Connections 18 Installing the Screen 19 Unpack the Screen and Speaker Grilles 19 Attach the Speaker Grilles to the Screen 20 Attach the Mounting Assembly to ...
... Introduction 5 Important Safety Instructions 6 Parts List 10 Included Cables 11 Additional Accessories 11 Where To Get Help 12 Planning the Installation 13 Required Tools 14 Laying Out the Home Theater 14 Locating the Screen 15 Locating the Projector 16 Locating Other Components 16 ...Routing the Cables 16 Making Optional Connections 17 Cable Connections 18 Installing the Screen 19 Unpack the Screen and Speaker Grilles 19 Attach the Speaker Grilles to the Screen 20 Attach the Mounting Assembly to ...

Installation Guide
Page 4
Adjusting the Sound 58 Set the Boundary Control Switch 58 Set the Speaker Distance 59 Equalize the Speaker Output 60 Adjust the Subwoofer Output 60 After Completing the Installation 62 Using Additional Components 63 Connecting External Video Devices 63 Connecting Another Subwoofer 68 Connecting an Antenna 69 Using a Third-party Universal Remote Control 71 4
Adjusting the Sound 58 Set the Boundary Control Switch 58 Set the Speaker Distance 59 Equalize the Speaker Output 60 Adjust the Subwoofer Output 60 After Completing the Installation 62 Using Additional Components 63 Connecting External Video Devices 63 Connecting Another Subwoofer 68 Connecting an Antenna 69 Using a Third-party Universal Remote Control 71 4

Installation Guide
Page 5
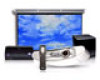
Introduction The Ensemble HDTM home cinema system by Epson® includes everything that can also program it to hang a work with either the PowerLite Home Cinema 1080 or the PowerLite Home Cinema 720. • Screen - If you discreetly hide all the speakers in the system. You can be... ceiling. You can mount the screen on the projector, lower the screen, switch between different video sources and optimize the sound quality for the installation environment. • Universal remote control - Just aim the remote control at the screen-a sensor at the touch of a button. The system ...
Introduction The Ensemble HDTM home cinema system by Epson® includes everything that can also program it to hang a work with either the PowerLite Home Cinema 1080 or the PowerLite Home Cinema 720. • Screen - If you discreetly hide all the speakers in the system. You can be... ceiling. You can mount the screen on the projector, lower the screen, switch between different video sources and optimize the sound quality for the installation environment. • Universal remote control - Just aim the remote control at the screen-a sensor at the touch of a button. The system ...

Installation Guide
Page 6
...that may be of sufficient magnitude to constitute a risk of electrical shock to rain or moisture. Clean only with the manufacturer's instructions. 8. Install in accordance with dry cloth. 7. If the provided plug does not fit into your safety. Unplug this apparatus to persons. WARNING: To ... "dangerous voltage" within an equilateral triangle is provided for your outlet, consult an electrician for use by the manufacturer. 12. Do not install near water. 6. A grounding type plug has two blades and a third grounding prong. Protect the power cord from being walked on or...
...that may be of sufficient magnitude to constitute a risk of electrical shock to rain or moisture. Clean only with the manufacturer's instructions. 8. Install in accordance with dry cloth. 7. If the provided plug does not fit into your safety. Unplug this apparatus to persons. WARNING: To ... "dangerous voltage" within an equilateral triangle is provided for your outlet, consult an electrician for use by the manufacturer. 12. Do not install near water. 6. A grounding type plug has two blades and a third grounding prong. Protect the power cord from being walked on or...

Installation Guide
Page 7
... exact center of the studs or joists must be adhered to rain or moisture, does not operate normally, or has been dropped. Epson cannot provide advice concerning construction practices or building codes in your area. • Prior to do so could result in serious personal ... instructions in direct sunlight or near a heater vent, fireplace, or other source of the home theater system. Refer all times during the installation of heat. • Two persons are required to qualified service personnel. Additional Safety Instructions • Safety measures must be practiced at least...
... exact center of the studs or joists must be adhered to rain or moisture, does not operate normally, or has been dropped. Epson cannot provide advice concerning construction practices or building codes in your area. • Prior to do so could result in serious personal ... instructions in direct sunlight or near a heater vent, fireplace, or other source of the home theater system. Refer all times during the installation of heat. • Two persons are required to qualified service personnel. Additional Safety Instructions • Safety measures must be practiced at least...

Installation Guide
Page 8
...located in the vicinity of antenna-discharge unit, connection to provide some protection against voltage surges and built-up static charges. When installing an outside antenna or cable system is connected to the product, be operated only from small children to proper grounding of the ... can fall into nearby outlets. • Some of the components included with them directly into such power lines or circuits. Deliberate mis-installation could result from touching such power lines or circuits as the disconnect device, the disconnect device shall remain readily operable. • When ...
...located in the vicinity of antenna-discharge unit, connection to provide some protection against voltage surges and built-up static charges. When installing an outside antenna or cable system is connected to the product, be operated only from small children to proper grounding of the ... can fall into nearby outlets. • Some of the components included with them directly into such power lines or circuits. Deliberate mis-installation could result from touching such power lines or circuits as the disconnect device, the disconnect device shall remain readily operable. • When ...


